How to Generate an AI Video from an Image
This tutorial shows how easily and quickly generate an AI video from an image you provide in a MindStudio workbench.

How to Generate an AI Video from an Image
MindStudio is the easiest way to create amazing AI-generated videos from your images using Google Veo 3.1 and other frontier AI video generation models like:
- OpenAI Sora 2 Pro
- Runway Gen-4 Turbo
- Kling’s Kling O1
- Lightricks LTX-2 10b
- Luma Labs Ray Flash 2
- Wan 2.6
- and several others
Generate videos in minutes without requiring a high-powered computer or complex software.
Remix Link
Instructions
Follow the steps below to build a simple video generation from a provided image in a workbench:
-
Create a MindStudio account.
-
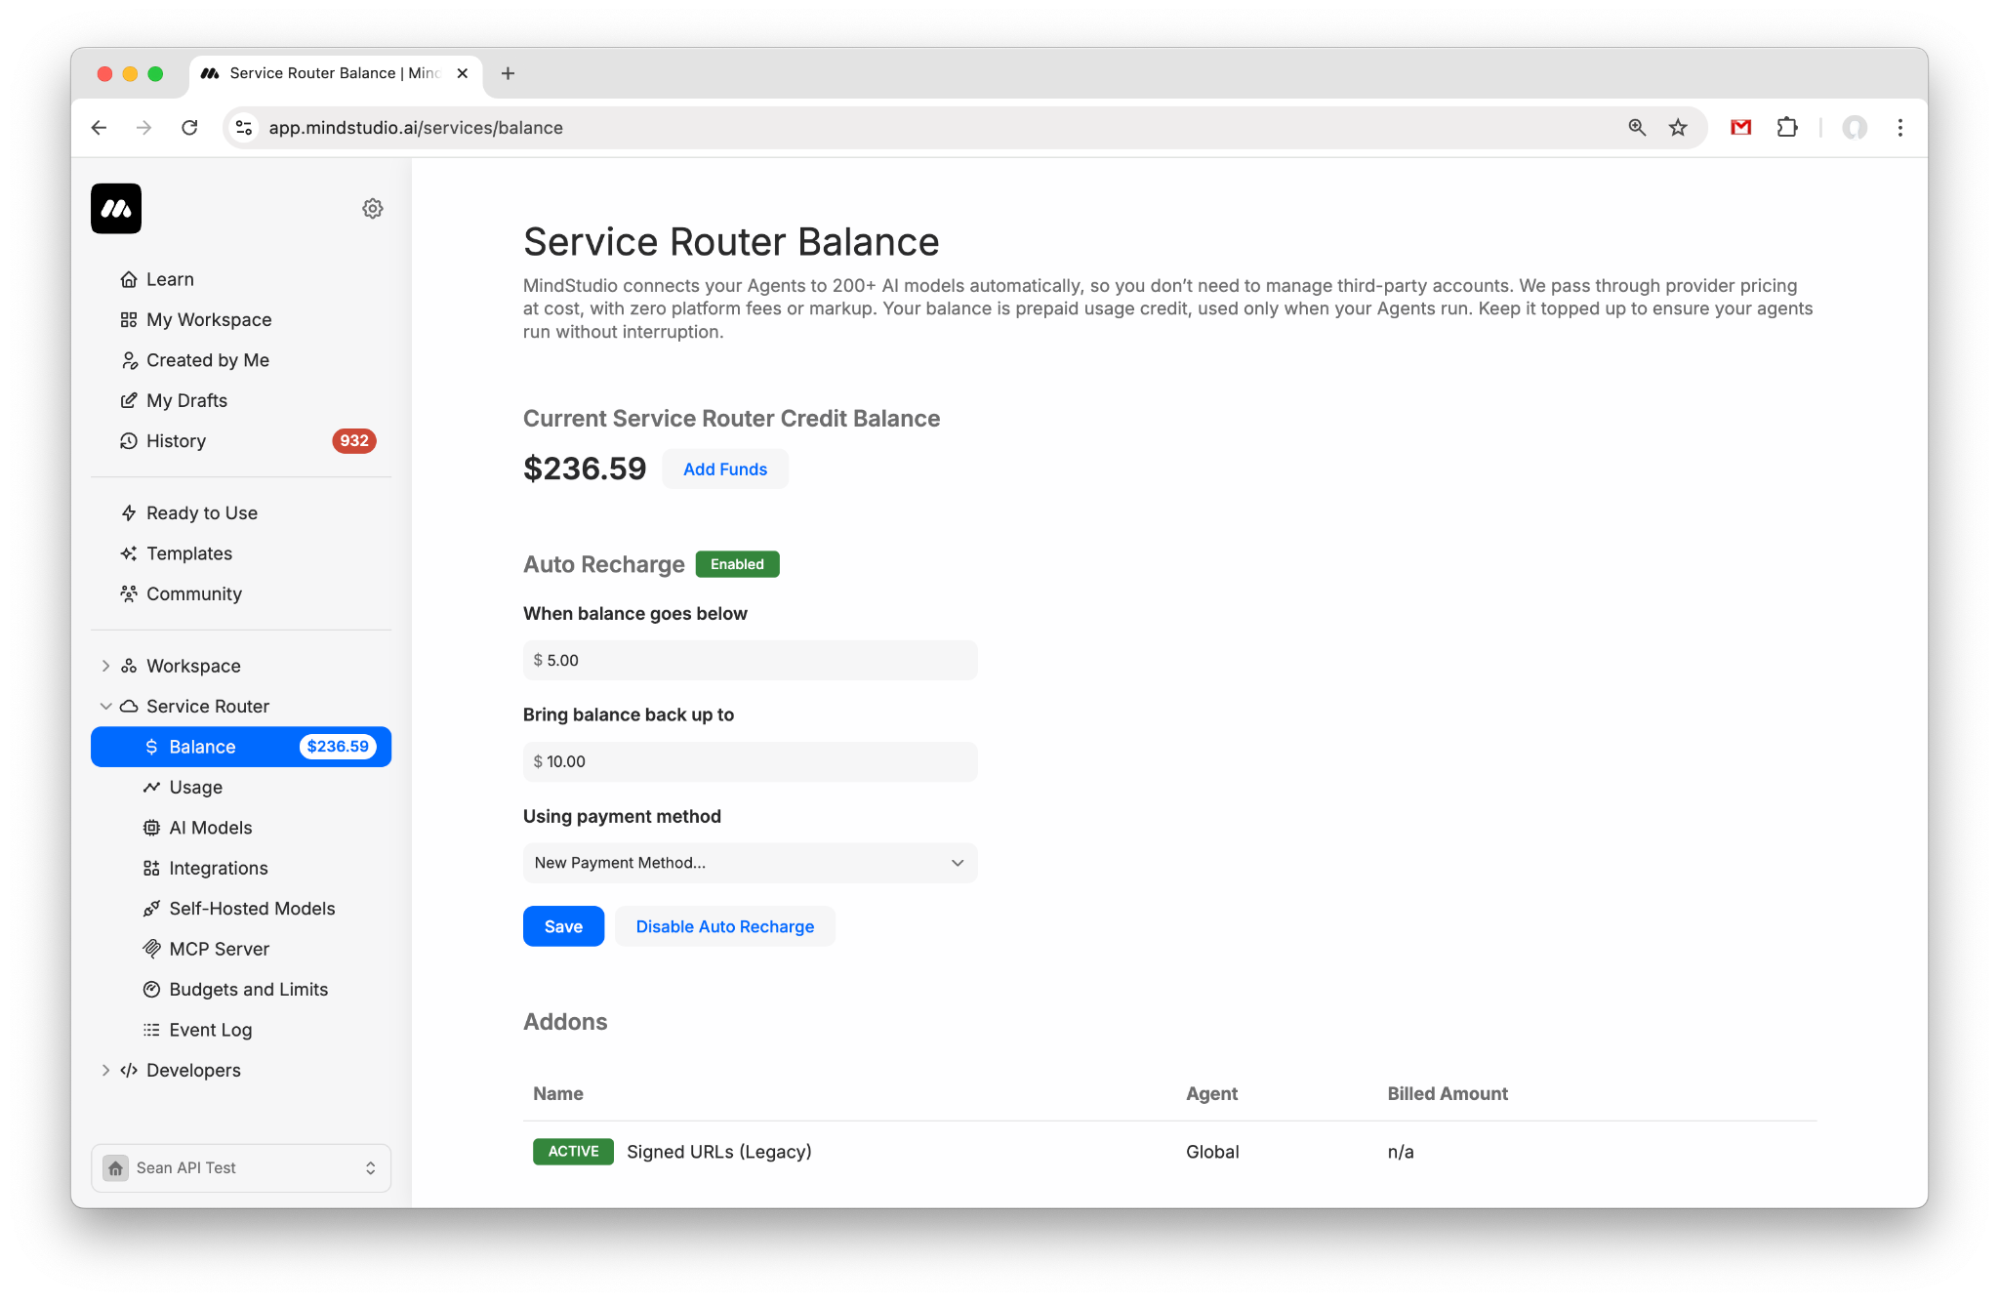
Go to “Service Router > Balance” to add funds to your Service Router balance. Add $5 to get started.
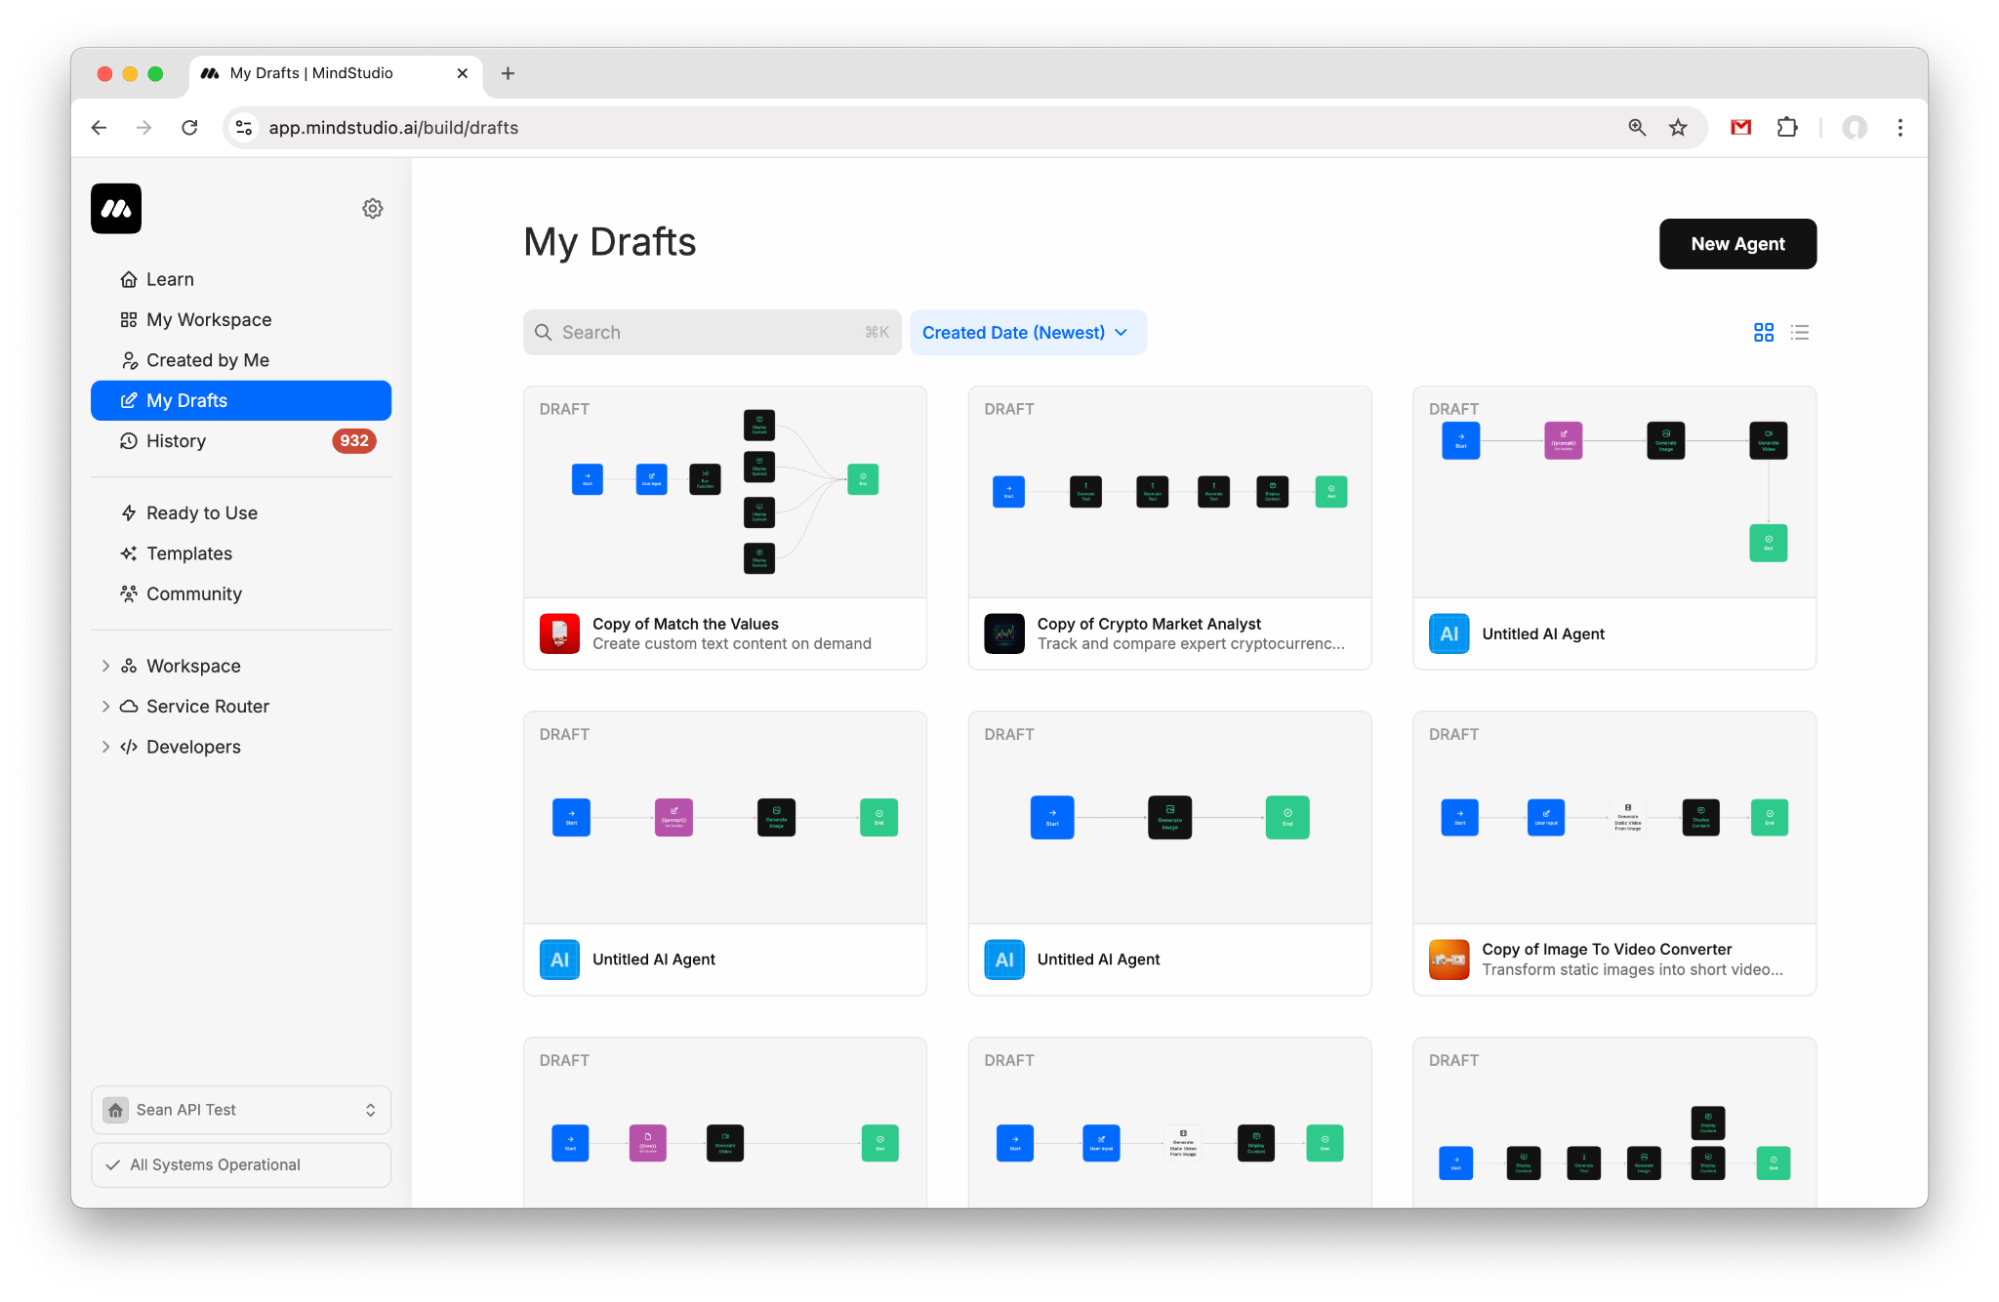
- Create a new agent from My Drafts.
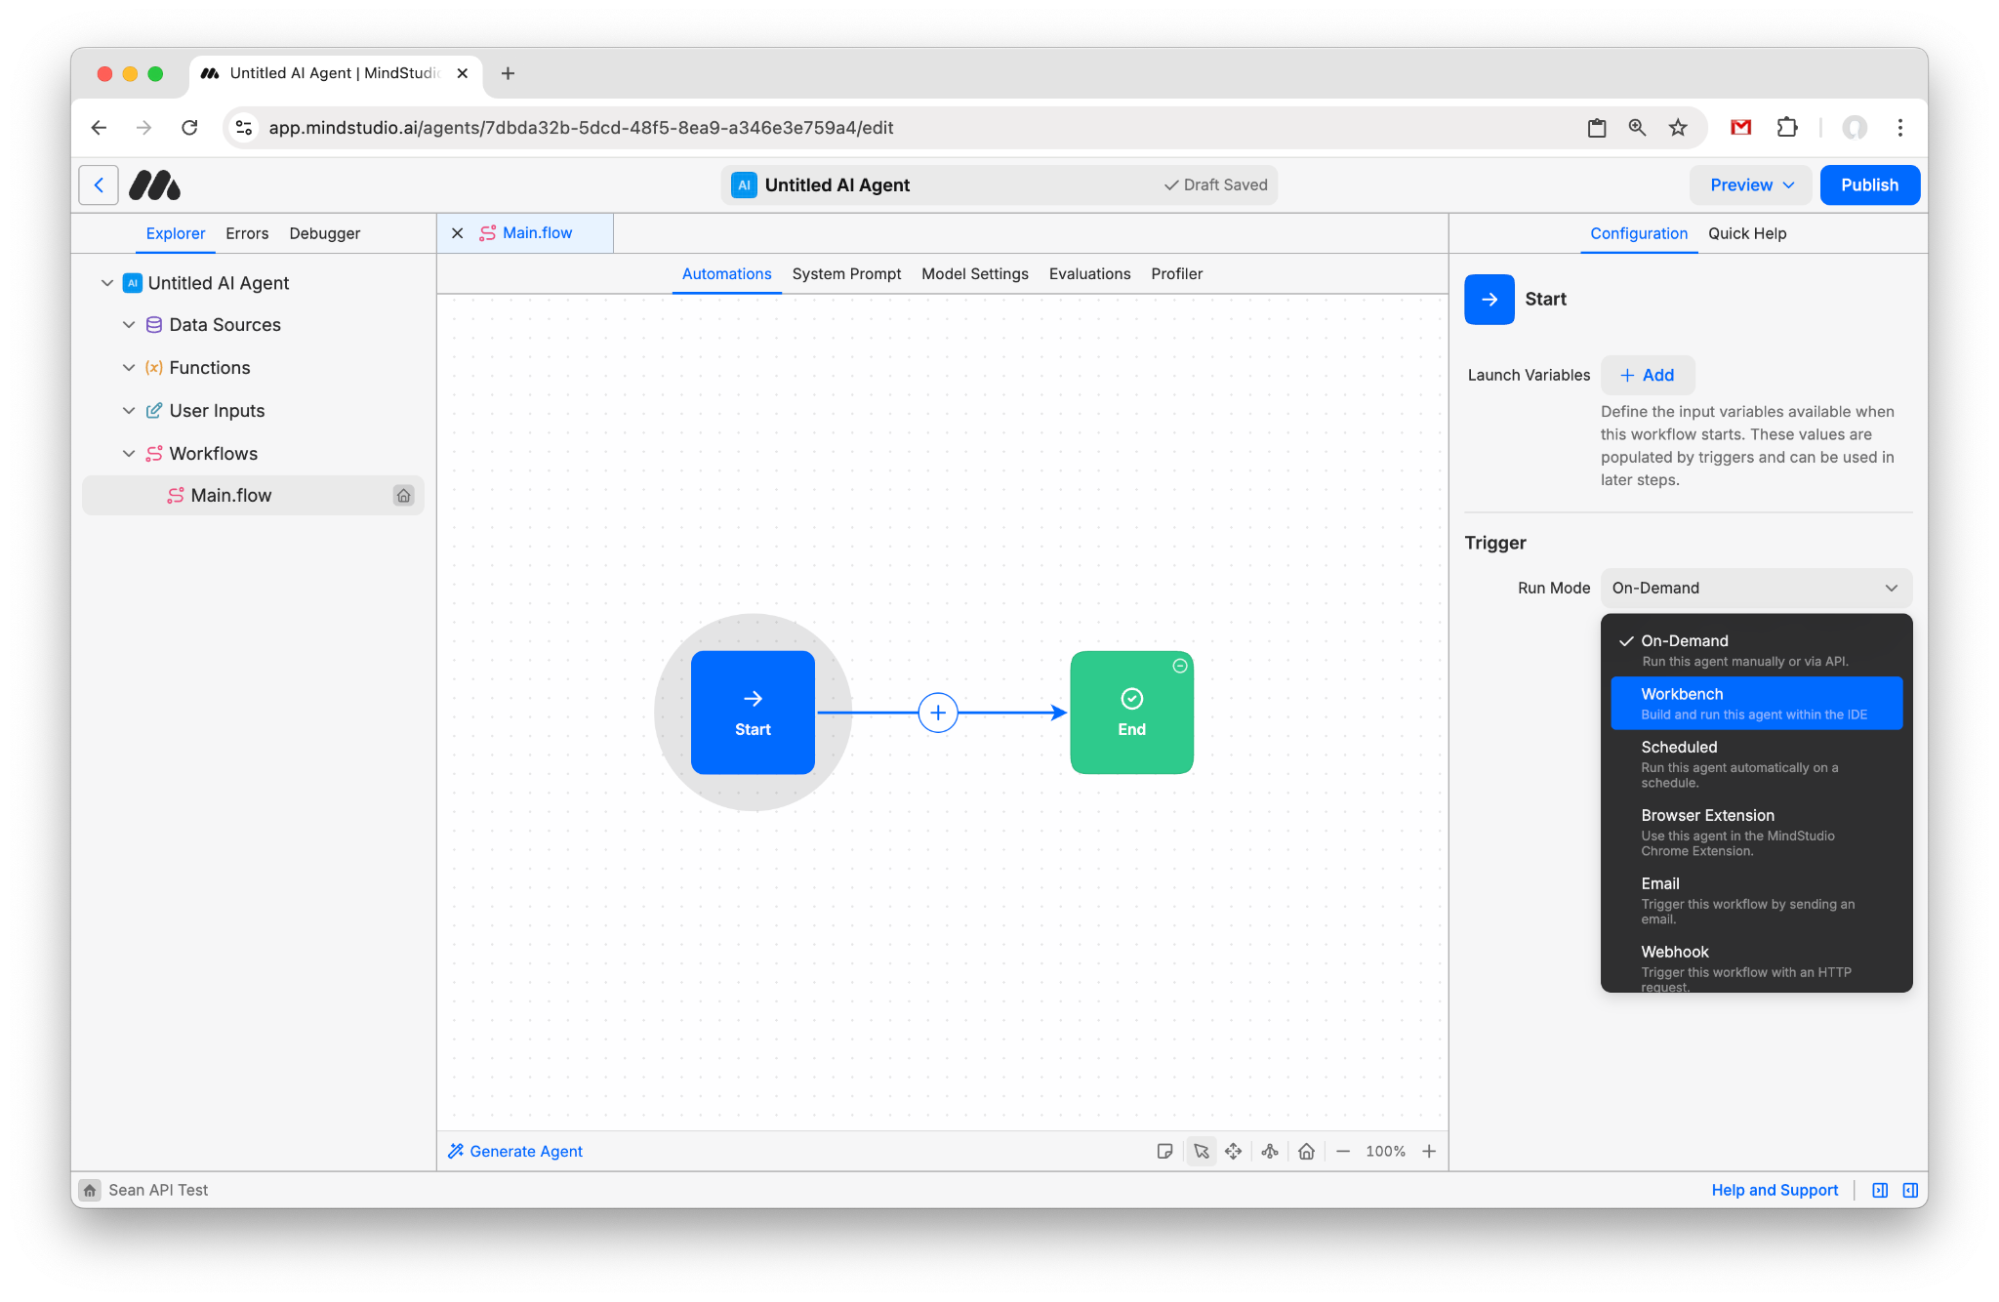
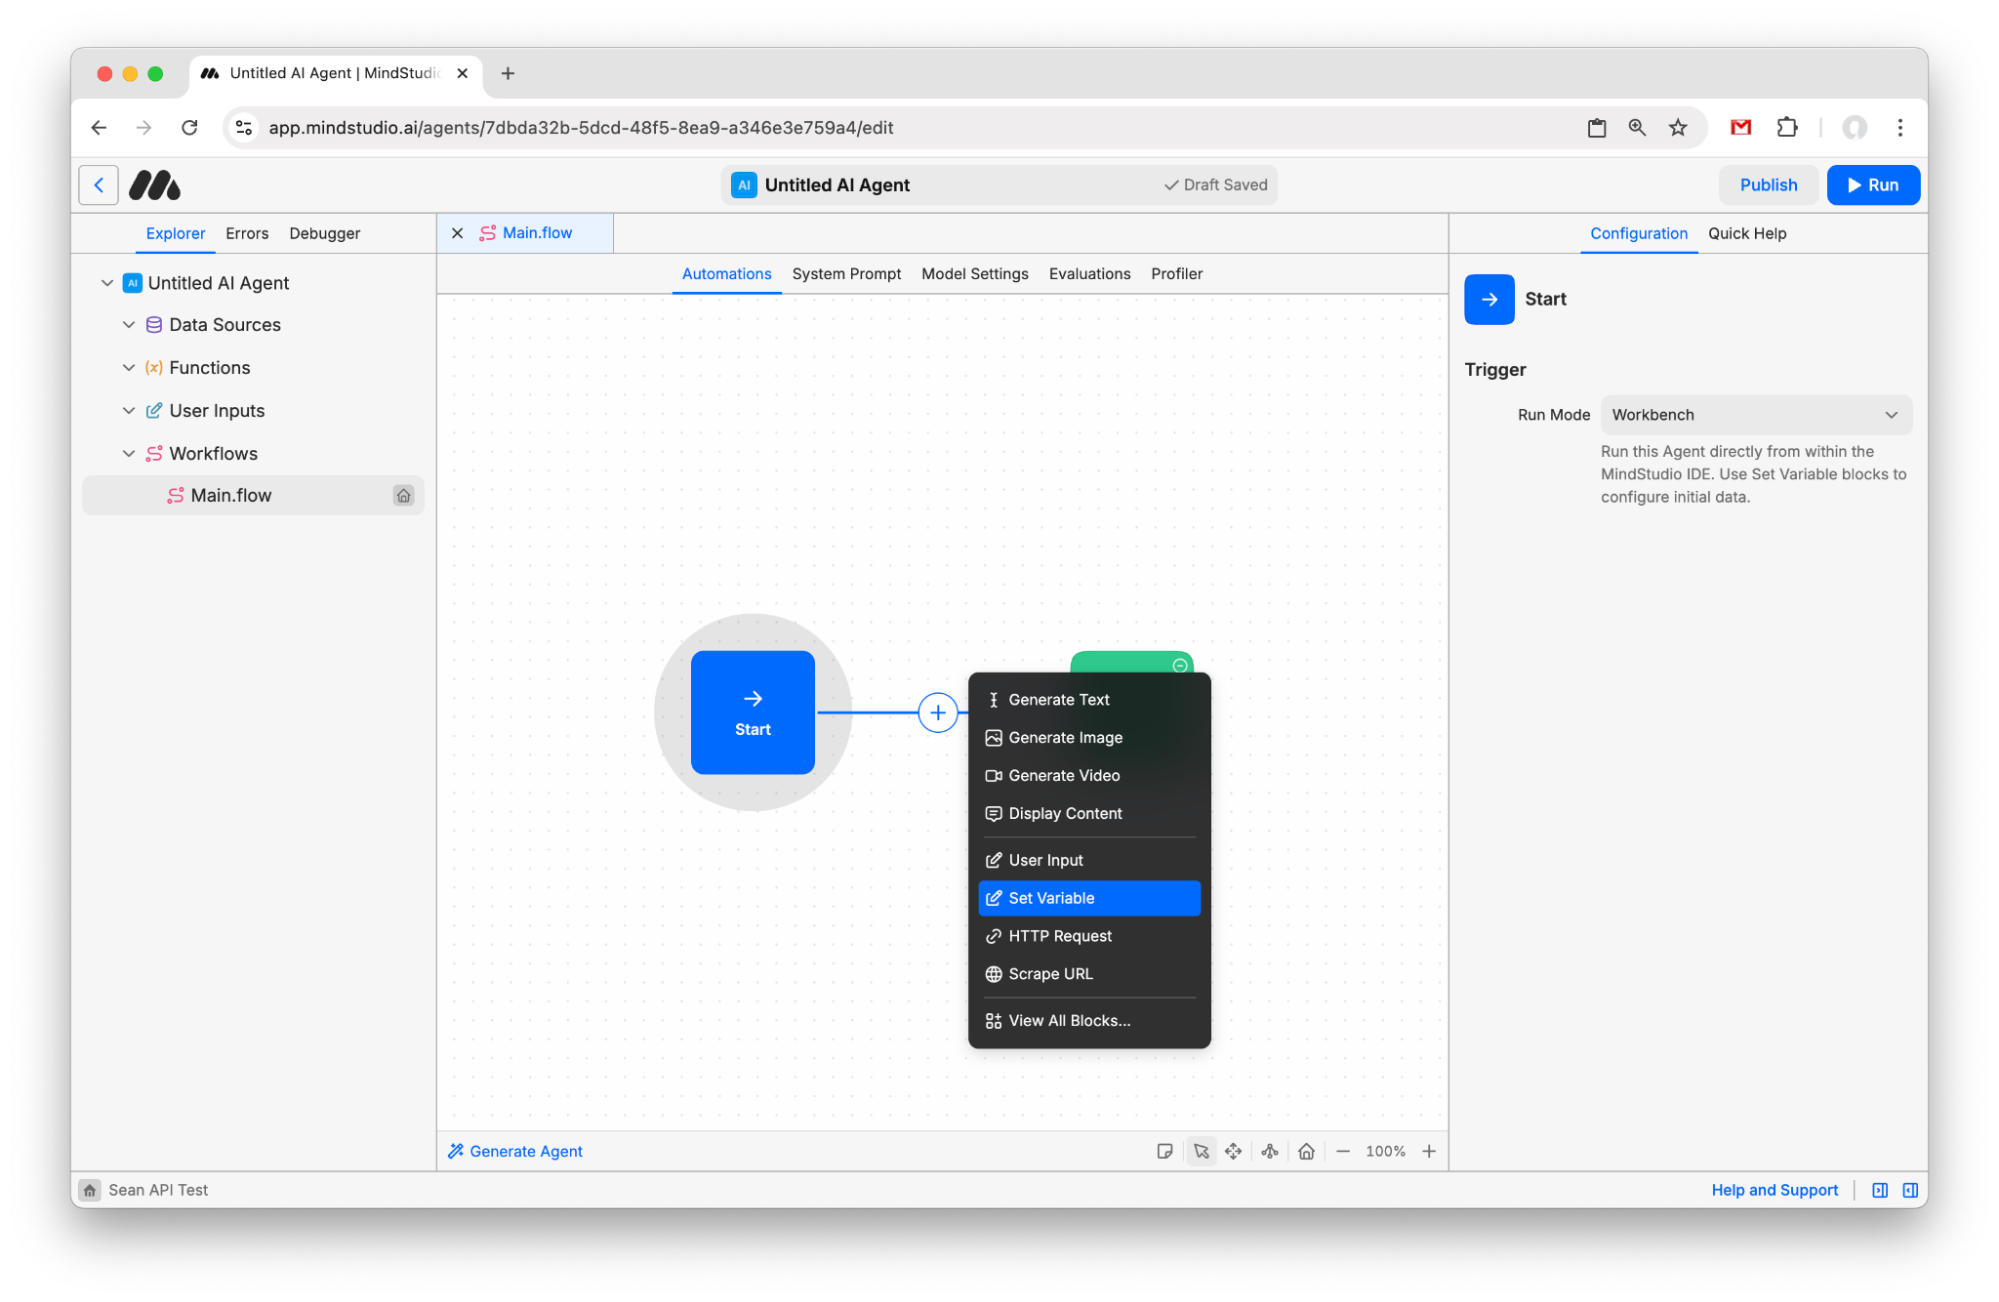
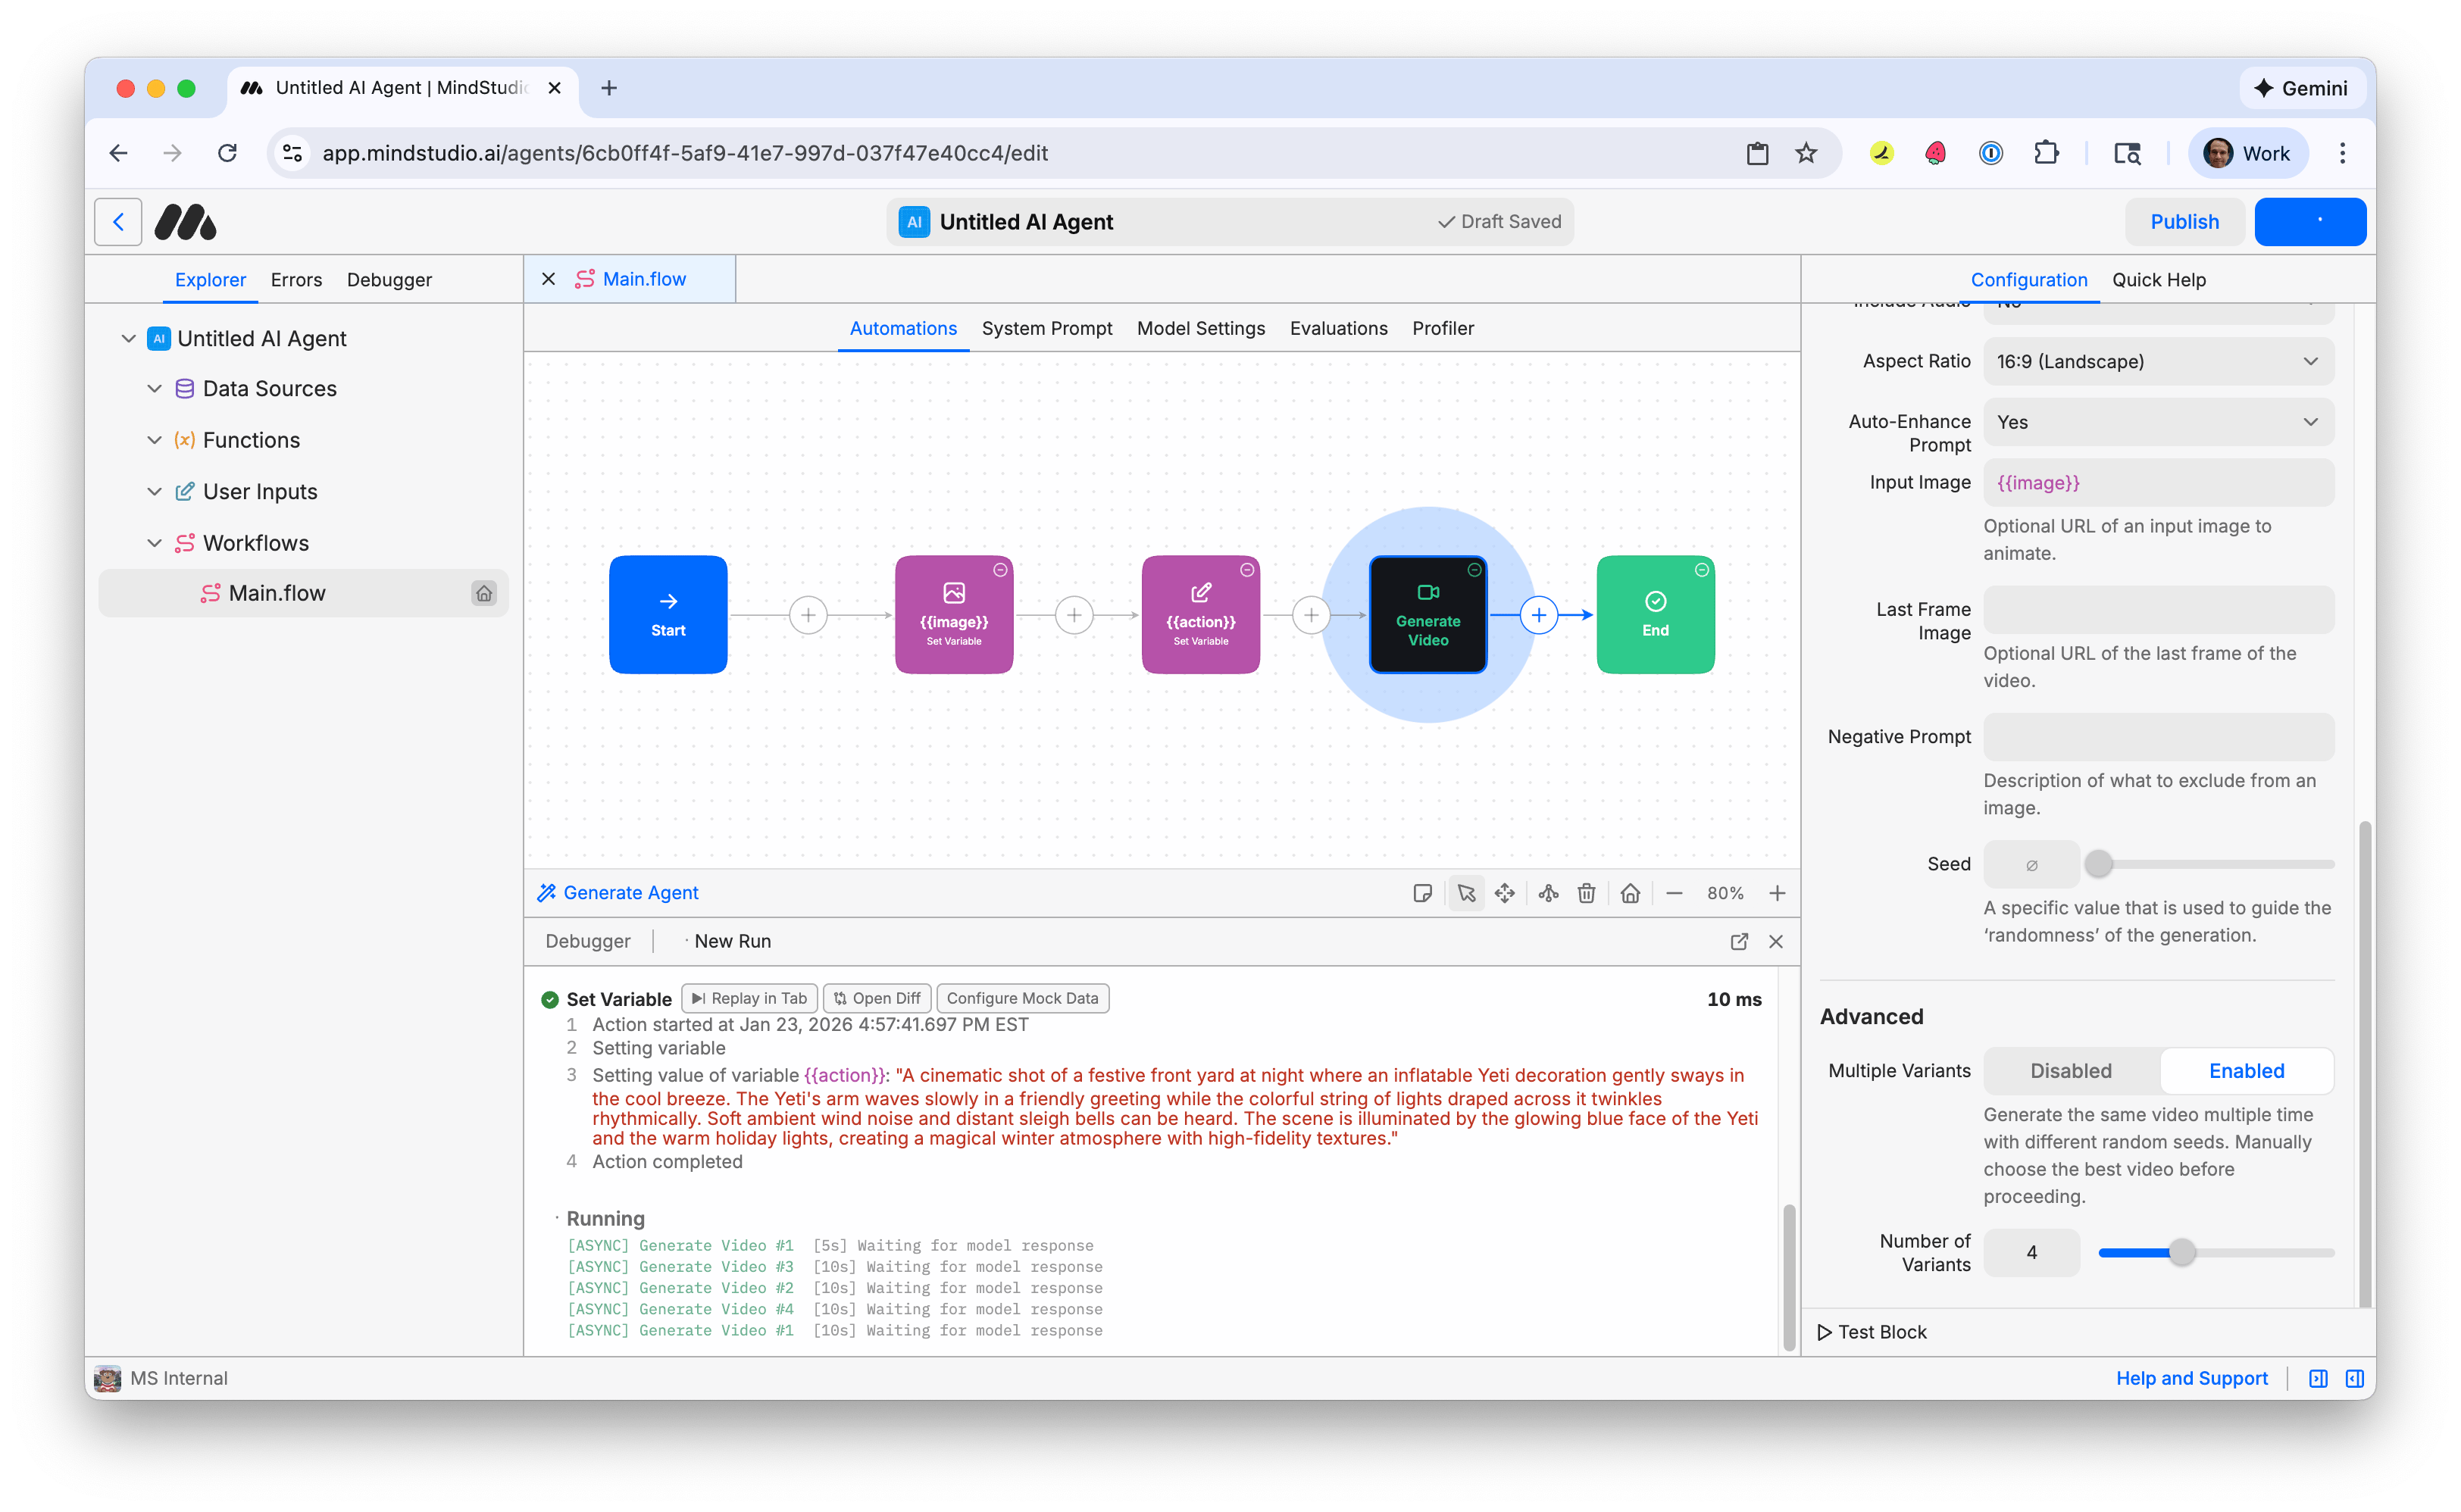
- Click the “Start” block and change the Run Mode to “Workbench”.
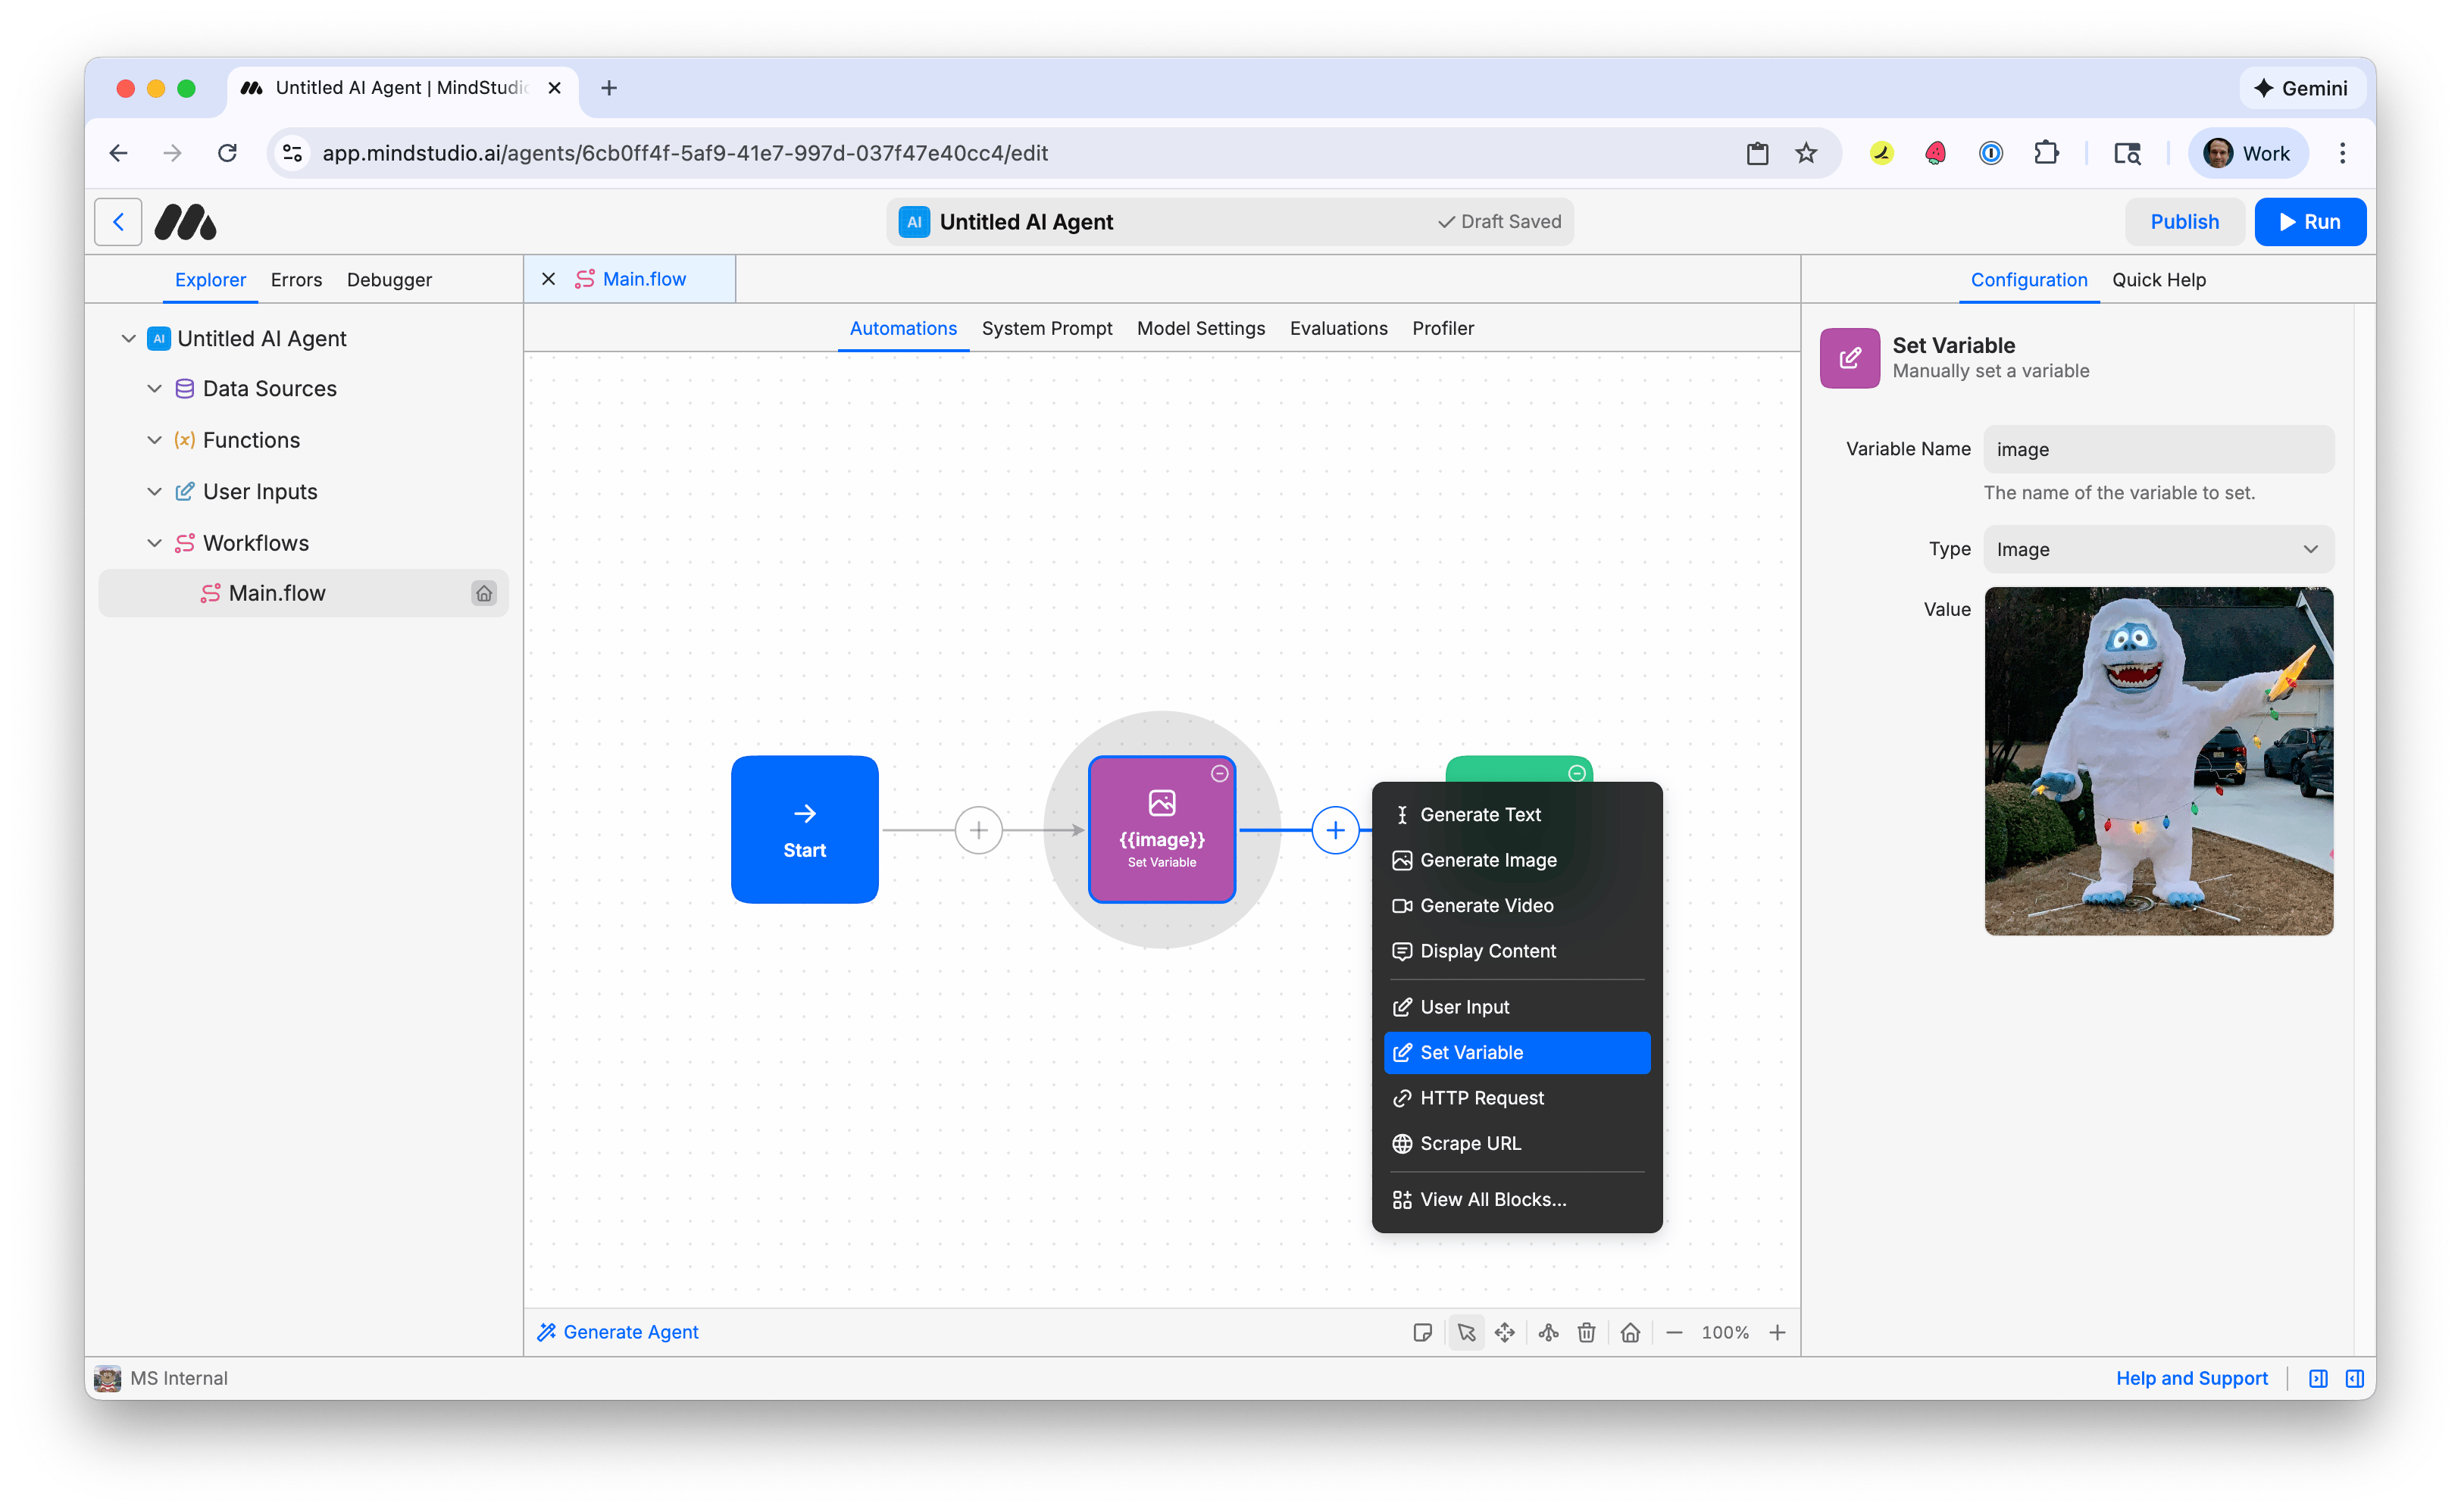
- Click the + button to add a new block and choose “Set Variable”.
- Name the variable “image”. This will be the image that you provide as a reference to generate the AI video.
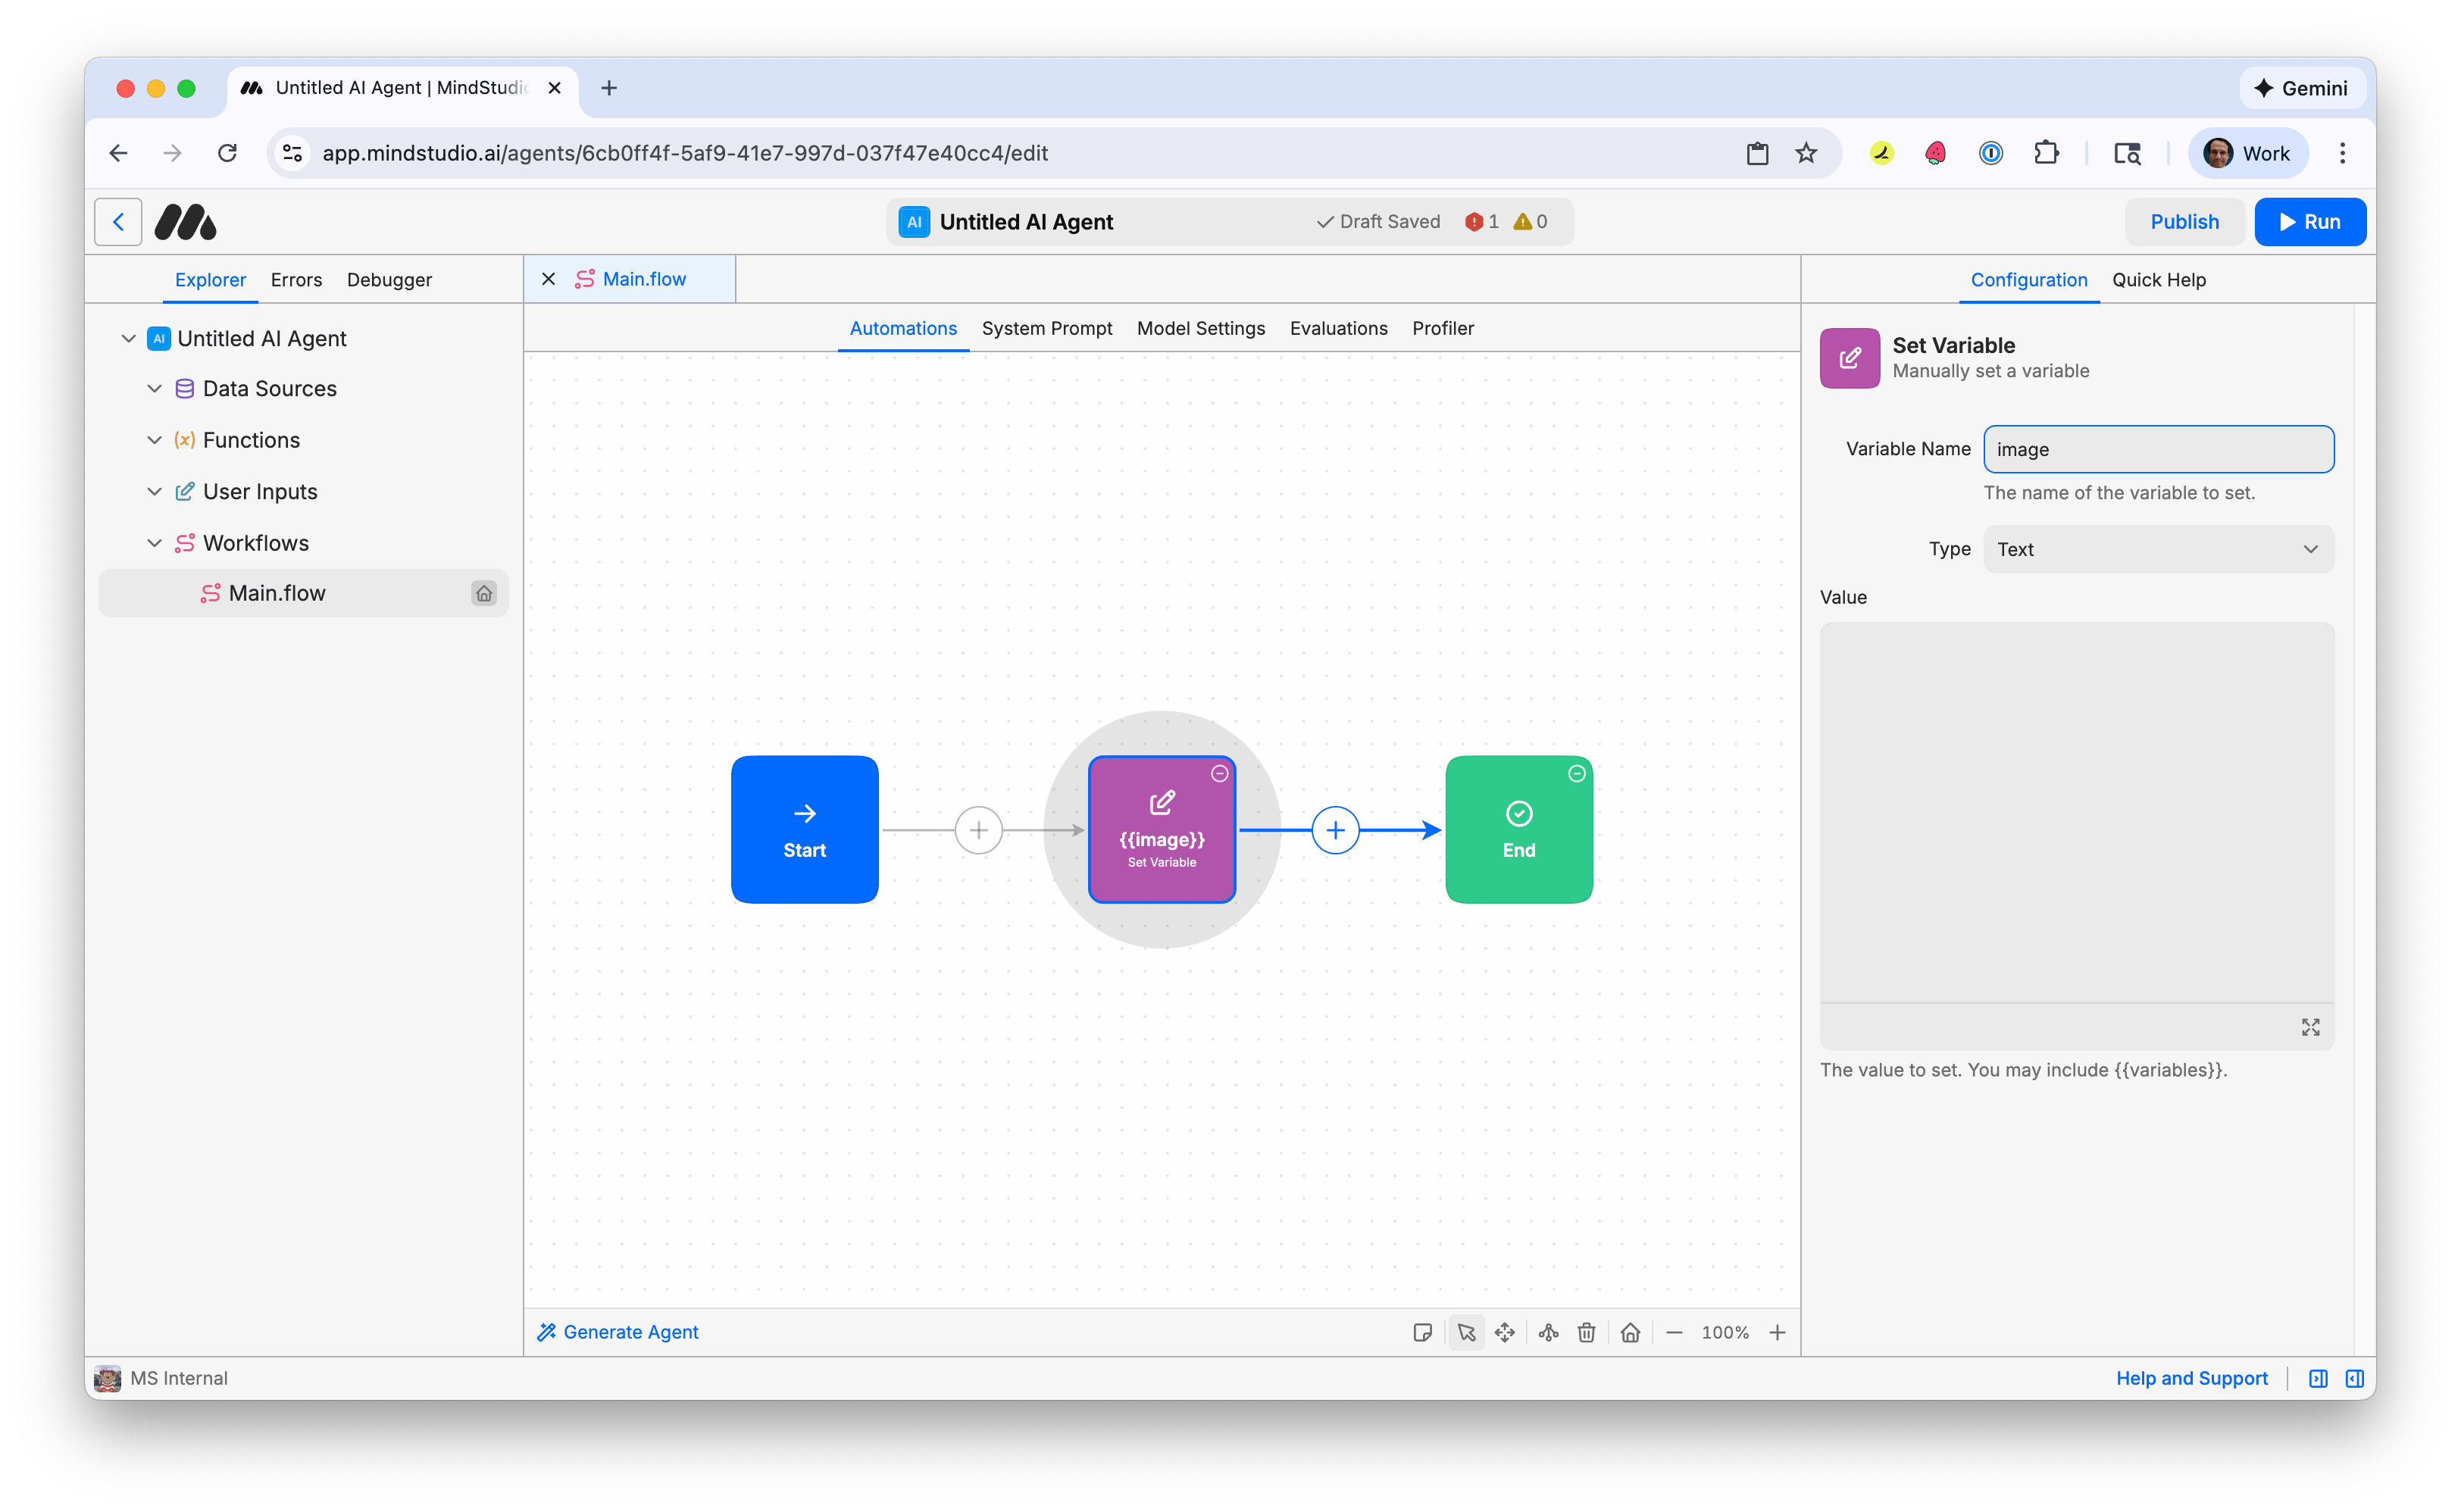
- Click the “Type” setting, then select “Image”.
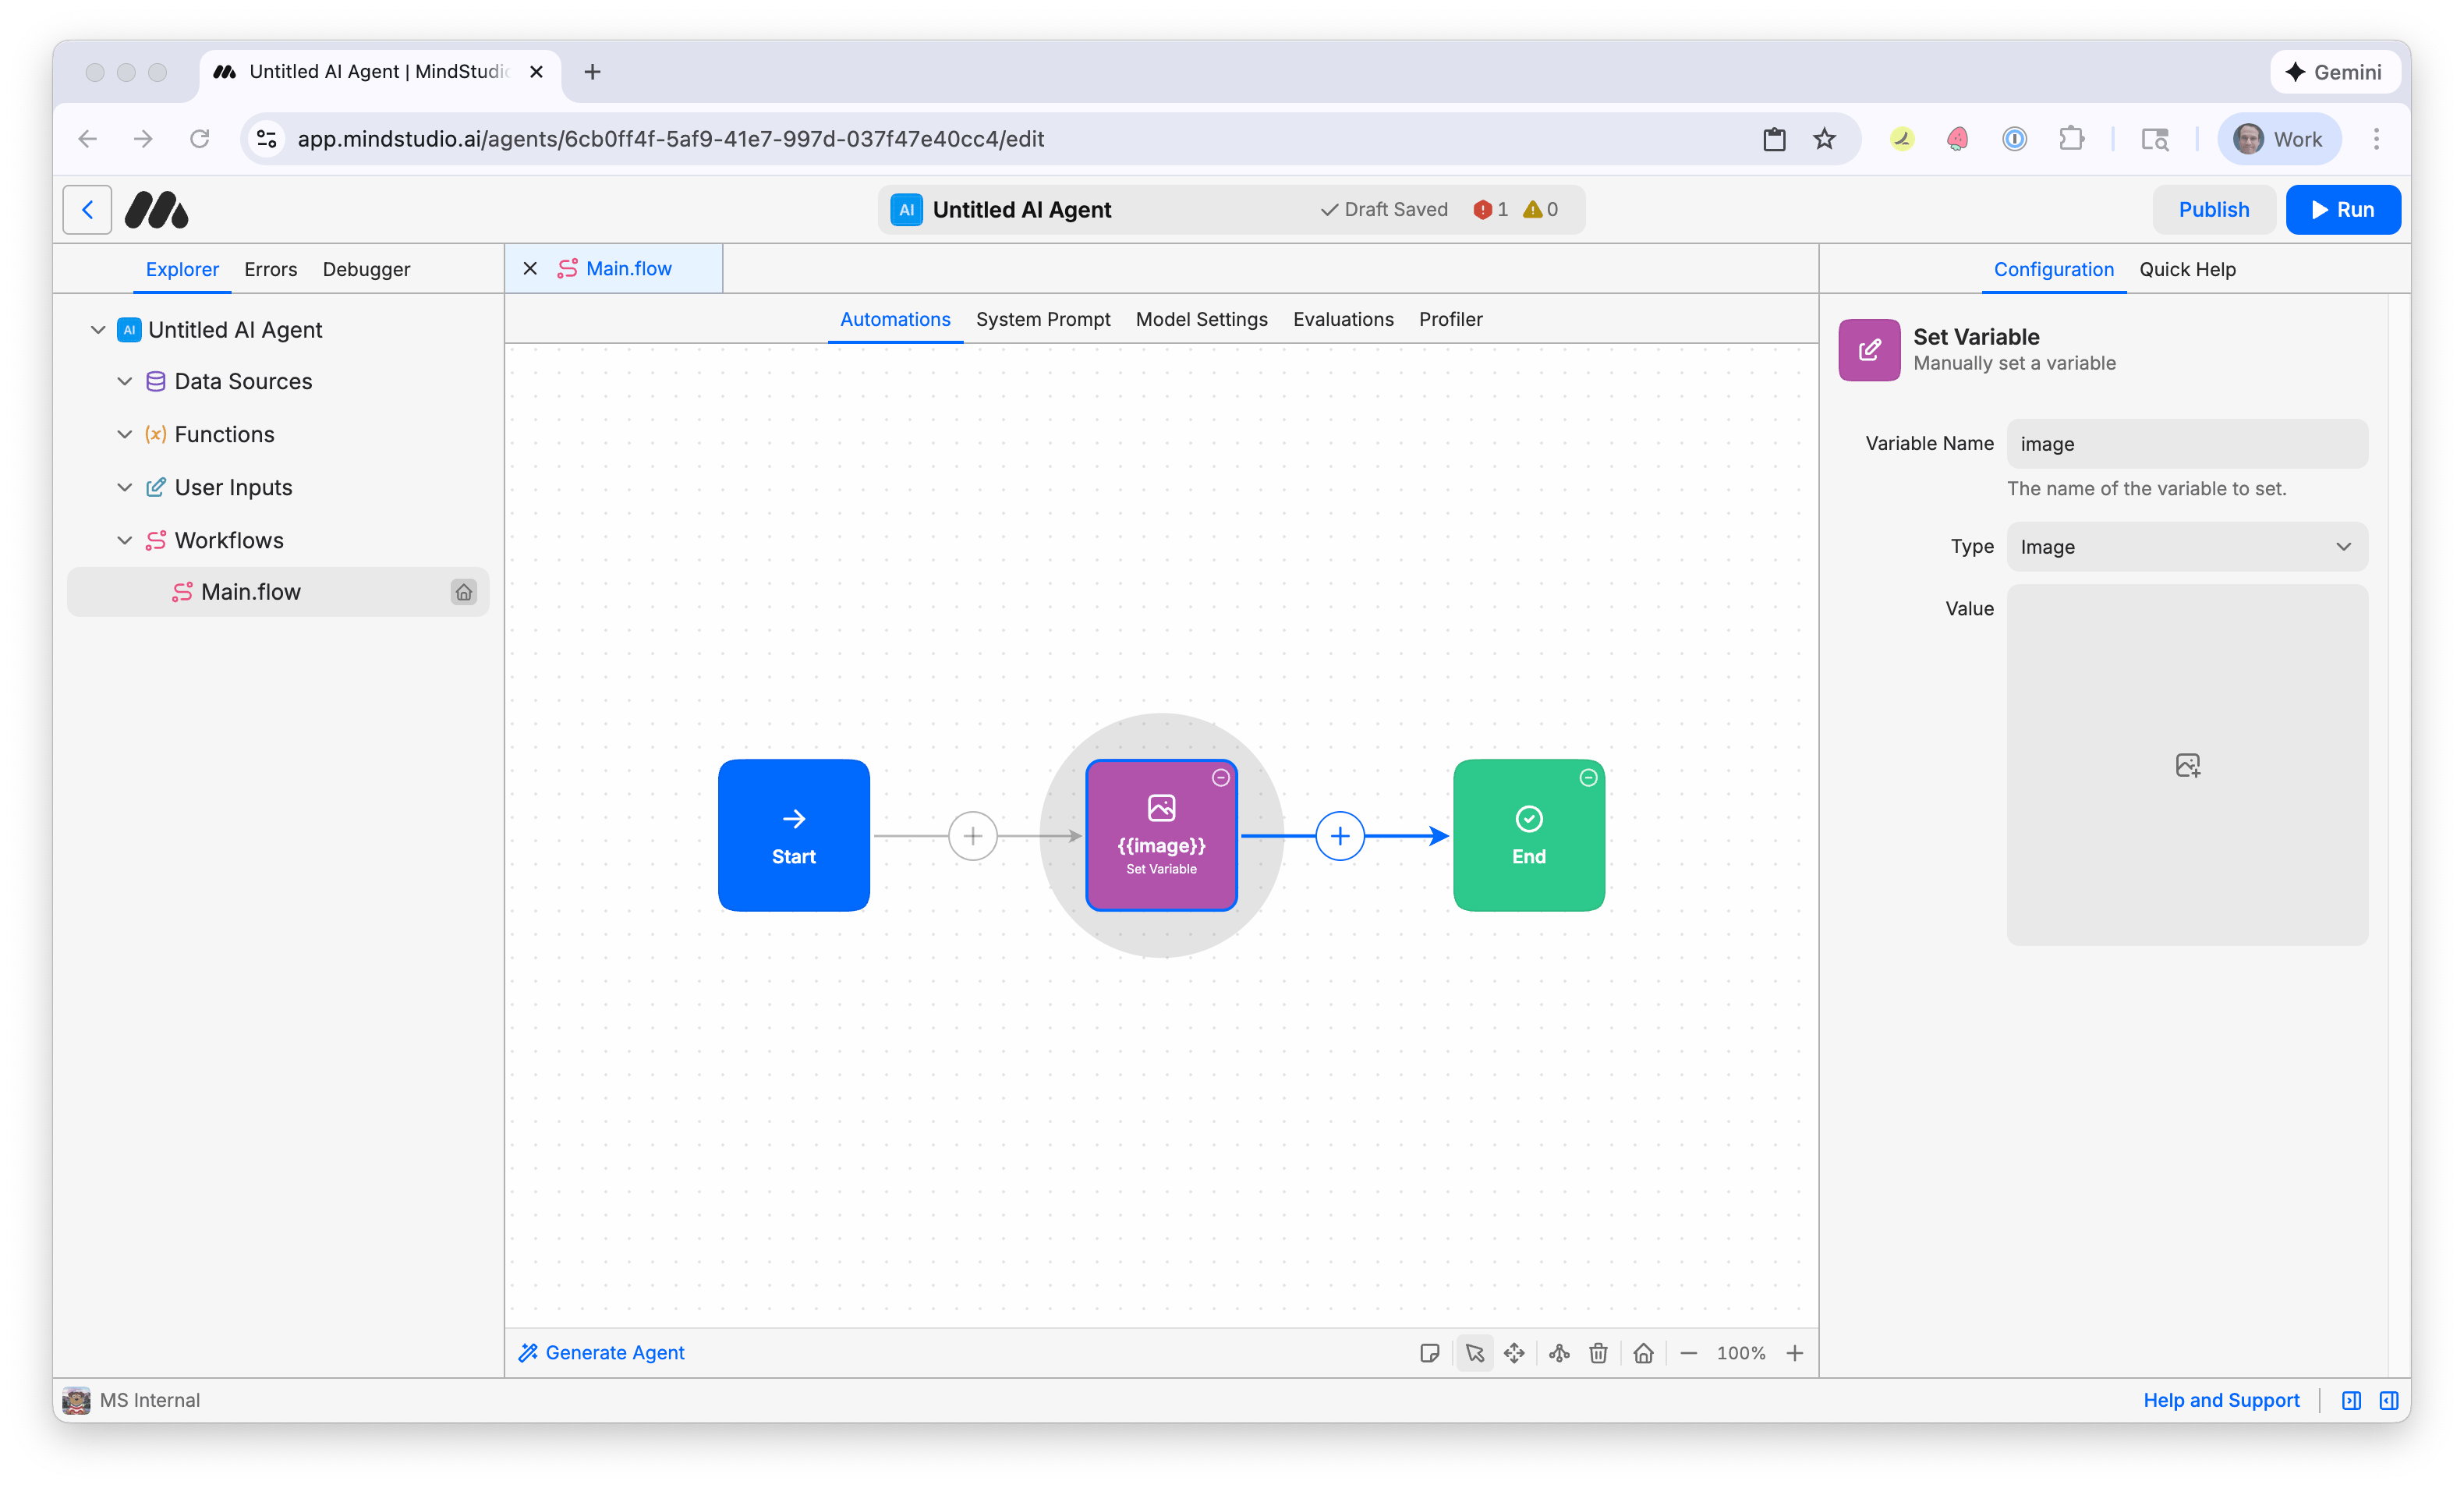
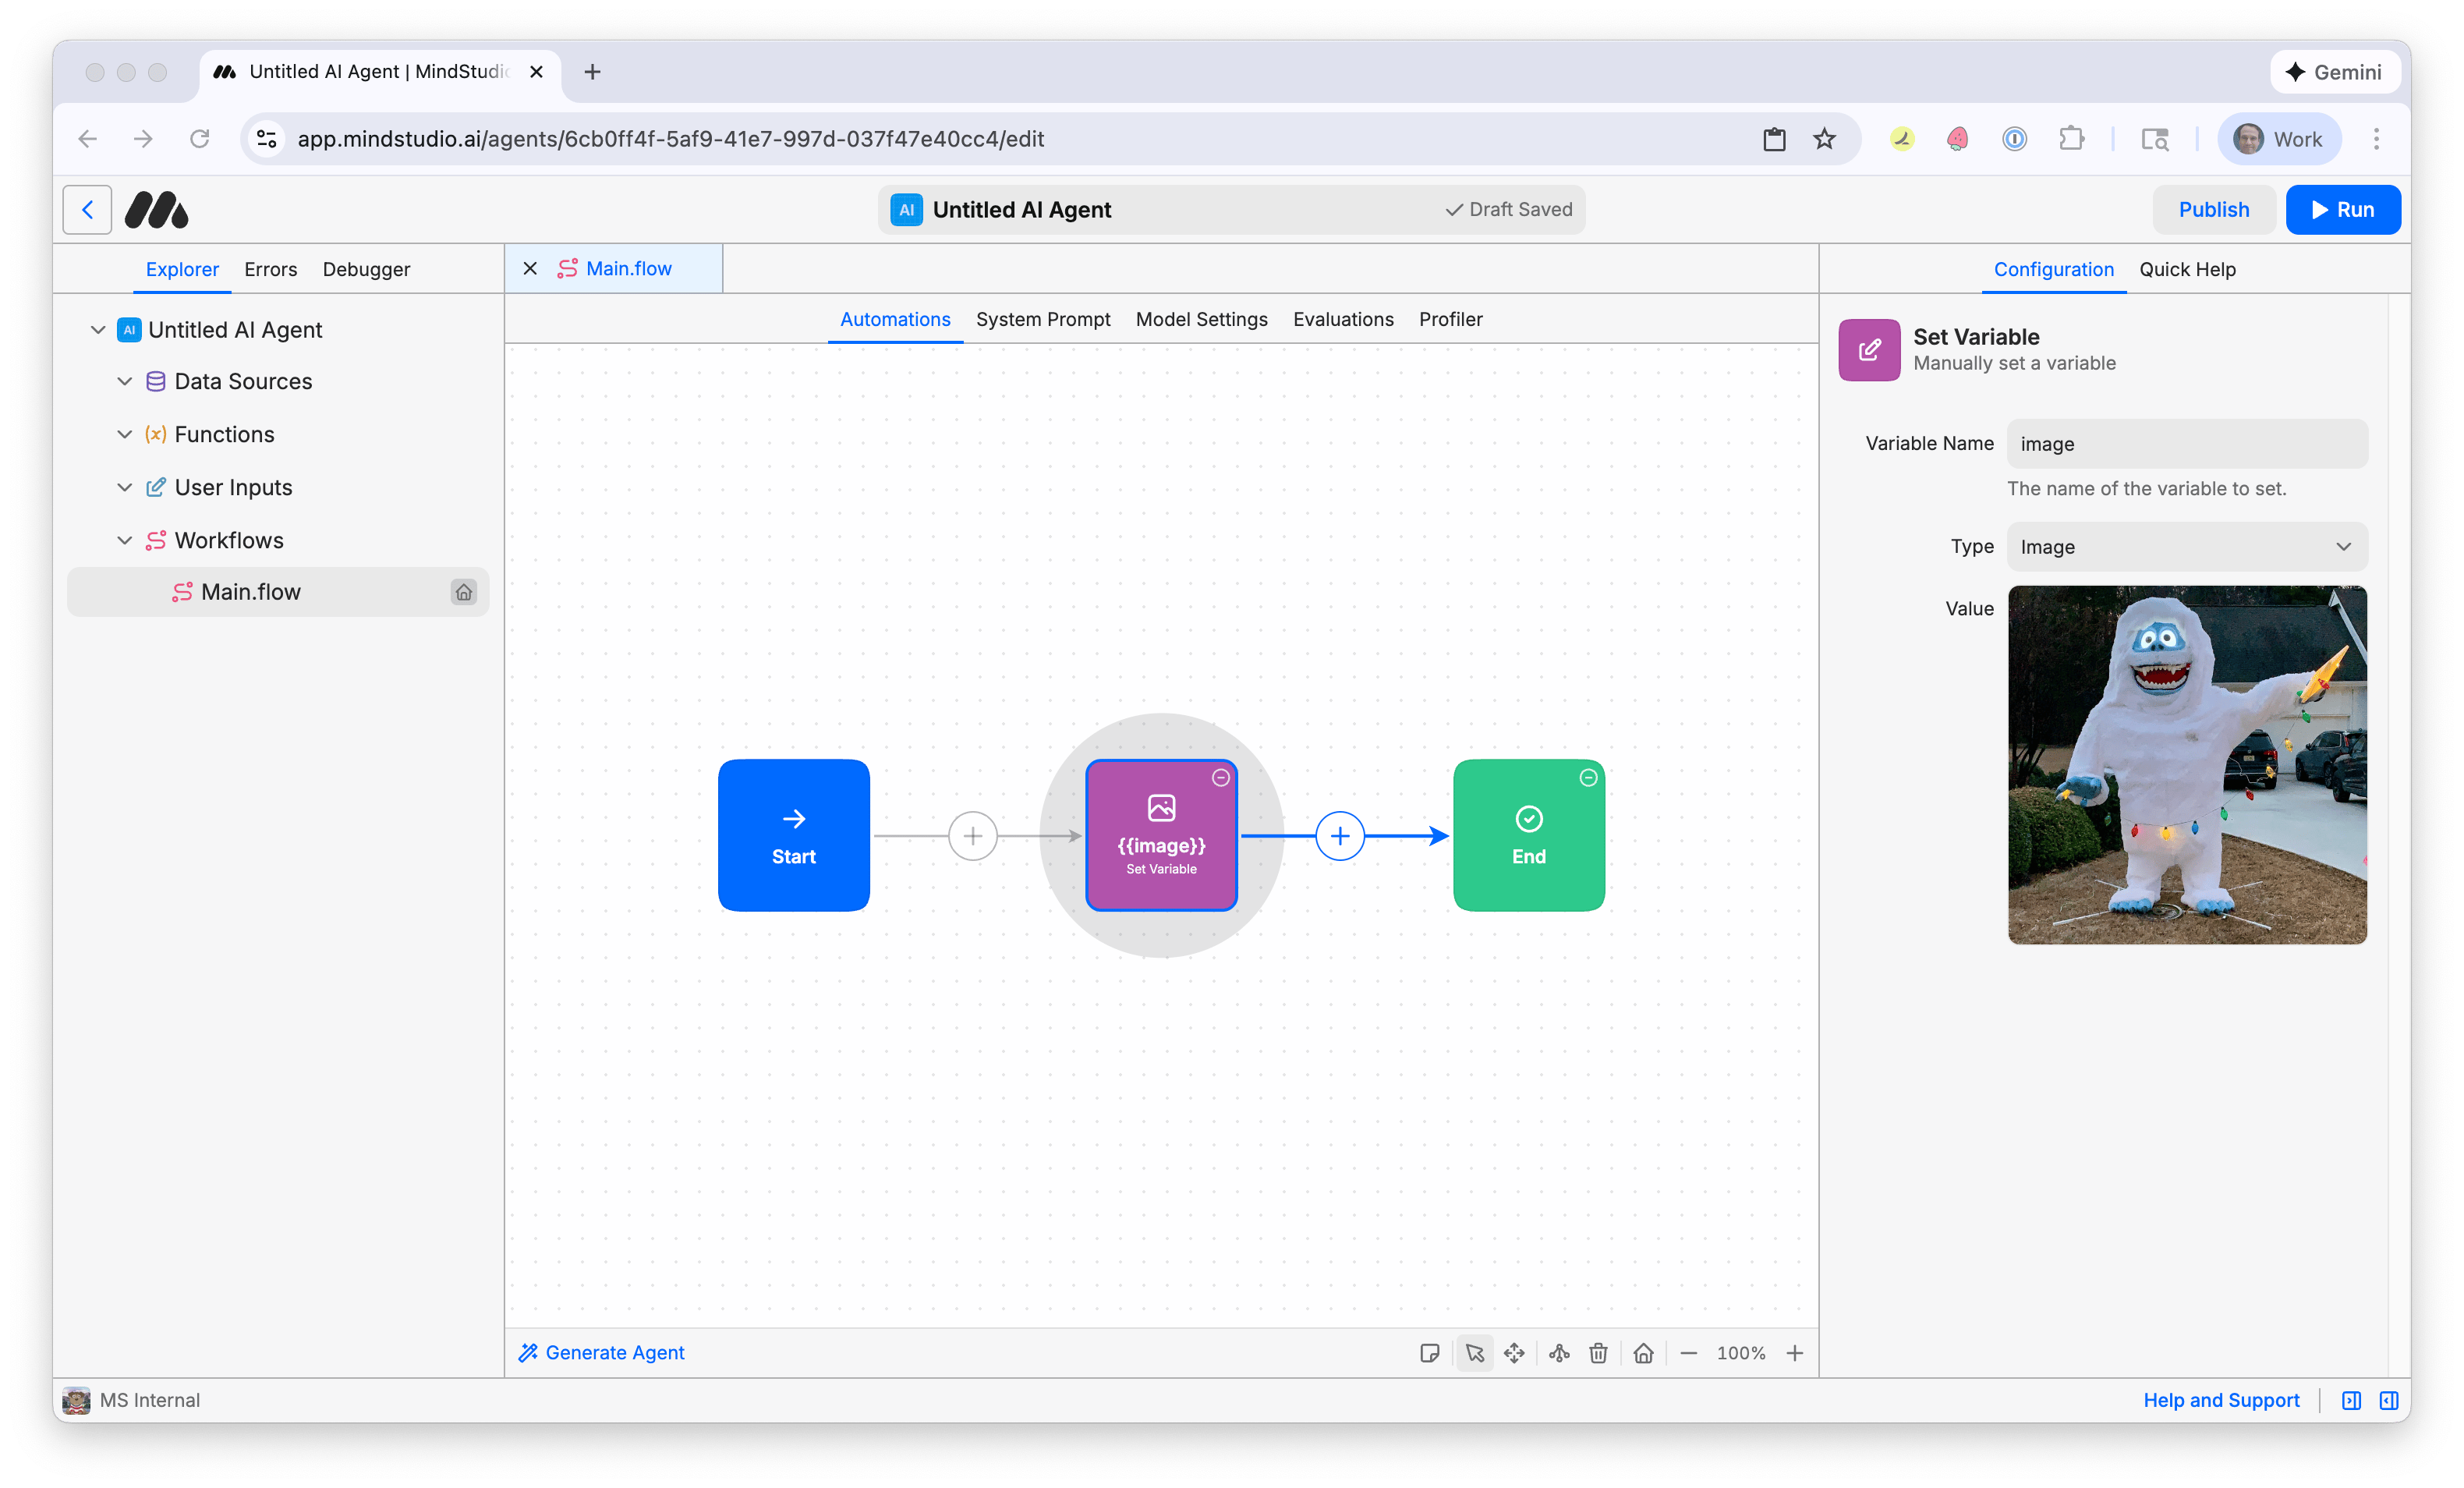
- Click on “Value”, then select the image as a reference to generate the AI video. A preview of that image is displayed.
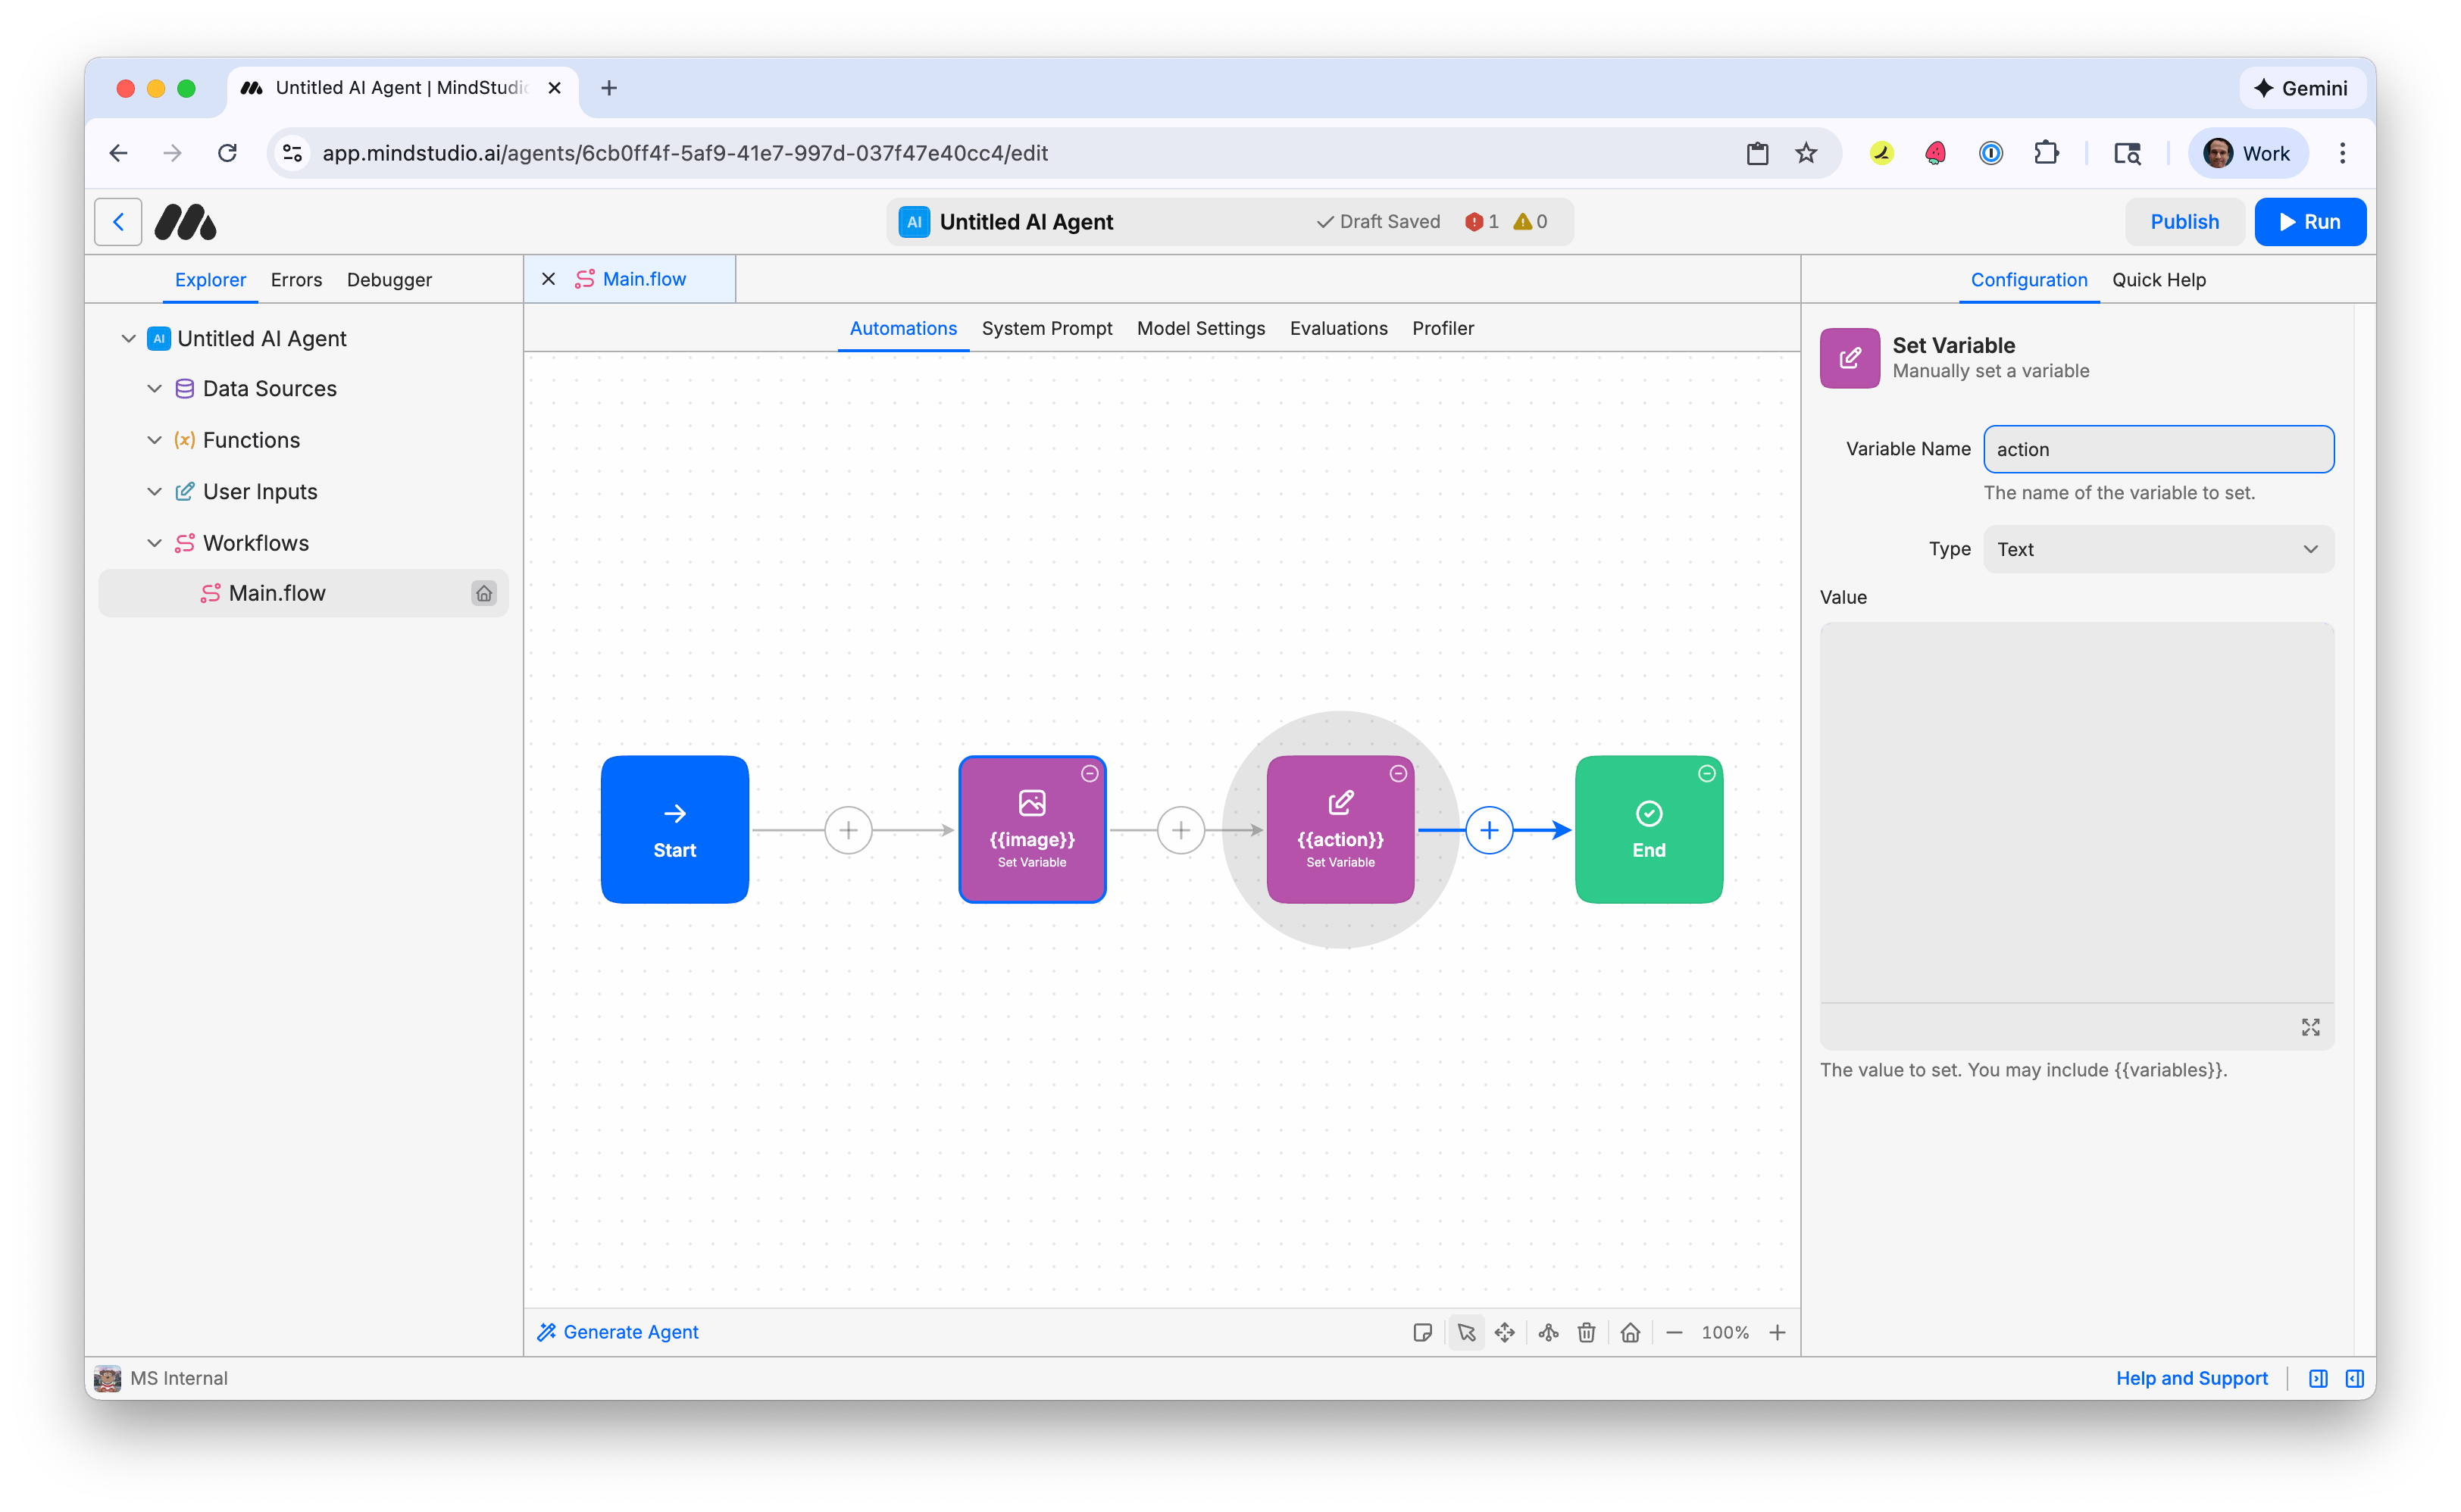
- Click the + again and add a second “Set Variable” block.
- Name the variable “action”. This will be the prompt for the AI video generation model that describes the action to do with the provided image for the AI video generation.
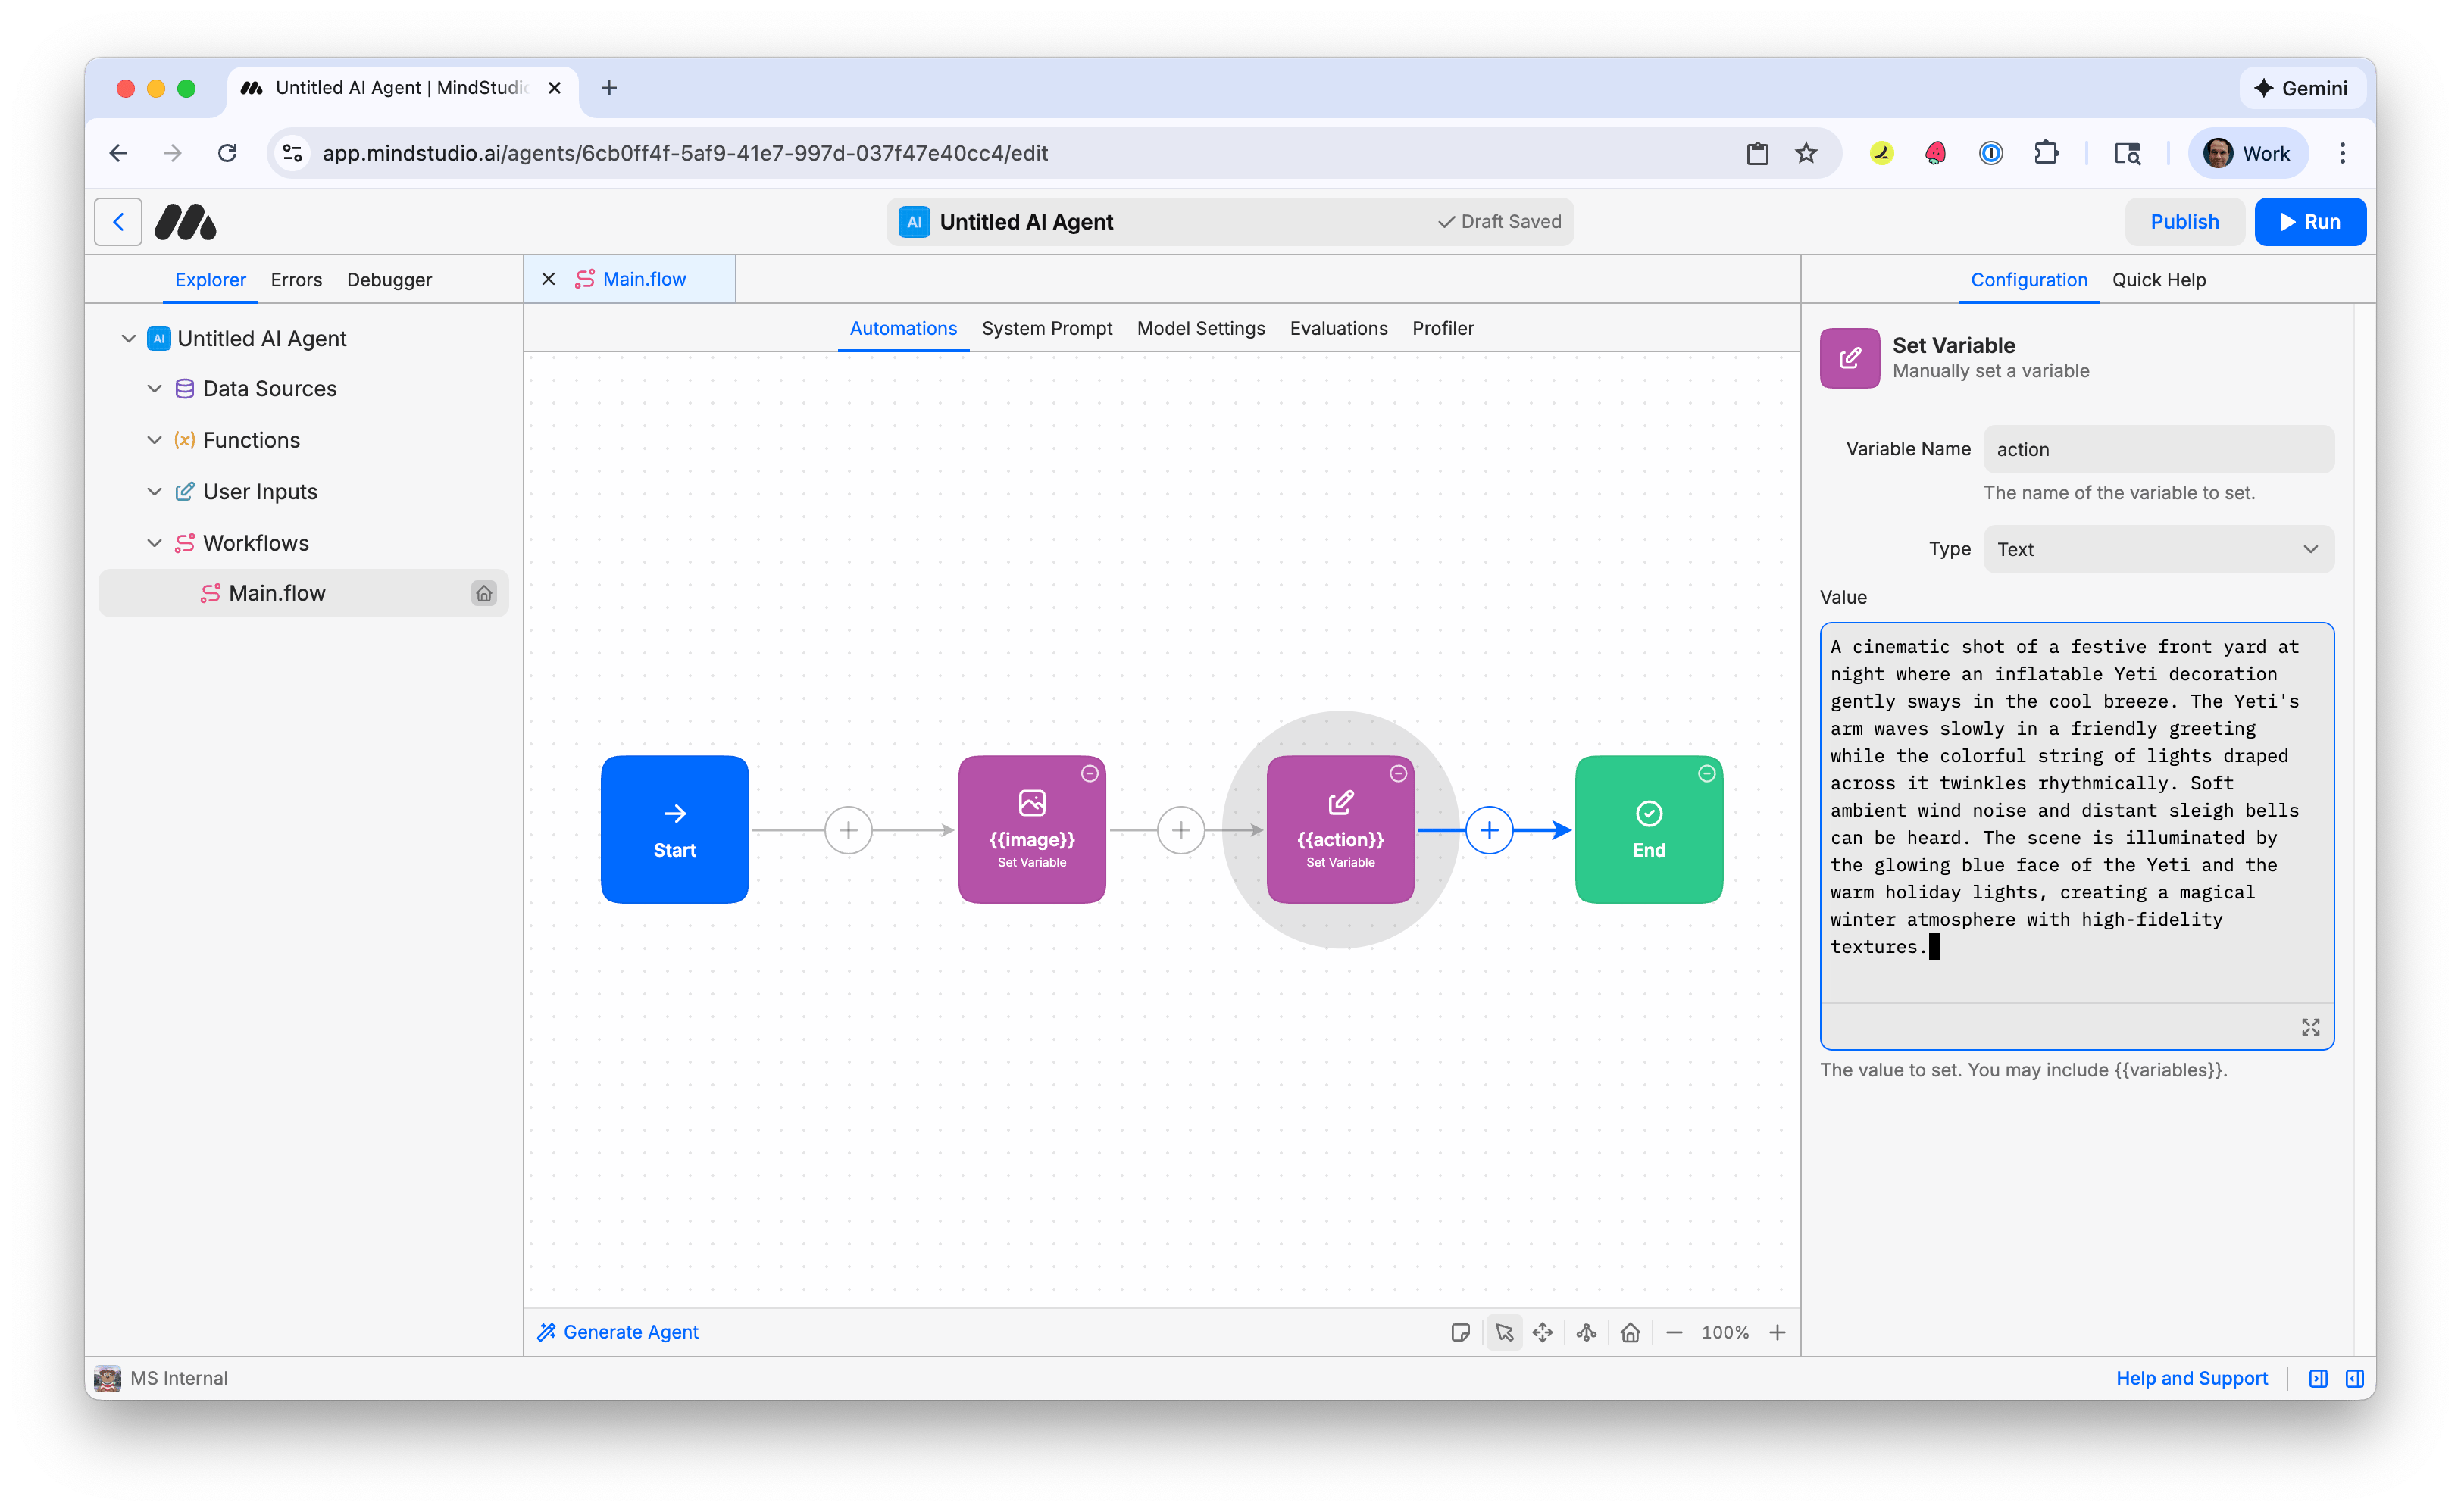
- In the “Value” setting, enter a prompt that describes the action in the video that the AI video generation model does based on your provided reference image. You’ll use your own prompt, but as an example of how to structure your prompt, this tutorial uses this prompt.
Other agents start typing. Remy starts asking.
Scoping, trade-offs, edge cases — the real work. Before a line of code.
“A cinematic shot of a festive front yard at night where an inflatable Yeti decoration gently sways in the cool breeze. The Yeti’s arm waves slowly in a friendly greeting while the colorful string of lights draped across it twinkles rhythmically. Soft ambient wind noise and distant sleigh bells can be heard. The scene is illuminated by the glowing blue face of the Yeti and the warm holiday lights, creating a magical winter atmosphere with high-fidelity textures.”
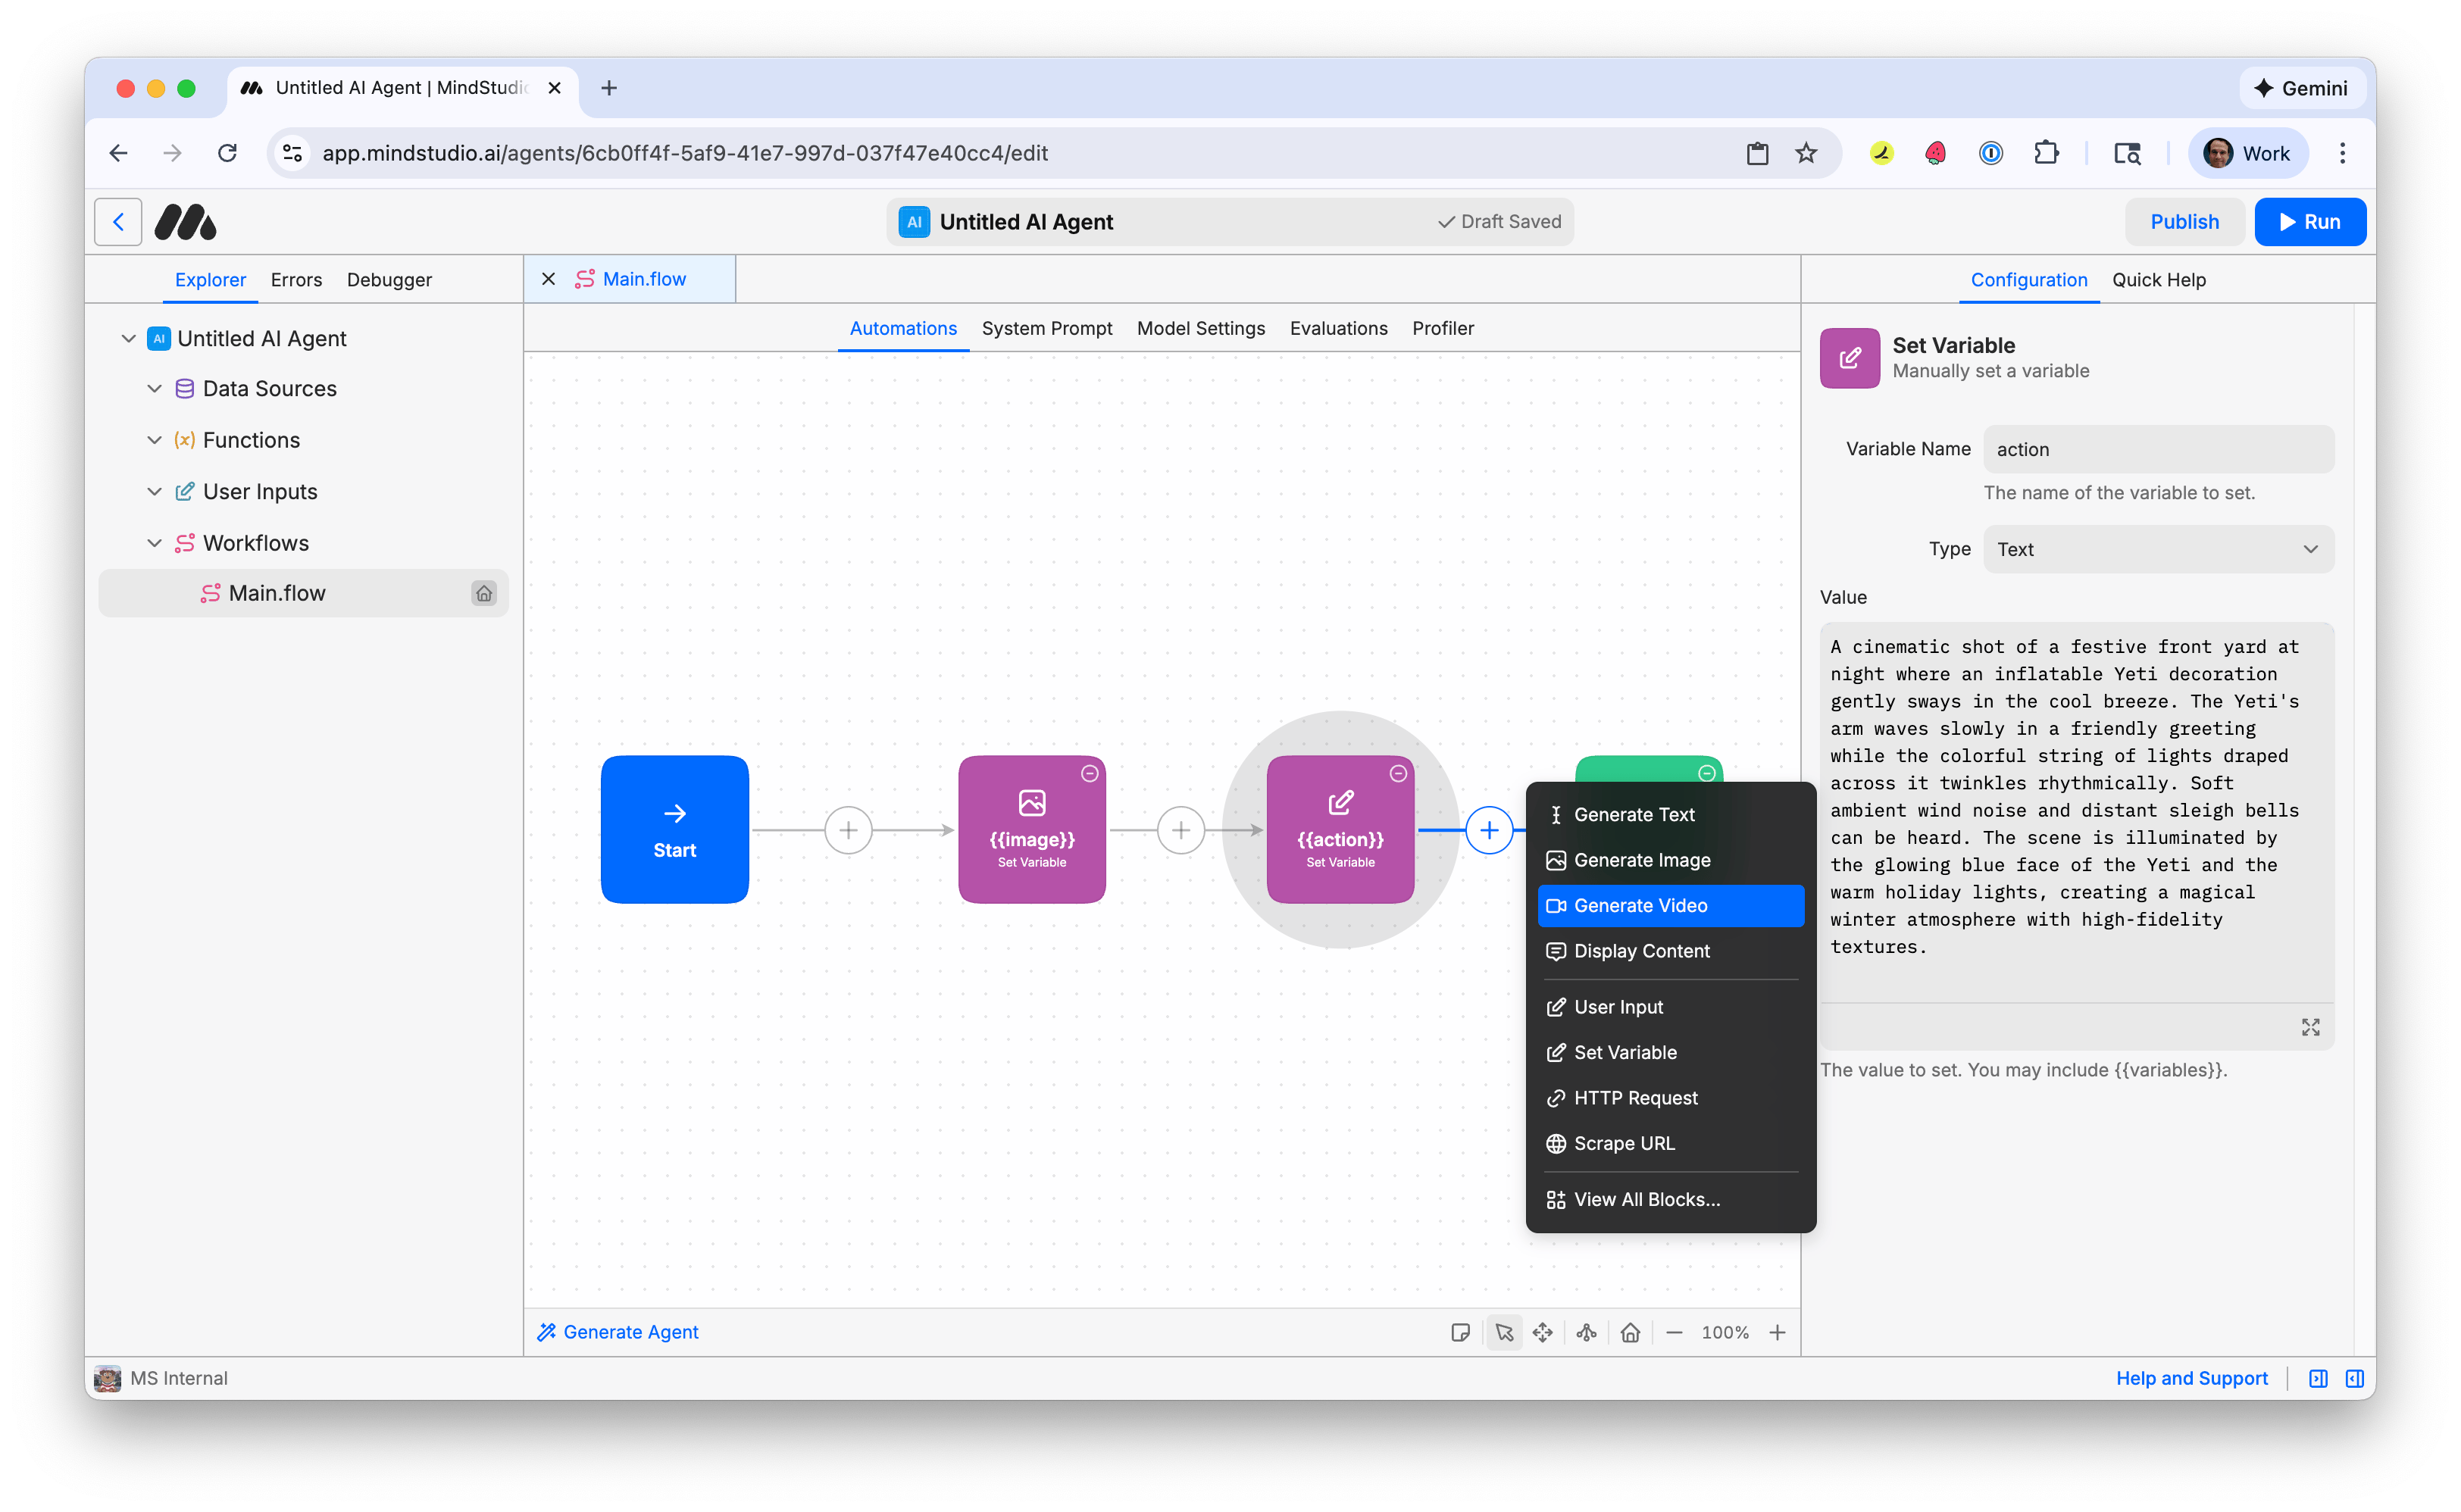
- Click the + again and add a “Generate Video” block.
- Click the “Zoom Out” icon in the Automation Canvas to zoom out (80%), so you can see your entire workflow on-screen. If necessary, click “Auto Arrange” (or A) to automatically arrange the workflow for better viewing.
 .png)
.png)
- Click the “Generate Video” block, then type “{{action}}” in the prompt field to pass your variable “action” into the Image Generation model.
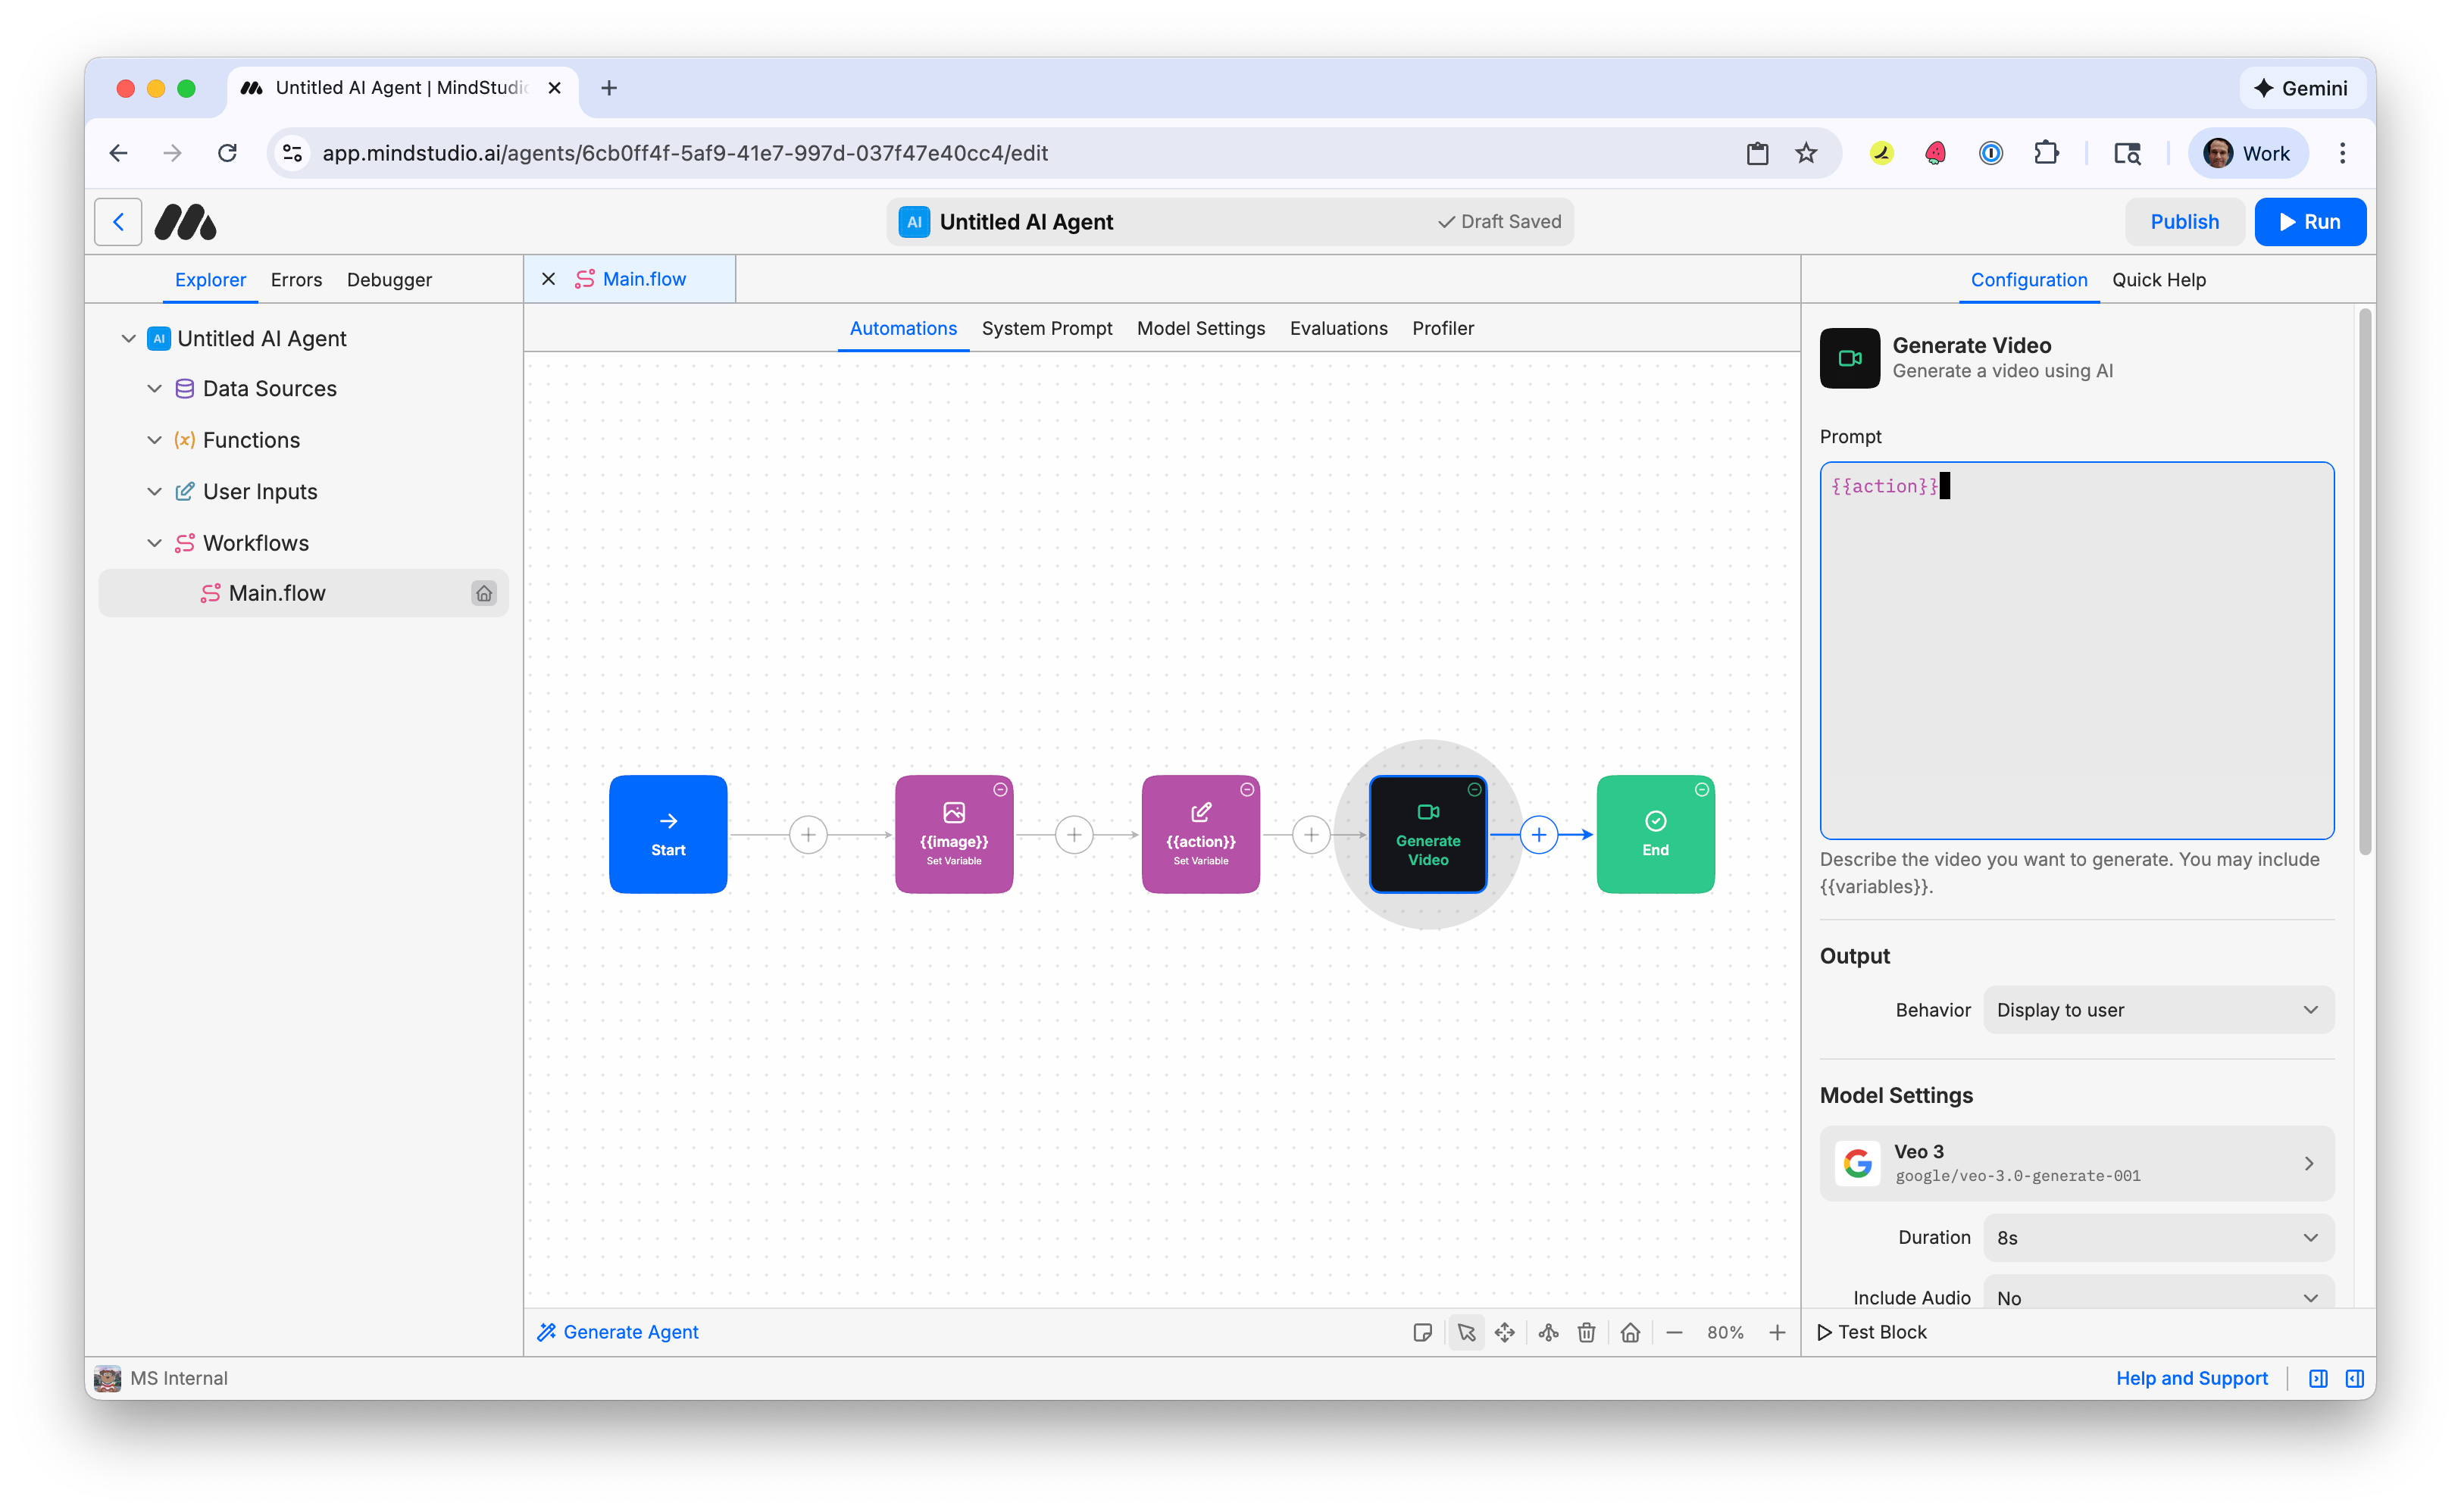
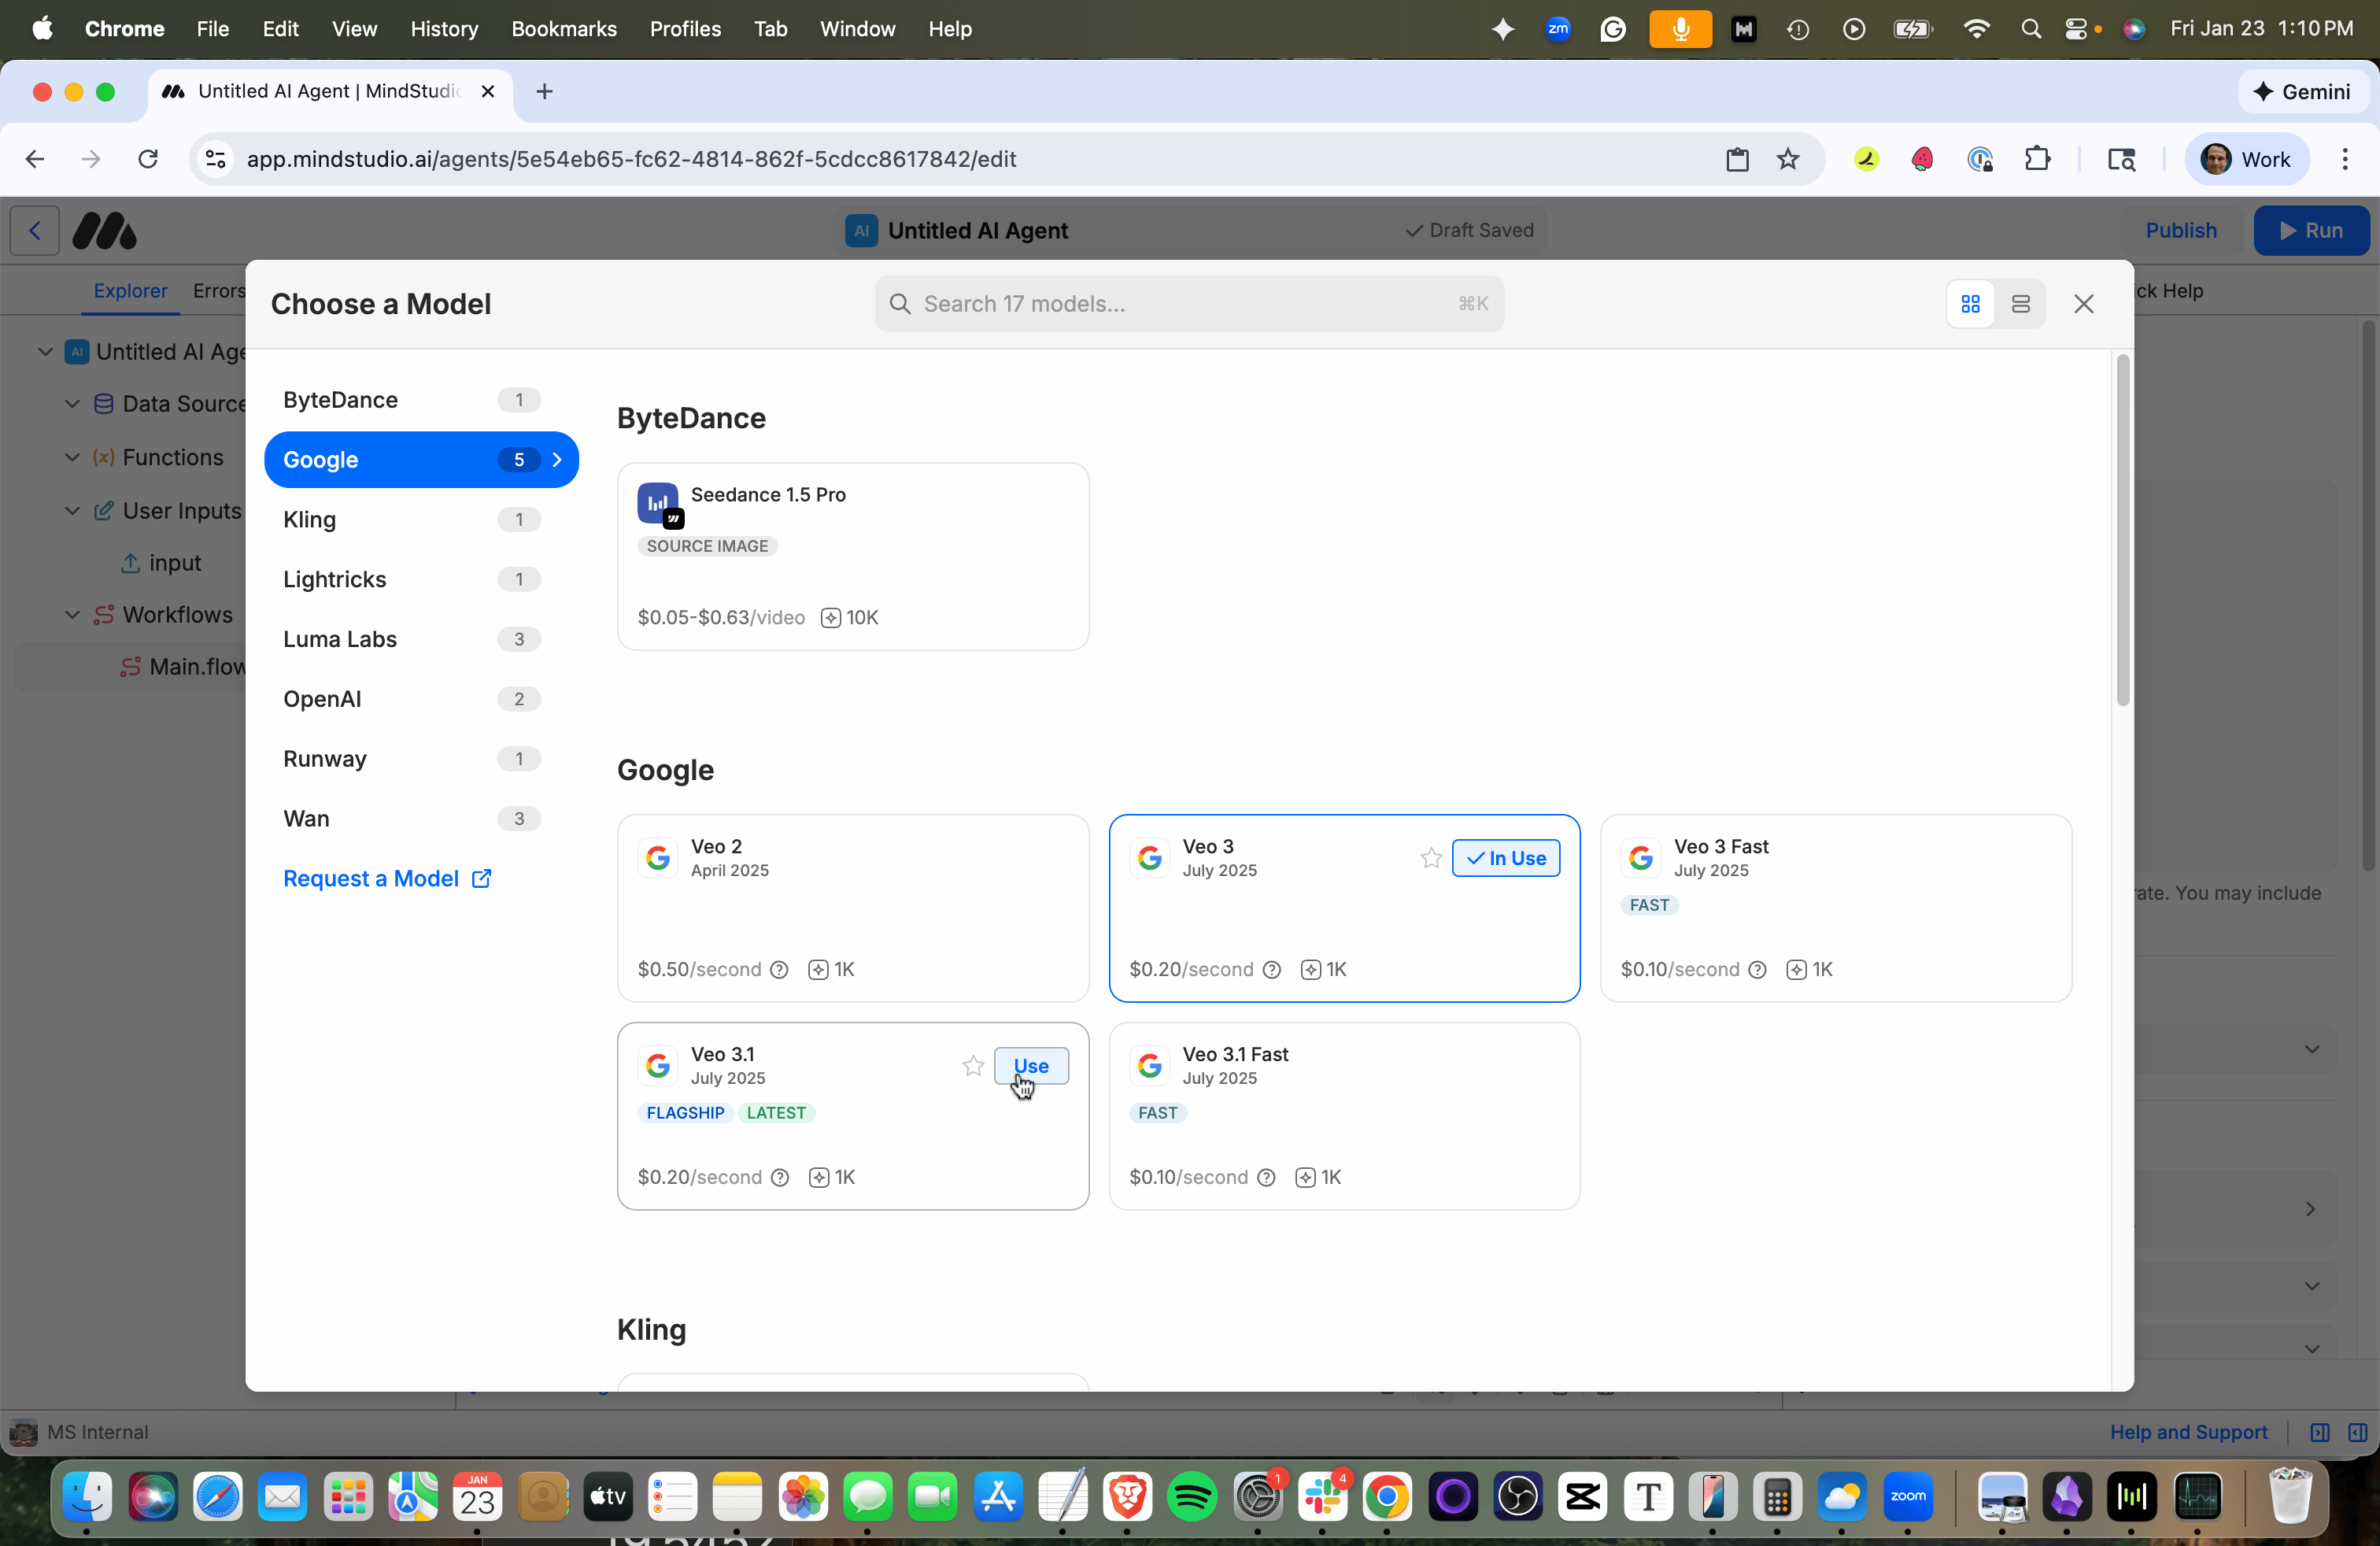
- Click “Veo 3” under “Model Settings” to open the Video Model picker.
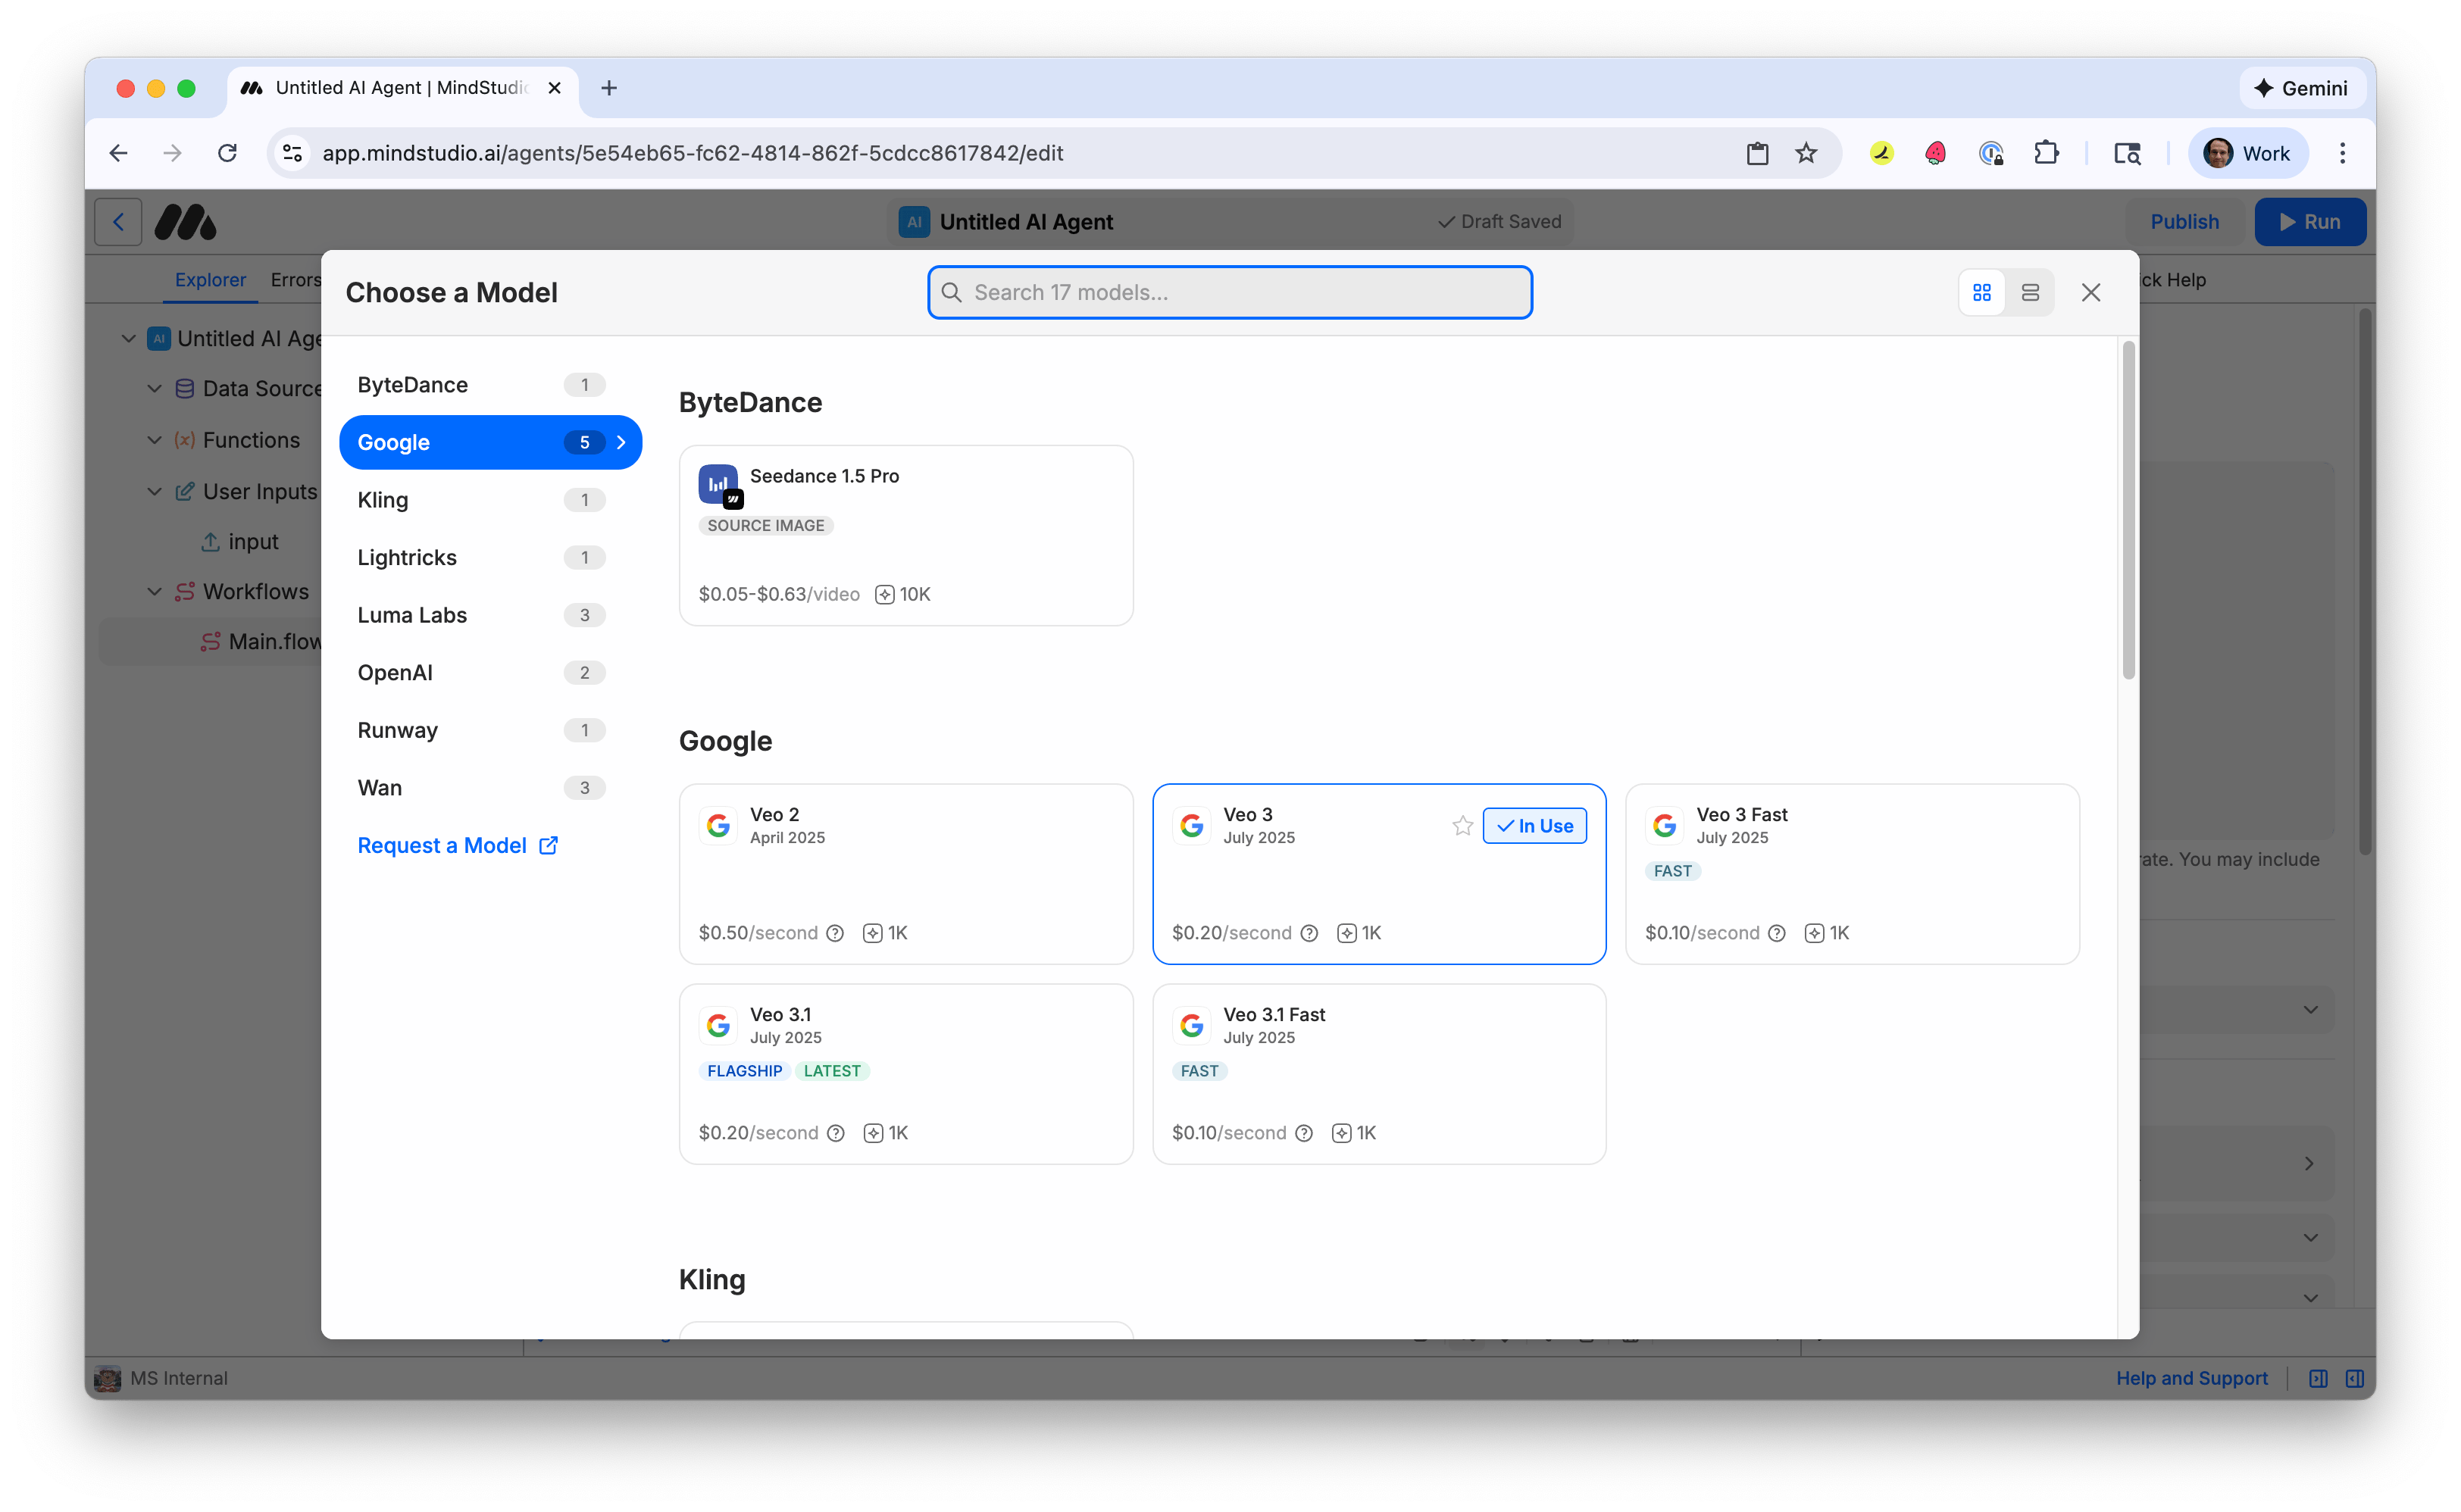
- Click the “Use” button for “Veo 3.1”.
- In the “Include Audio” setting, select “Yes”.
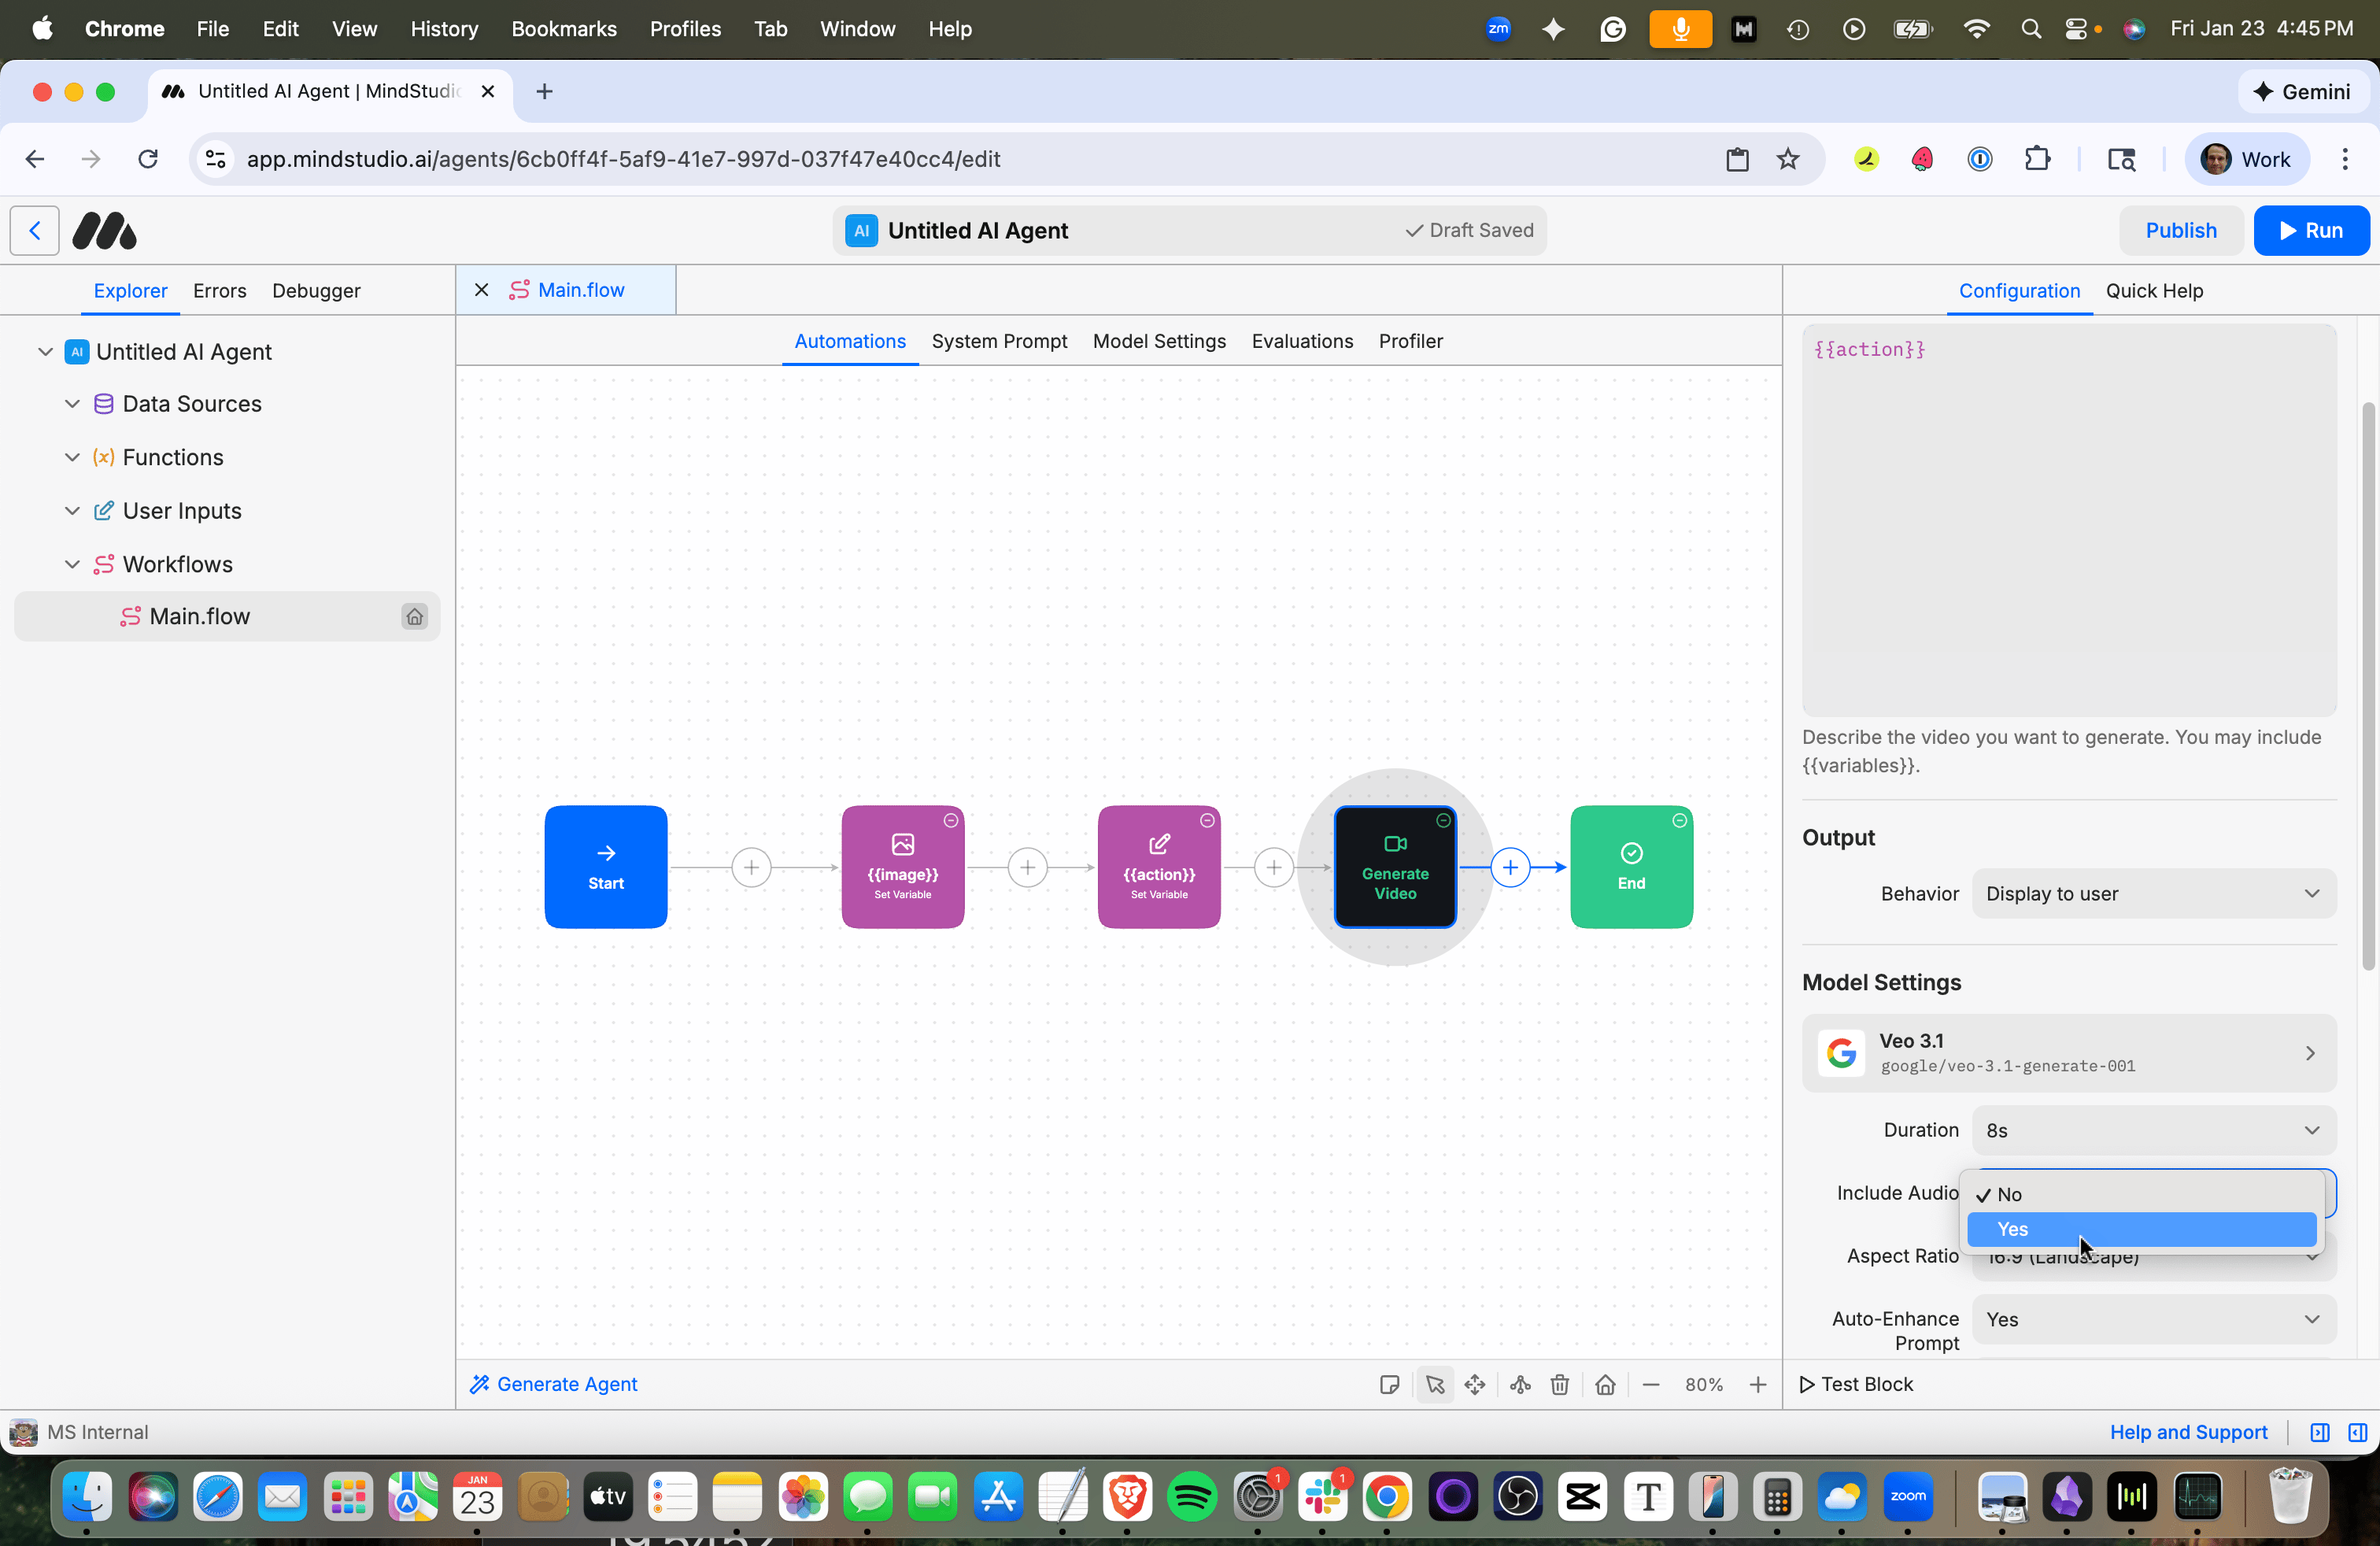
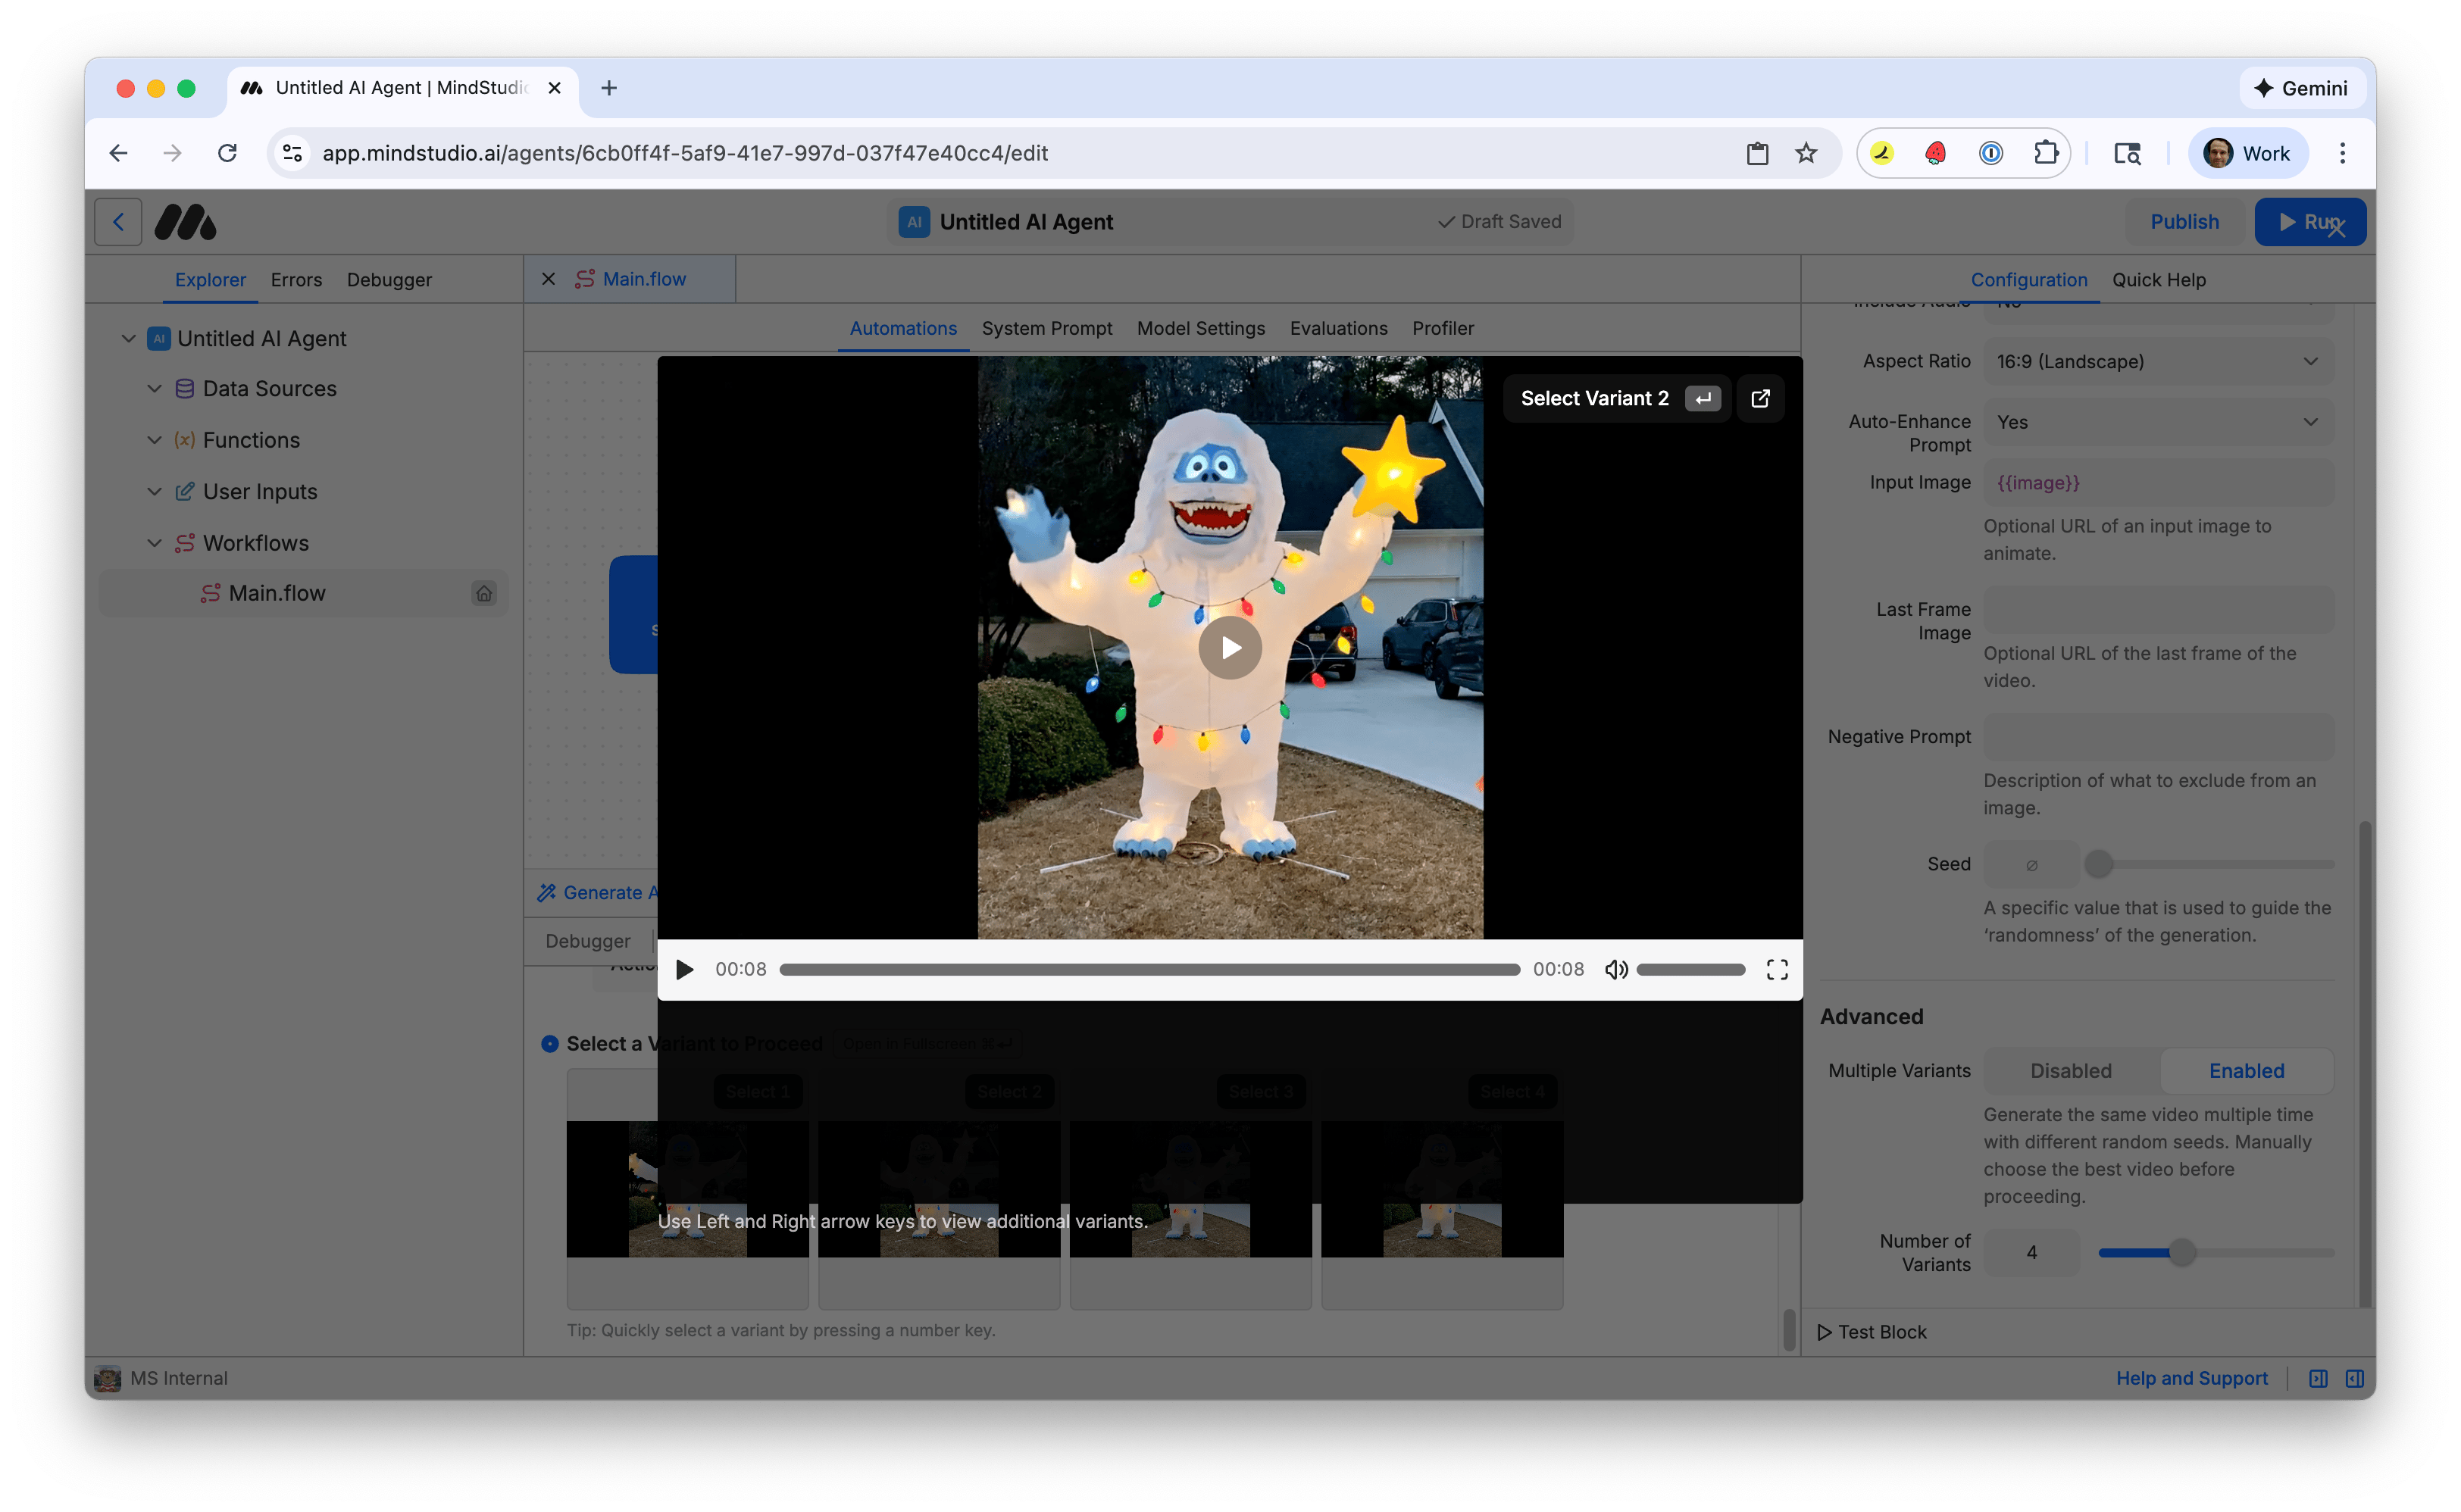
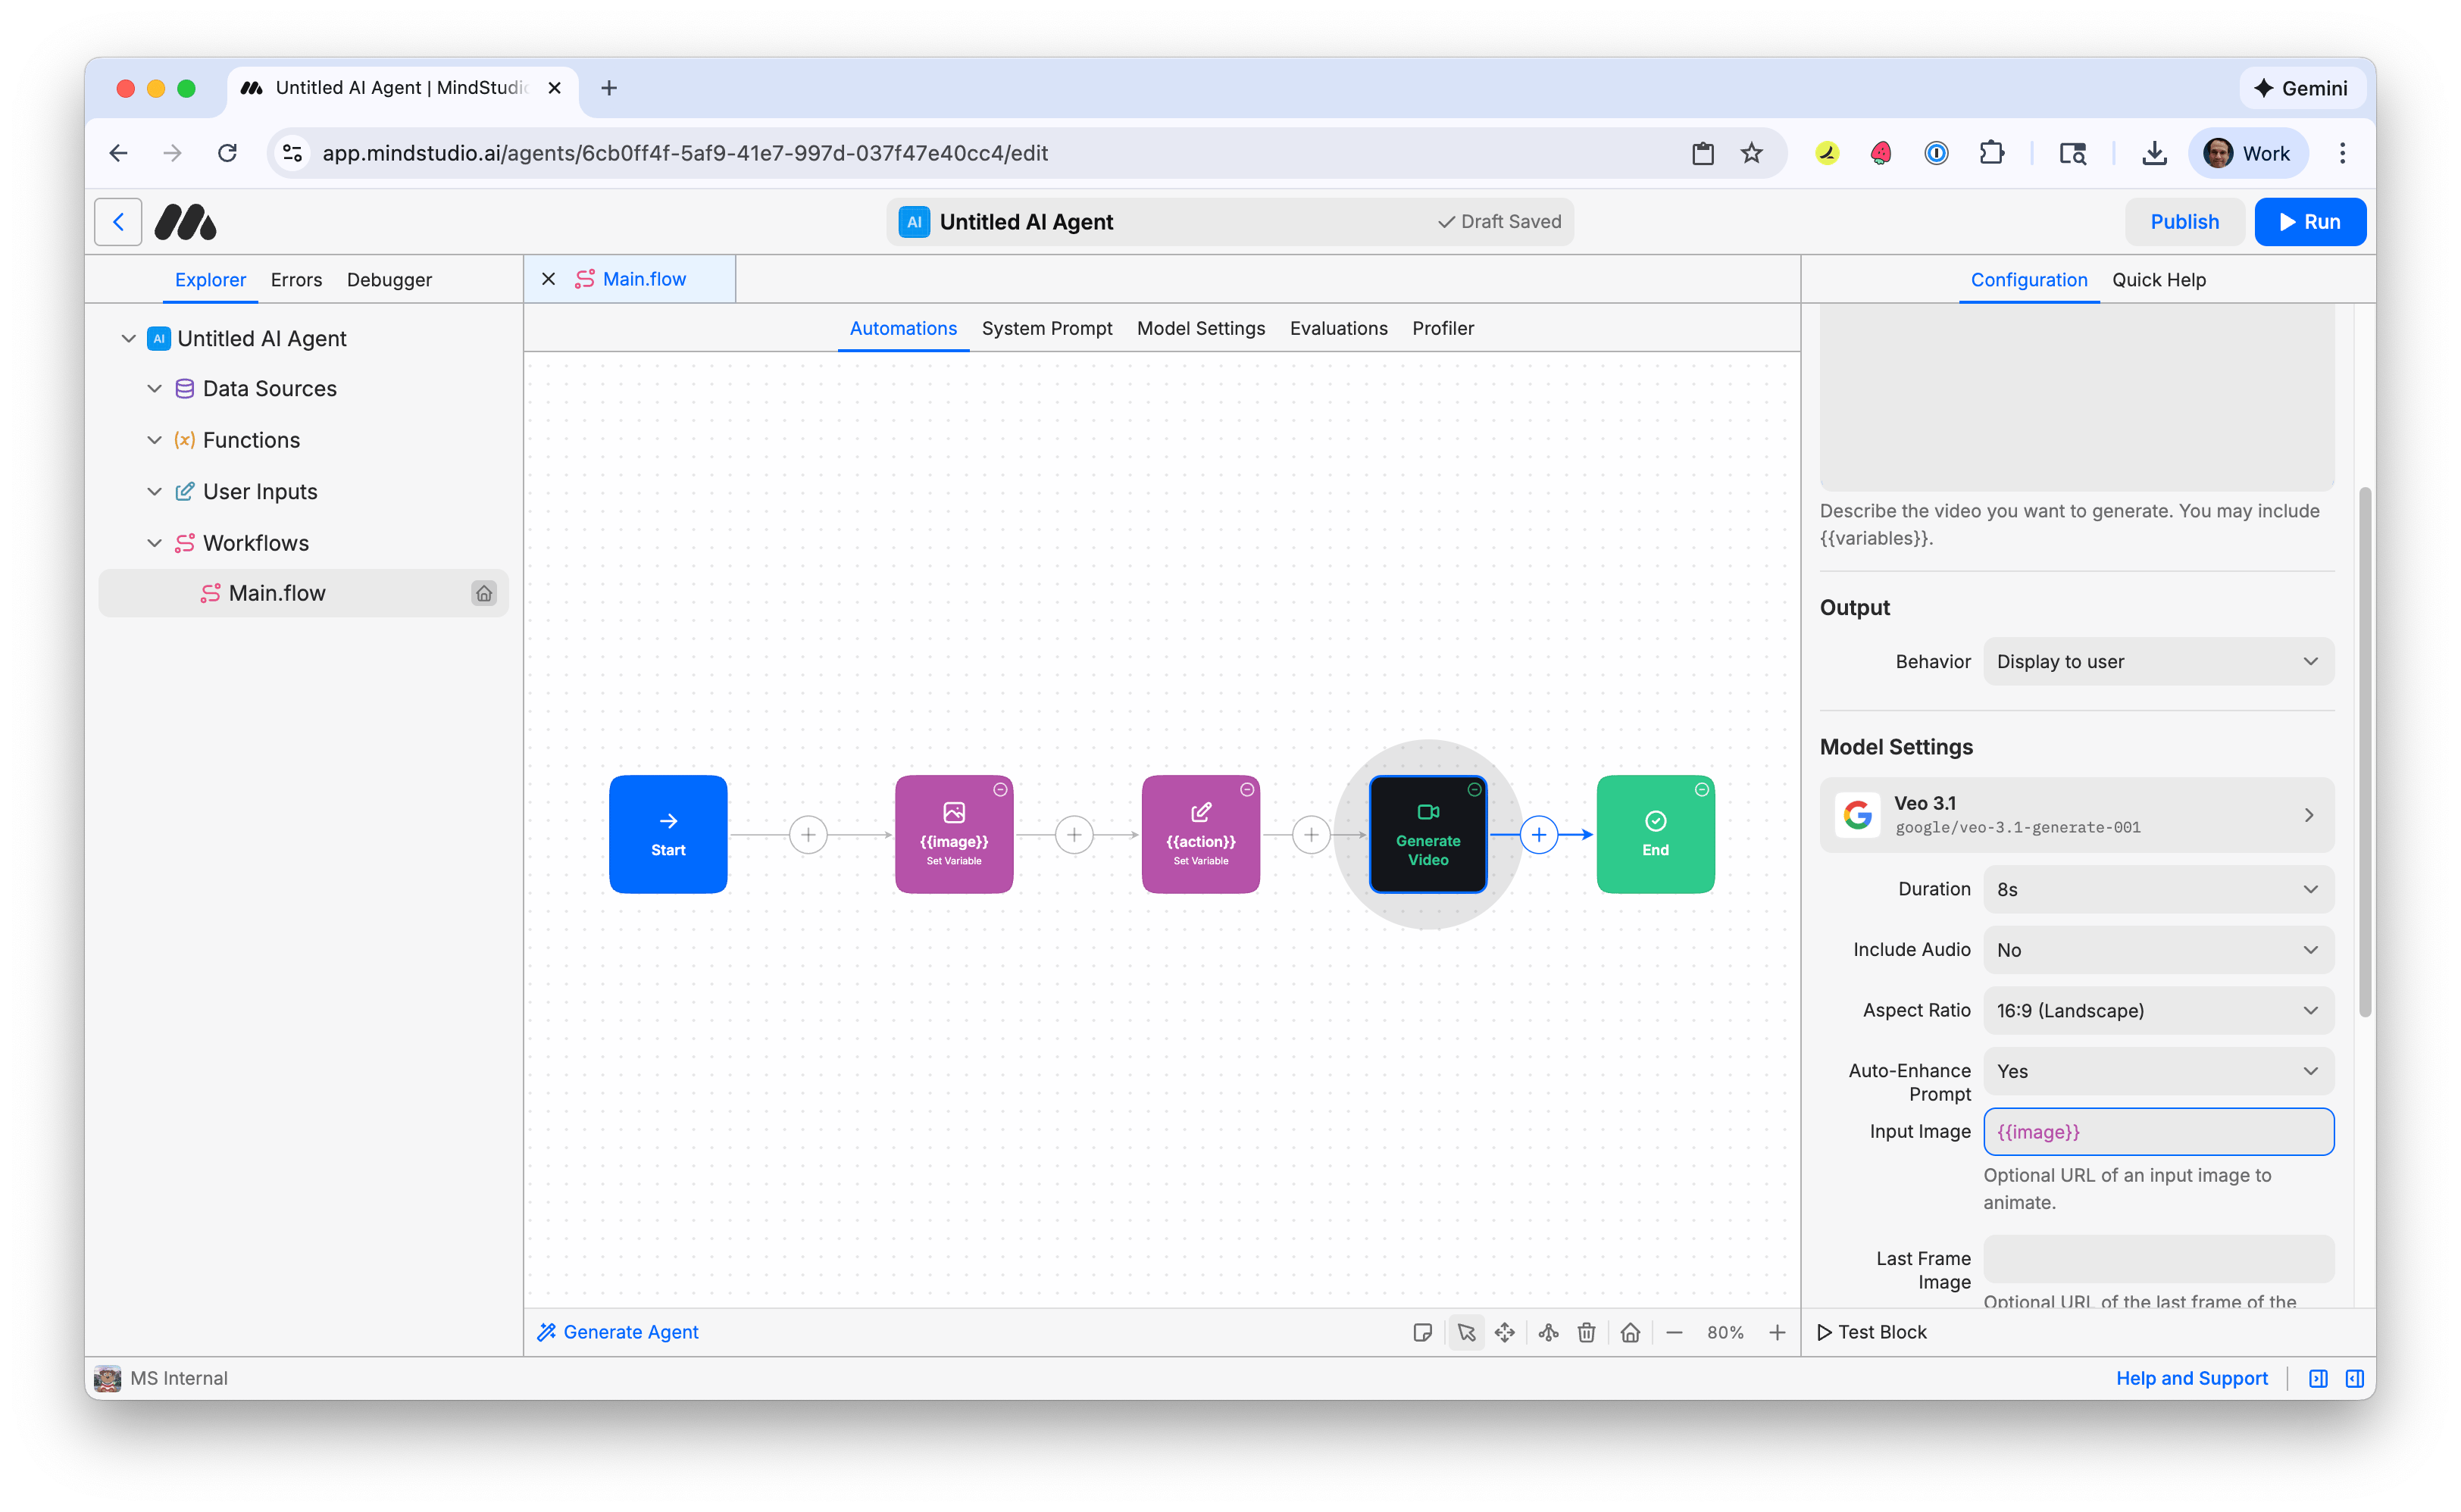
- Type “{{image}}” into the “Input Image” setting. This setting will get the provided image set to the “image” variable when the AI video is generated.
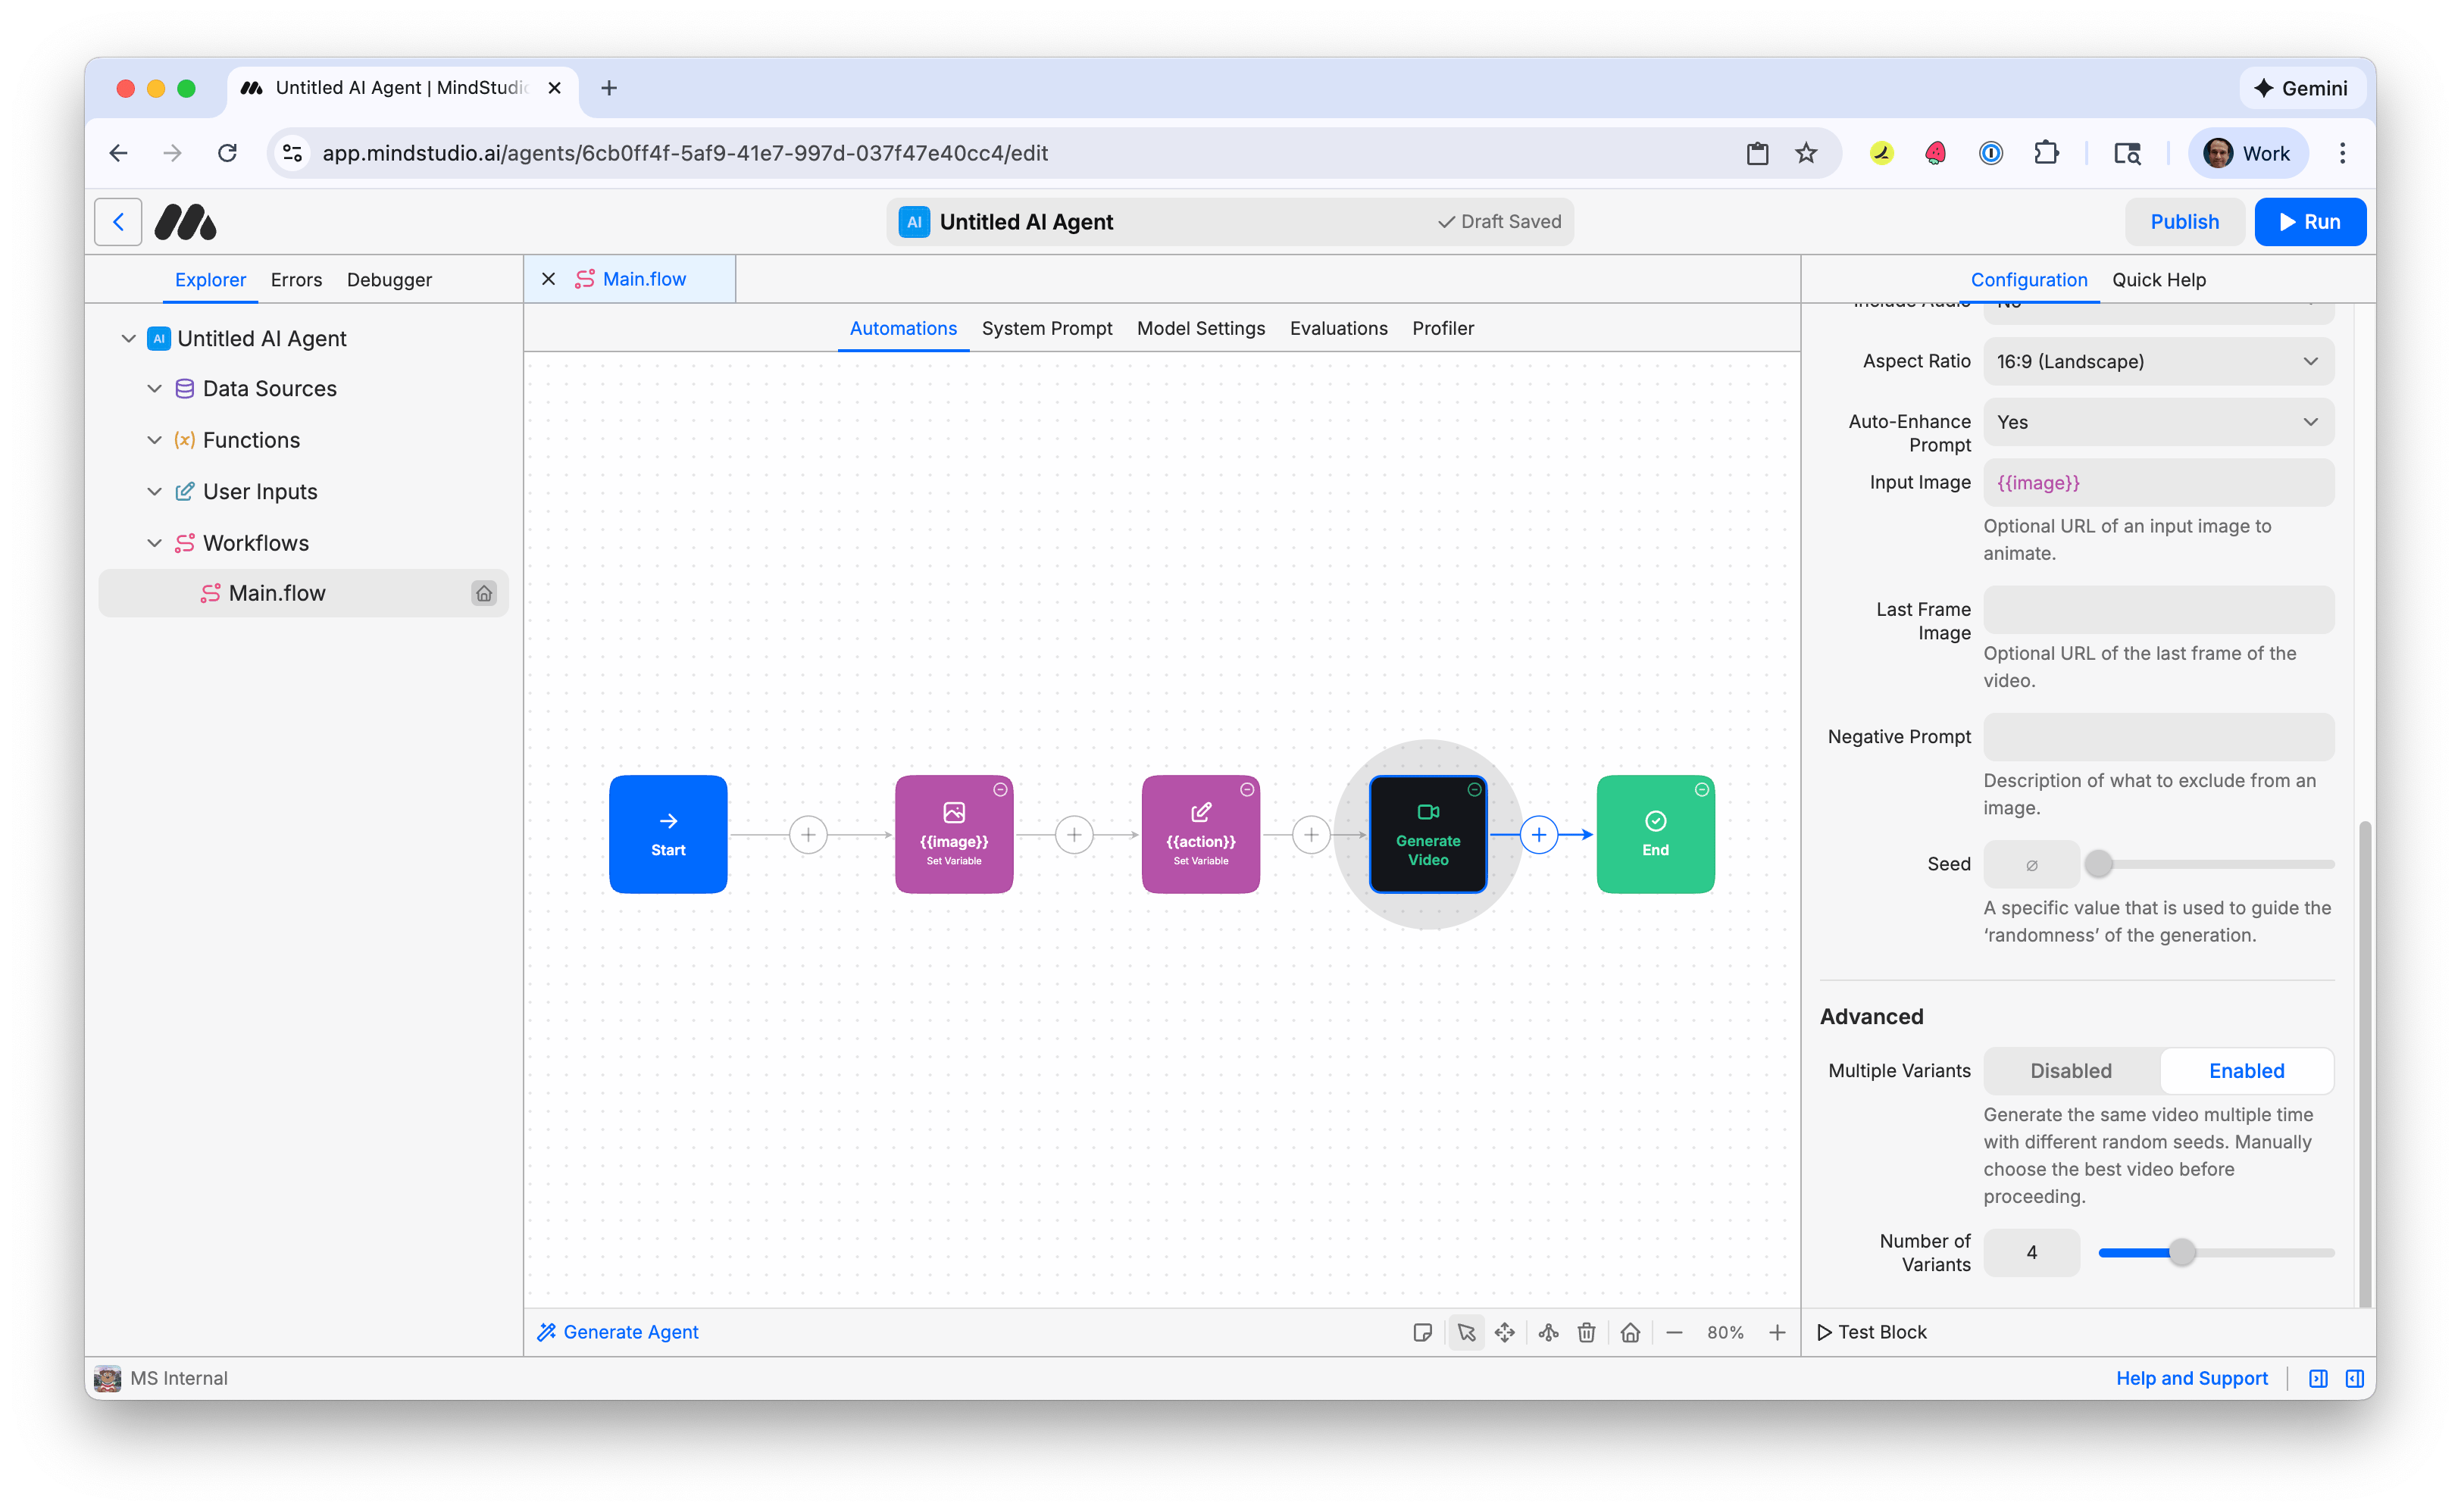
- In the configuration panel on the right, scroll down to “Advanced”, then select “Enabled” toggle on the “Multiple Variants” option. This is disabled by default. This allows you to generate multiple variations of this image at once.
-
Adjust how many variations to make when you run this workbench. 4 is default. This is a good setting to start with so you do not pay for too many videos at once.
-
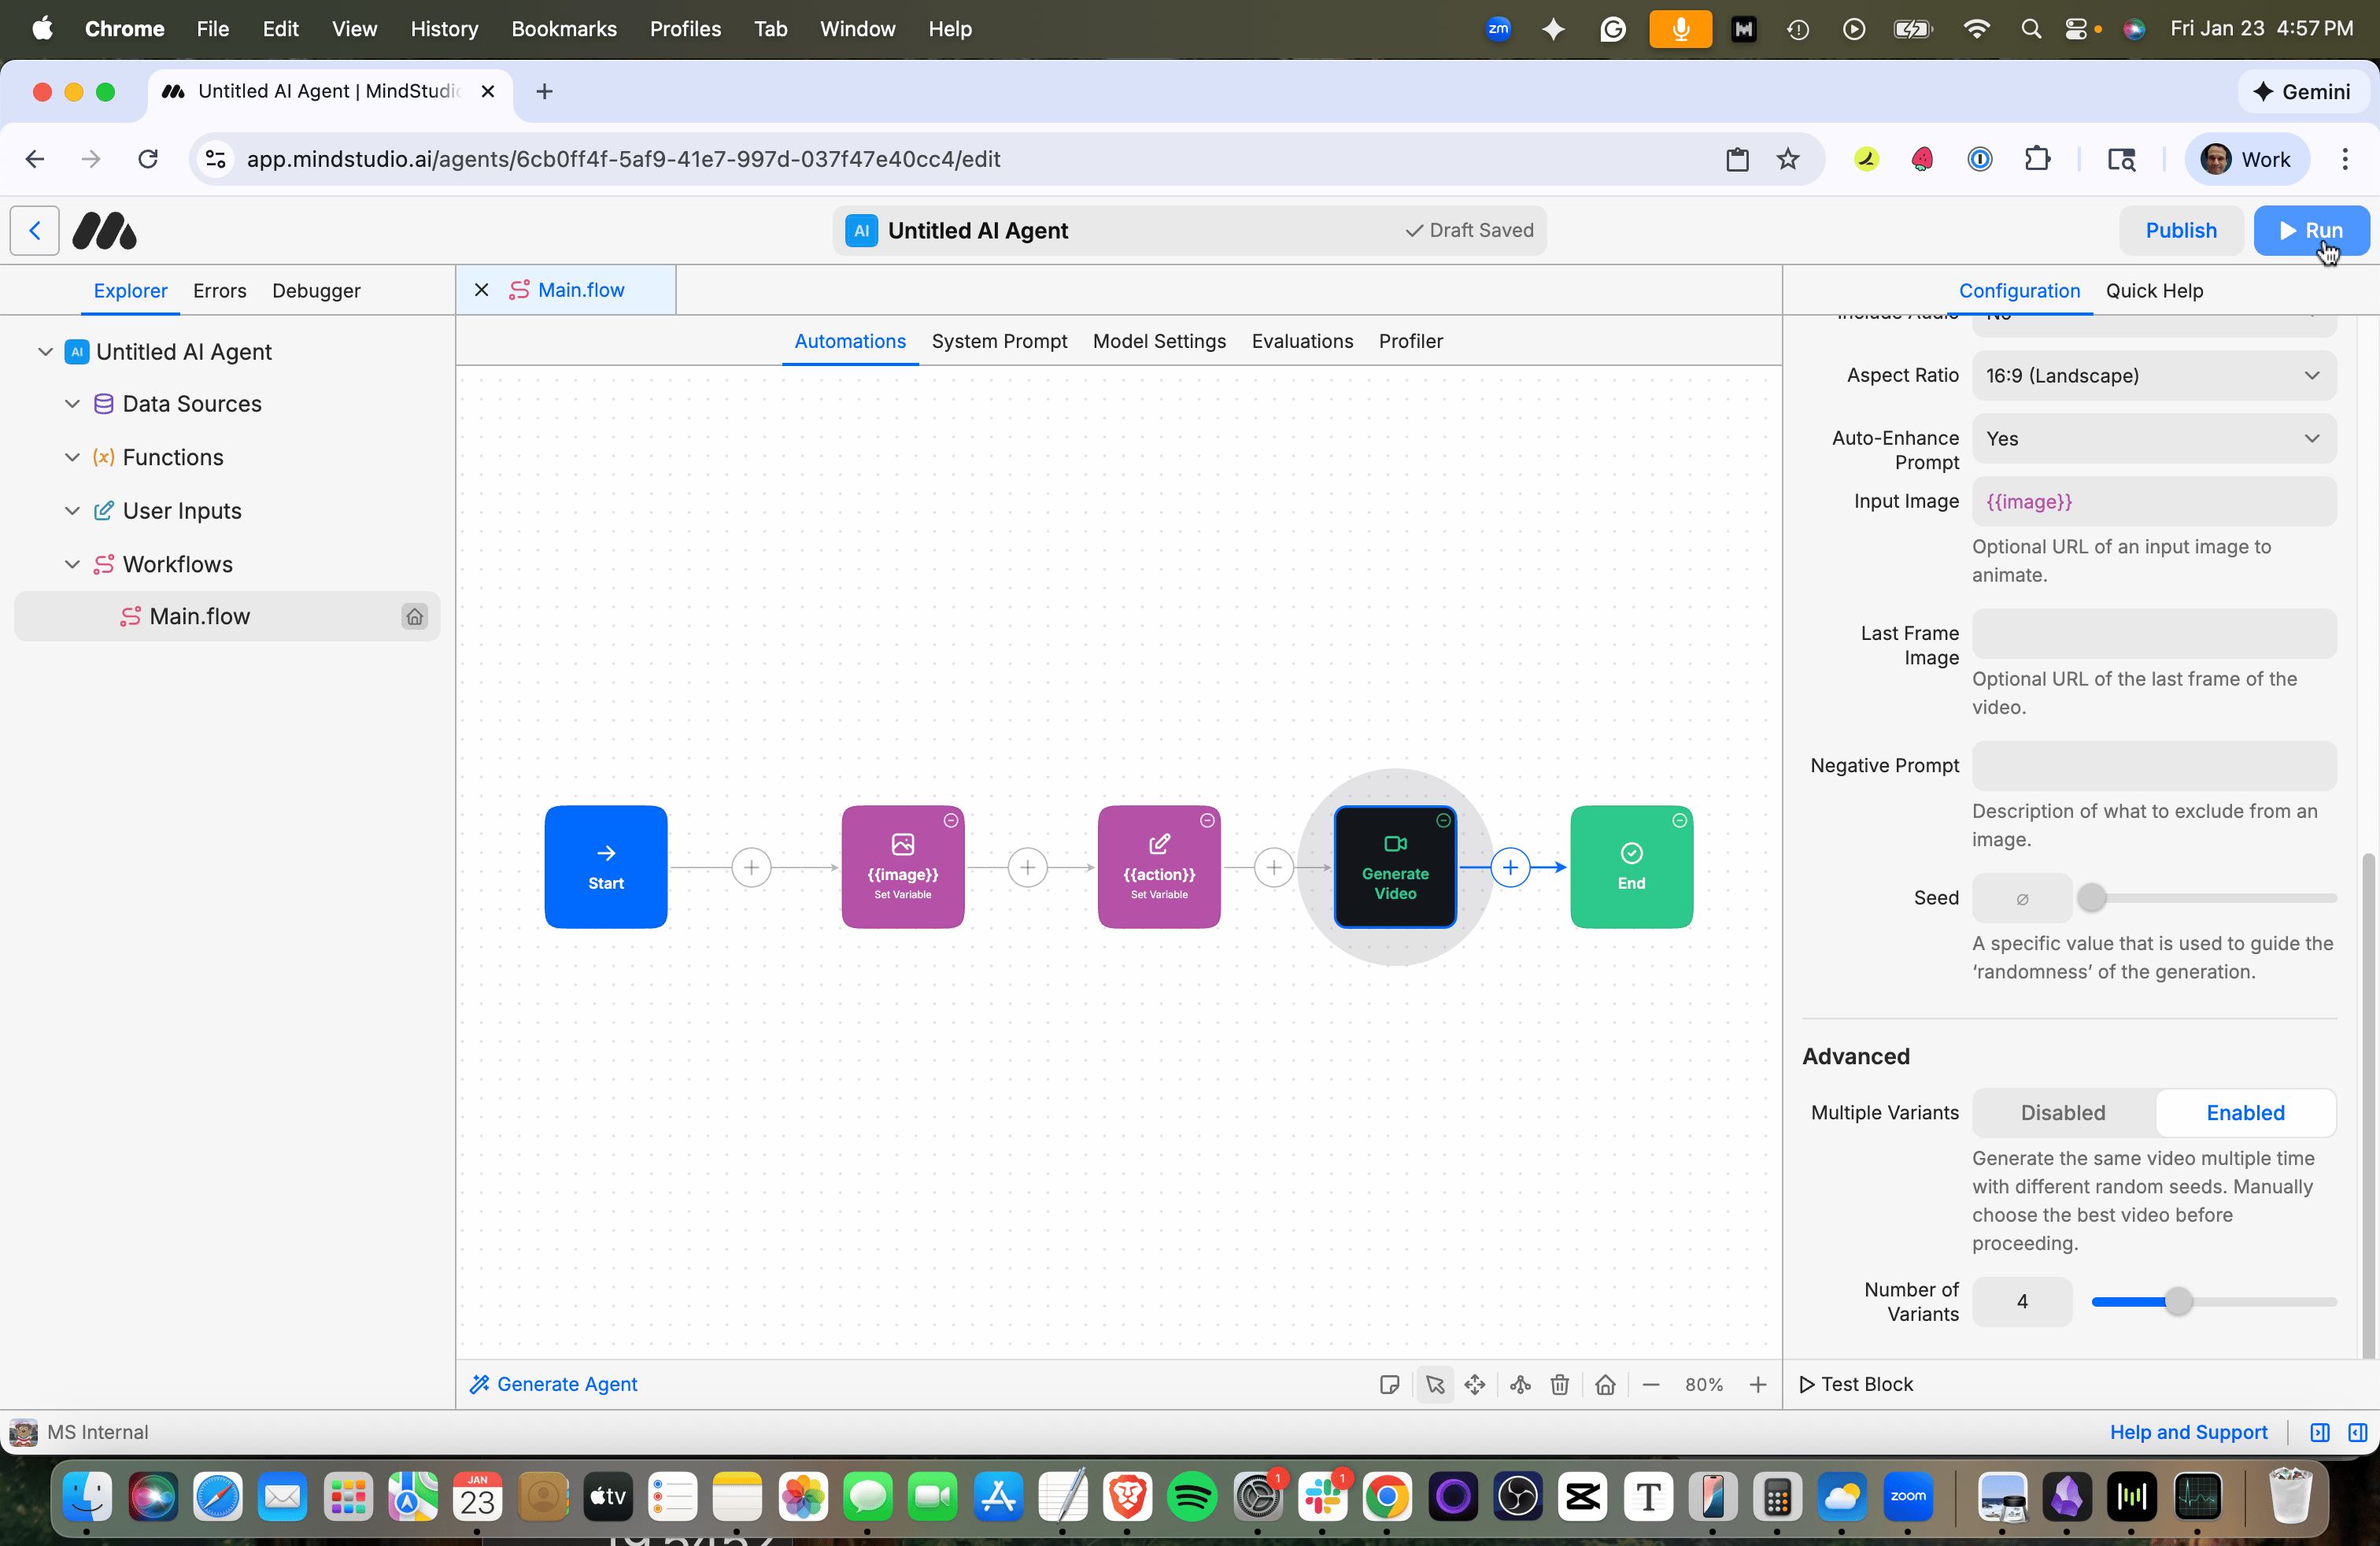
Press “Run” in the top right (or Cmd/Ctrl+R) to start the workbench.
The MindStudio workbench runs in Debugger.
- When the generations finish, four variants are displayed. Click one to open in full screen.
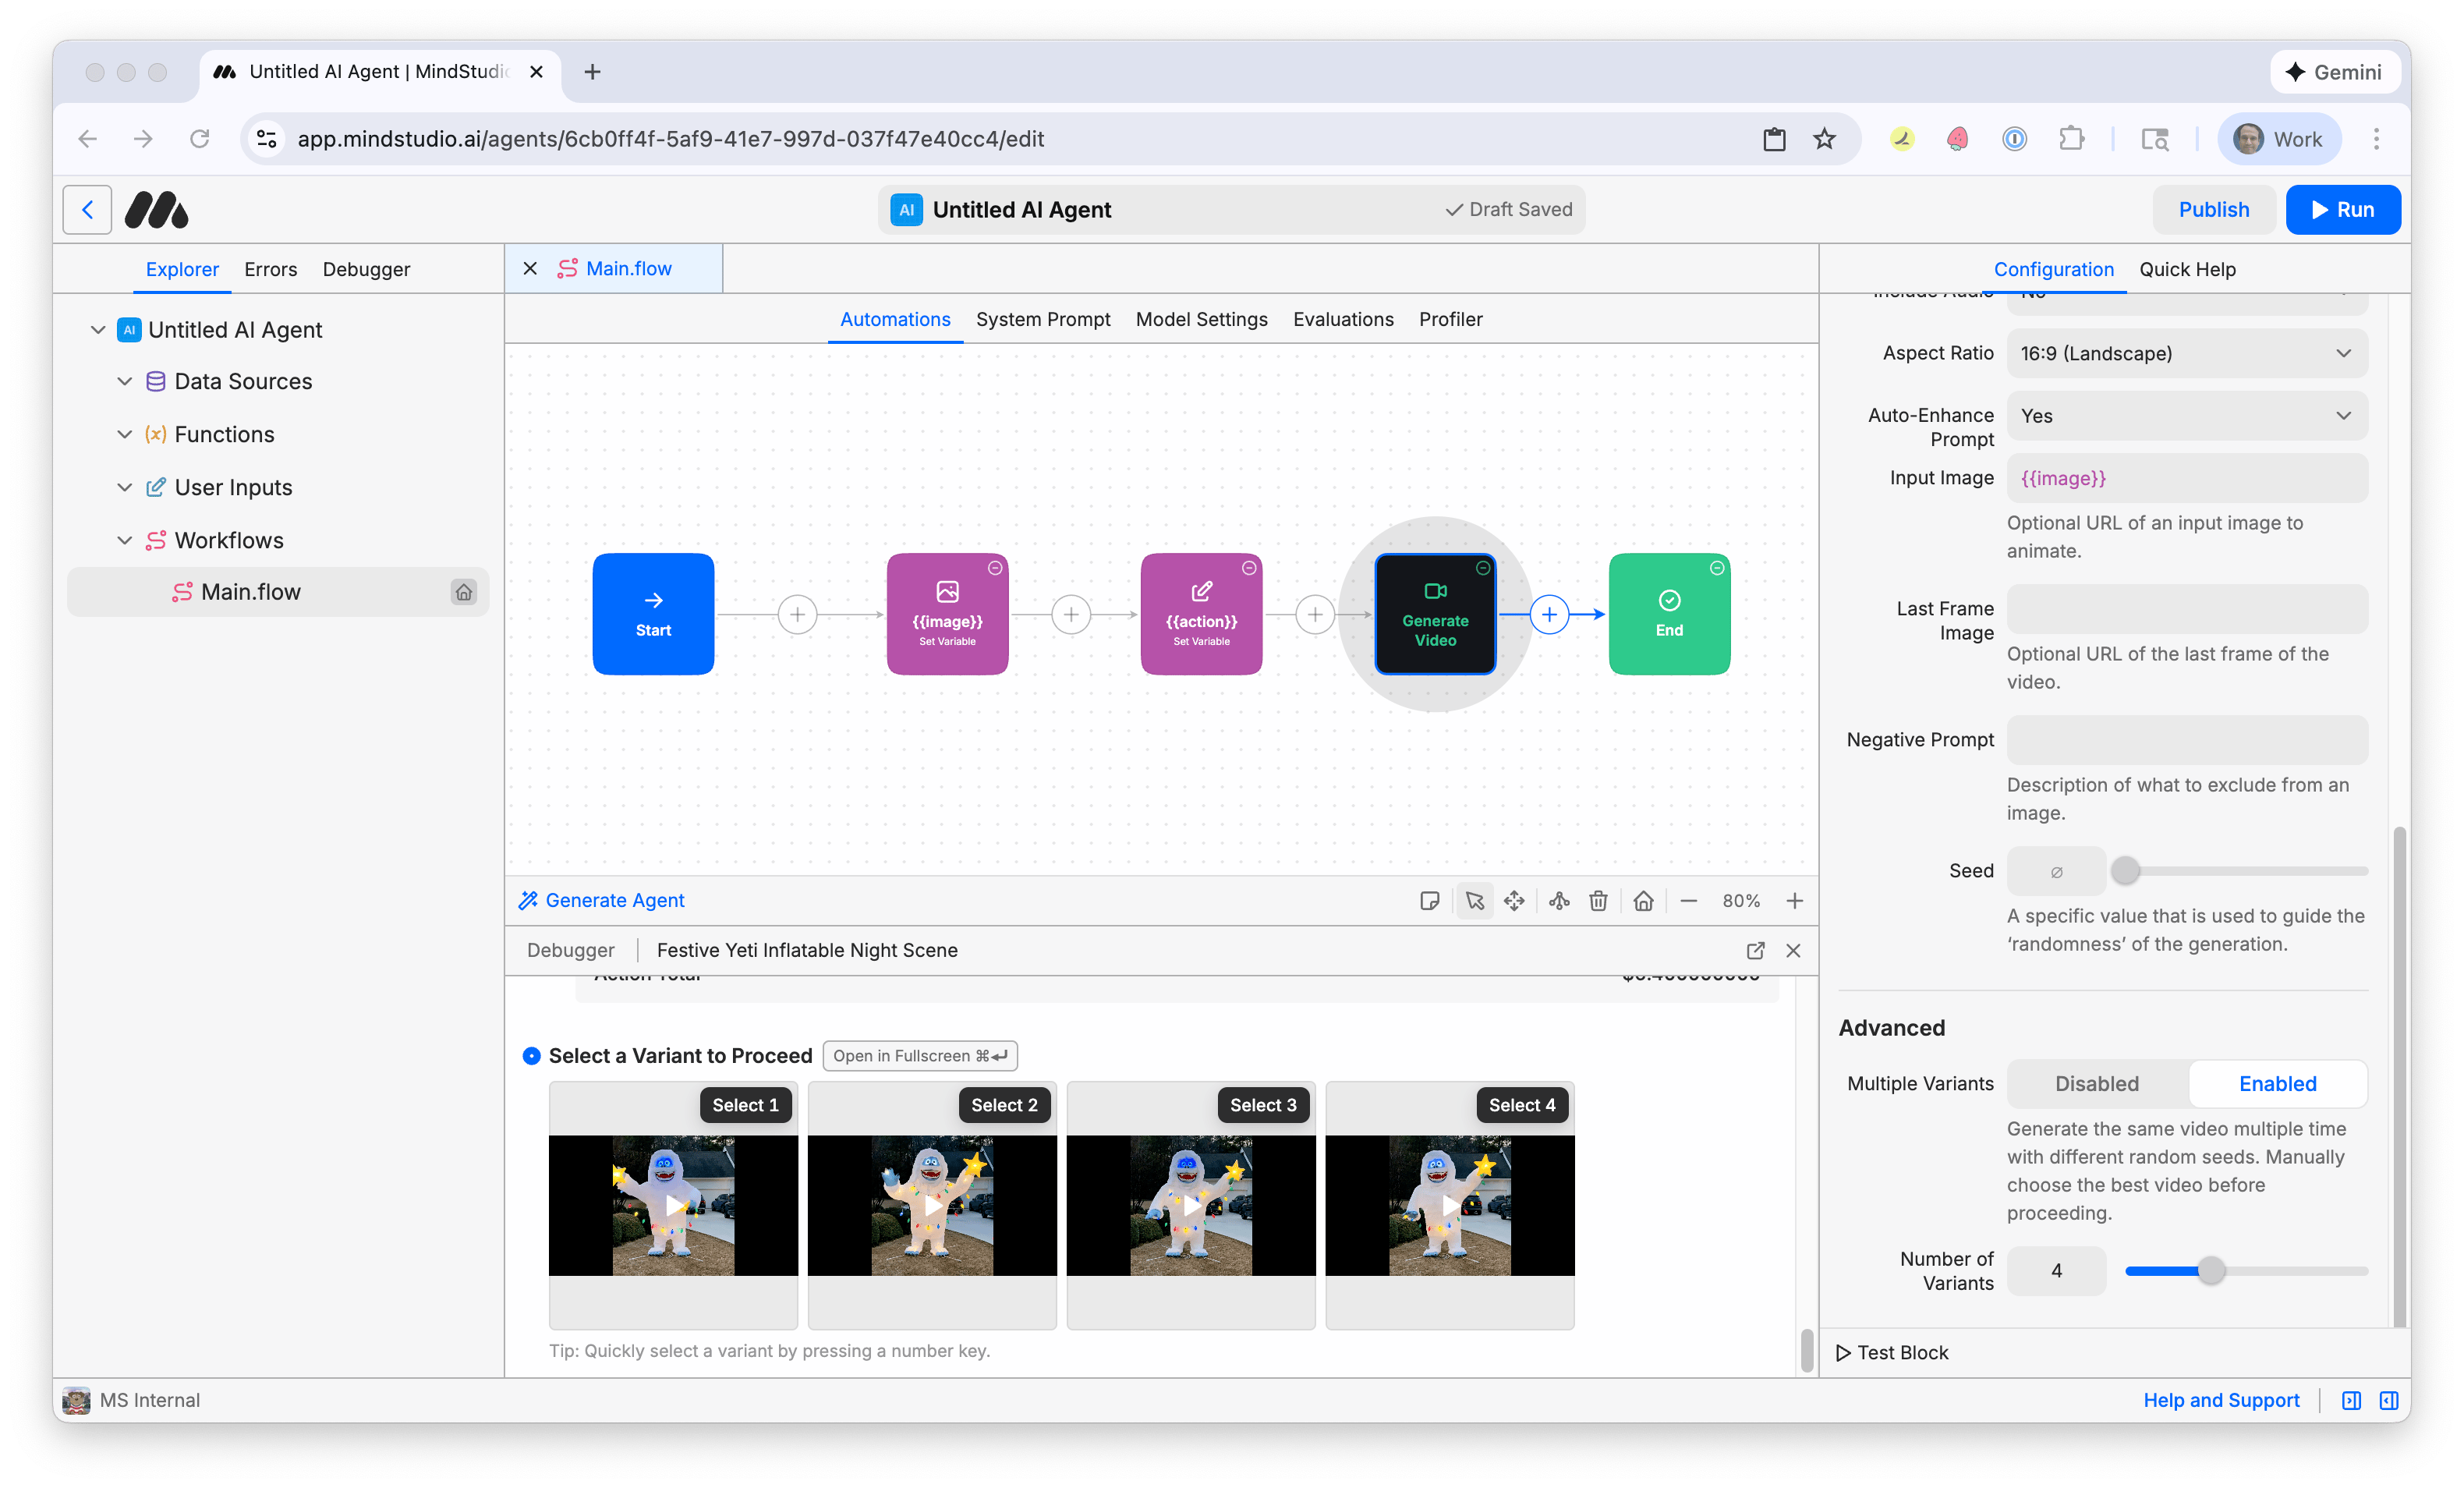
- Choose the best variant and select it to finish the workbench. Note that videos are already hosted on MindStudio CDN and ready to be shared or used in other workbenches. There are many other ways to work with videos! Check out other tutorials to learn how to continue!