How to Generate Images and Videos with LoRAs
Generate professional-quality AI-generated images and video easily in MindStudio using LoRAs

Introduction
MindStudio is the easiest way to generate production-grade images and videos using the latest proprietary and open source AI Image Generation and AI Video Generation models.
In just a few minutes, with no complex setups to configure or confusing credit systems to learn, you can be building pipelines and workflows that leverage models like:
- Flux 2 Dev LoRA
- Wan 2.2 LoRA
- Wan 2.5
- Wan 2.6
- SDXL LoRA
- Google Veo 3.1
- Kling O1
- Lightricks LTX-2 19b LoRA
- ByteDance Seedream 4.5,
- ByteDance Seedance 1.5
- Qwen, Z Image Turbo
- and more
MindStudio Workbenches are an easy-to-use alternative to ComfyUI, Higgsfield, OpenArt, and A1111 that allow you the same level of advanced control, including things like easy-to-use LoRA import from CivitAi or HuggingFace, without requiring high-powered computers or complex learning curves to get started generating amazing images and videos.
MindStudio allows you to use your own API keys to connect to inference providers like Fal, Wavespeed, and others - or you can use the MindStudio Service Router to automatically connect to these providers at-cost, with no added markup or fees.
Remix Link
Remix this agent in MindStudio
Instructions
Follow the steps below to build a simple image generation workbench:
-
Create a MindStudio account.
-
Add funds to your Service Router balance. Add $5 to get started. Or configure Custom Keys in the “AI Models” Configuration page. Note that we will be using Flux 2 Dev LoRA for this tutorial, and the final workbench will cost $0.072 USD to run via Wavespeed (we will be generating four images).

- Create a new agent from My Drafts.
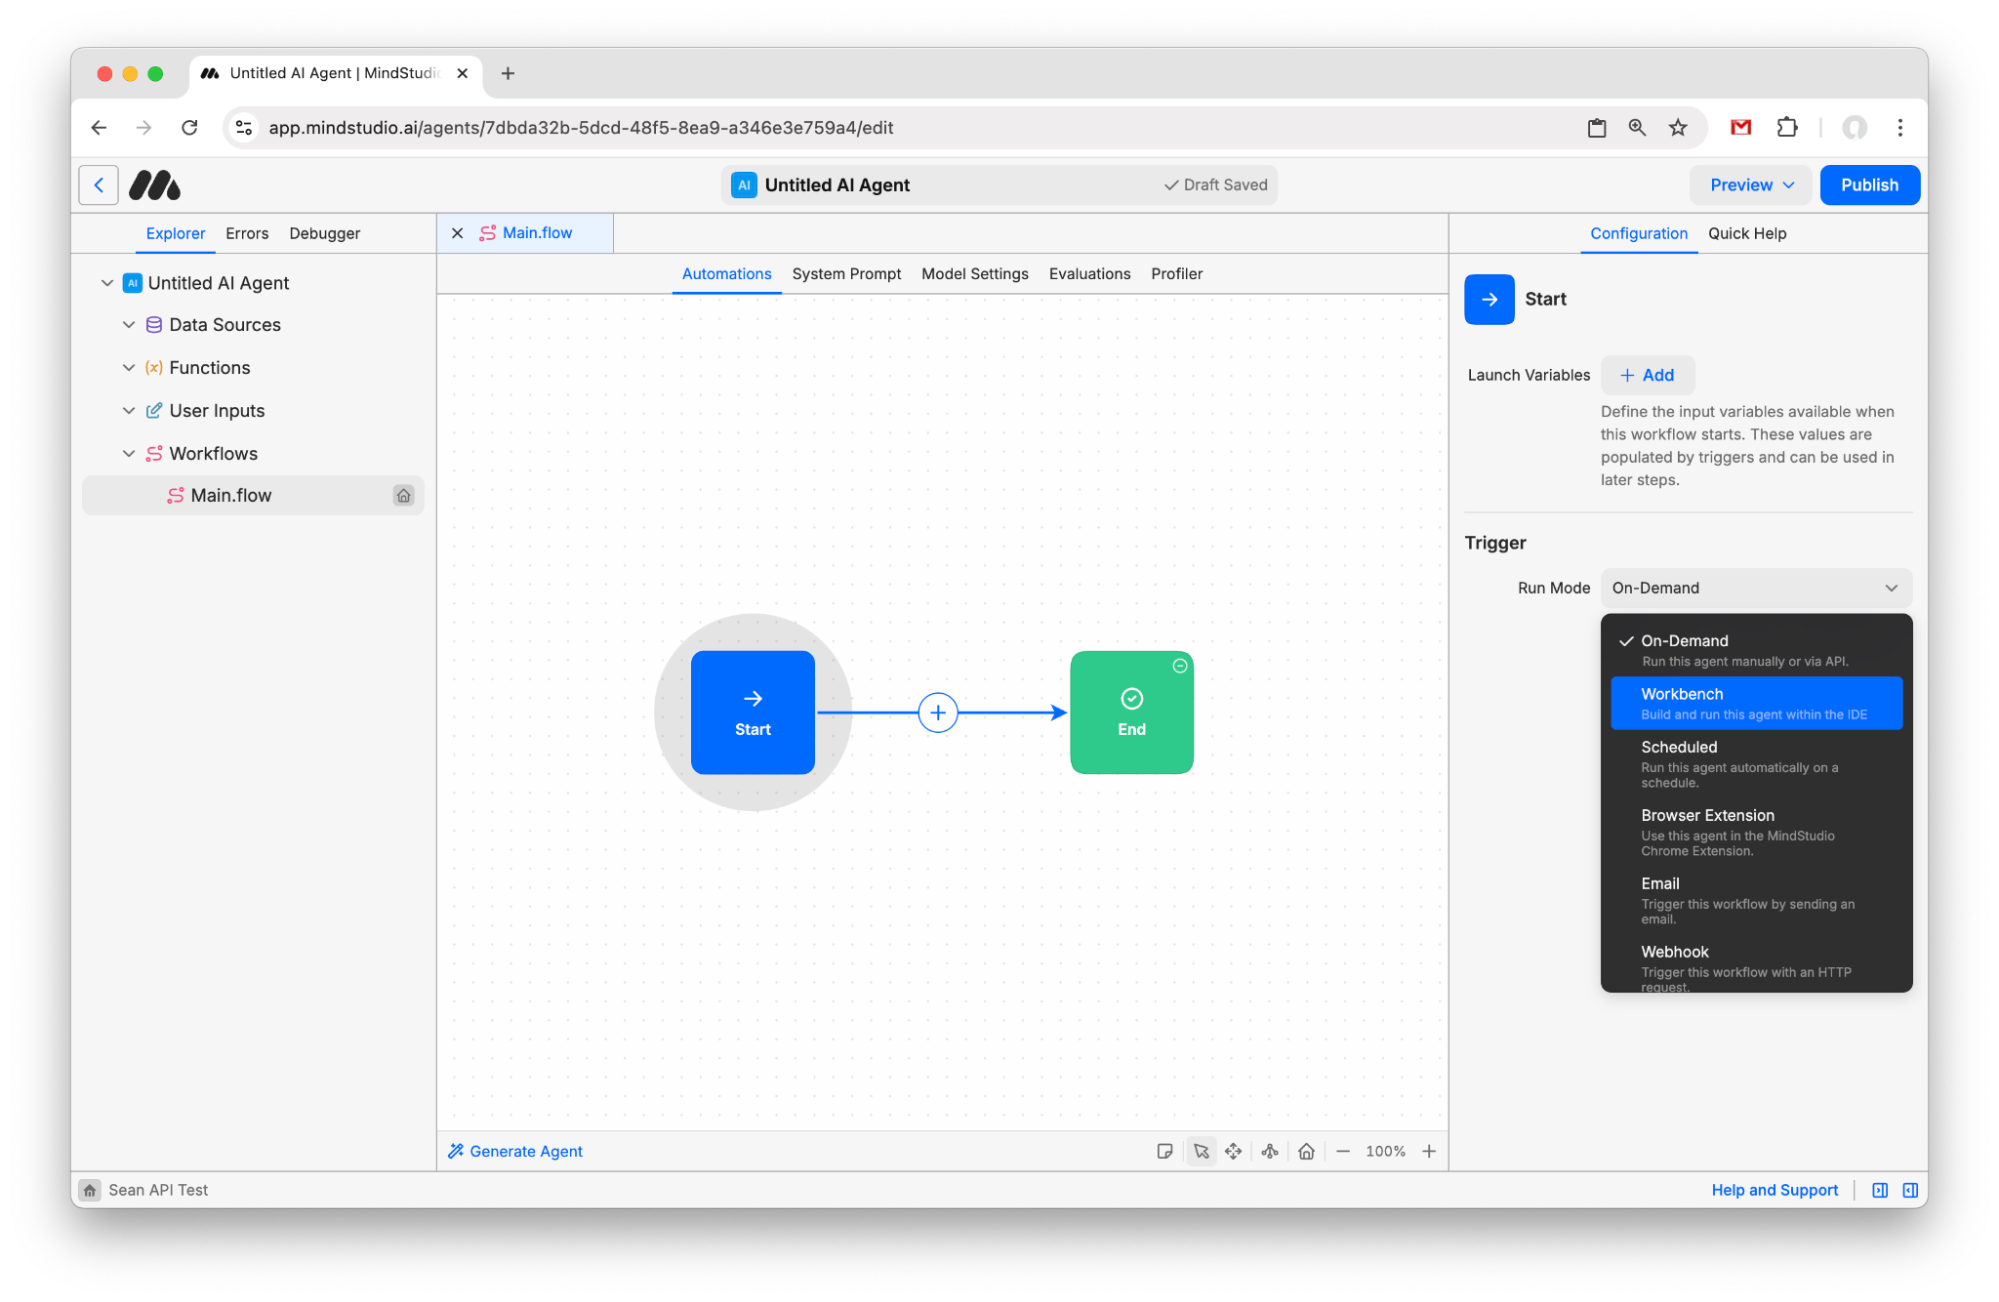
- Click the “Start” block and change the Run Mode to “Workbench”.
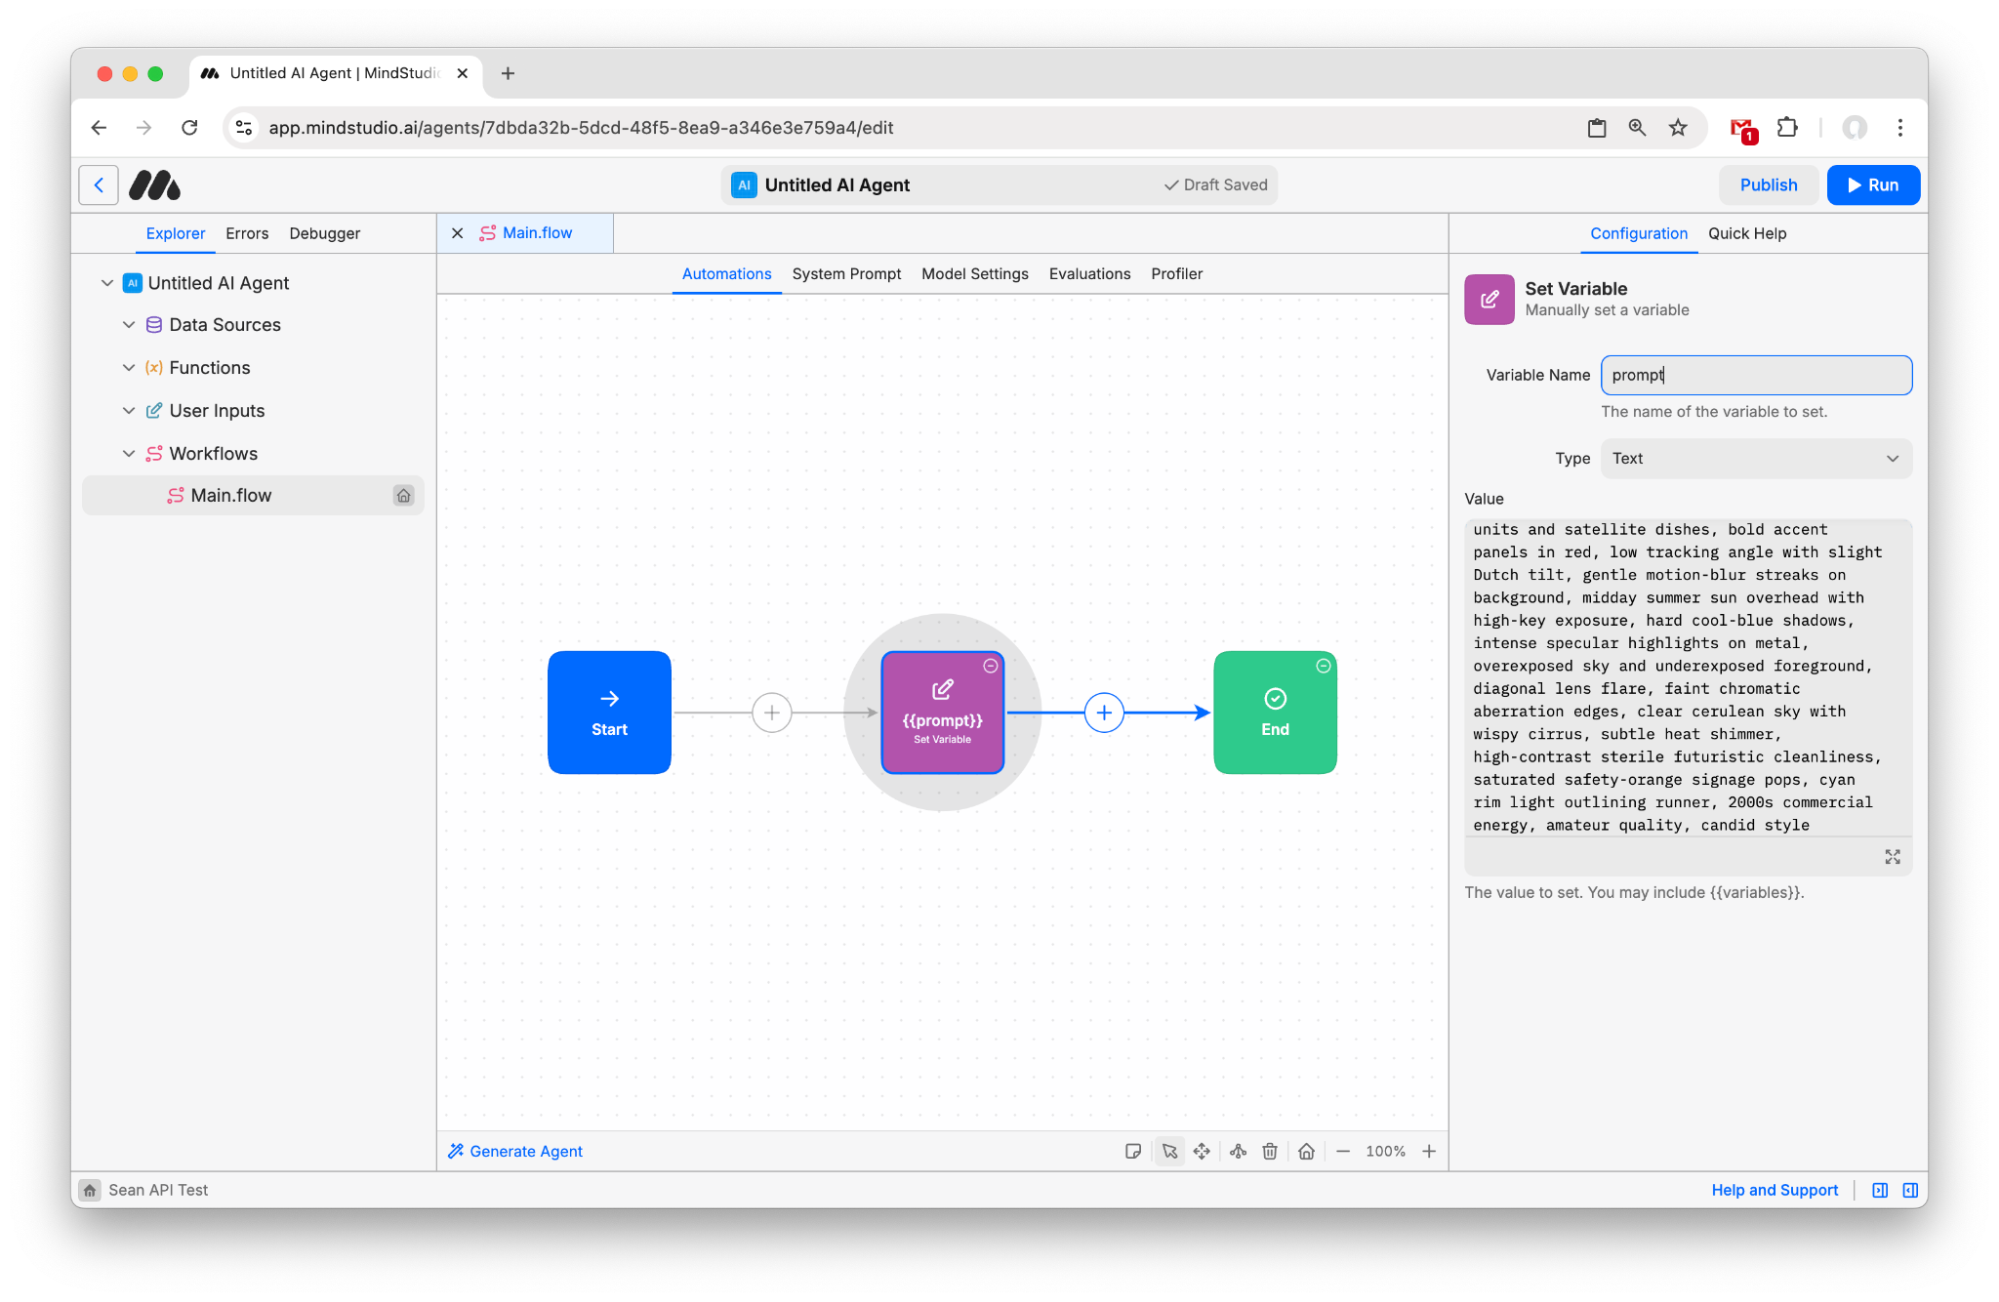
- Click the + button to add a new block and choose “Set Variable”.
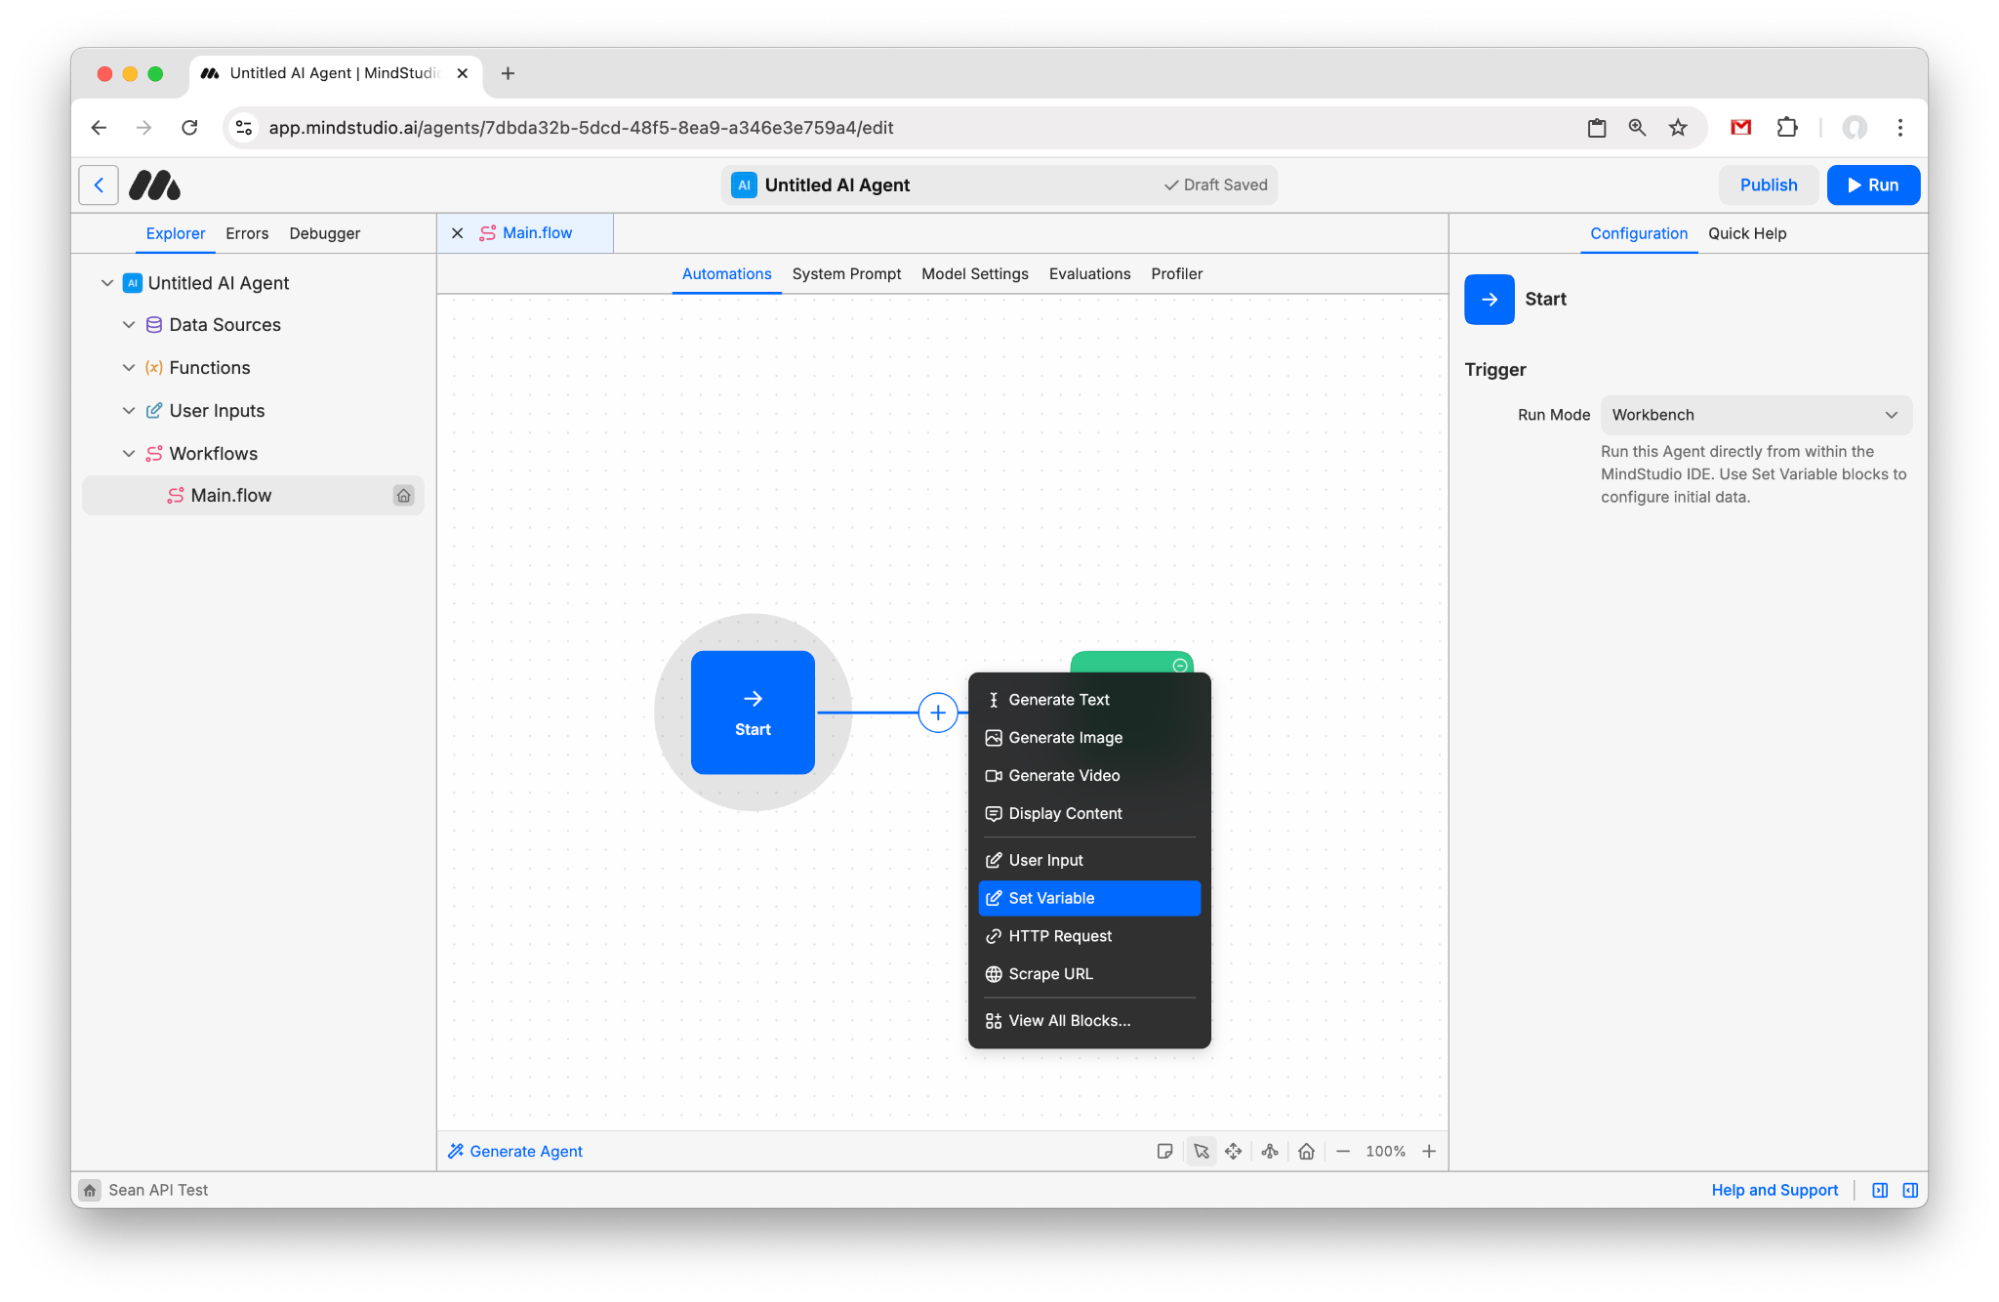
- Name the variable “prompt” and paste in the following prompt:
“7.1mm lens f/1.8, CCD sensor aesthetic, 5 megapixel resolution, action shot, A blurred figure of eurasian female girl running very fast, jet black sharp angled bob side-swept bangs with hair over left eye, serious expression, wearing black racerback tank top and cropped tactical vest with red accents, white tech-wear pants with black geometric panels, red glove on right hand, black mag-rope gauntlet on left hand, red sneakers, early-2000s digital-camera vibe with slight CCD bloom and tiny sensor noise, Mirror’s Edge x Y2K aesthetic, glossy ventilation units and satellite dishes, bold accent panels in red, low tracking angle with slight Dutch tilt, gentle motion-blur streaks on background, midday summer sun overhead with high-key exposure, hard cool-blue shadows, intense specular highlights on metal, overexposed sky and underexposed foreground, diagonal lens flare, faint chromatic aberration edges, clear cerulean sky with wispy cirrus, subtle heat shimmer, high-contrast sterile futuristic cleanliness, saturated safety-orange signage pops, cyan rim light outlining runner, 2000s commercial energy, amateur quality, candid style”.
- Click the + again and add a “Generate Image” block.
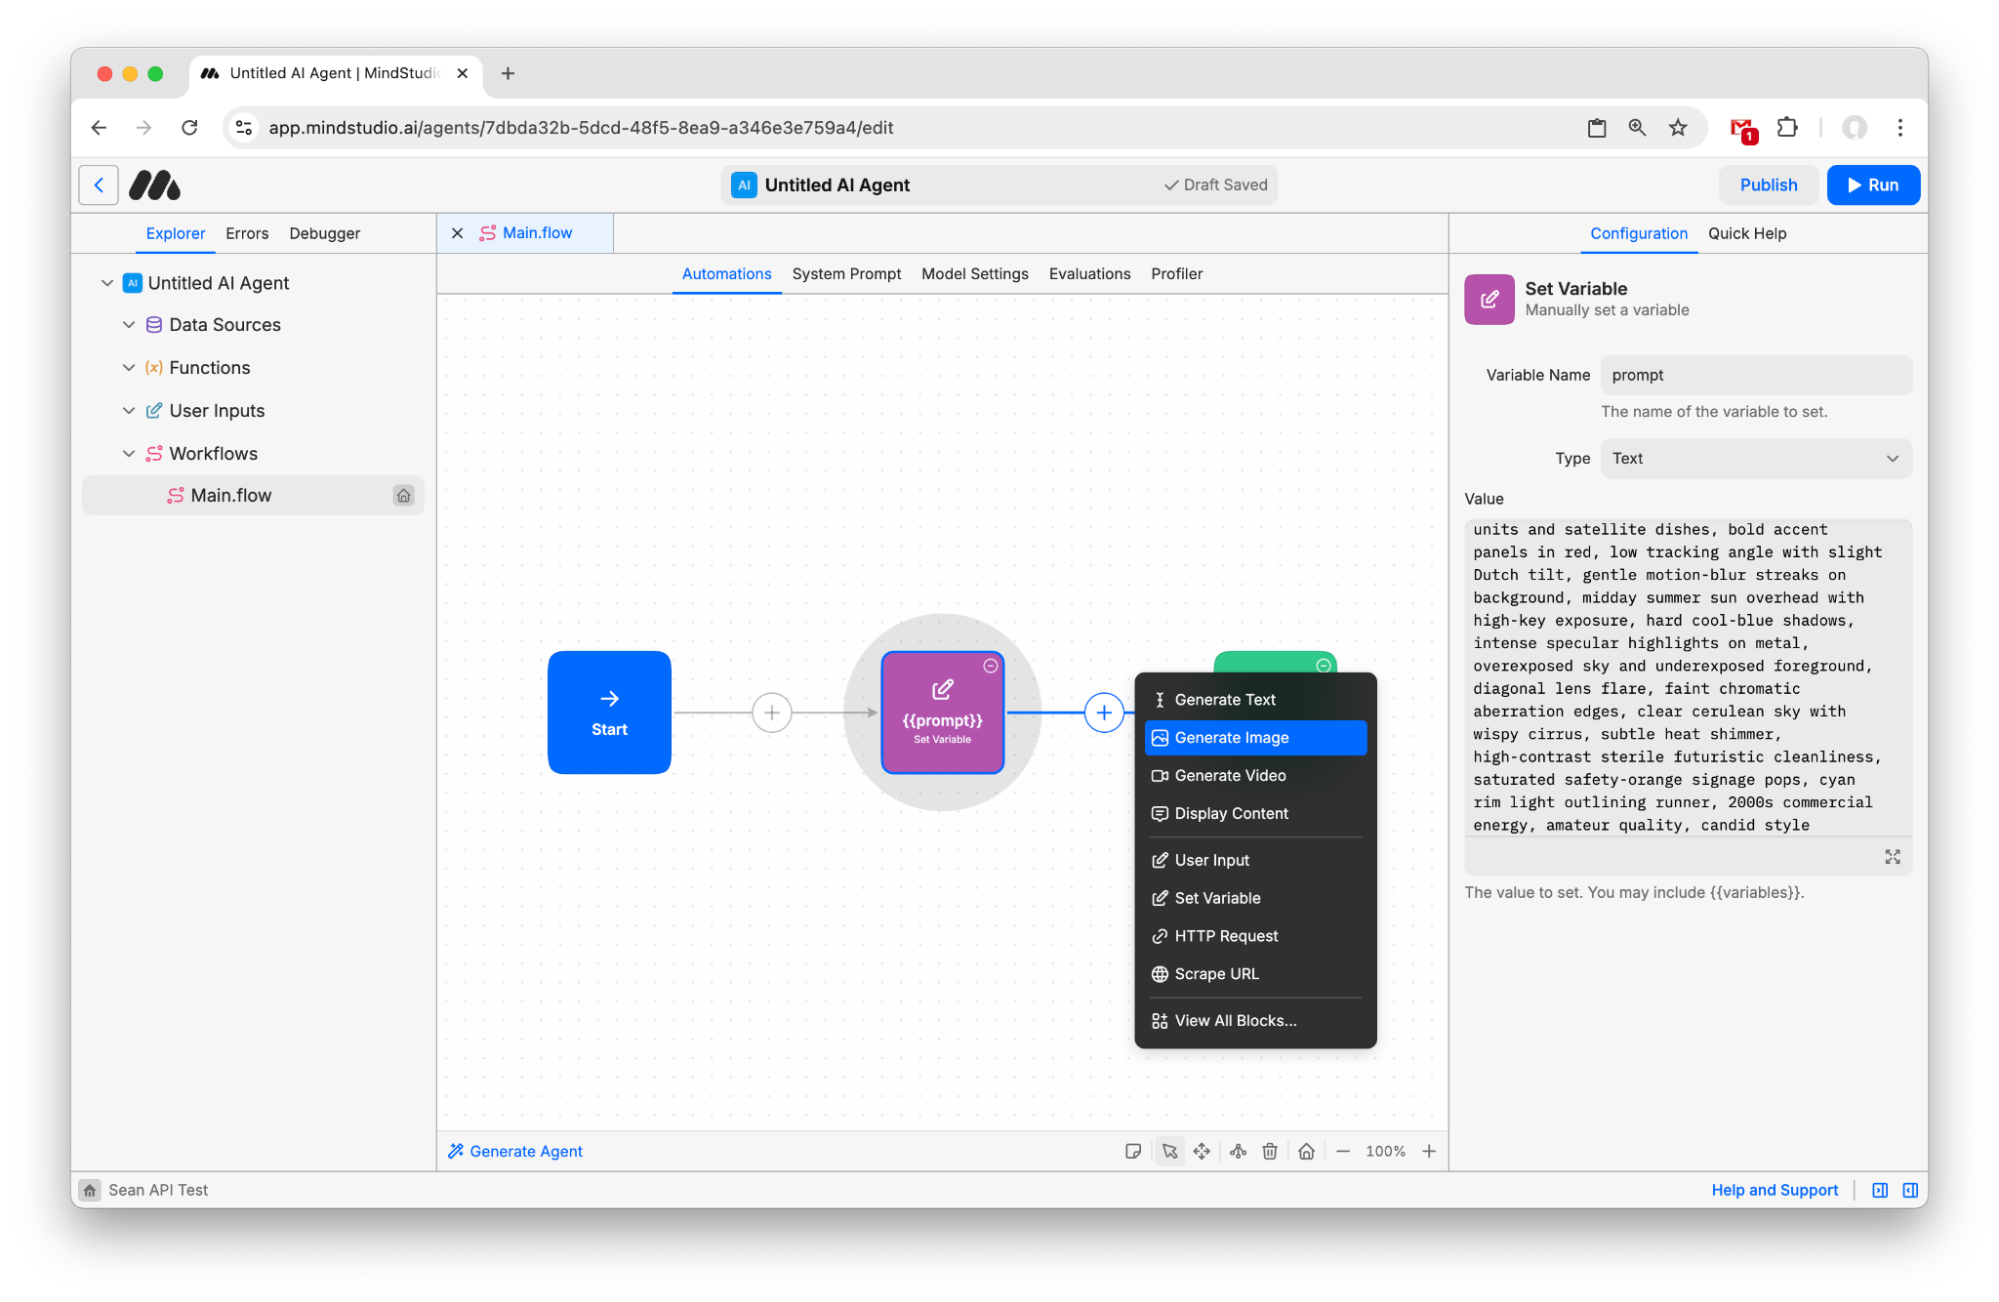
- Type “{{prompt}}” in the prompt field to pass your variable into the Image Generation model.
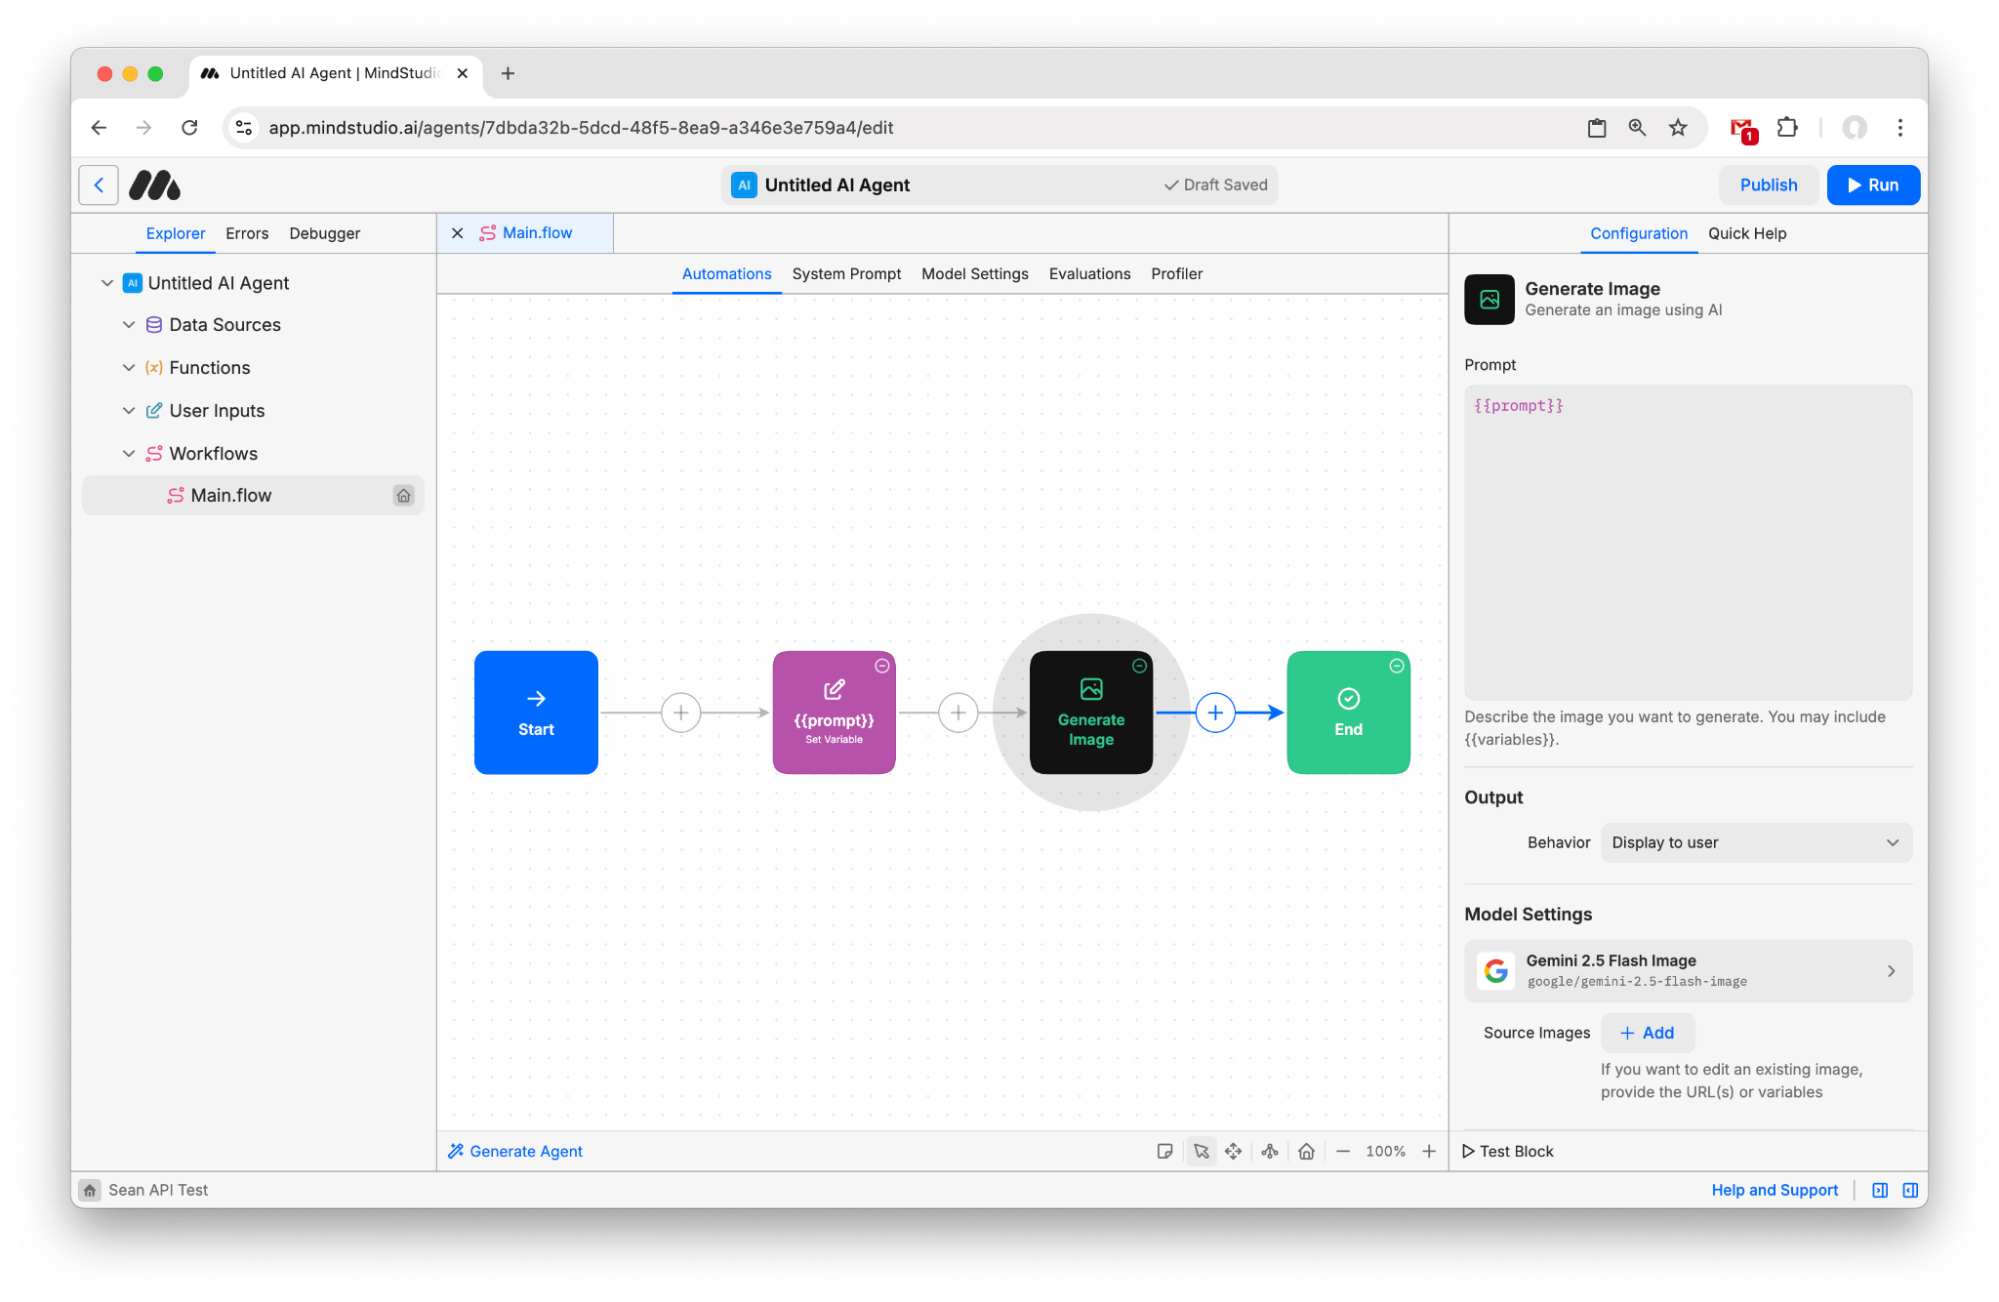
- Click “Gemini 2.5 Flash Image” under “Model Settings” to open the Image Model picker.
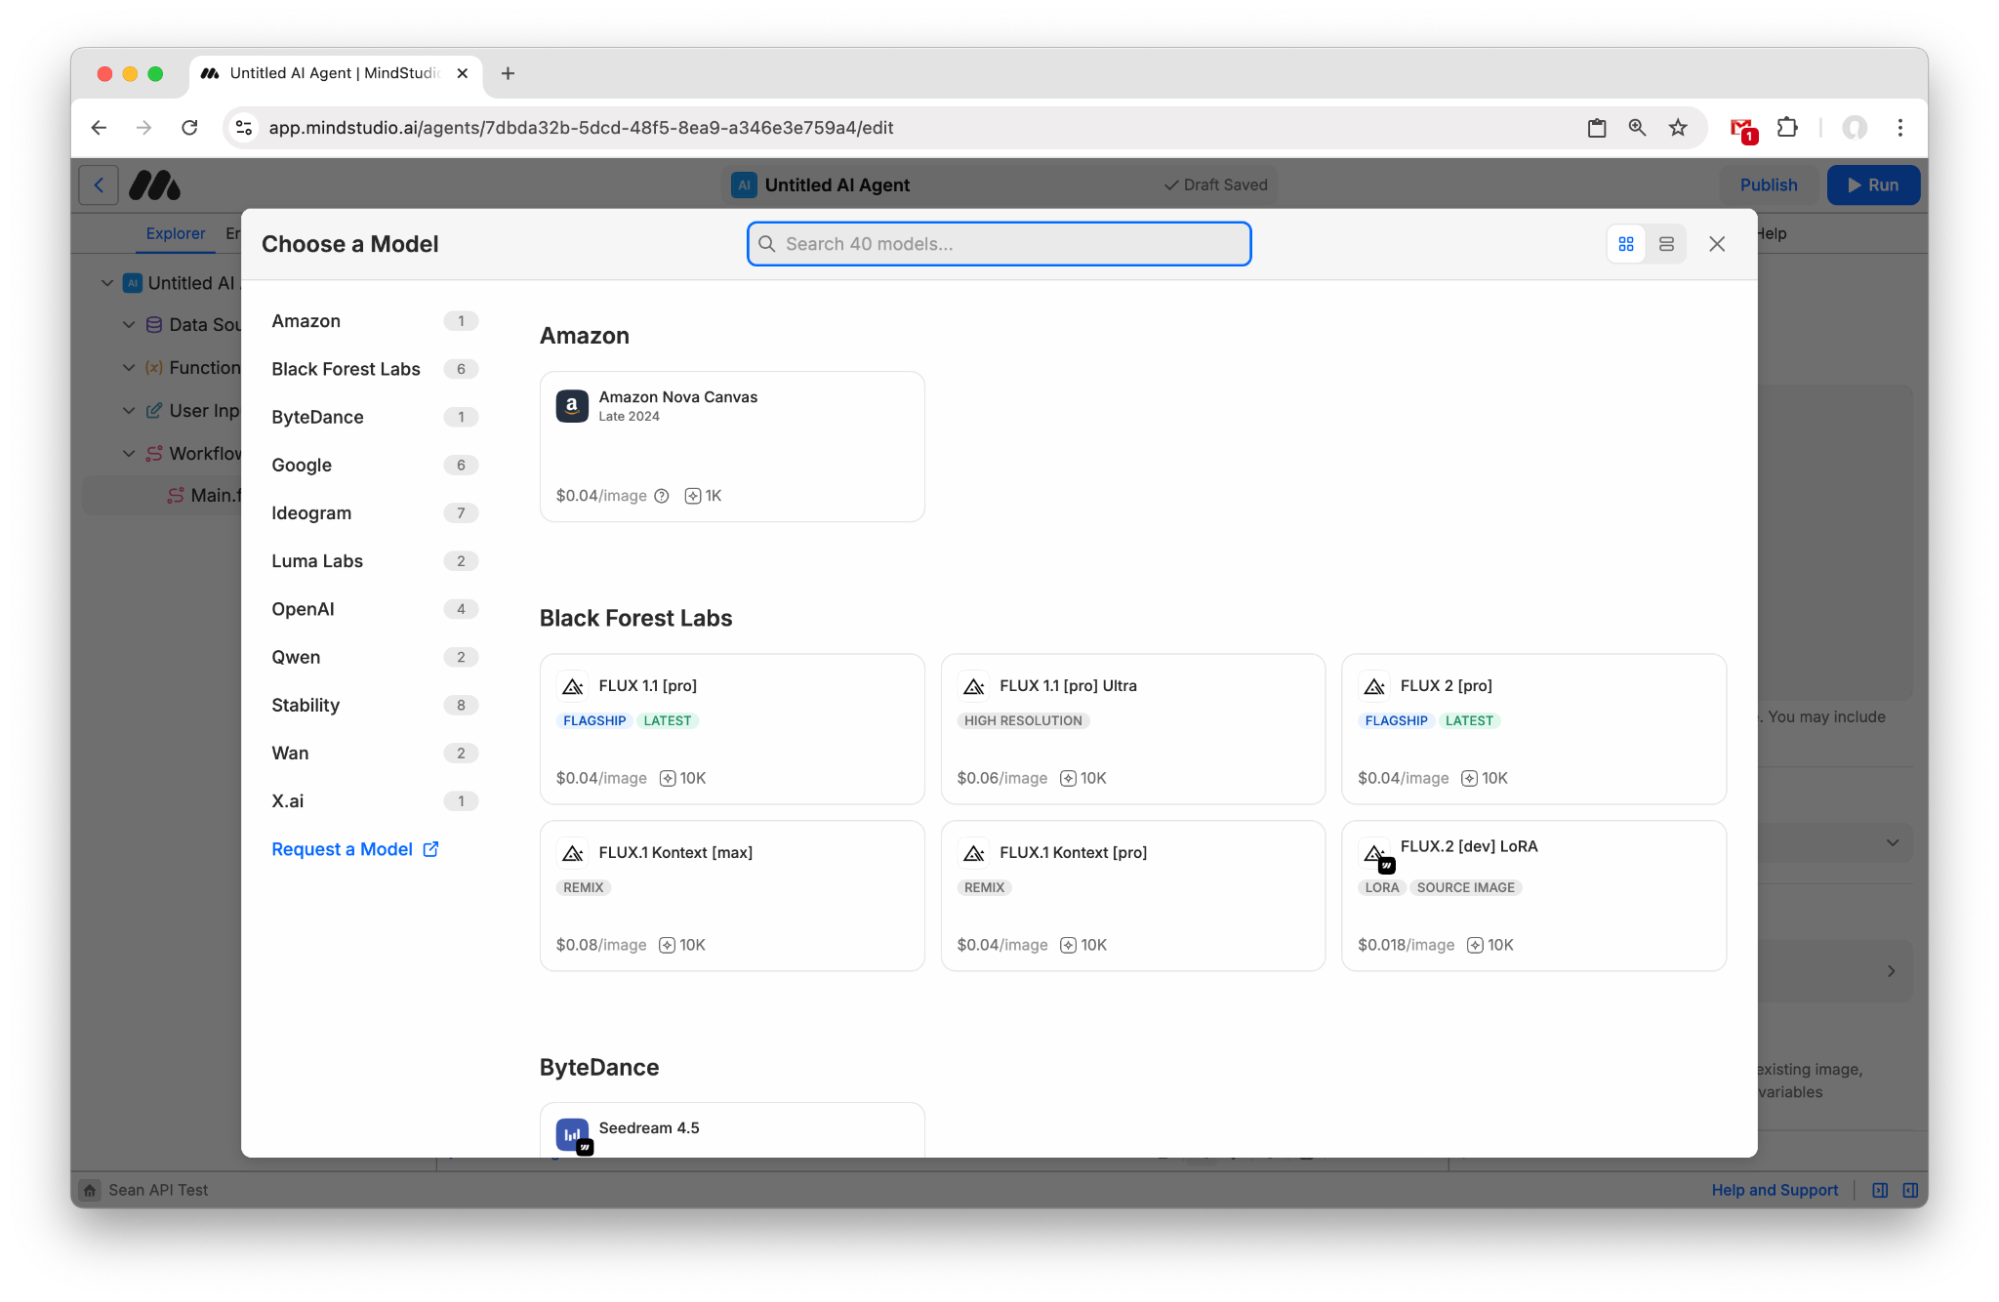
- Choose “Flux 2 [dev] LoRA”. Then click “Add” next to the LoRAs option.
![Add a LoRA to Flux 2 [dev] LoRA AI image generation model](https://i.mscdn.ai/images/76b81a63-51ec-43f4-b4ea-0b5023be600a_1772491077822.png?fm=auto)
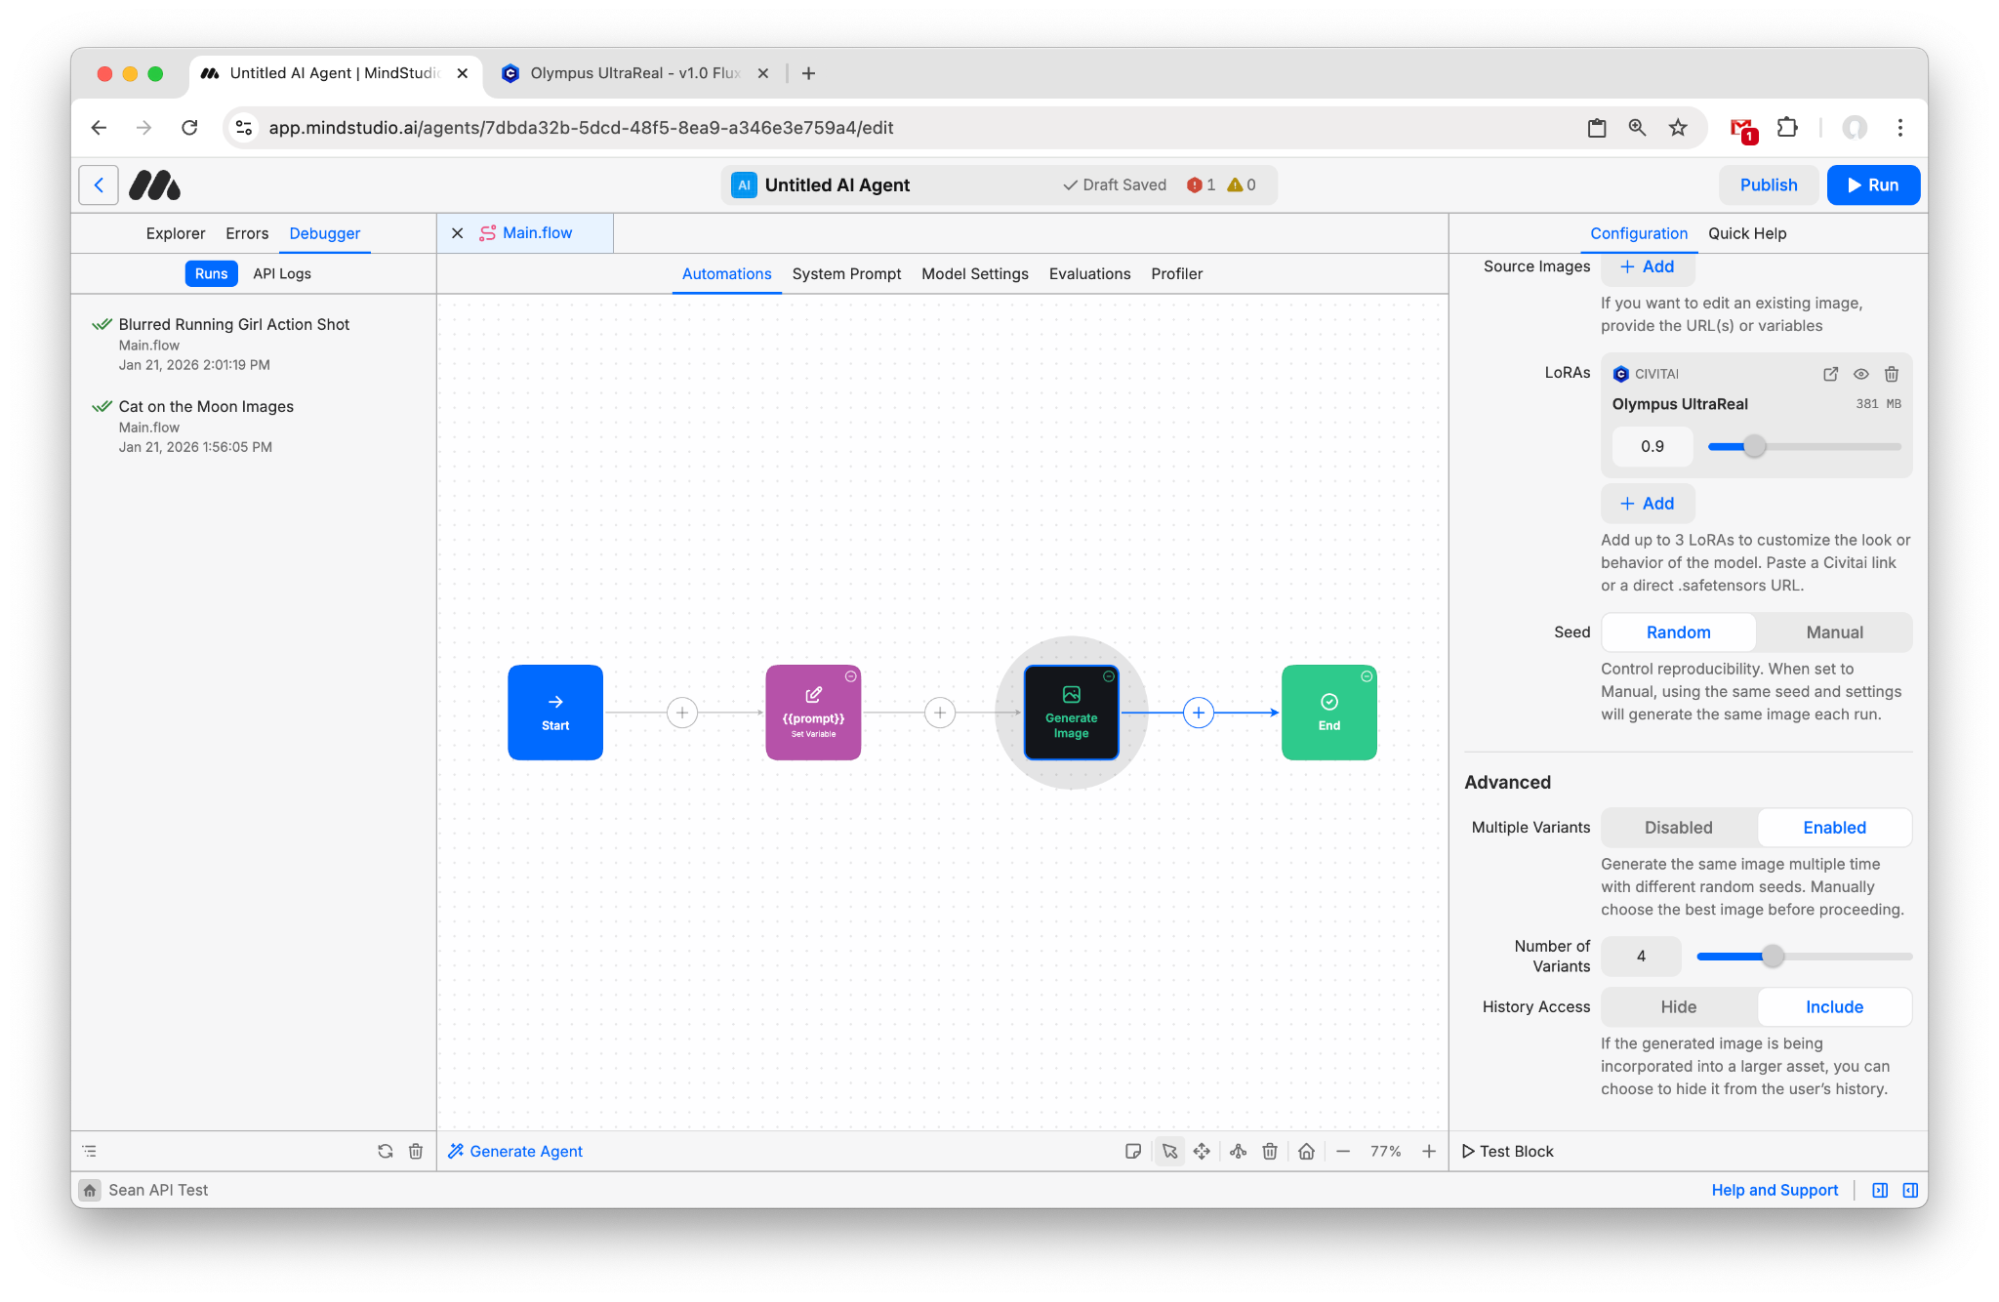
- Paste this LoRA URL: civitai.com/models/2212121/olympus-ultrareal Then set the strength to 0.9. You do not need a CivitAI account to use CivitAI LoRAs in MindStudio.

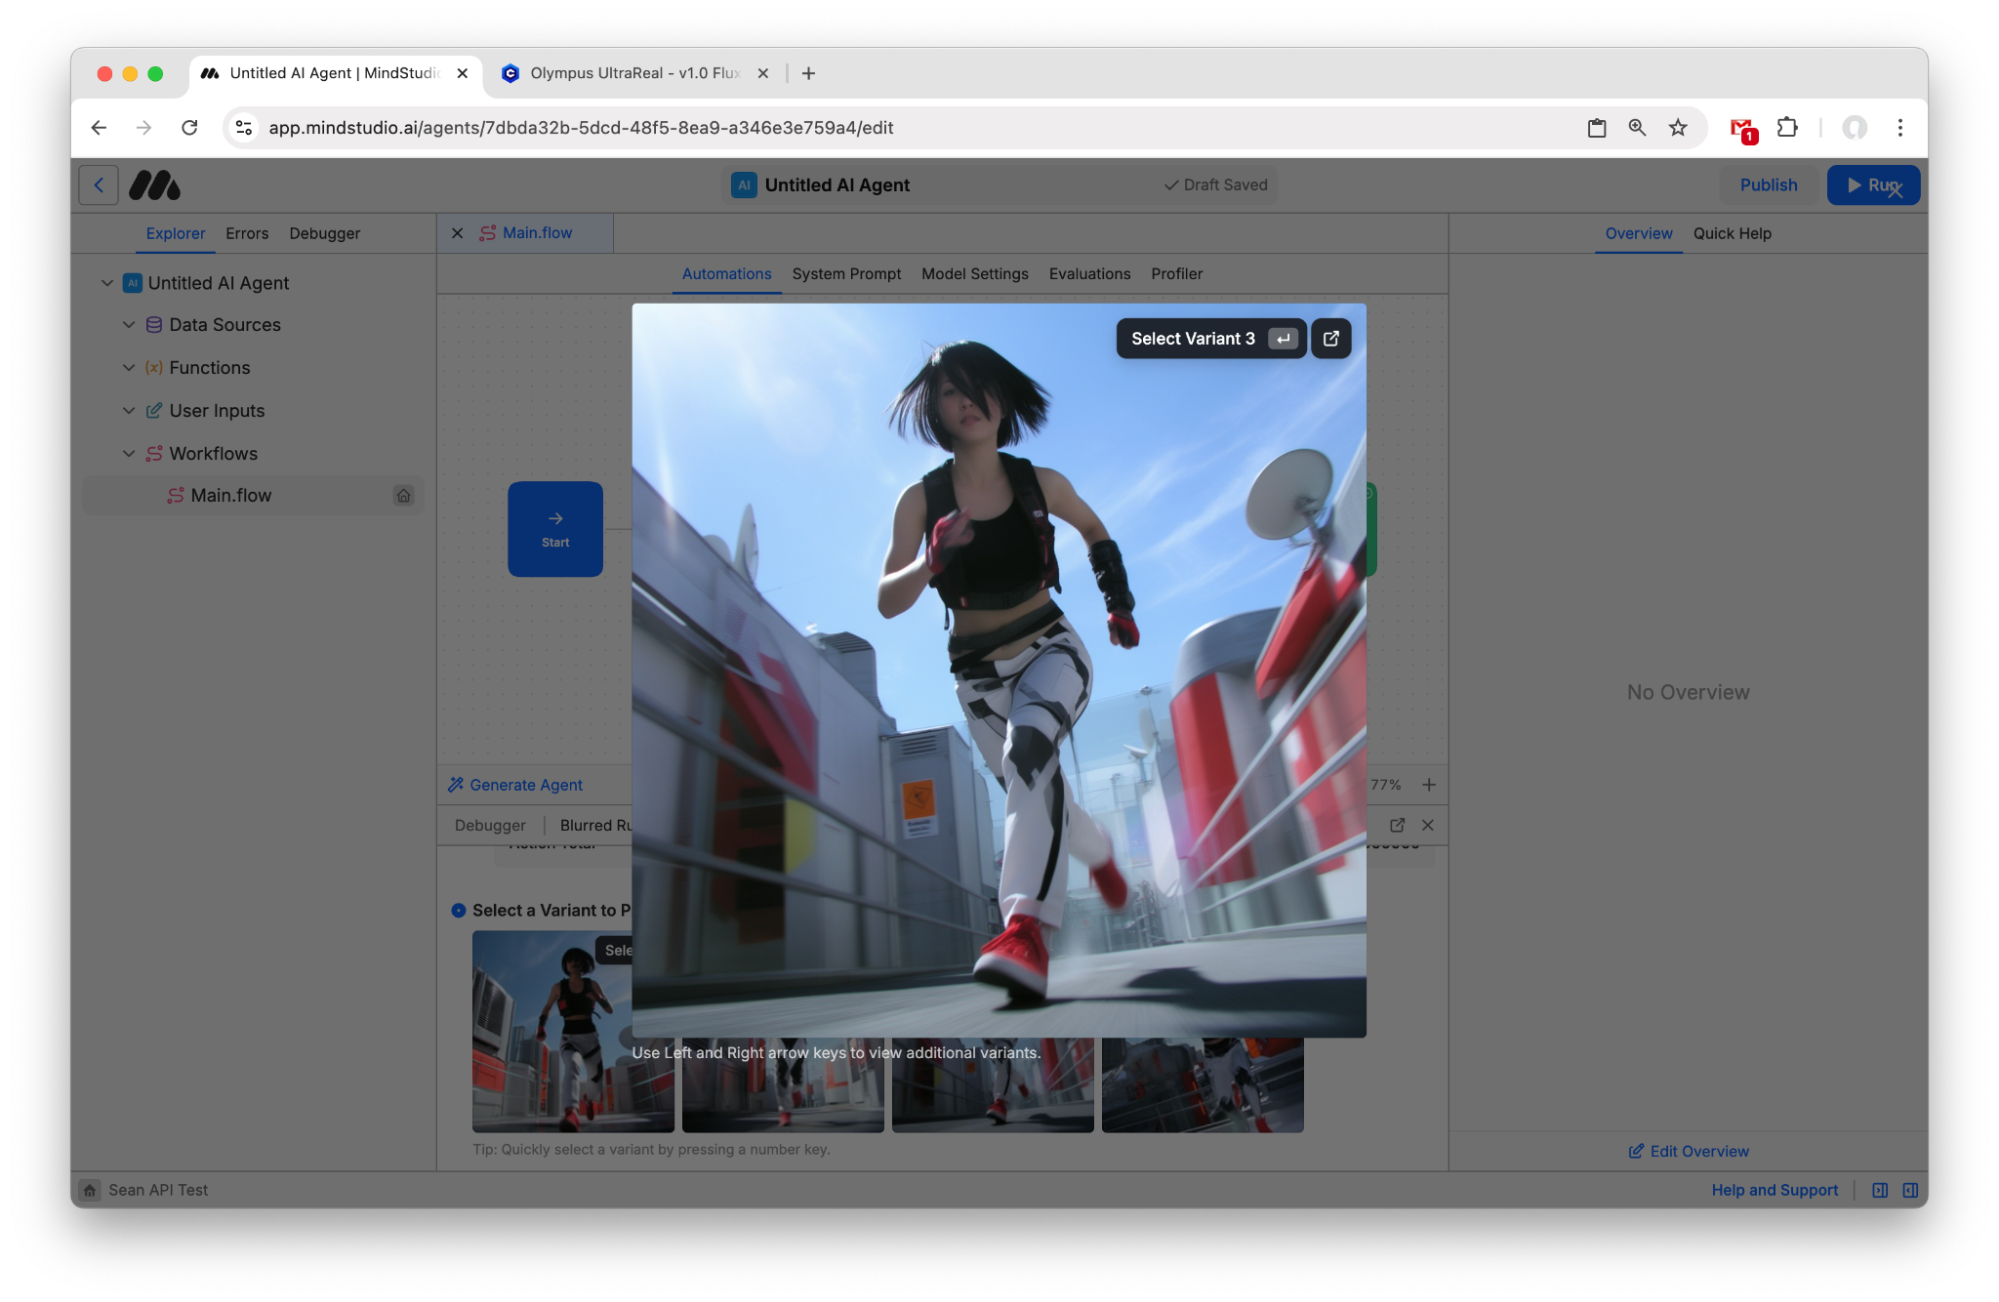
- Scroll down and set Multiple Variants to “Enabled”. Leave it set to 4 to generate 4 different randomly-seeded images from the prompt.
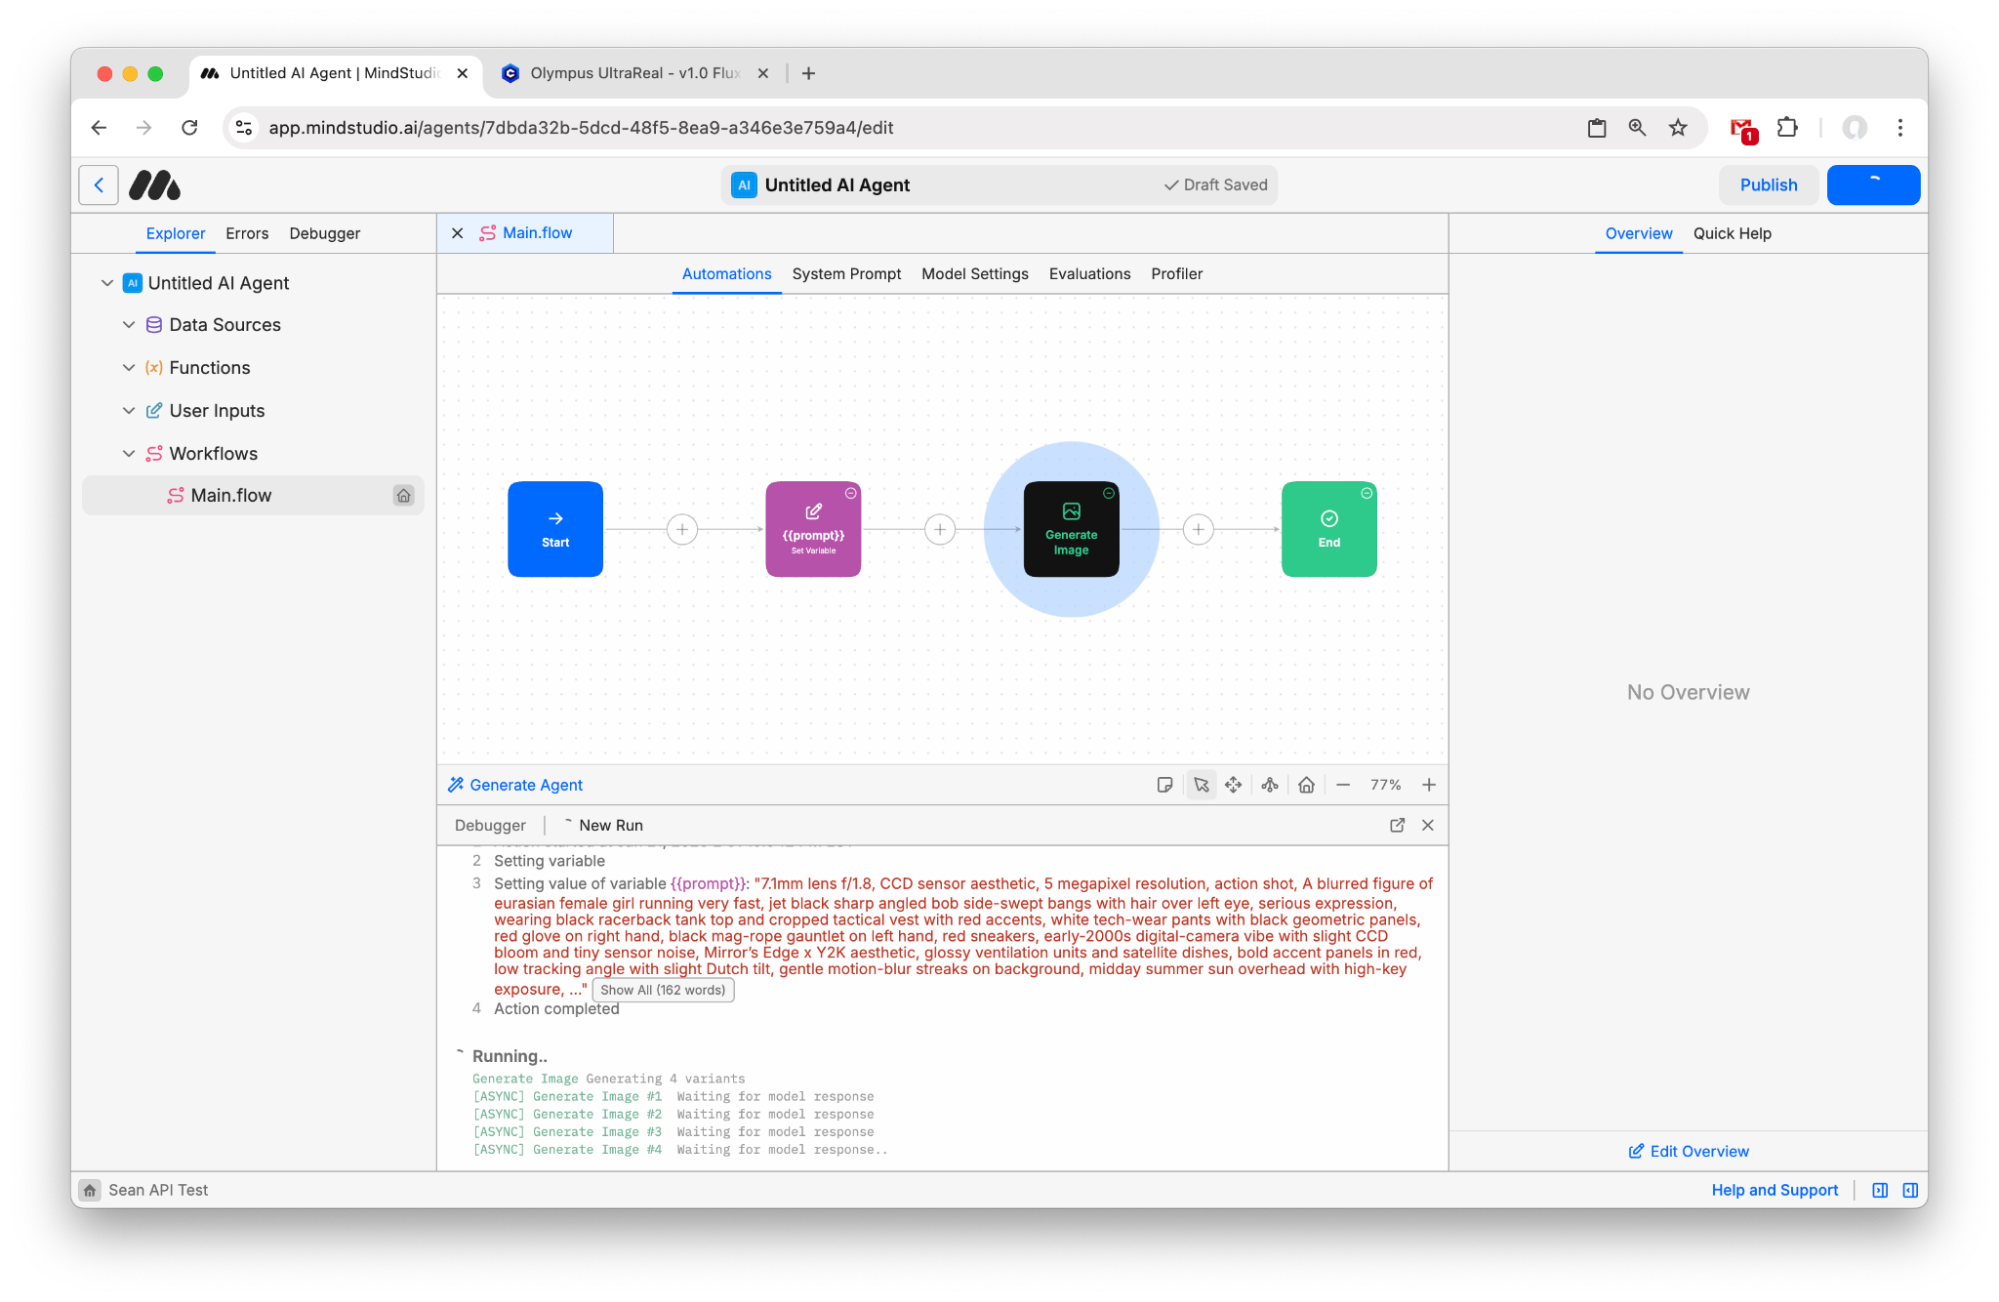
- Now, press Run in the top right (or Cmd/Ctrl+R) to start the workbench.
- When the generations finish, you can see the four variants. Click one to open in full screen.
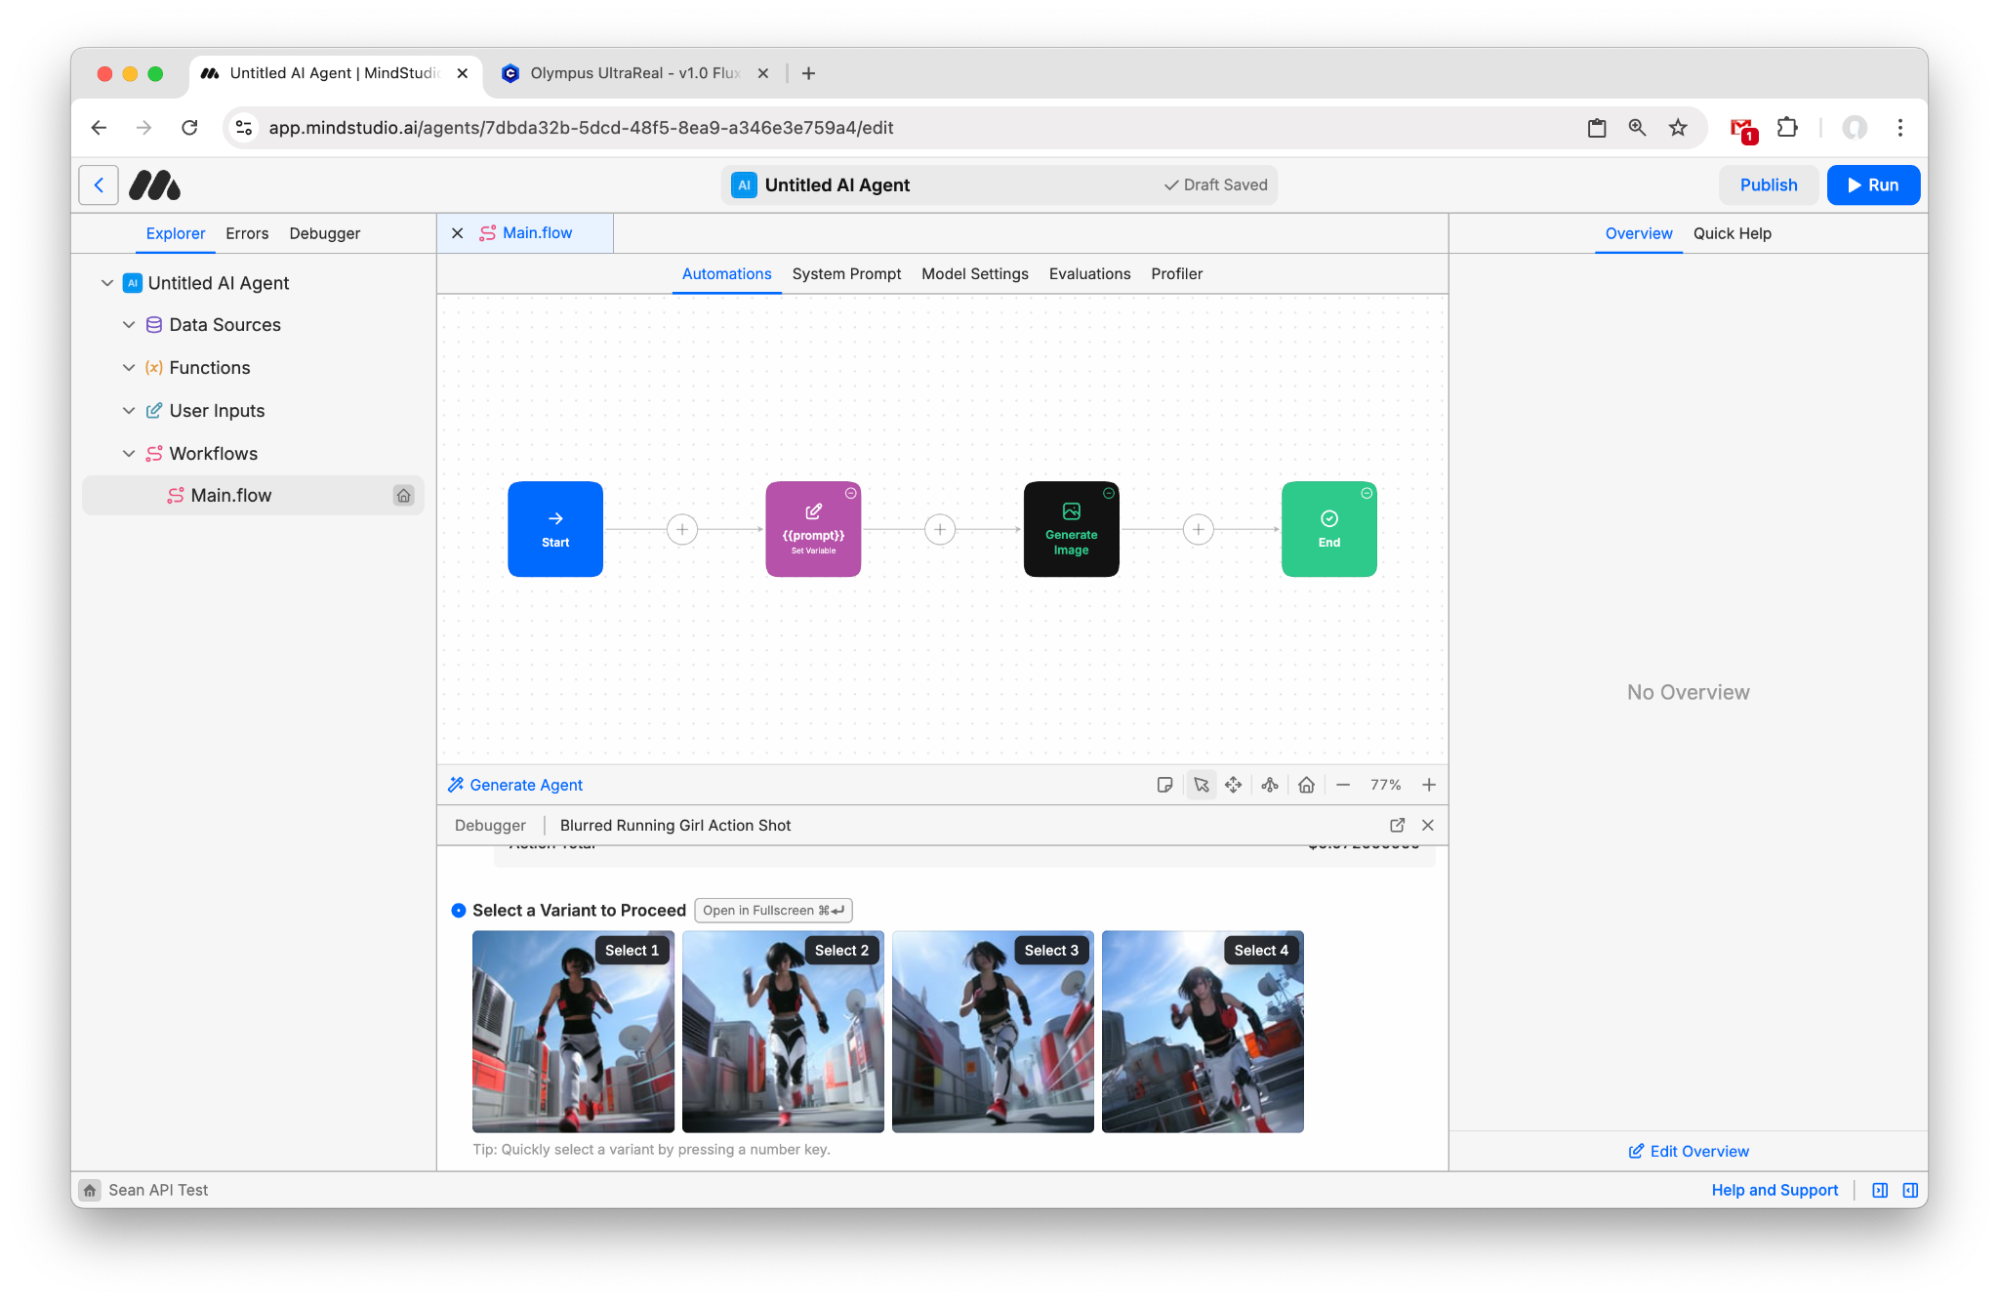
- Choose the best variant and select it to finish the workbench. Note that images are already hosted on MindStudio CDN and ready to be shared or used in other workbenches. This workbench ends with image generation, but a common next step would be to save the generated image to a variable and pass that as the first frame to a “Generate Video” block to animate the image. Check out other tutorials to learn how to continue!