How to Generate AI Videos with LoRAs
This tutorial shows how to quickly and easily generate AI videos using LoRAs.

How to Generate AI Videos with LoRAs
MindStudio is the easiest way to create amazing AI-generated videos using LoRAs. A LoRA is an AI image generation model specifically trained to produce highly consistent images.
MindStudio has a growing number of AI image generation models that support LoRAs:
- Black Forest Labs FLUX.2 [dev] LoRA
- Qwen’s Qwen Image and Z Image Turbo
- Stability SDXL LoRA
MindStudio also has several AI video generation models, including:
- OpenAI Sora 2 Pro
- Runway Gen-4 Turbo
- Kling’s Kling O1
- Lightricks LTX-2 10b
- Luma Labs Ray Flash 2
- Wan 2.6
- and several others
Generate videos in minutes without requiring a high-powered computer or complex software.
Remix Link
Instructions
Follow the steps below to build a simple video generation workbench:
-
Create a MindStudio account.
-
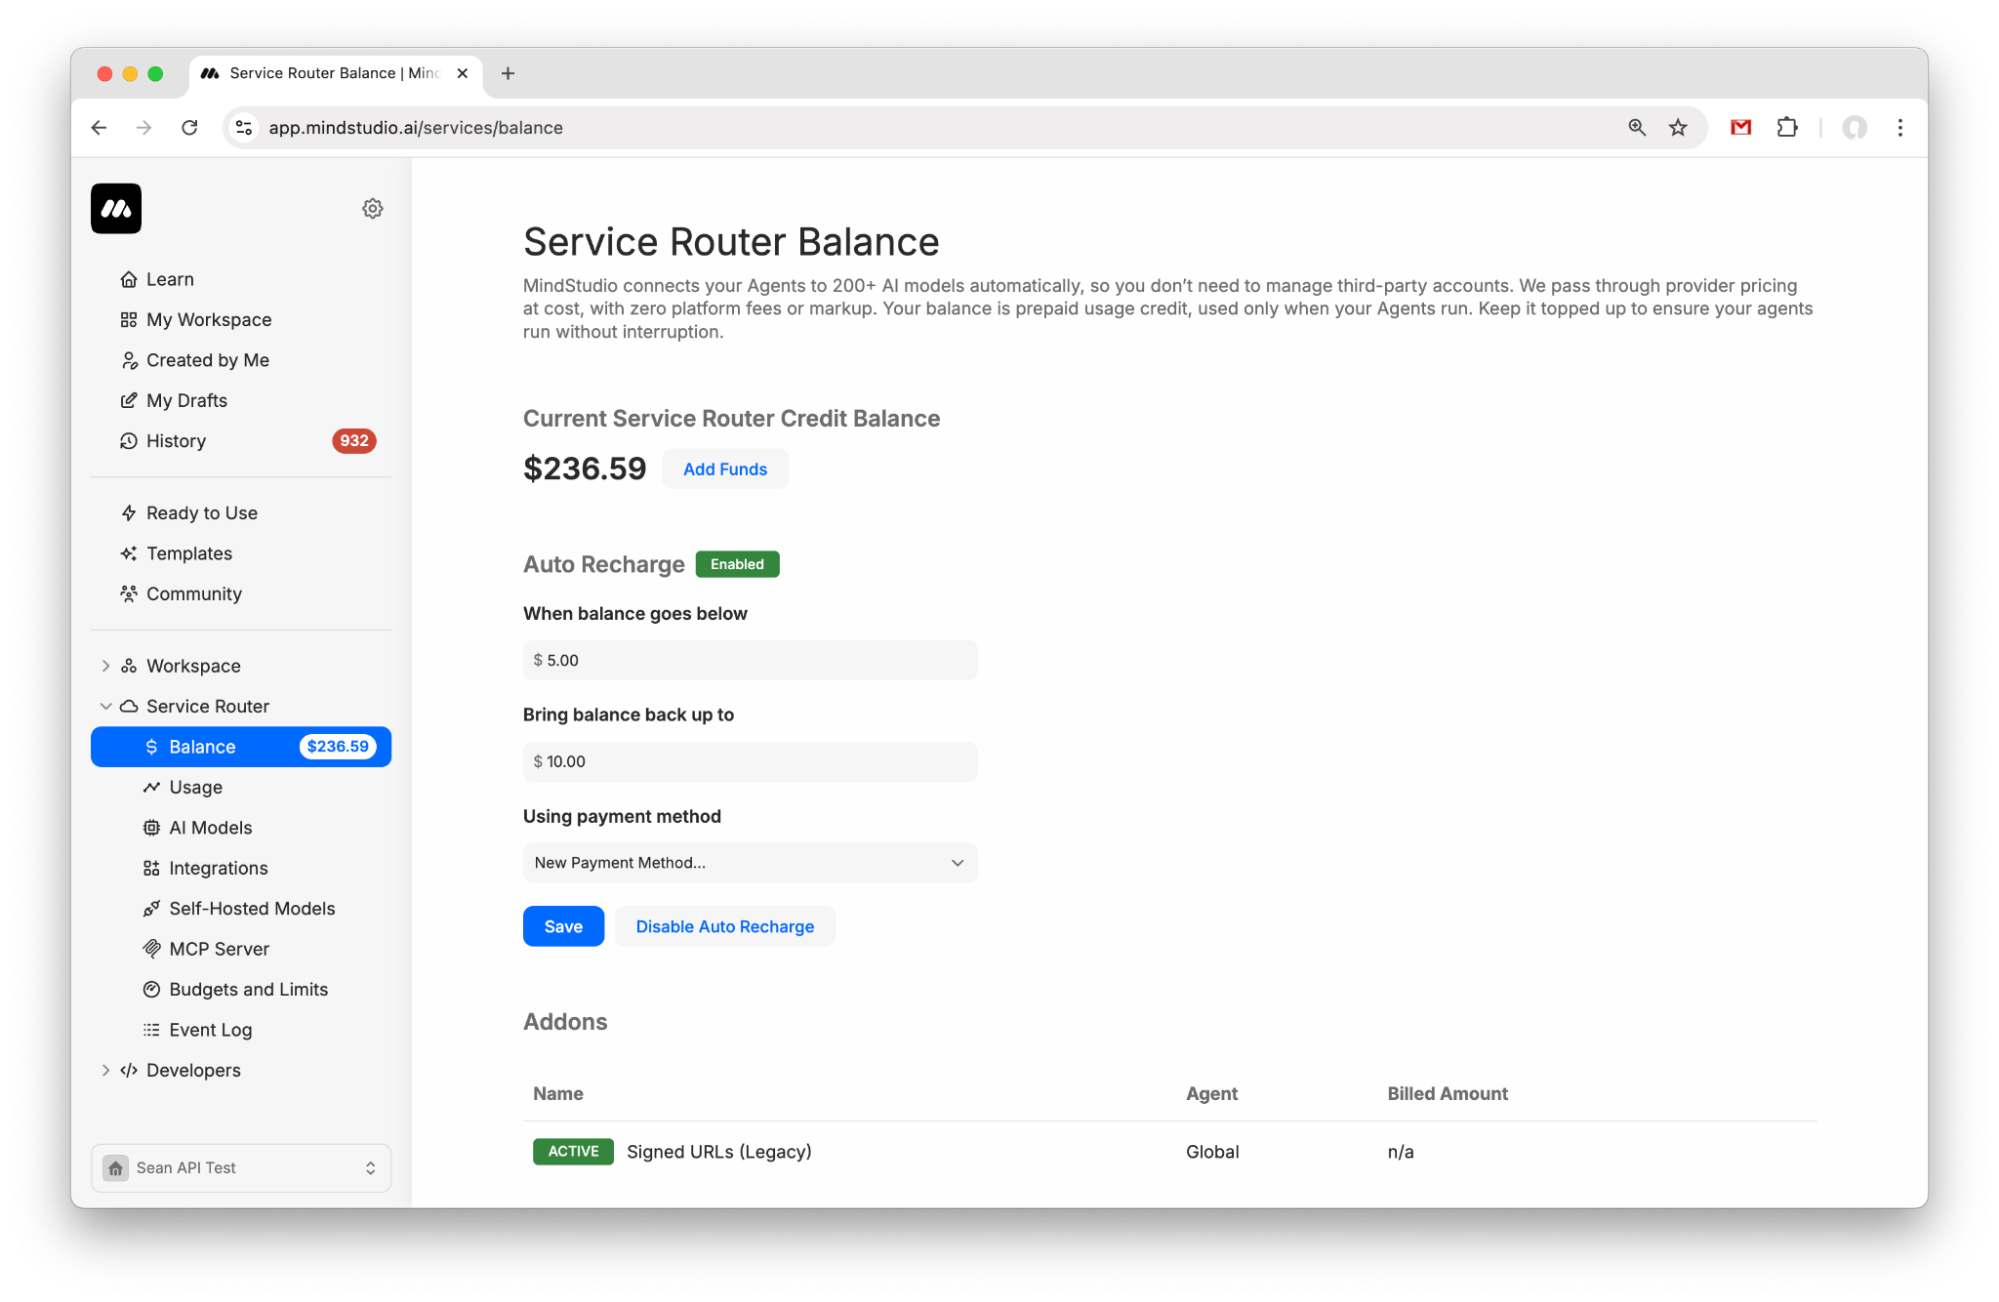
Go to “Service Router > Balance” to add funds to your Service Router balance. Add $5 to get started.
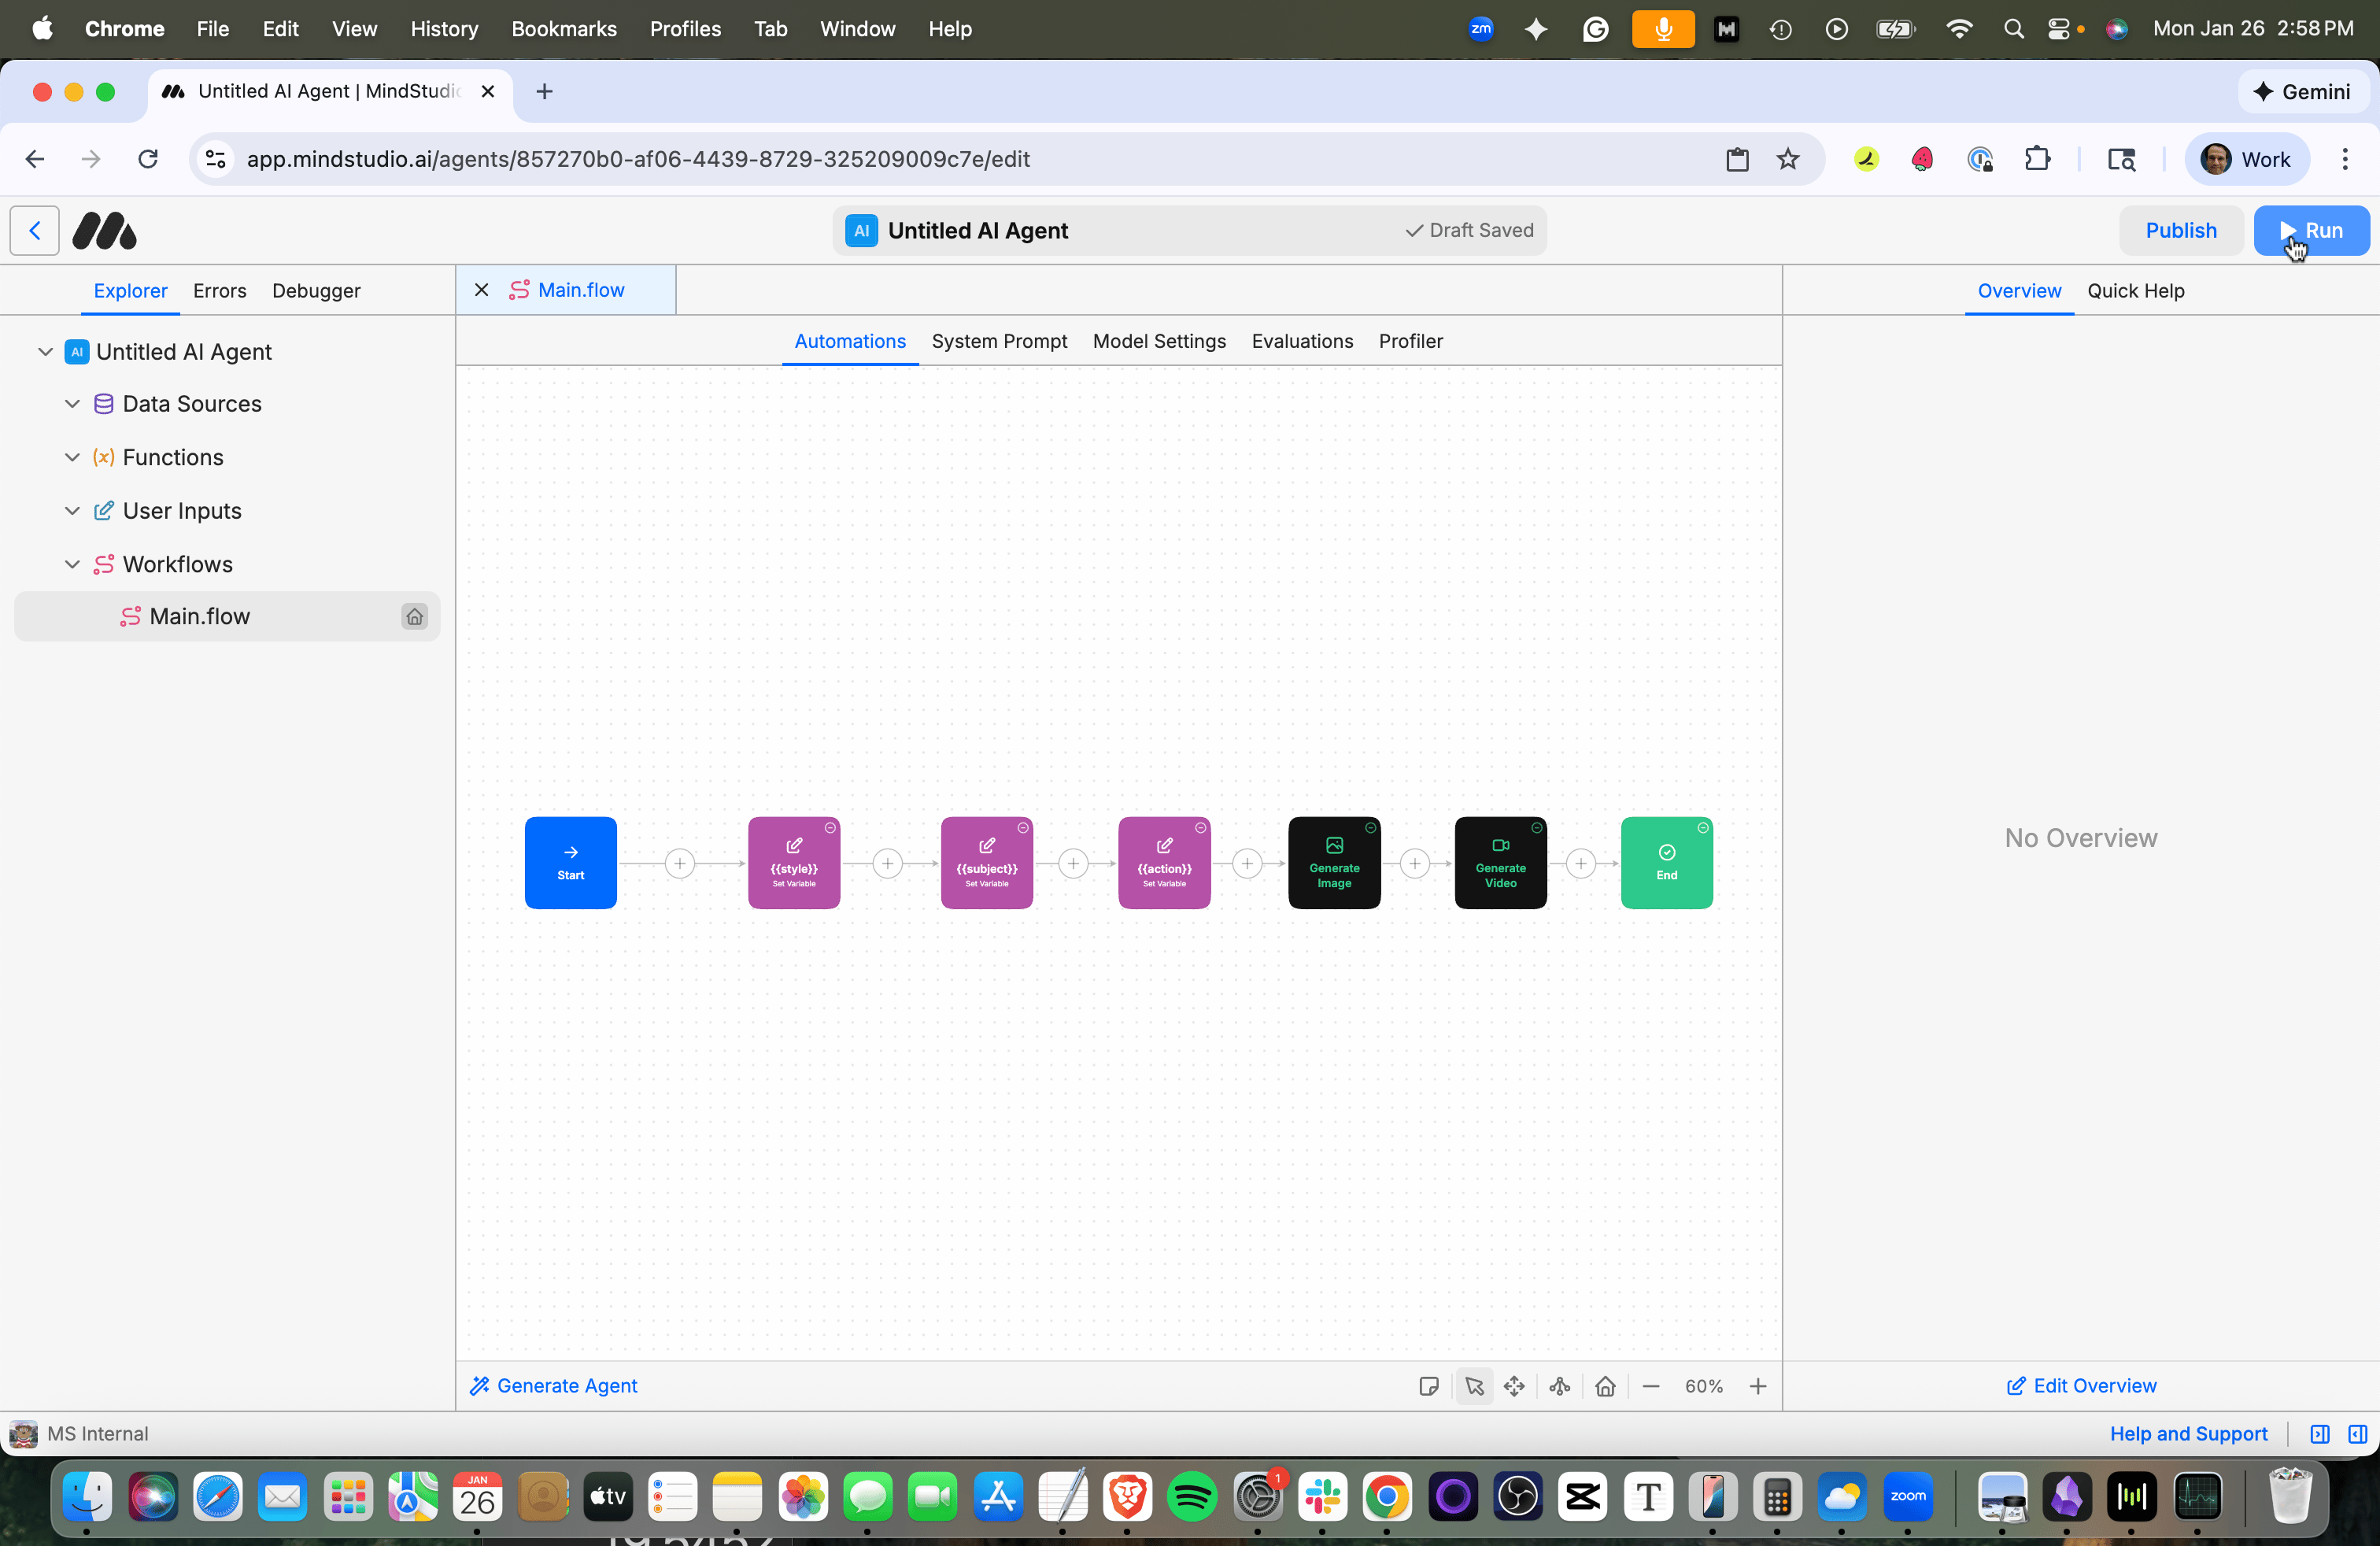
- Create a new agent from My Drafts.
4.Click the “Start” block and change the Run Mode to “Workbench”.
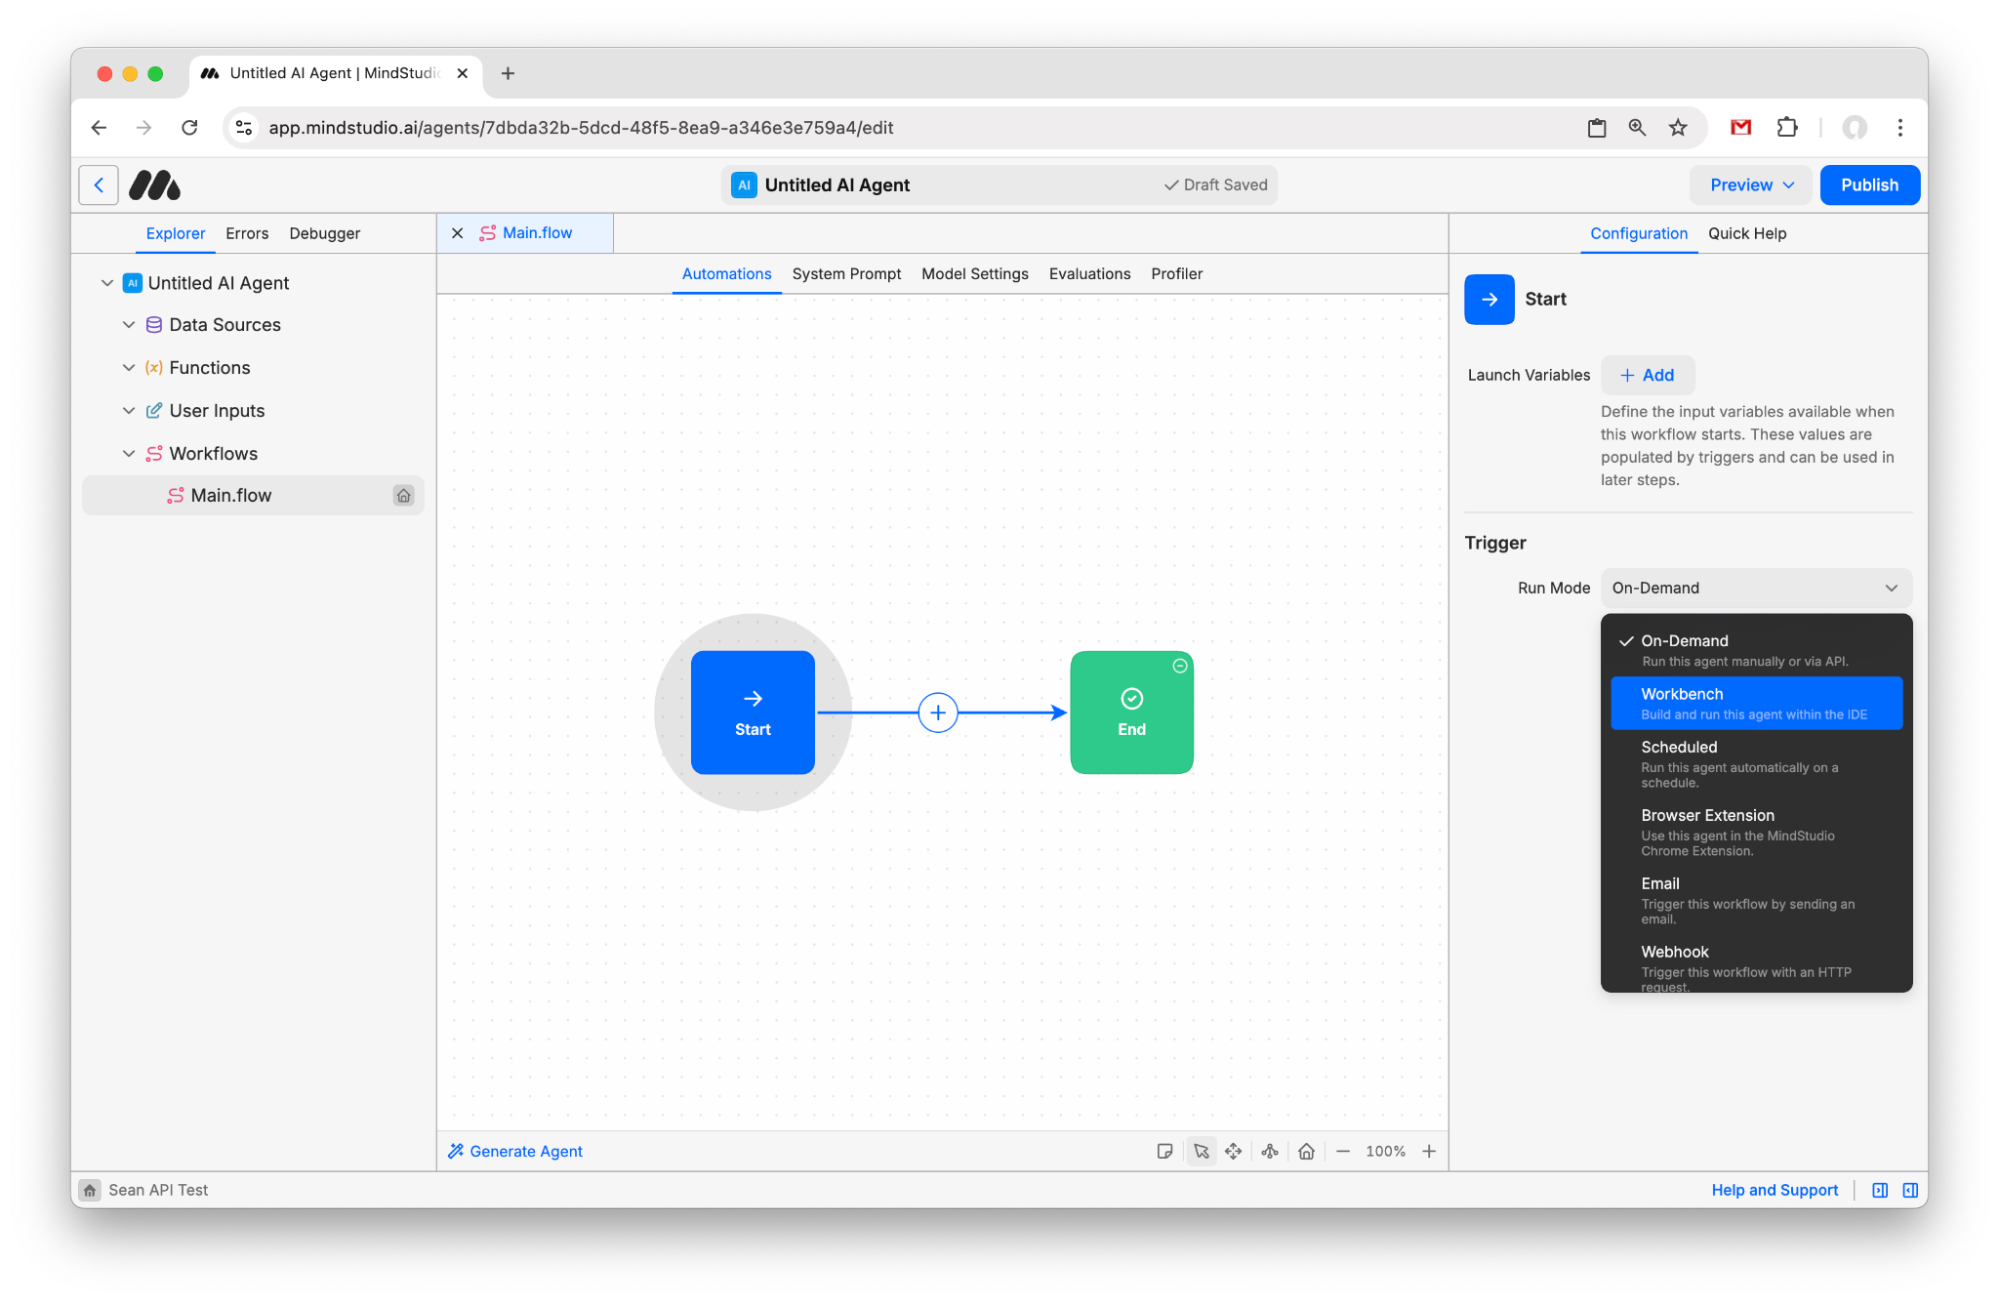
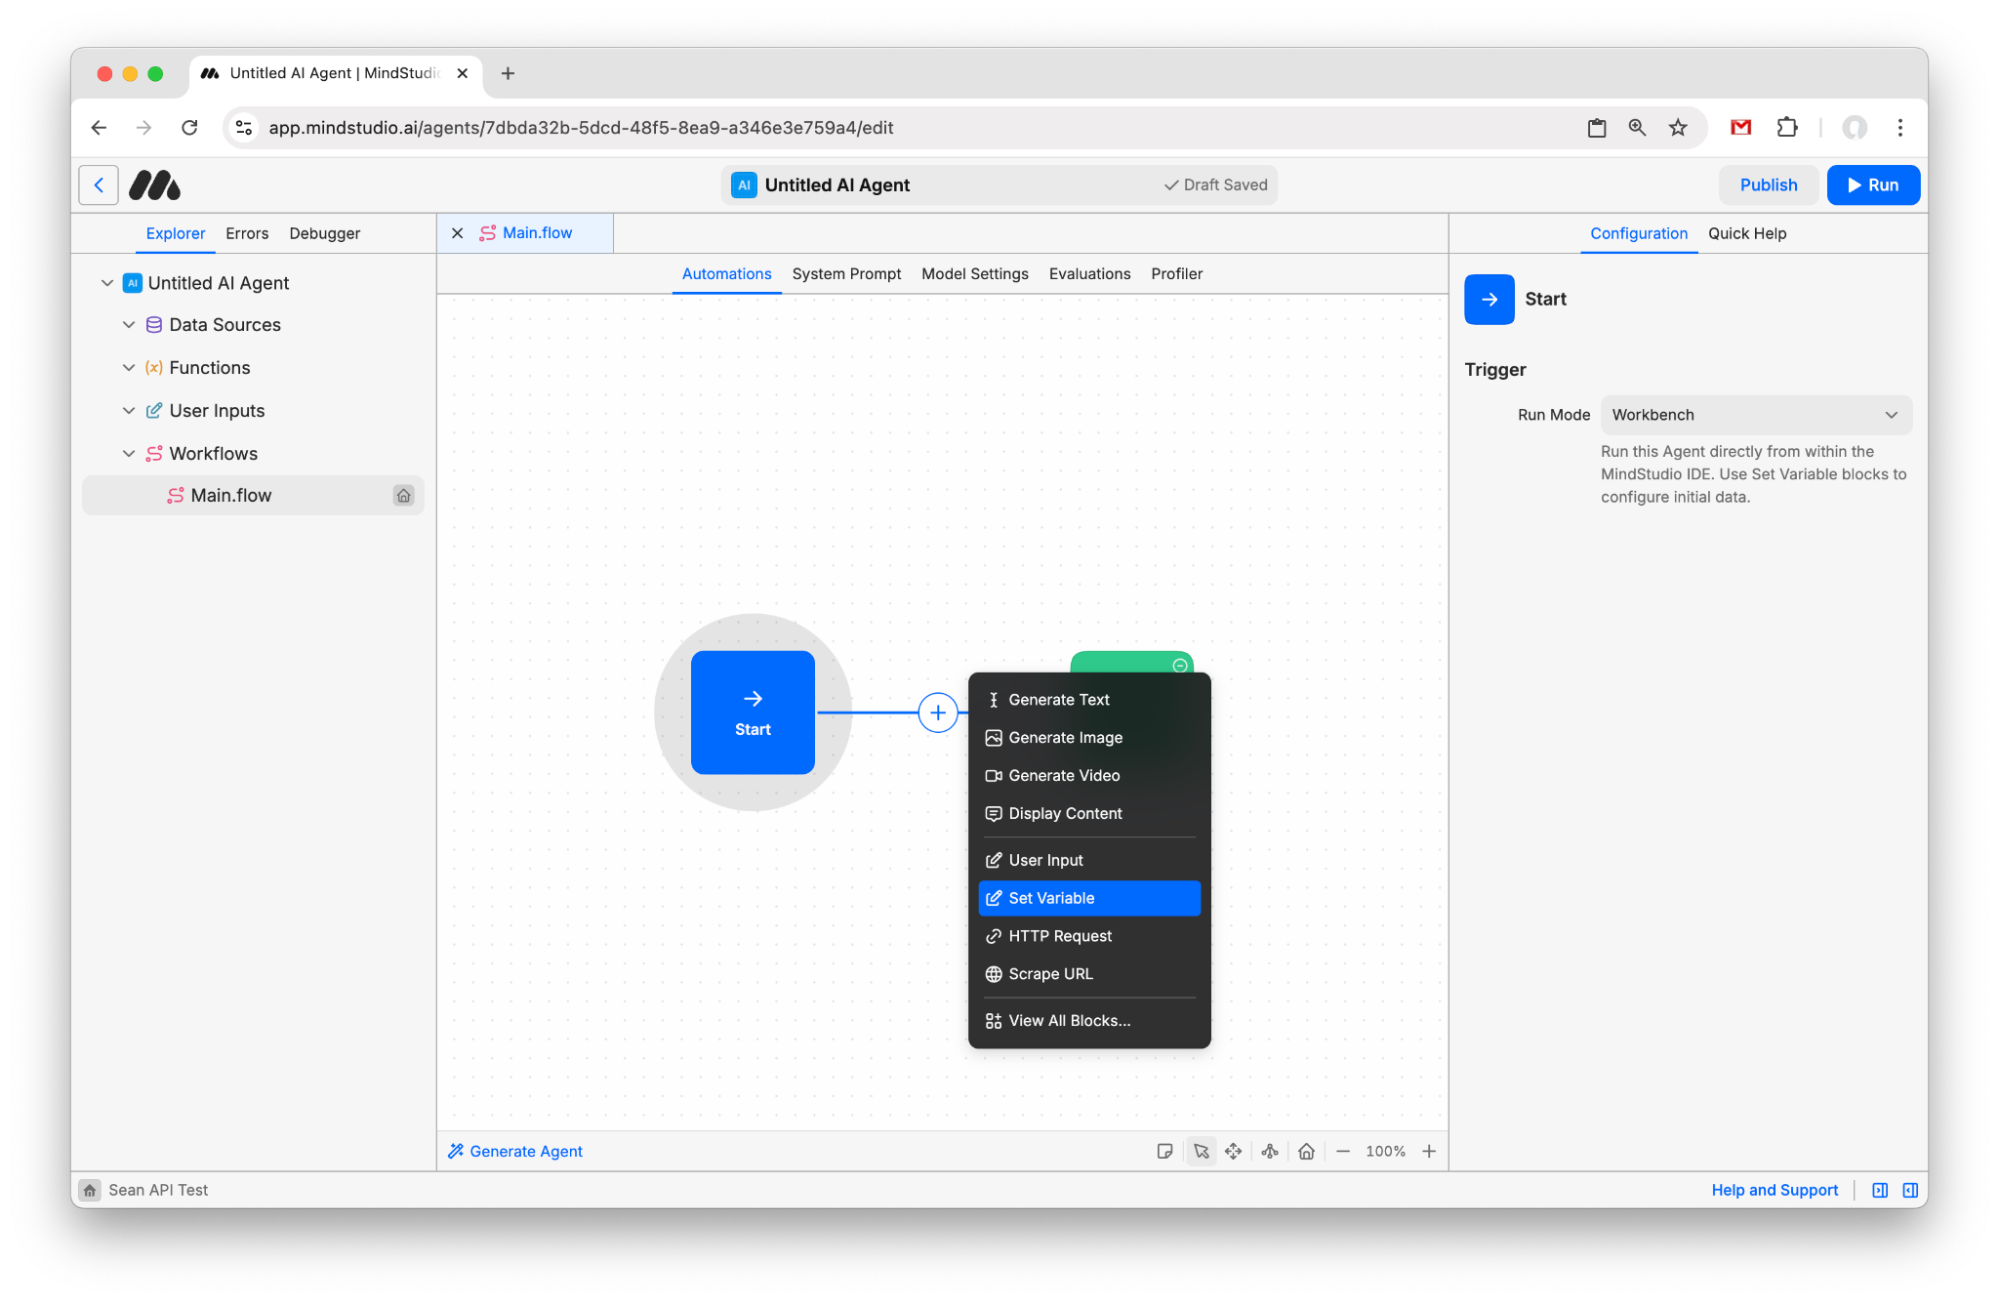
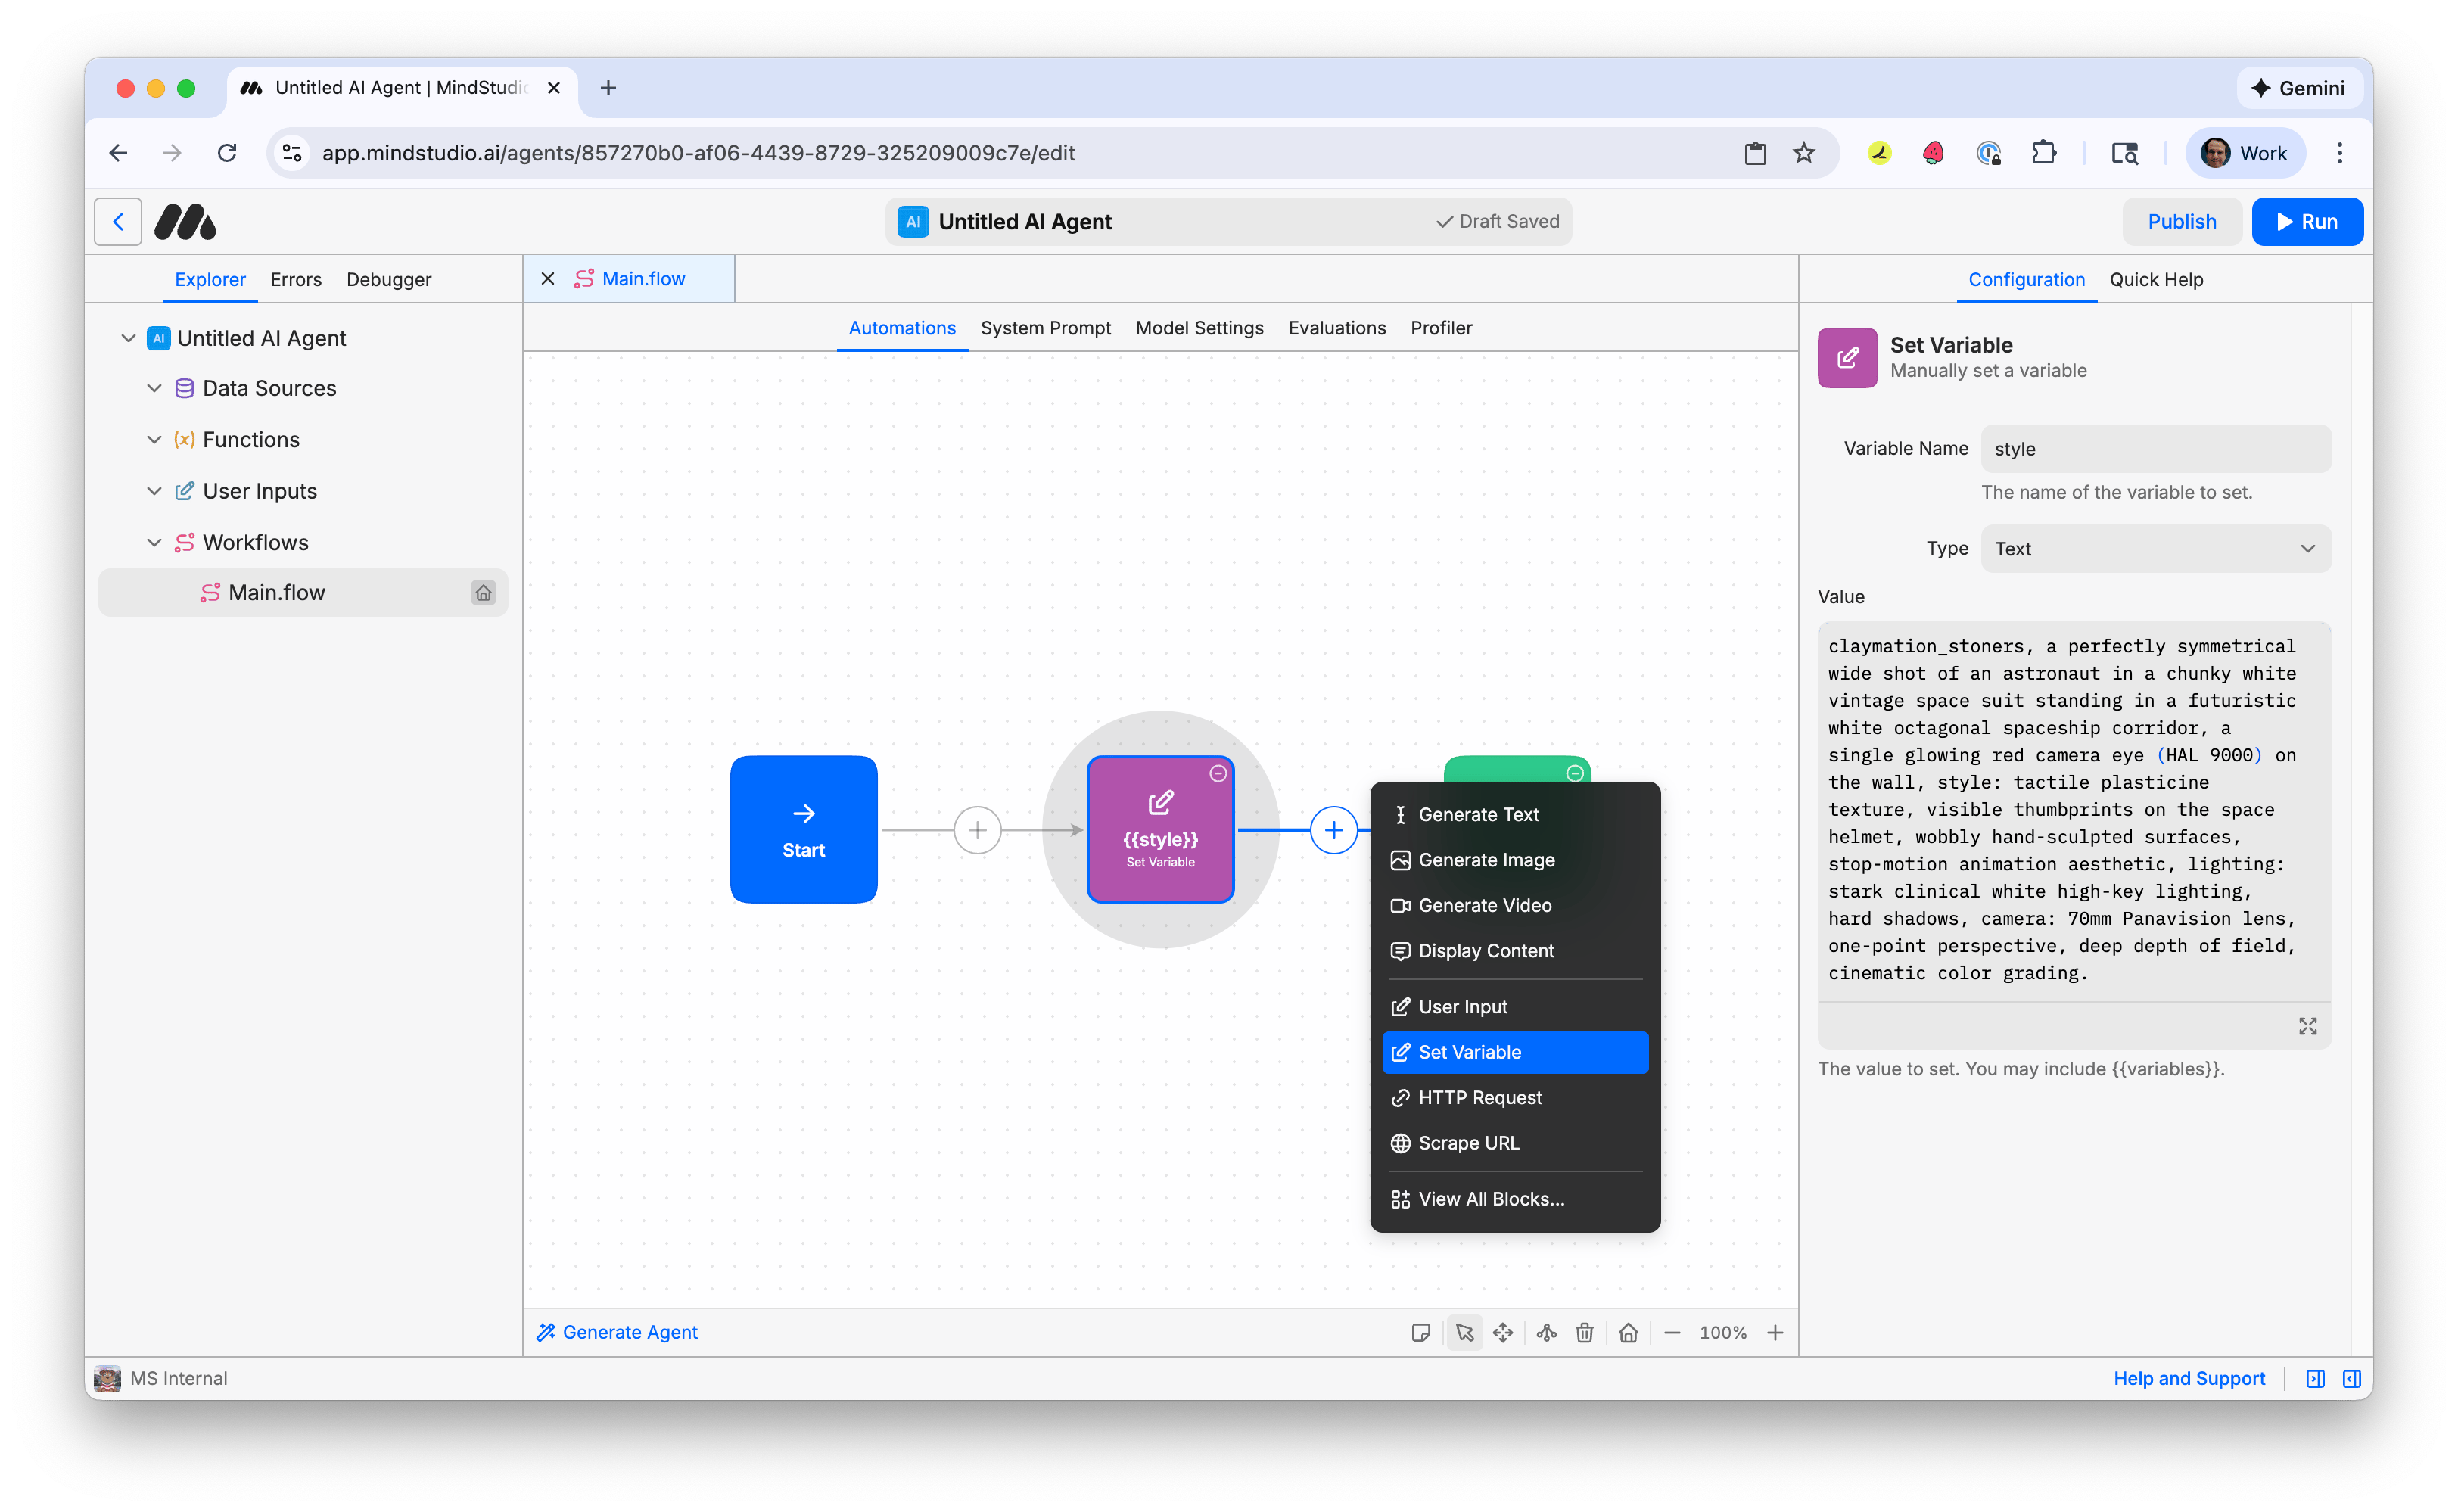
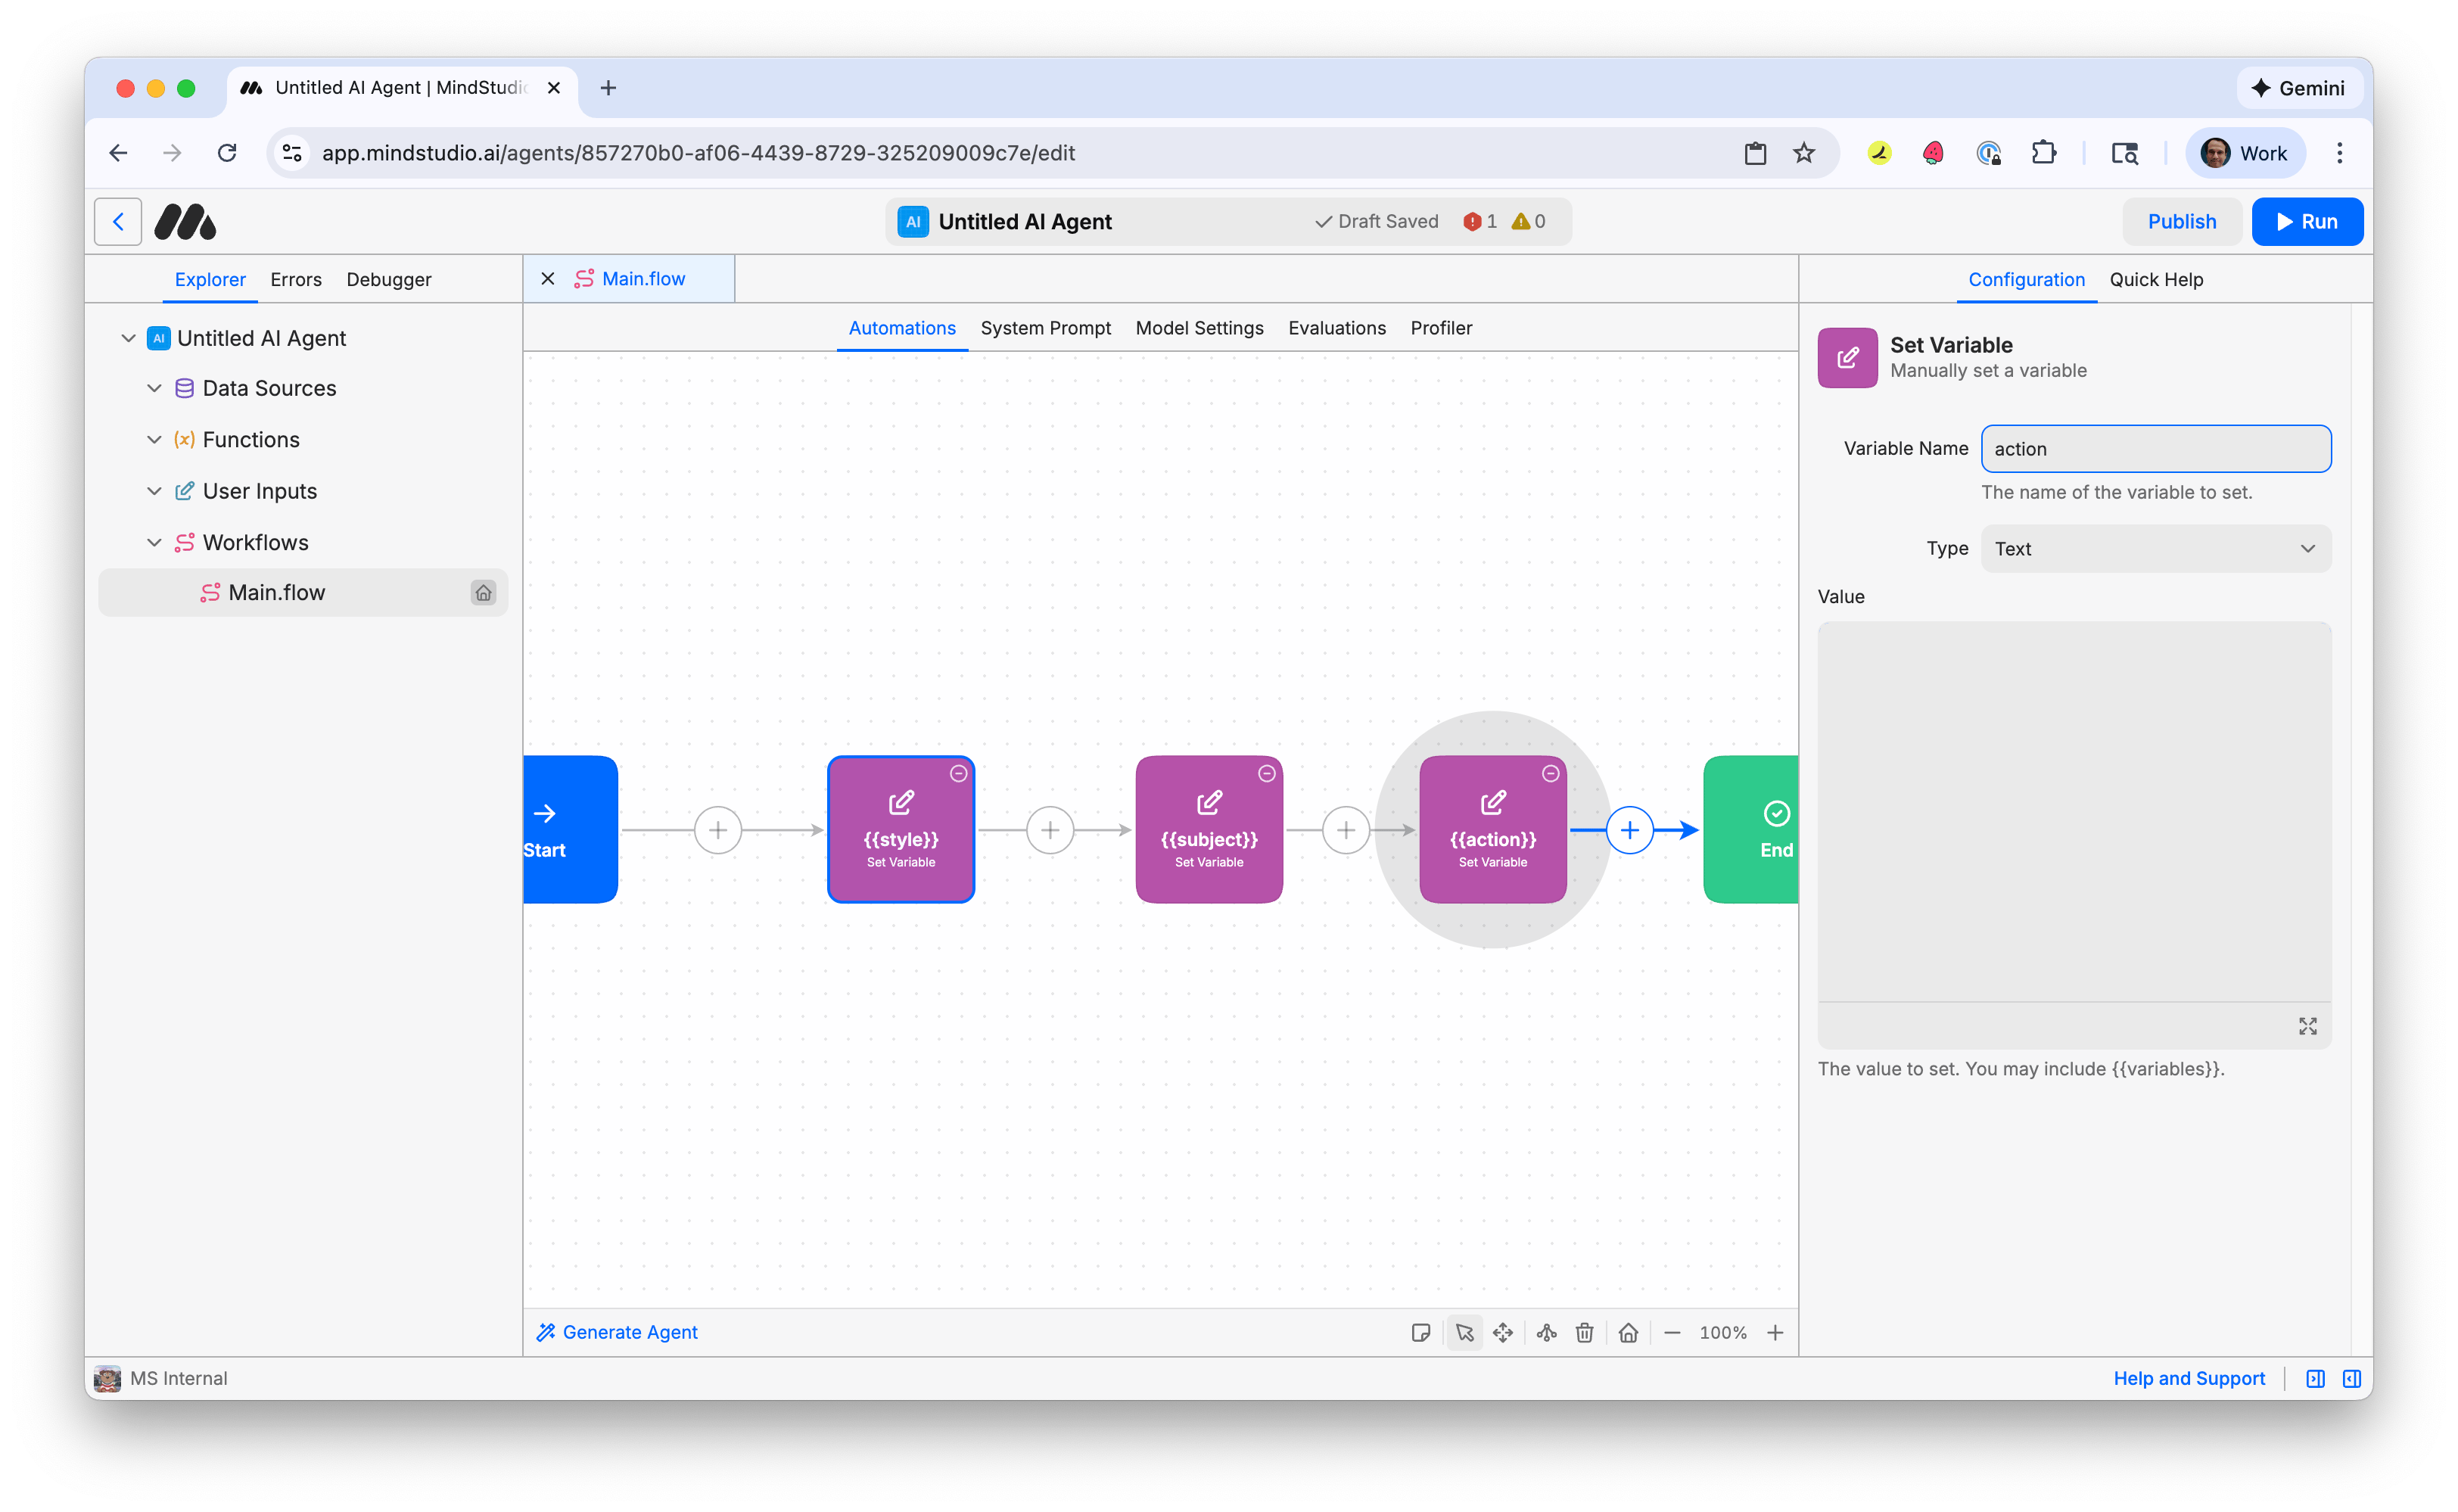
- Click the + button to add a new block and choose “Set Variable”.
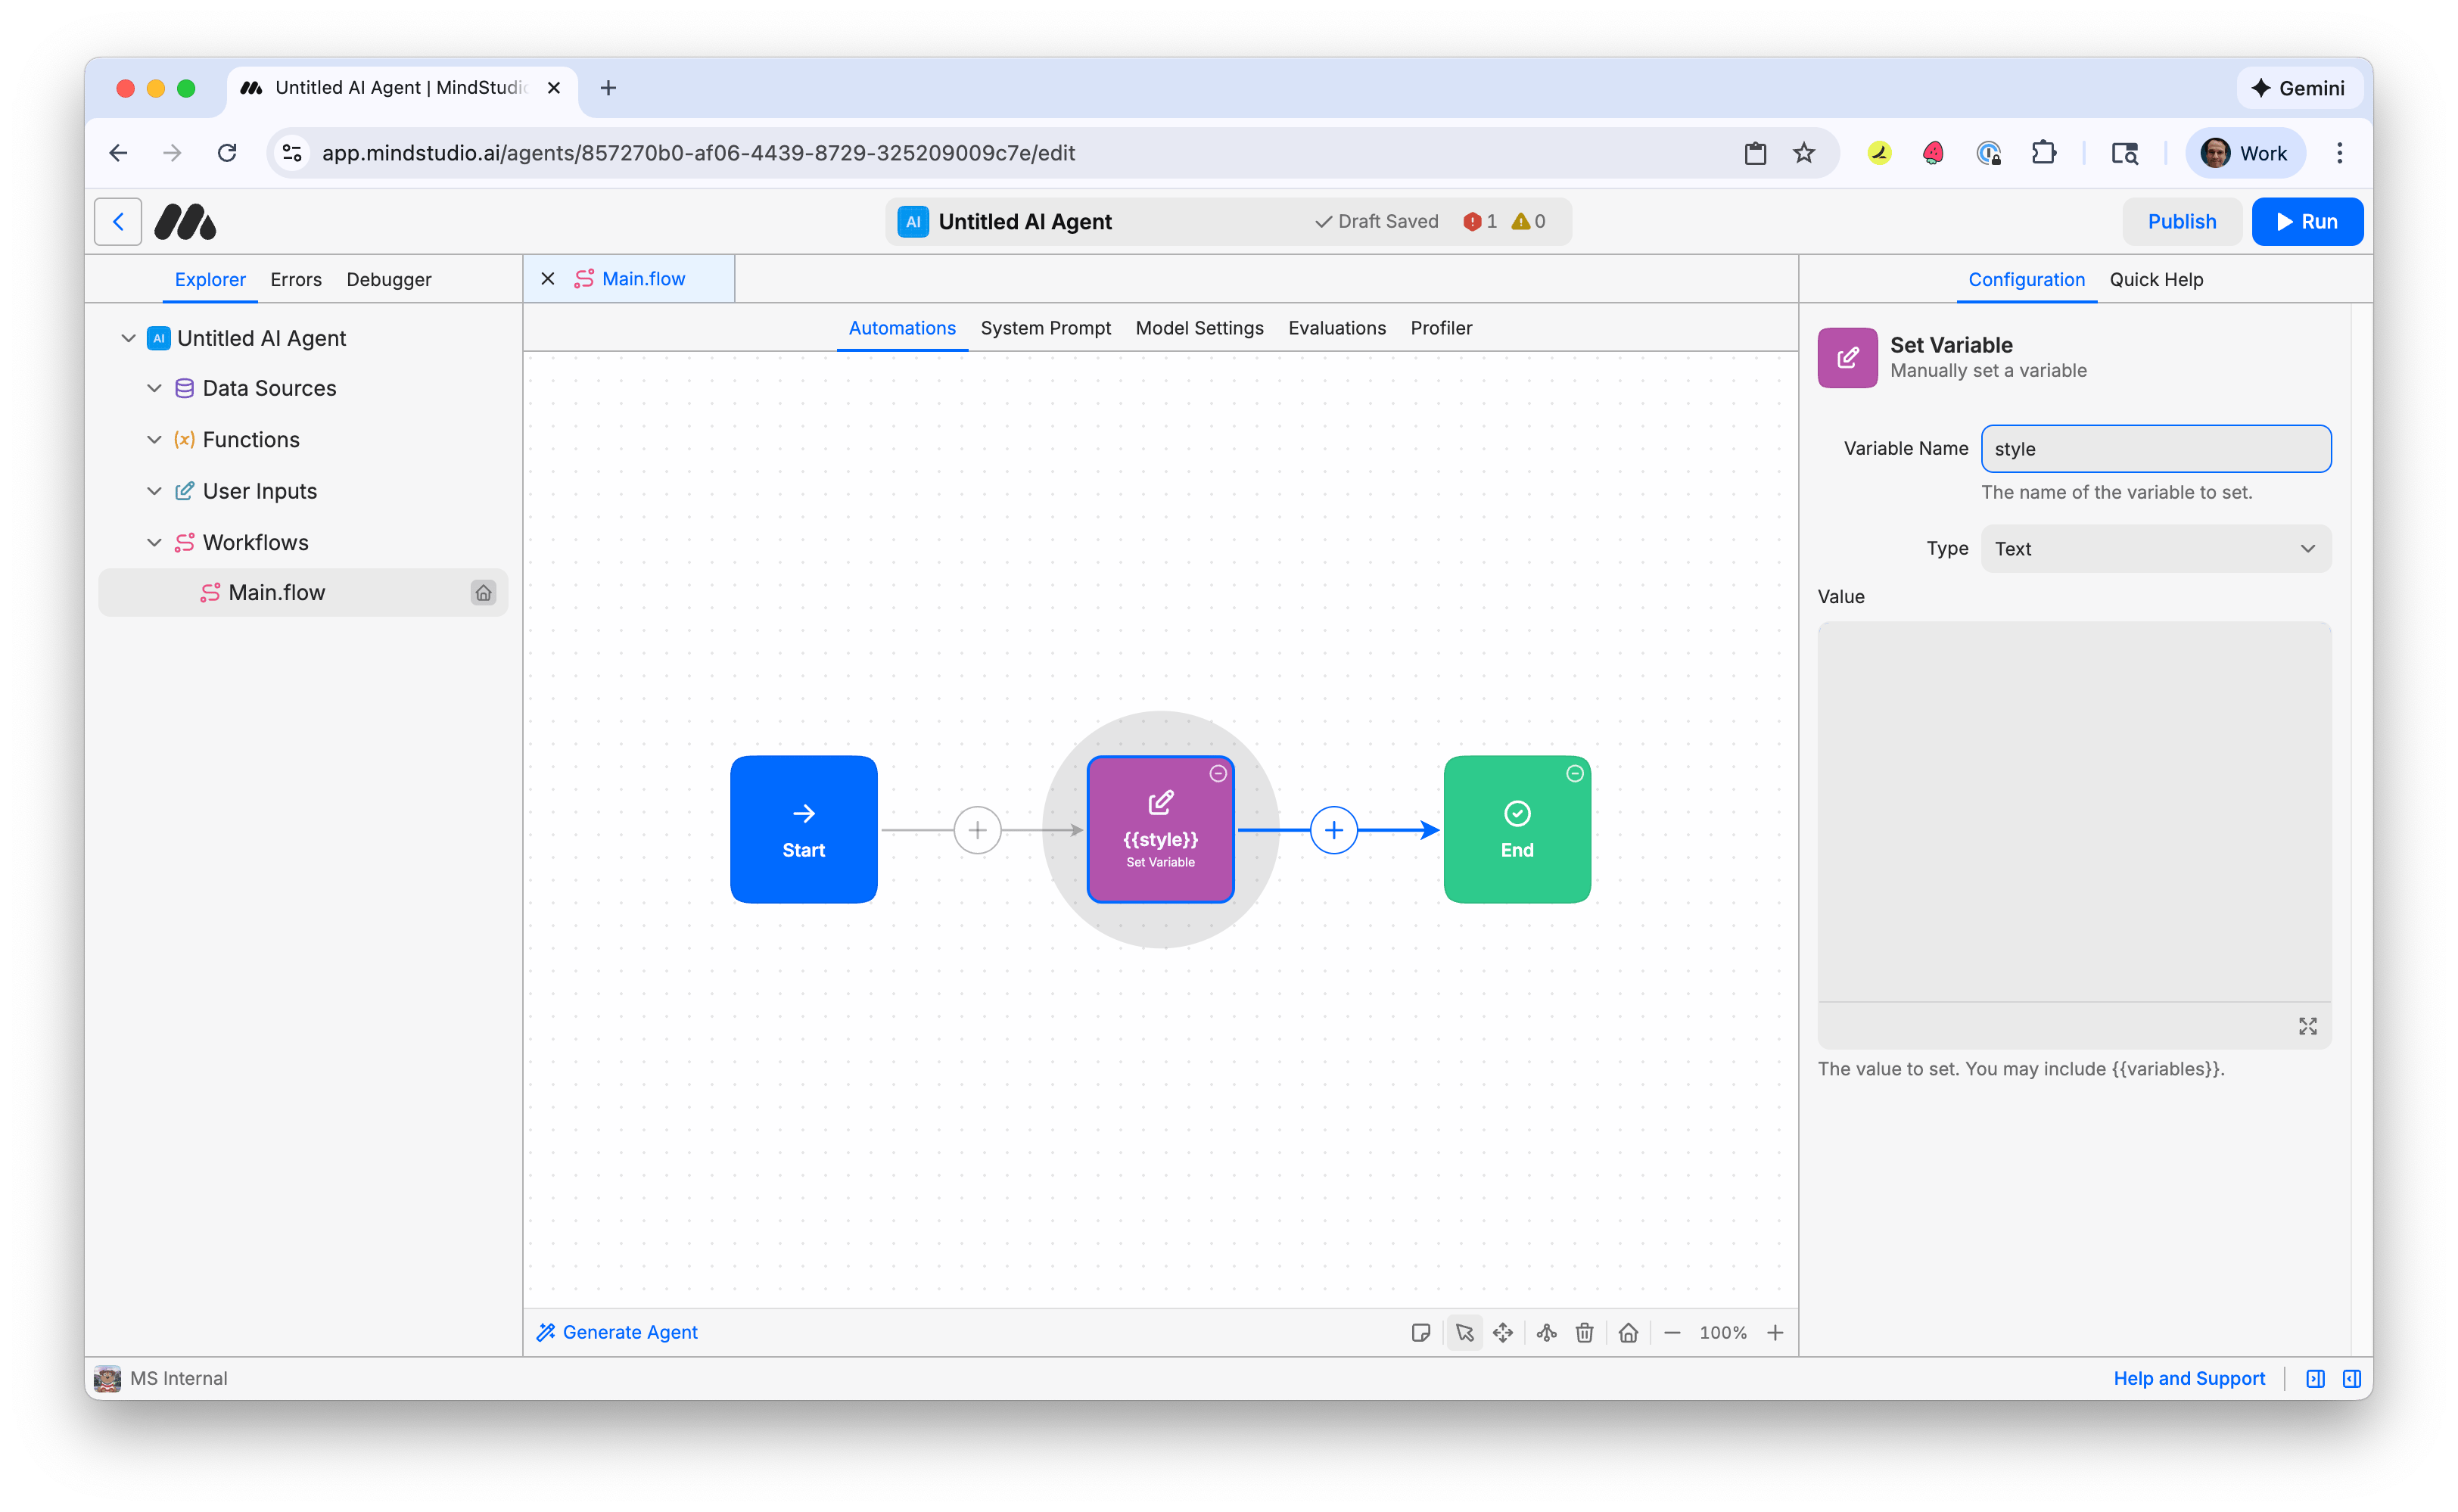
- Name the variable “style”. This will be the visual style for the first frame of the video.
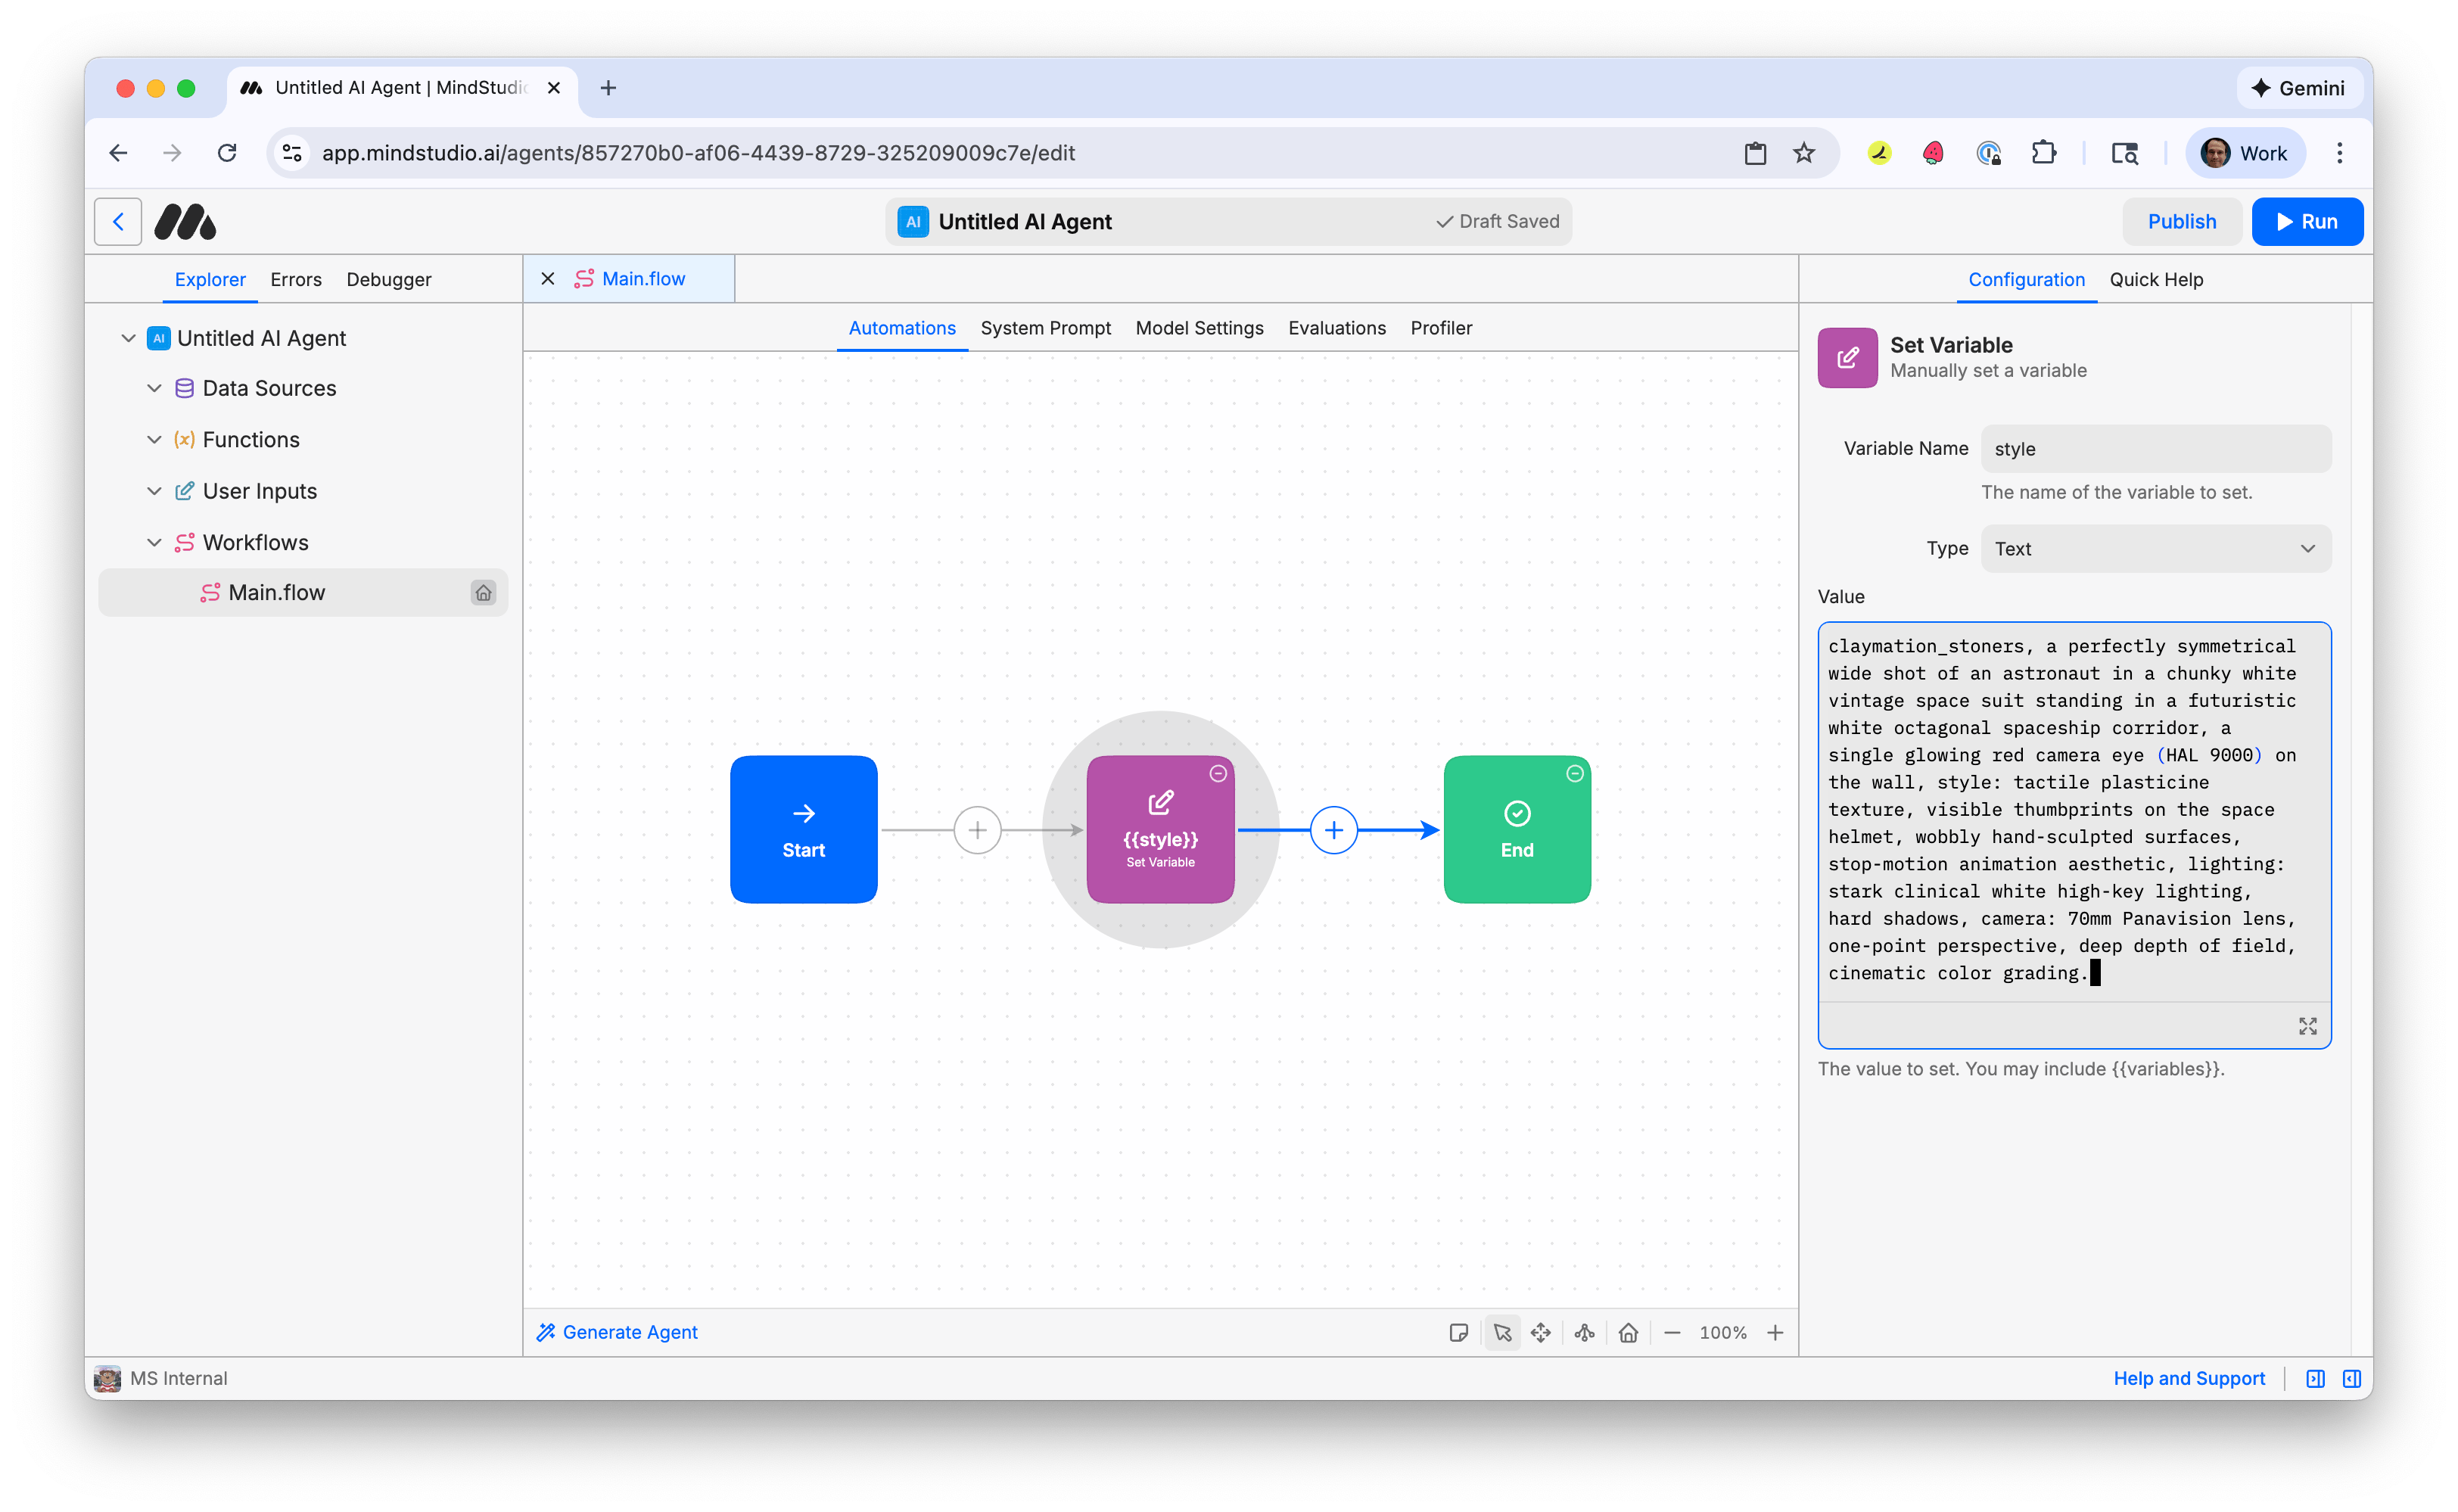
- Let’s generate a cool video style that blends claymation with the futurist style of the movie “2001: A Space Odyssey”. The beginning of the following prompt, “claymation_stoners”, triggers the LoRA we’ll use to generate the AI image. This AI image will be the first frame of the video to provide the video’s visual style. Copy and paste the following prompt:
Everyone else built a construction worker.
We built the contractor.
One file at a time.
UI, API, database, deploy.
“claymation_stoners, a perfectly symmetrical wide shot of an astronaut in a chunky white vintage space suit standing in a futuristic white octagonal spaceship corridor, a single glowing red camera eye (HAL 9000) on the wall, style: tactile plasticine texture, visible thumbprints on the space helmet, wobbly hand-sculpted surfaces, stop-motion animation aesthetic, lighting: stark clinical white high-key lighting, hard shadows, camera: 70mm Panavision lens, one-point perspective, deep depth of field, cinematic color grading.”
- Click the + again and add another “Set Variable” block.
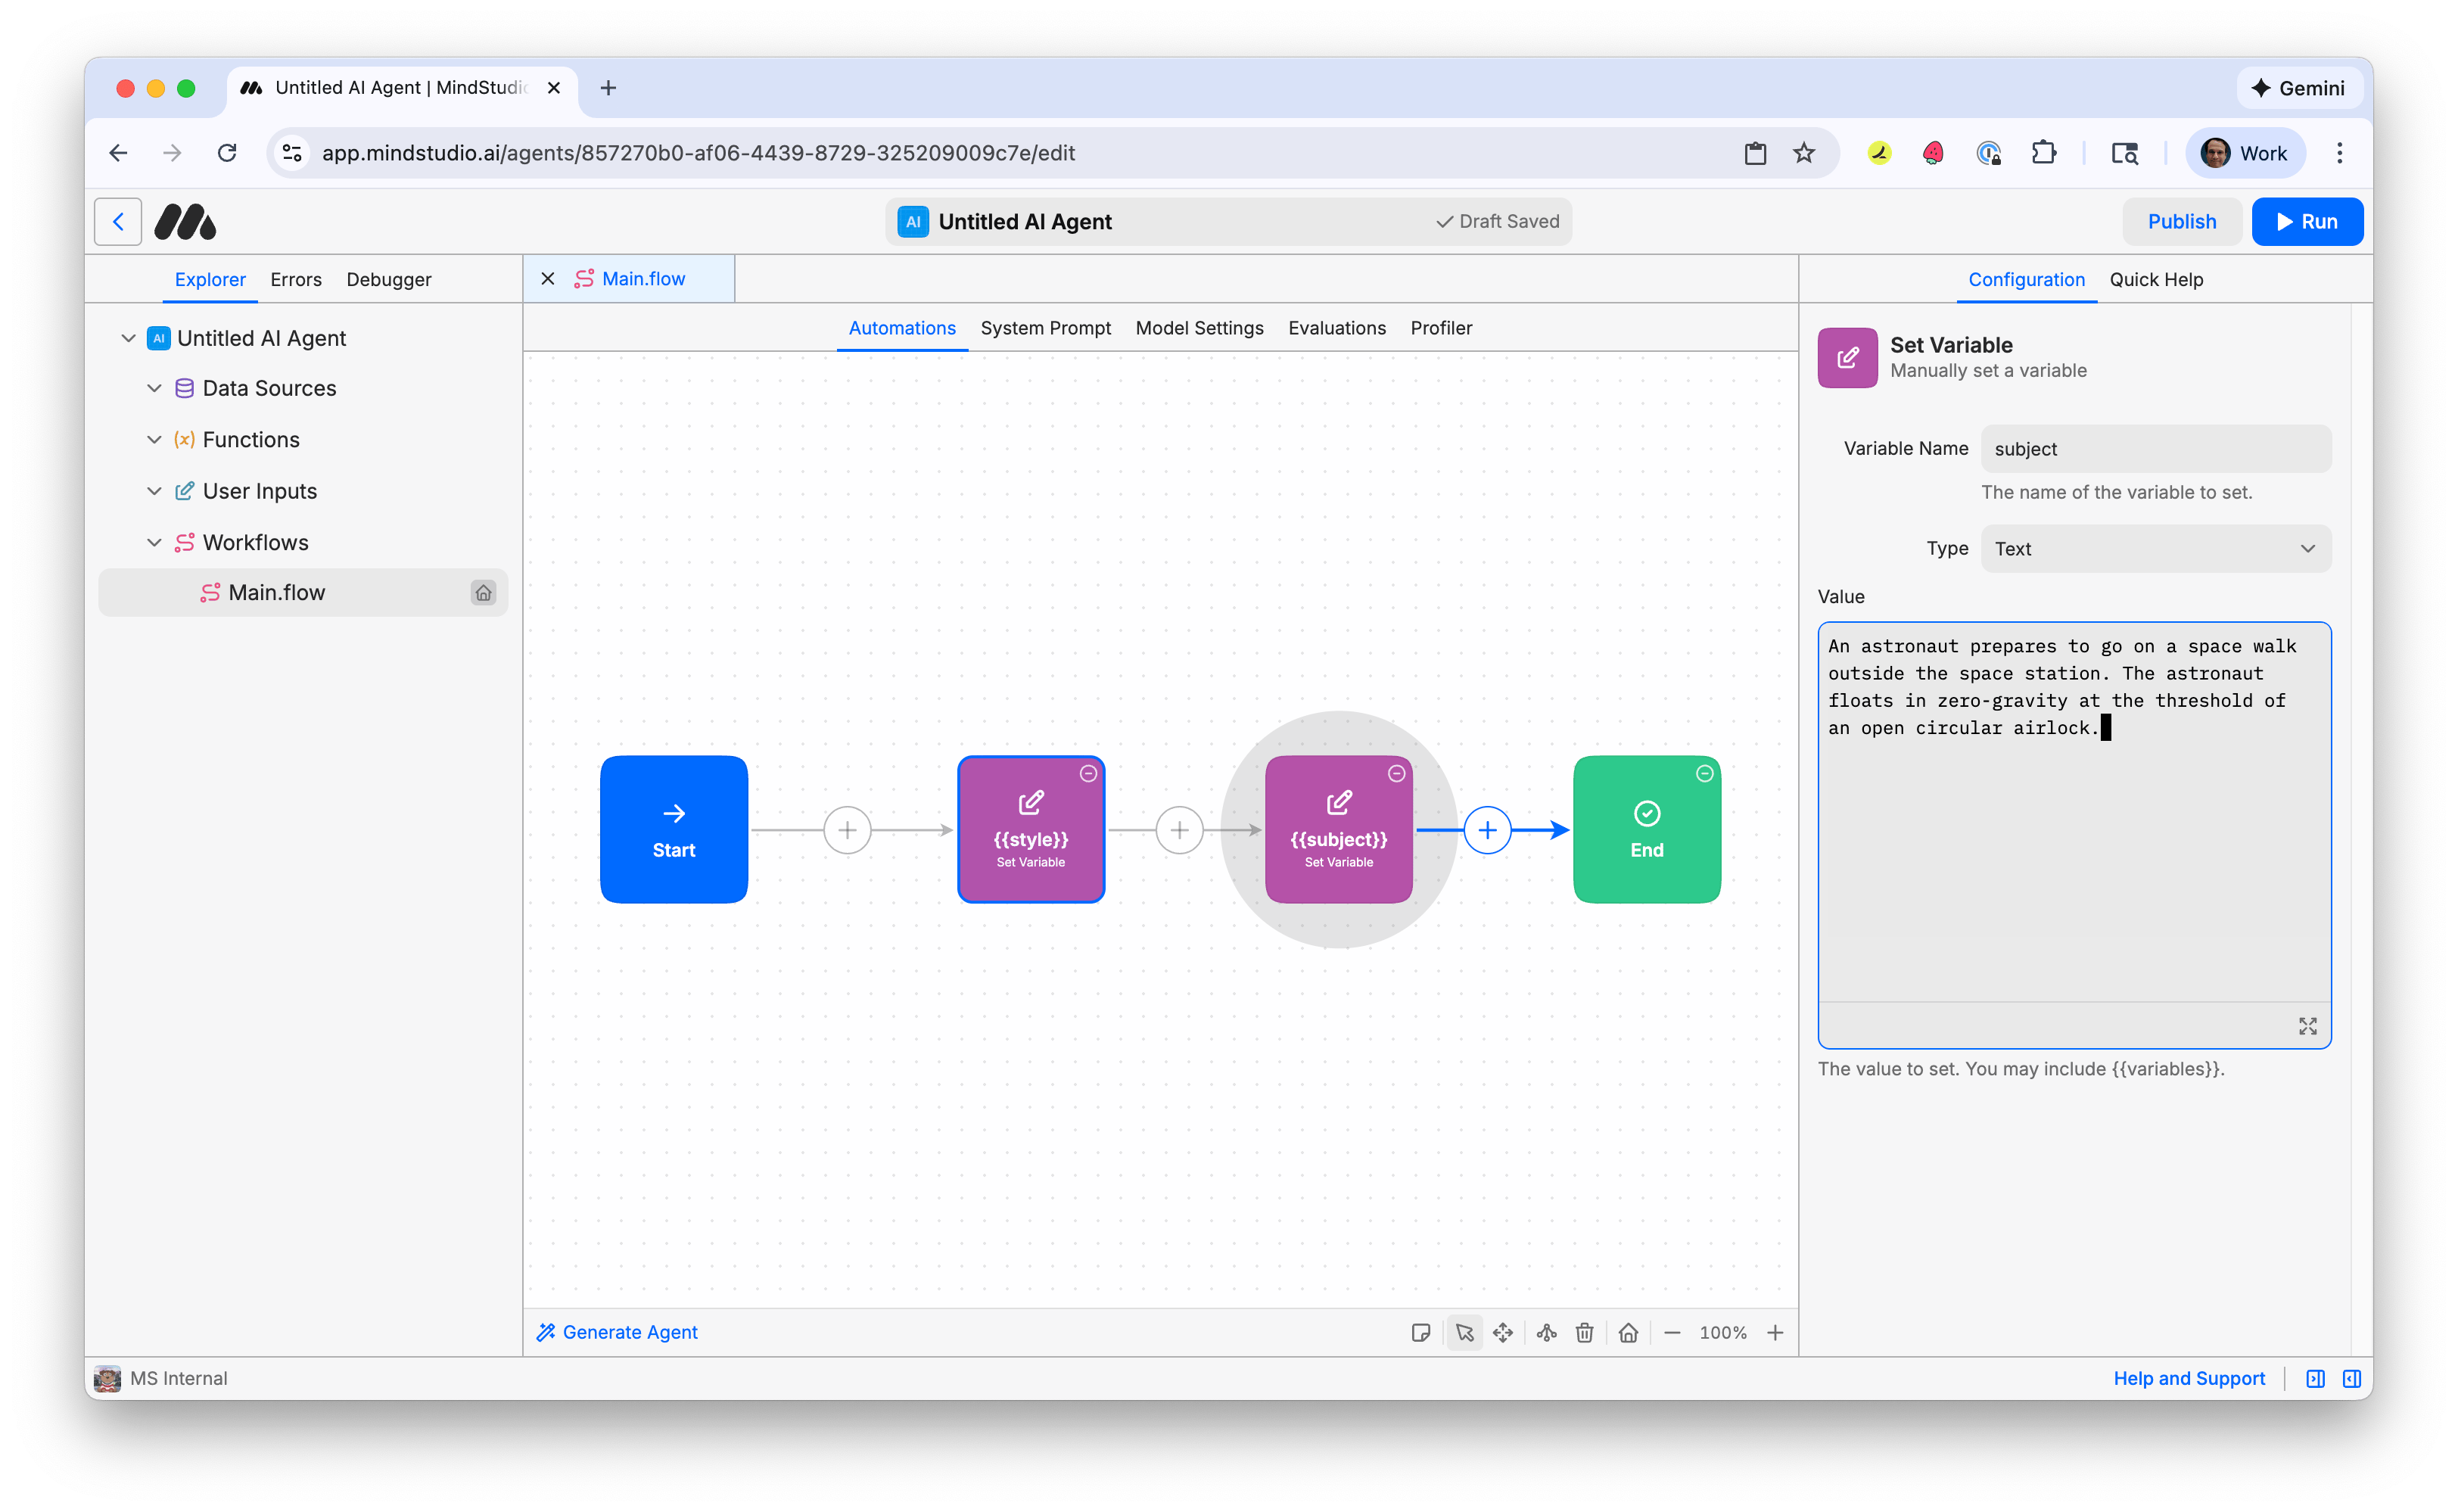
- Name the variable “subject”. This will be the subject of the video.
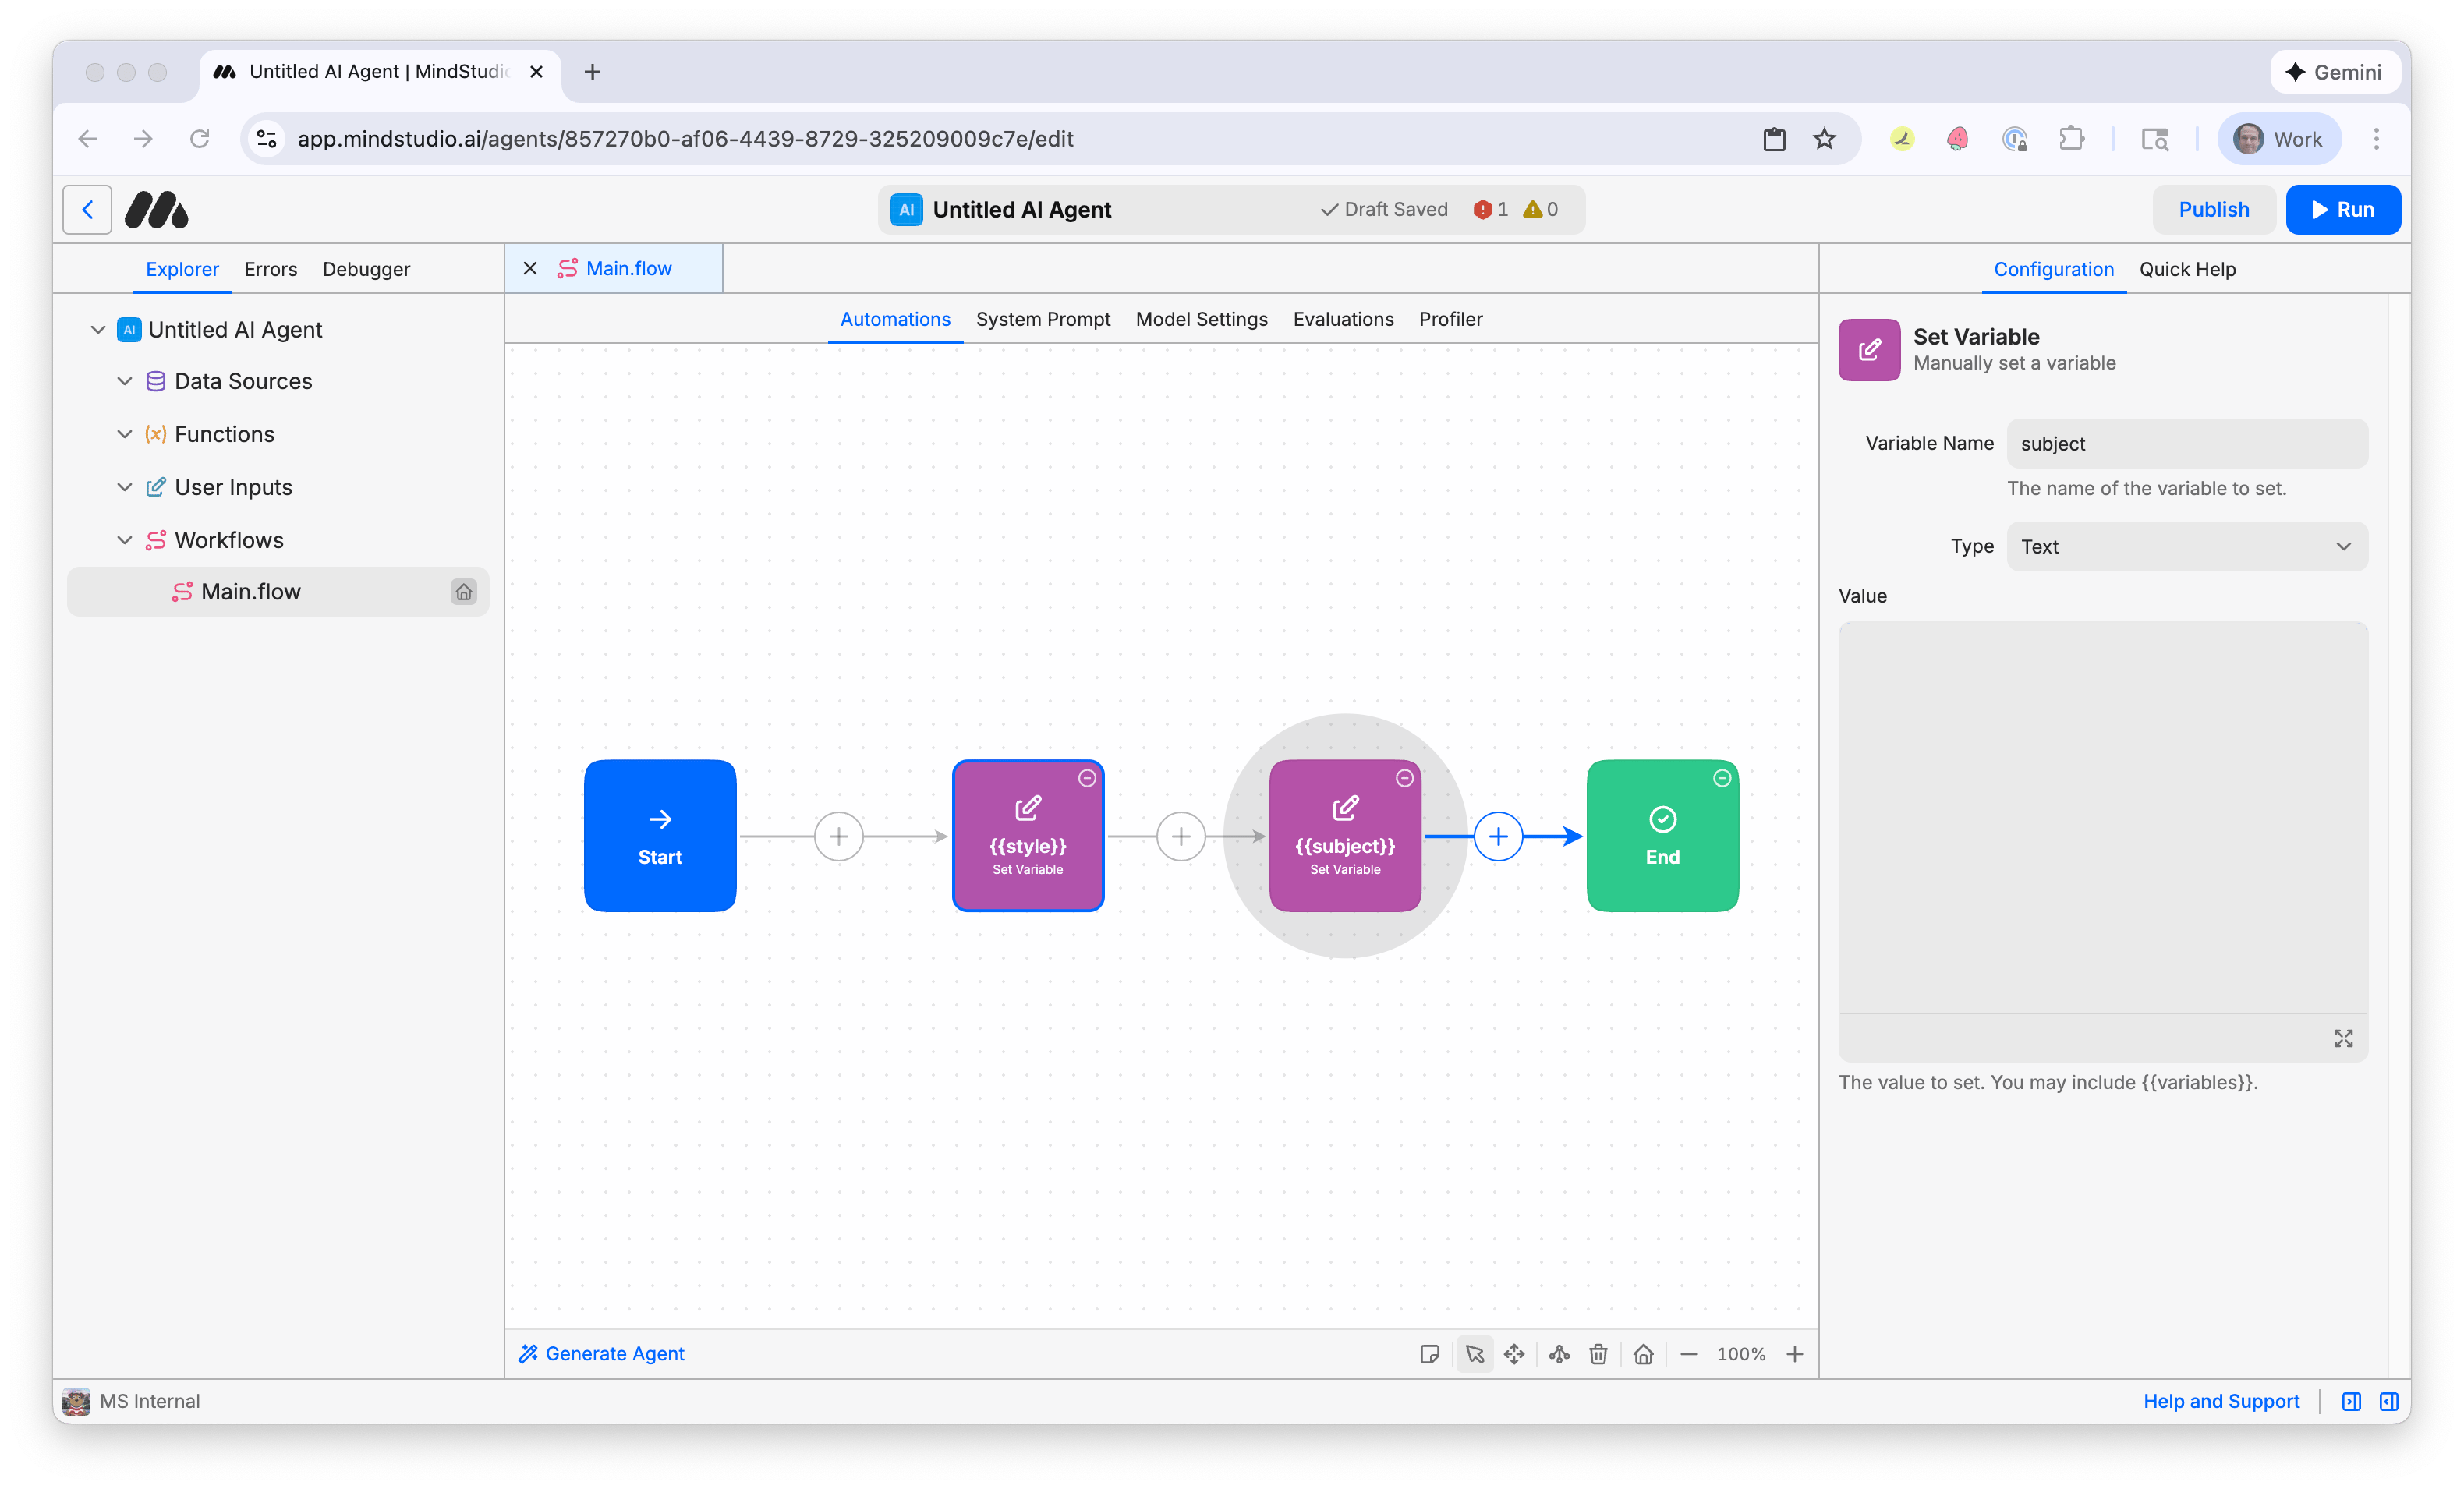
- Copy and paste the following prompt (or one of your choosing):
“An astronaut prepares to go on a space walk outside the space station. The astronaut floats in zero-gravity at the threshold of an open circular airlock.”
- Click the + again and add a third “Set Variable” block.
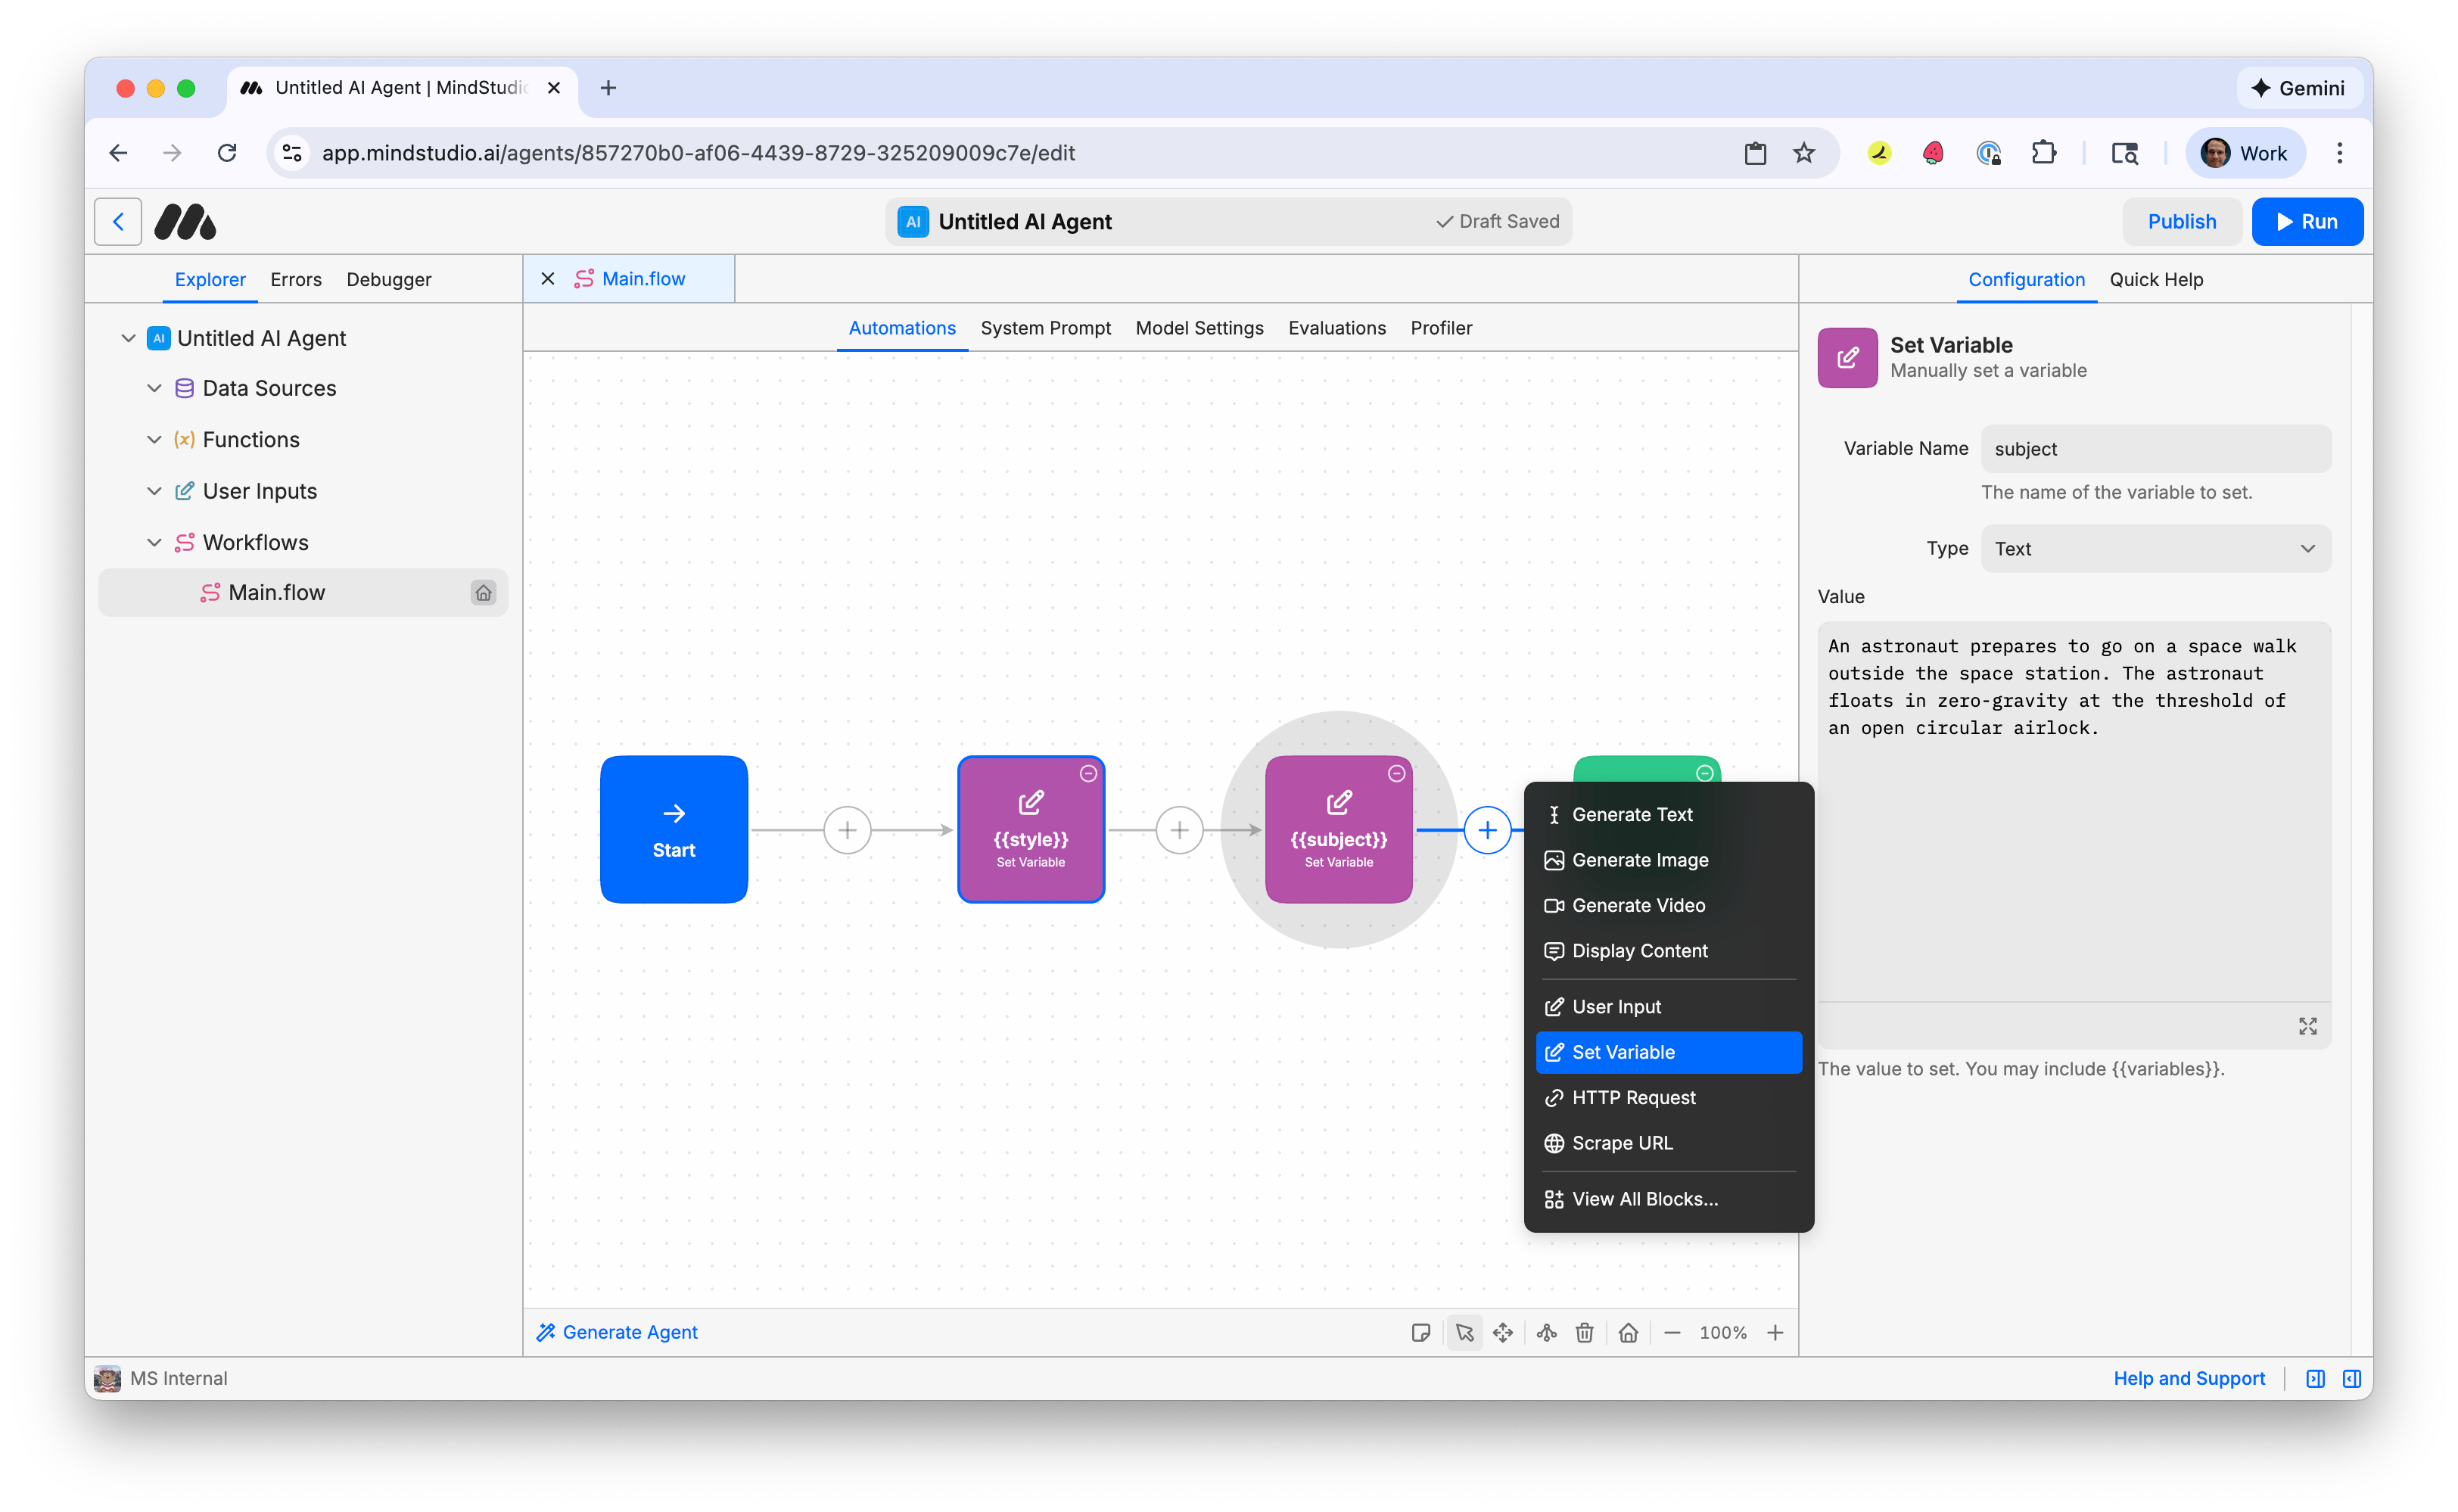
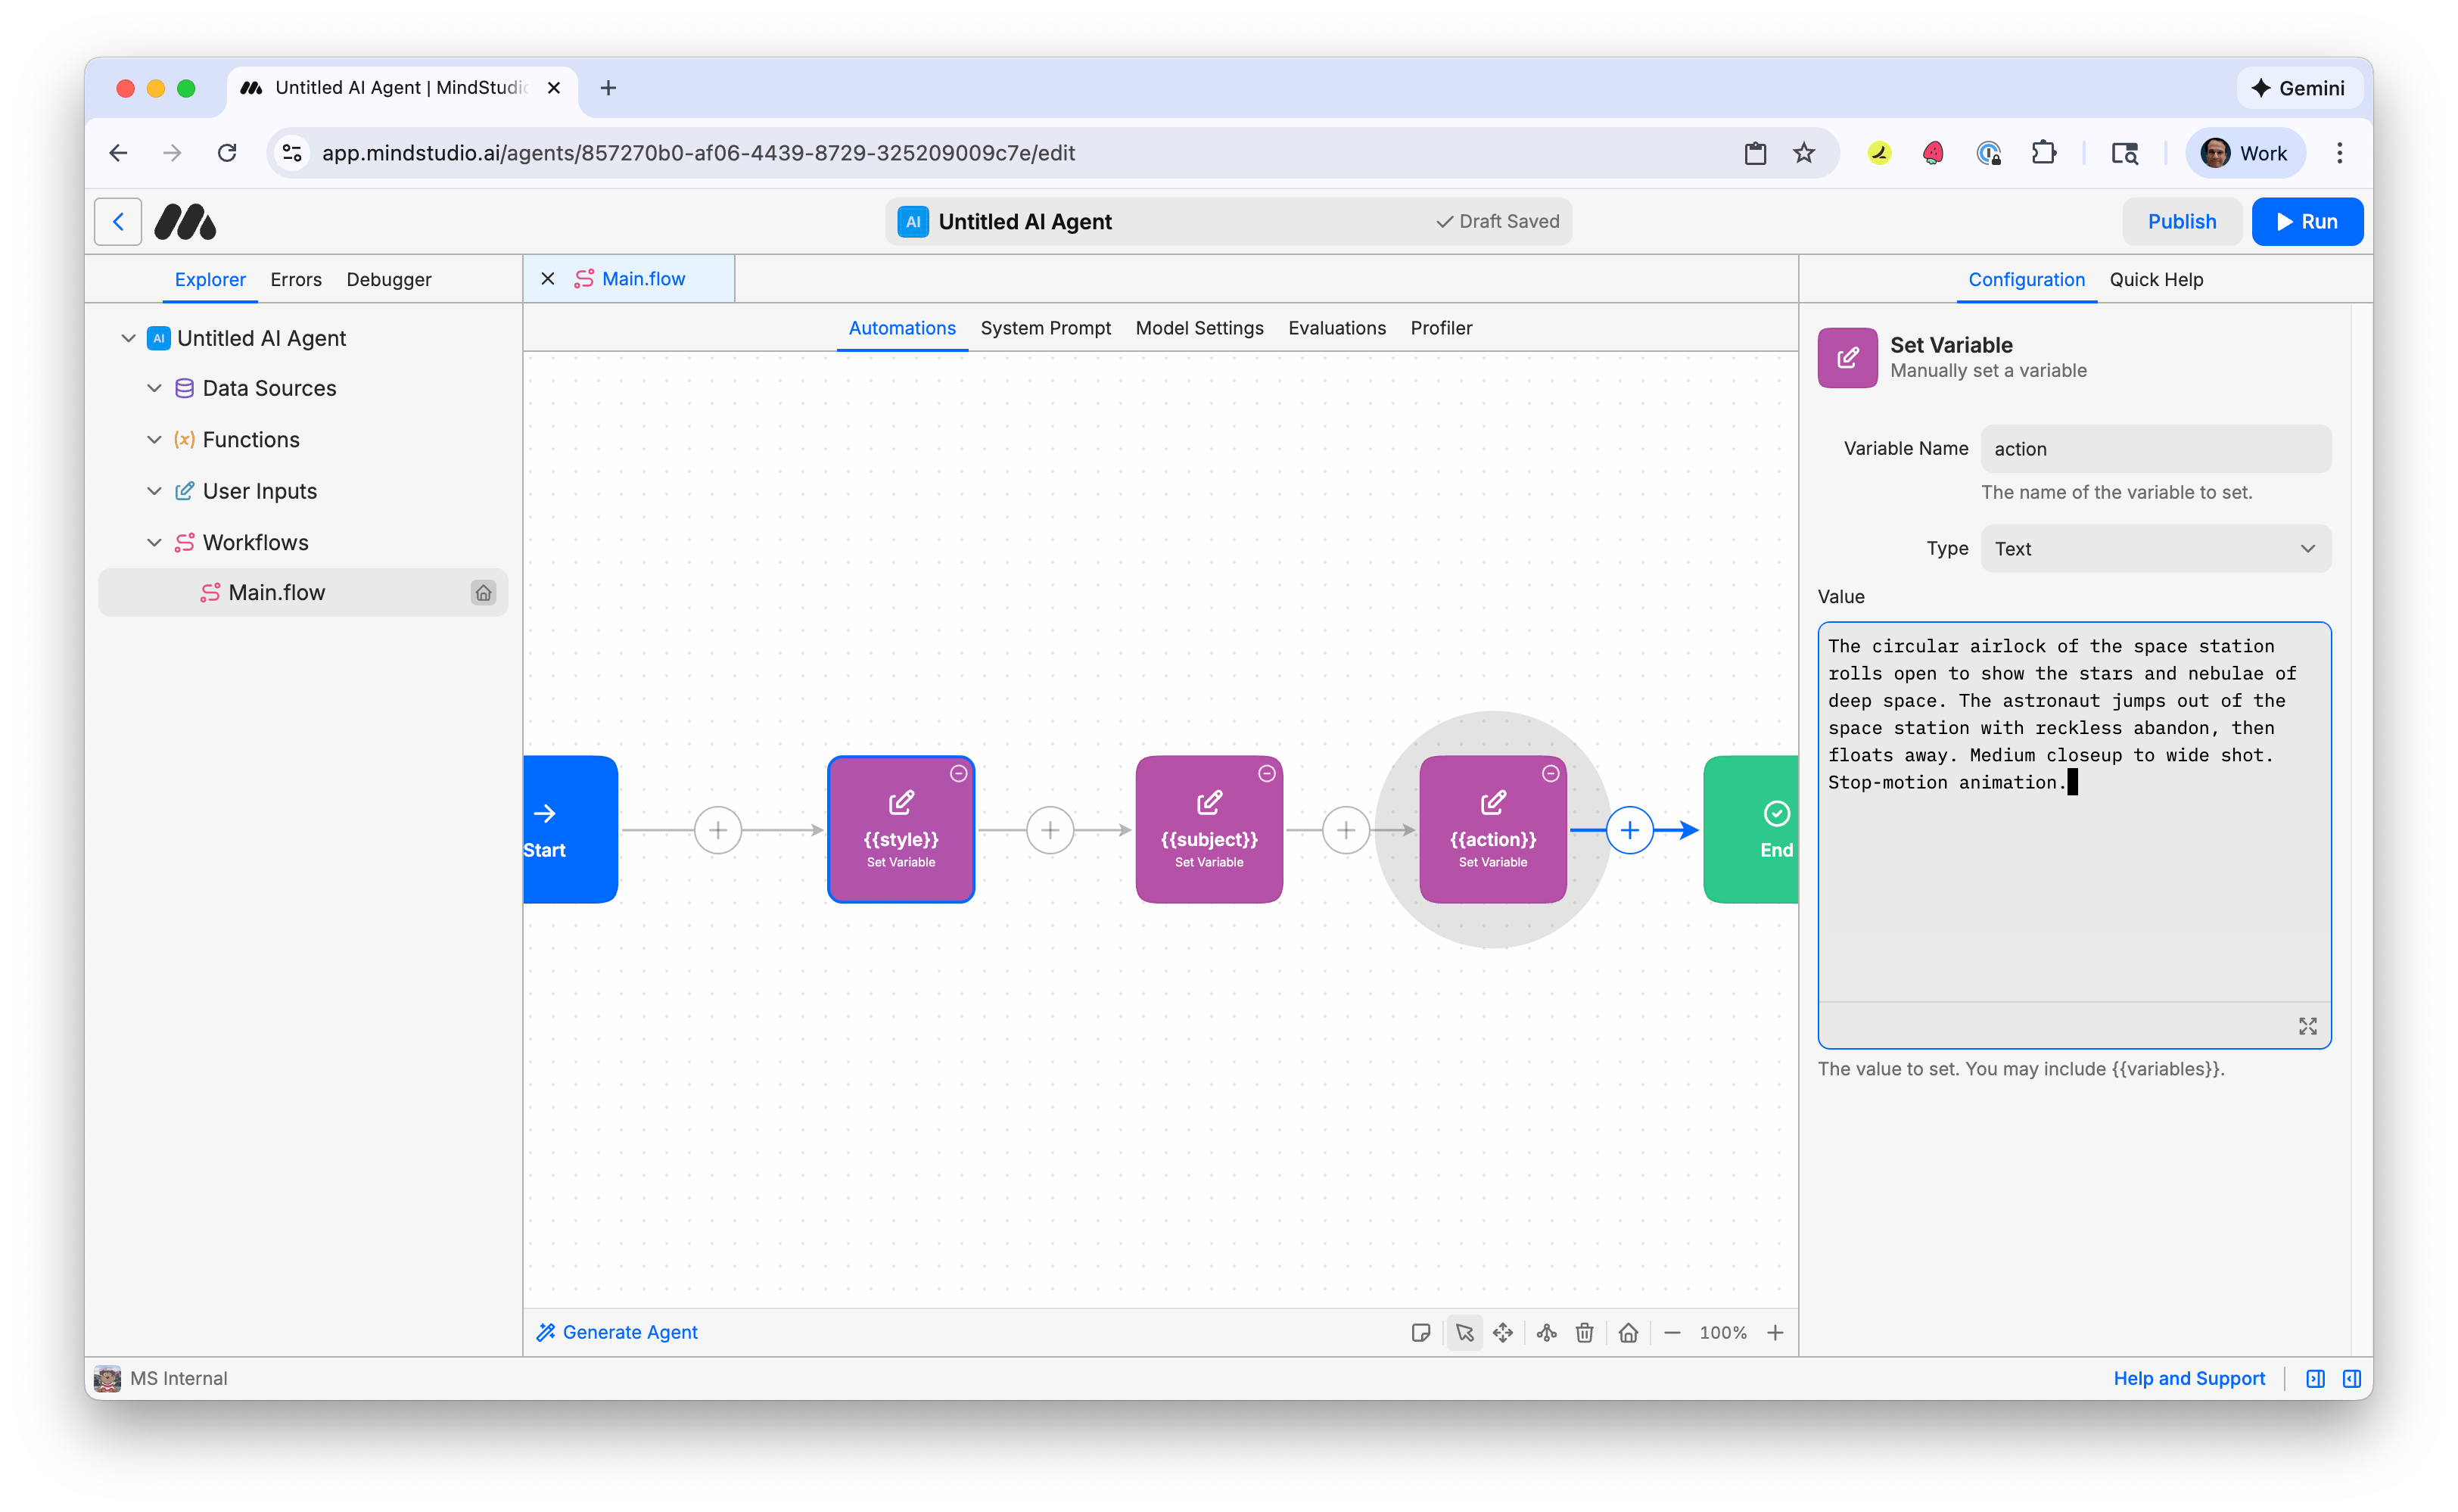
- Name the variable “action”. This will be the action in the video.
- Copy and paste the following prompt (or a prompt of your choosing):
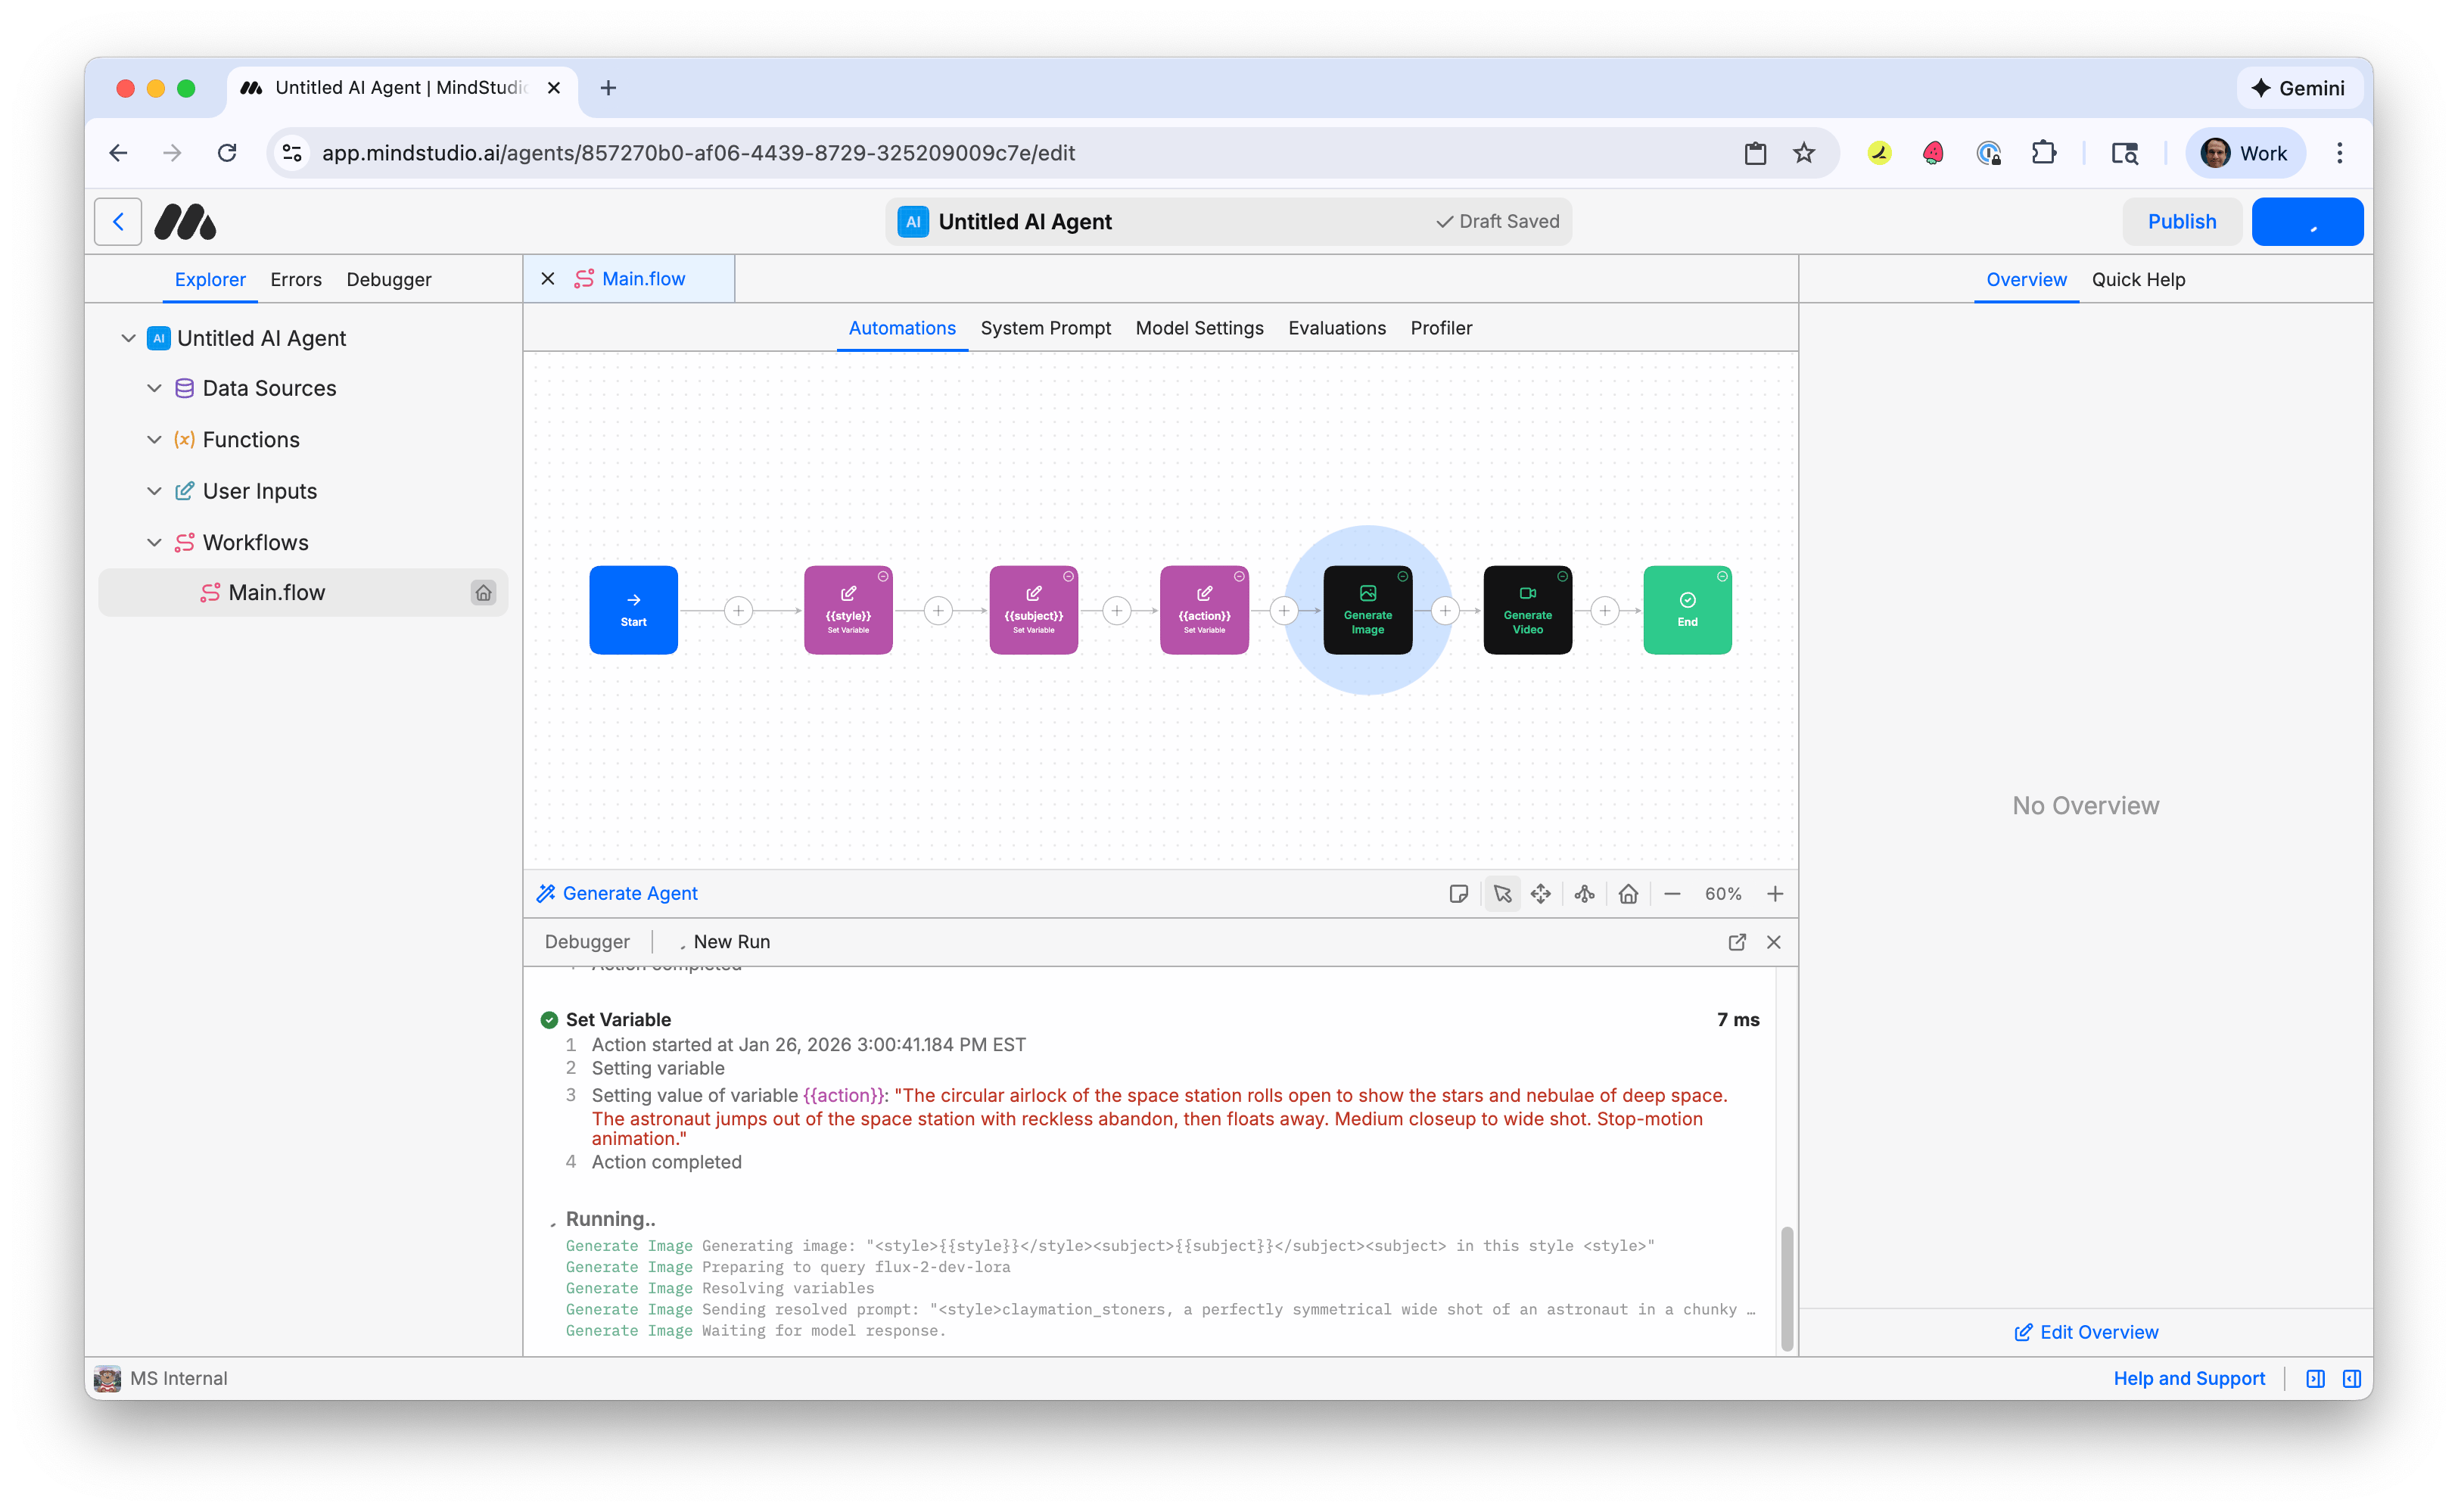
“The circular airlock of the space station rolls open to show the stars and nebulae of deep space. The astronaut jumps out of the space station with reckless abandon, then floats away. Medium closeup to wide shot. Stop-motion animation.”
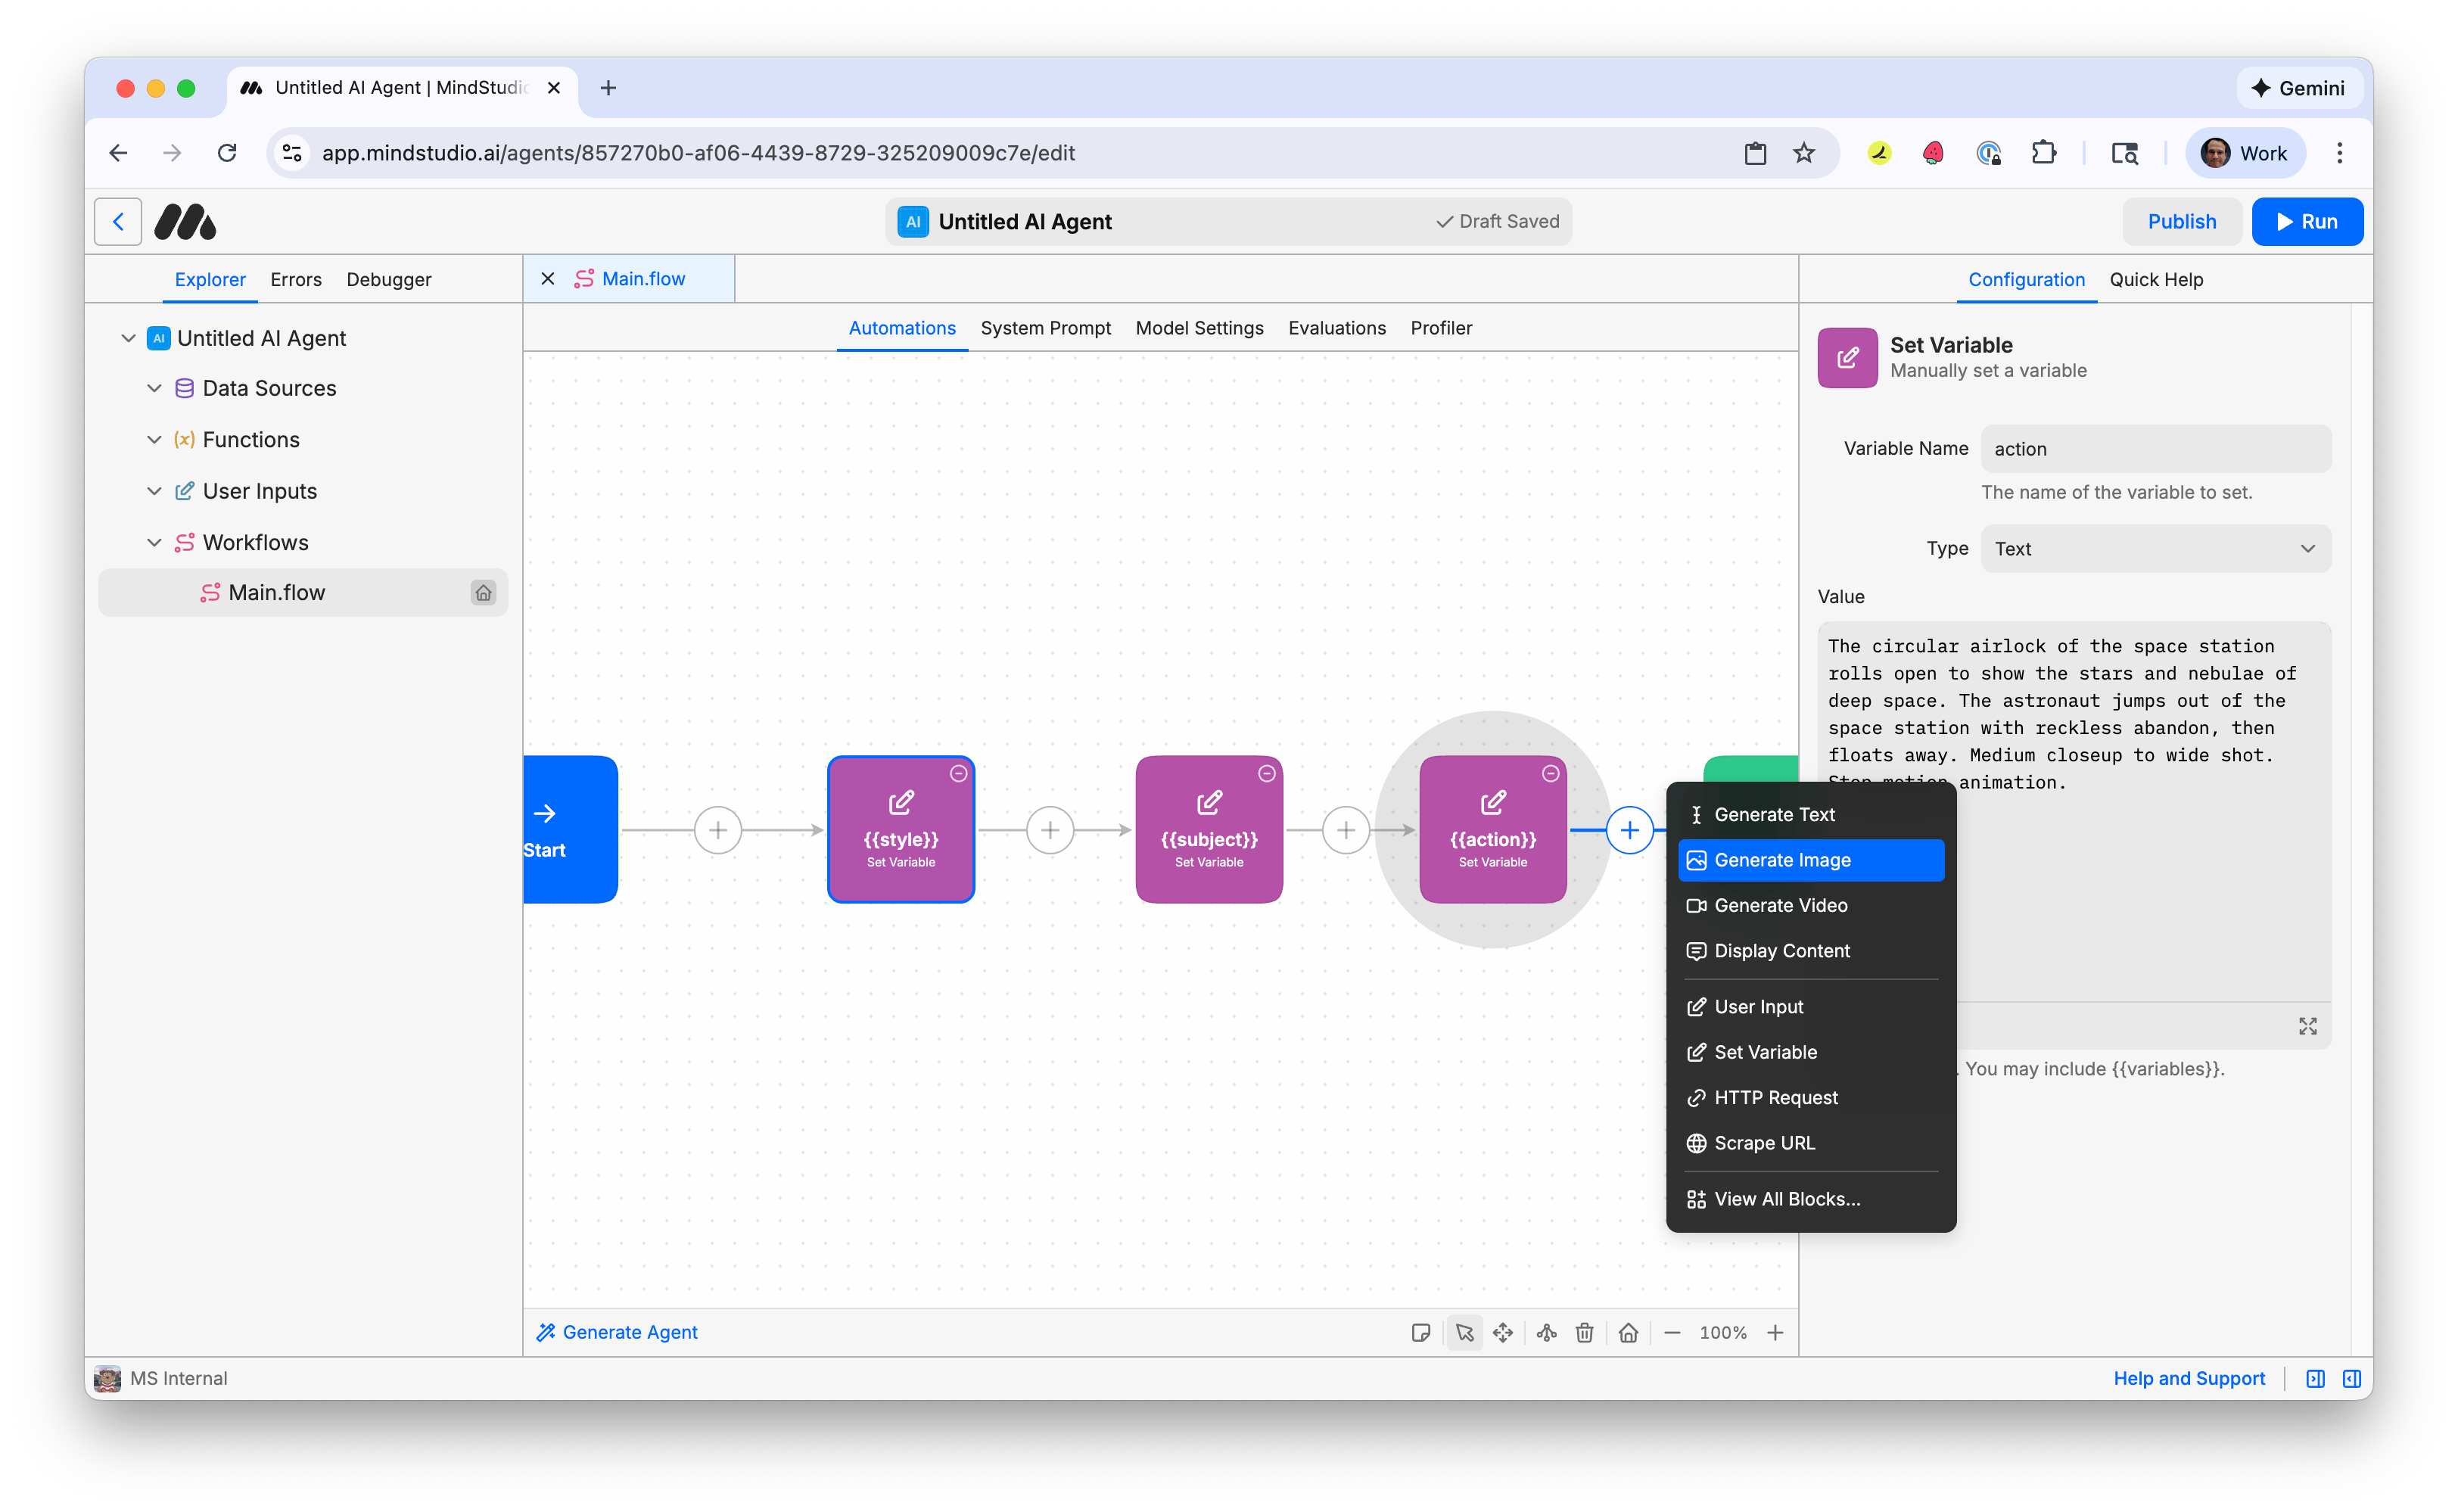
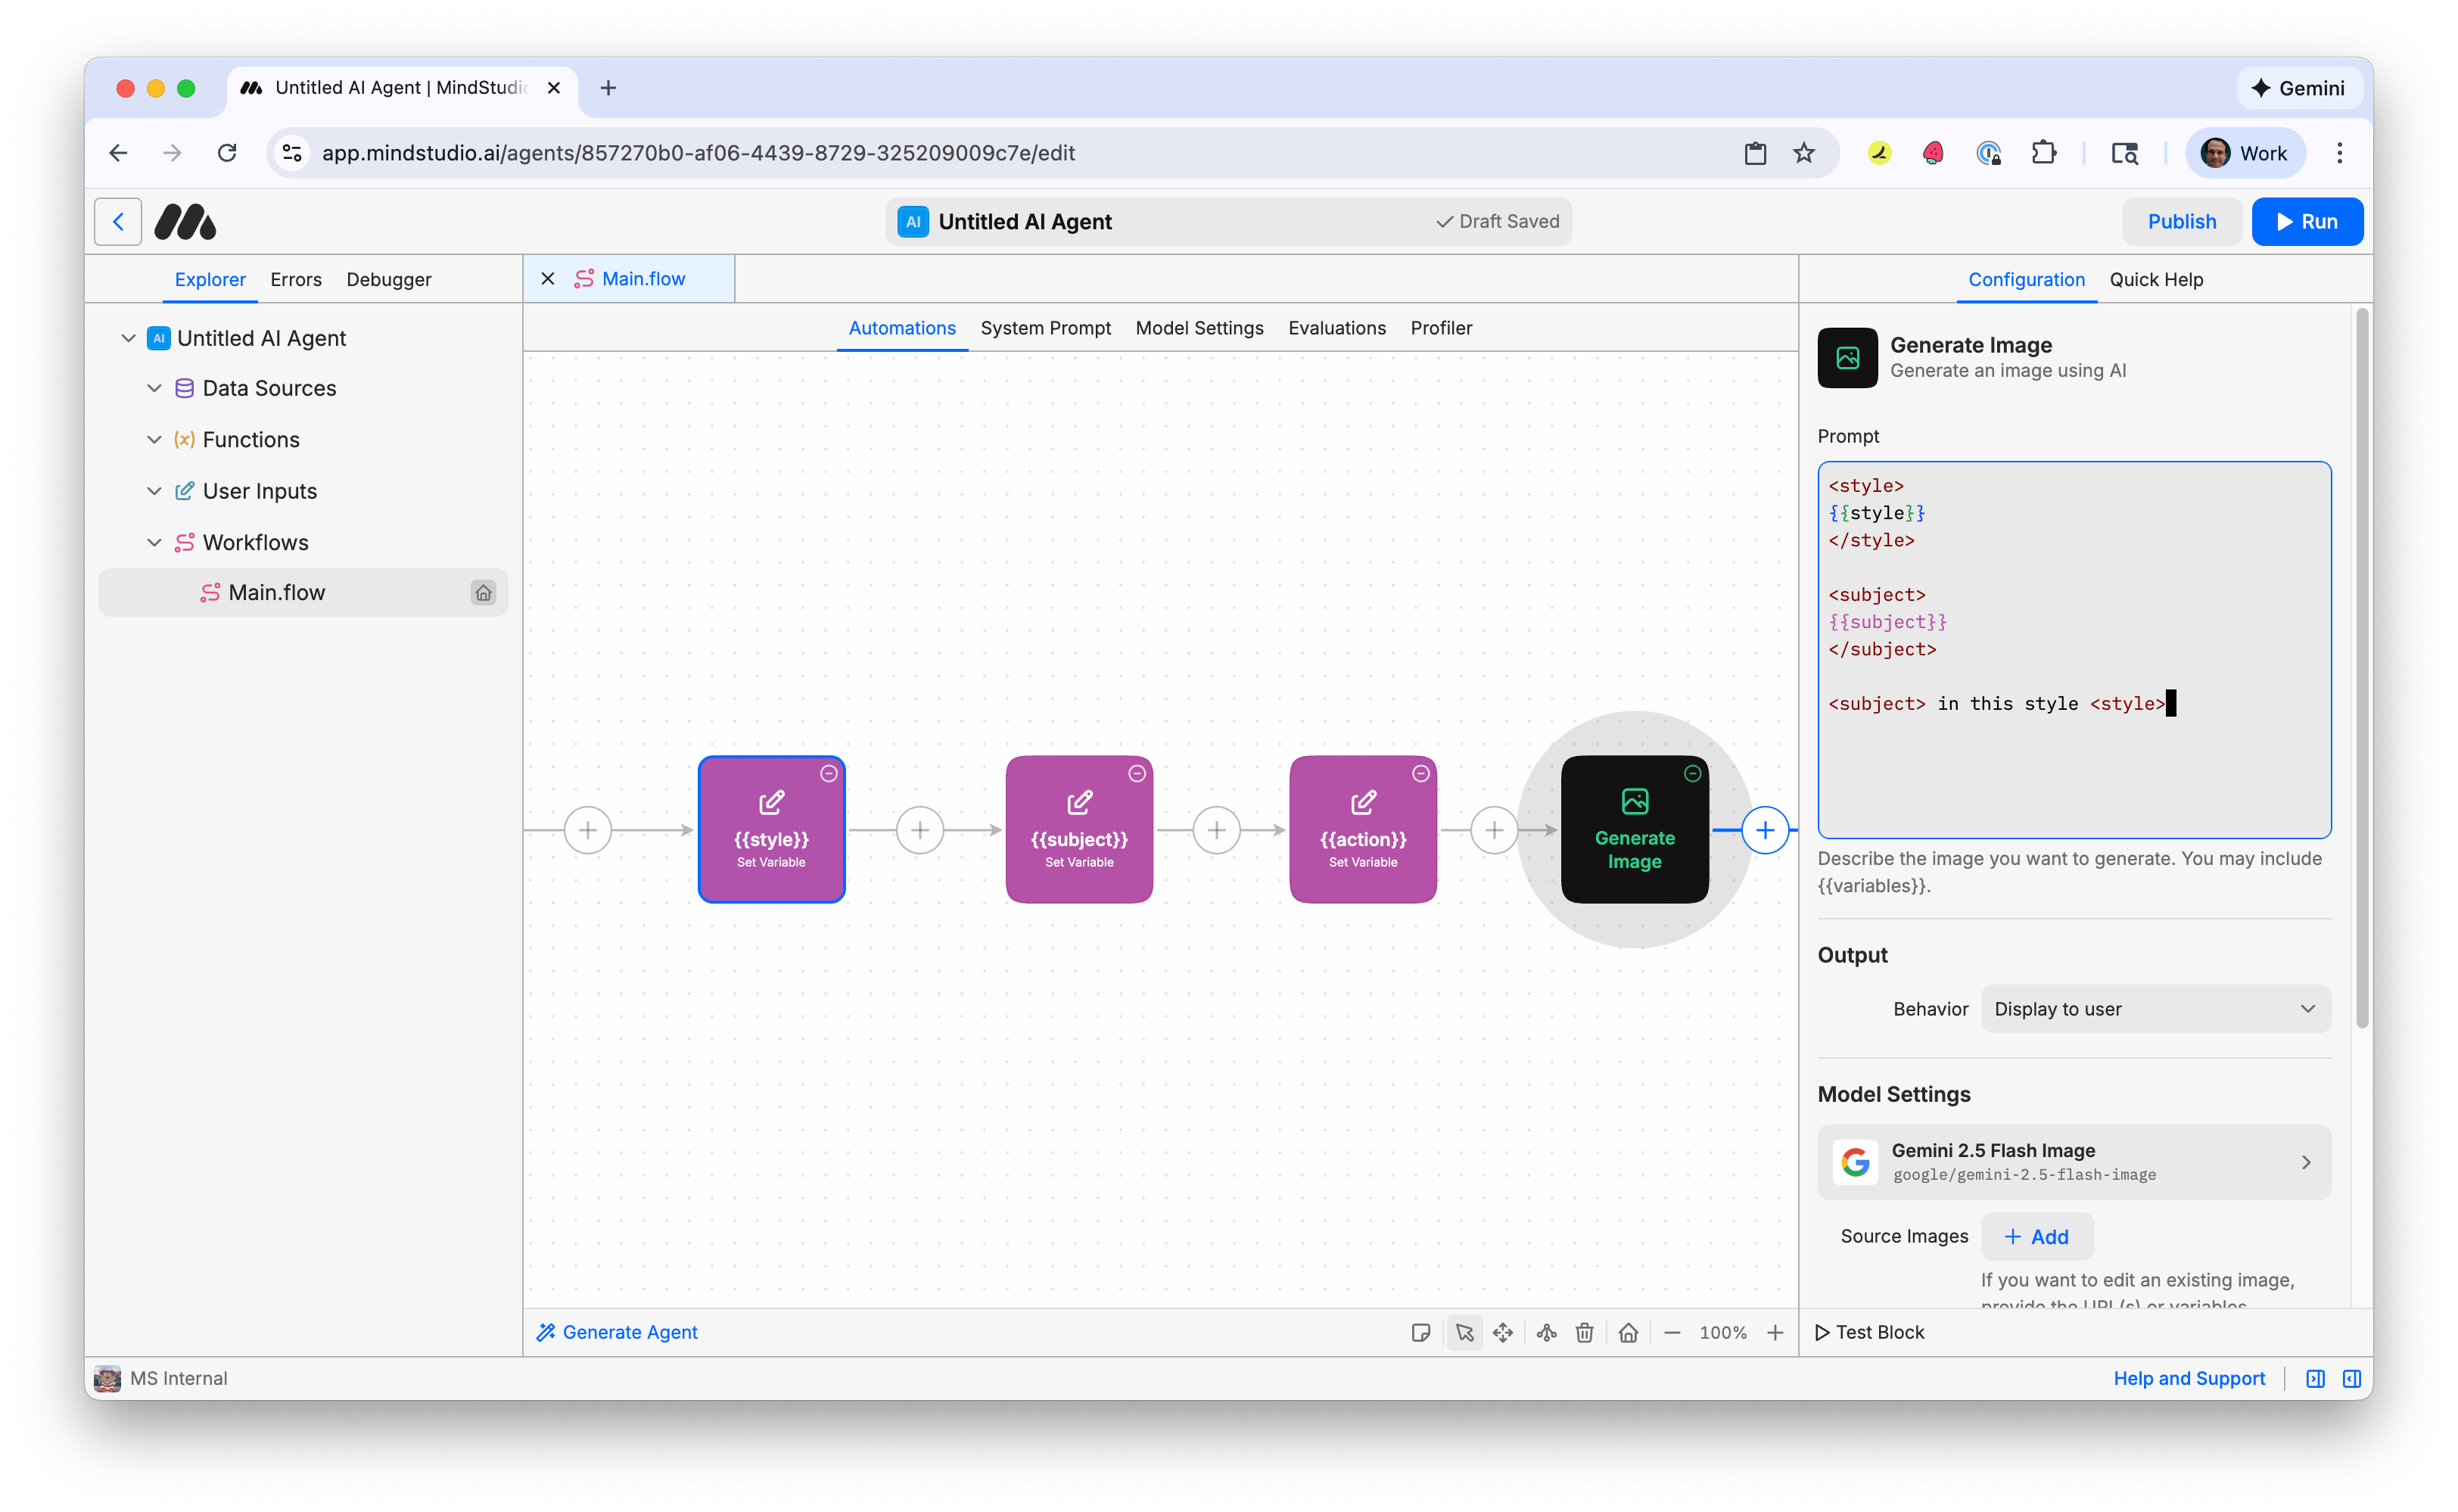
- Click the + again and add a “Generate Image” block.
- Add the following prompt. The XML-style brackets surrounding the variable names in double sets of curly braces separate “the instruction” from “the variable values” that we specified. We then reference the XML bracket in the instruction at the end of the prompt. Doing this is a best practice for prompting an AI model in general.
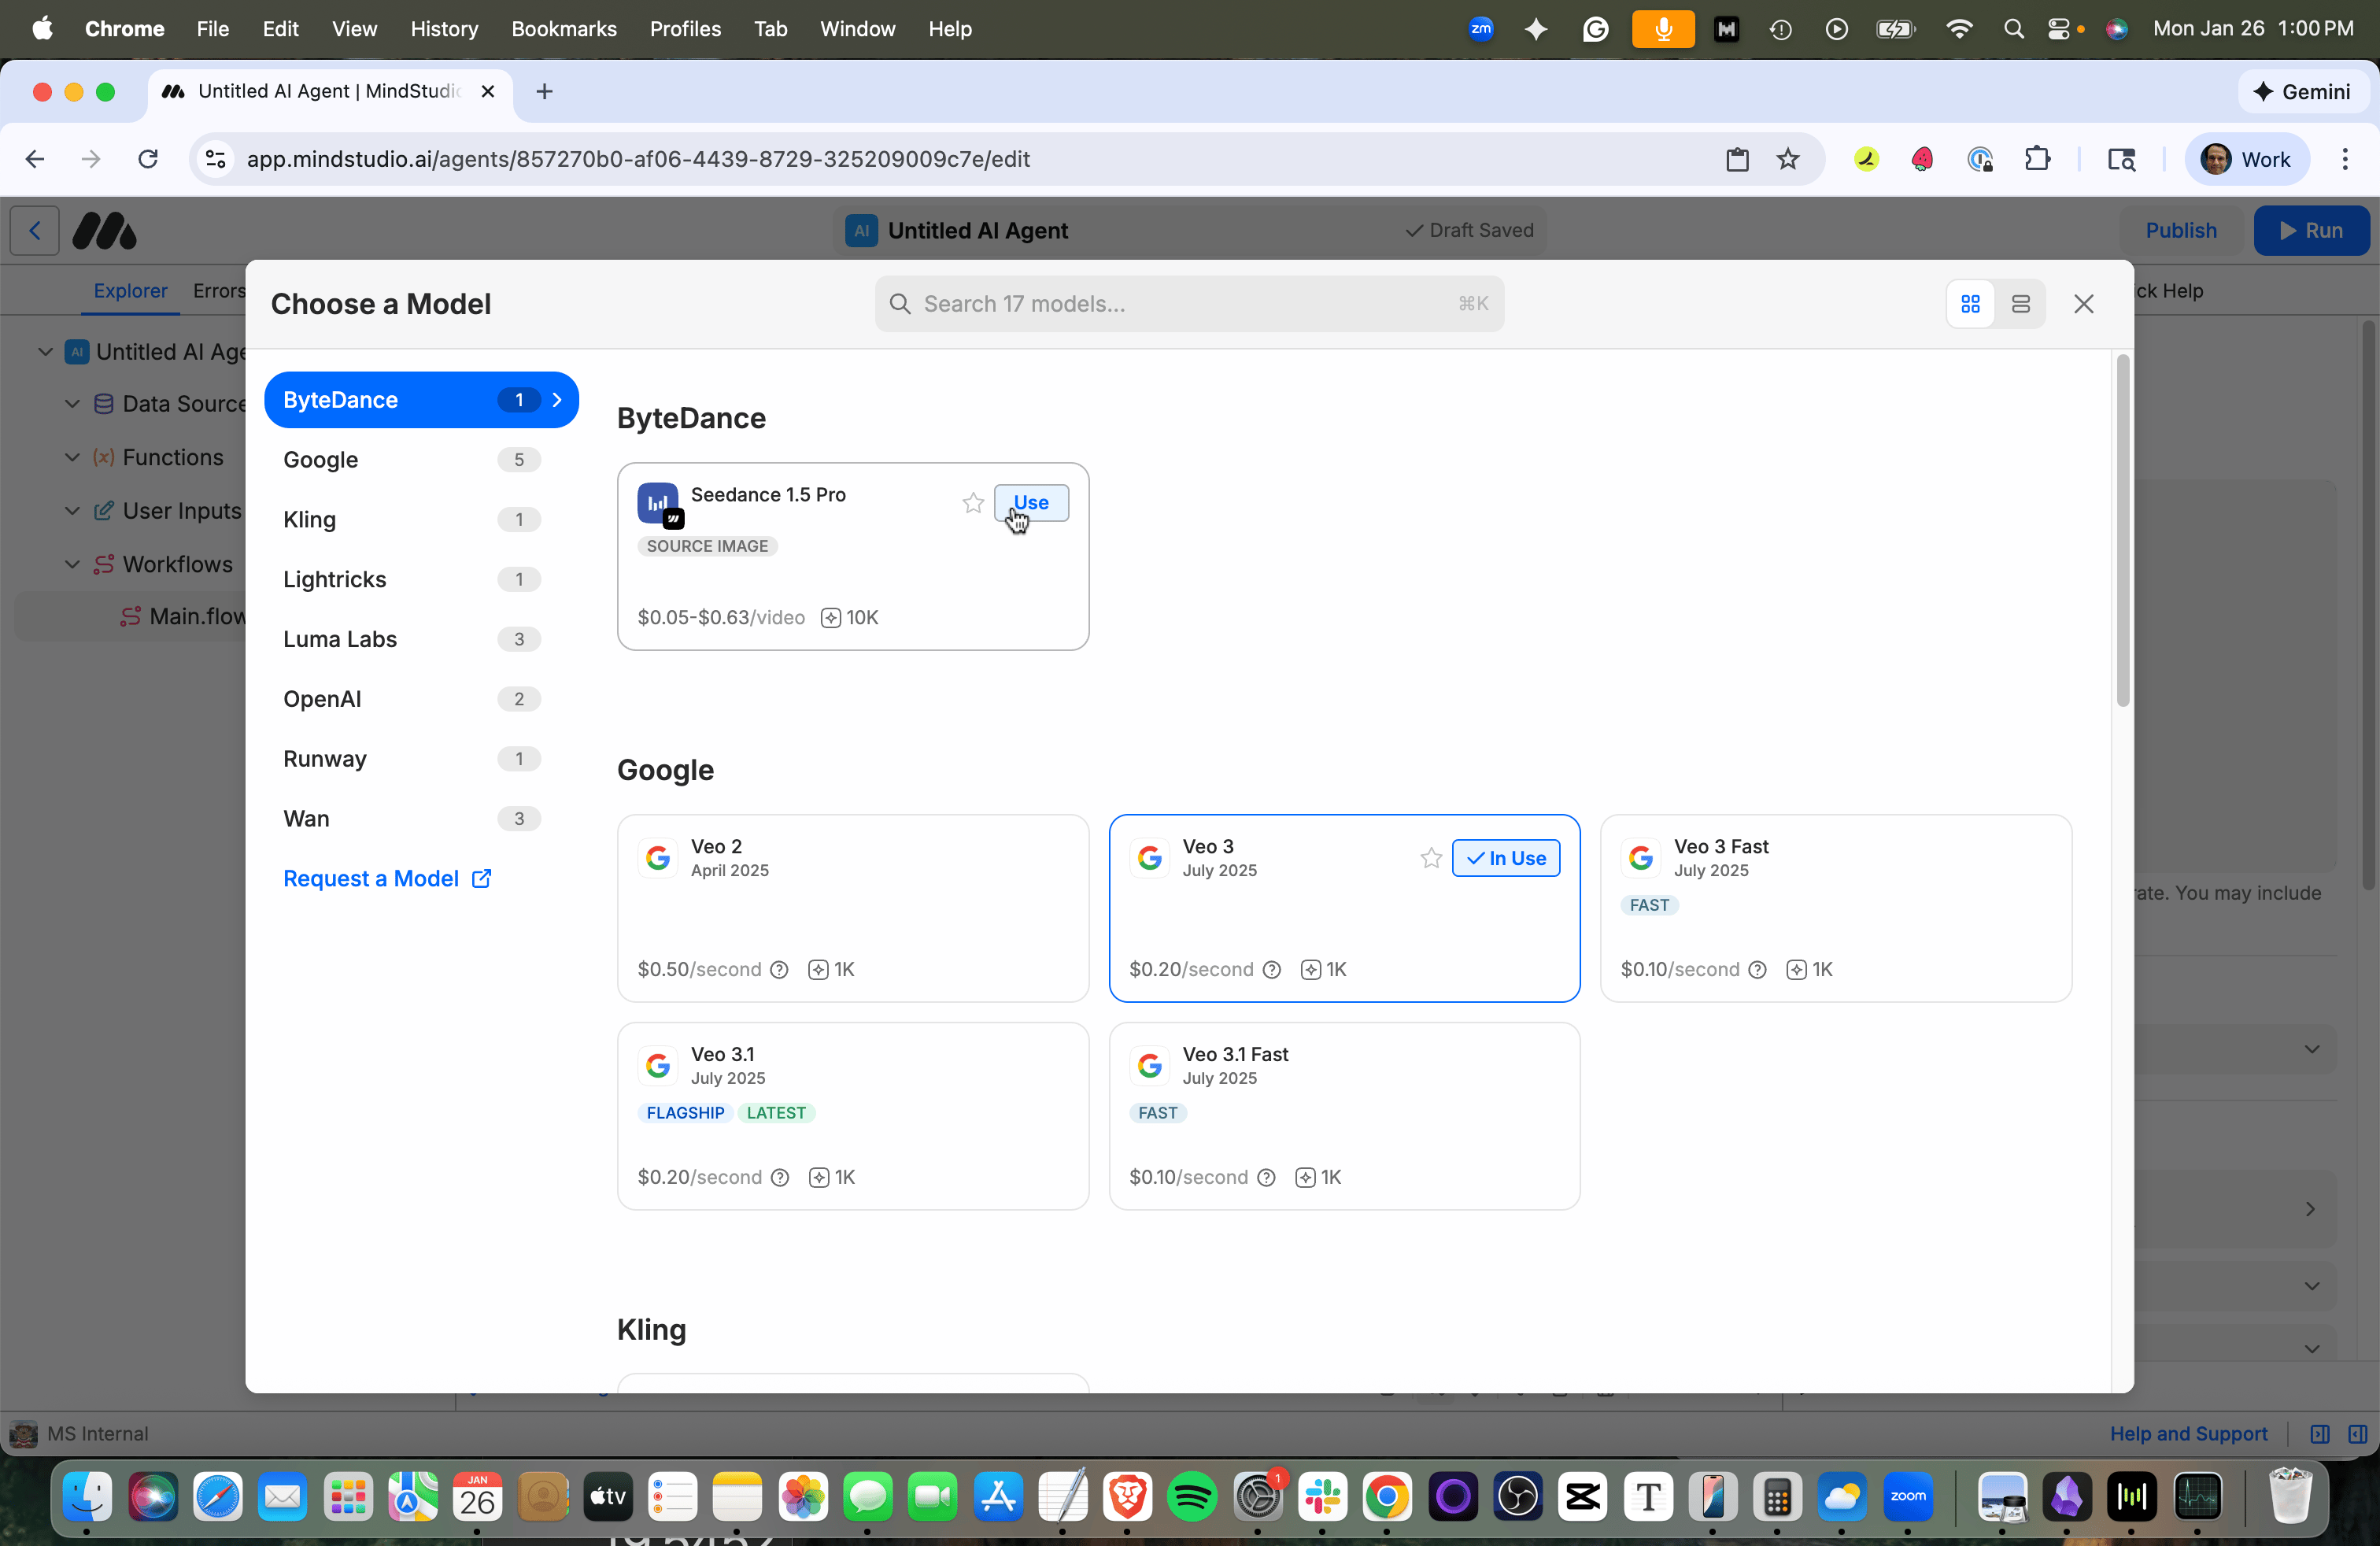
- Click “Gemini 2.5 Flash Image” under “Model Settings” to open the Image Model picker.
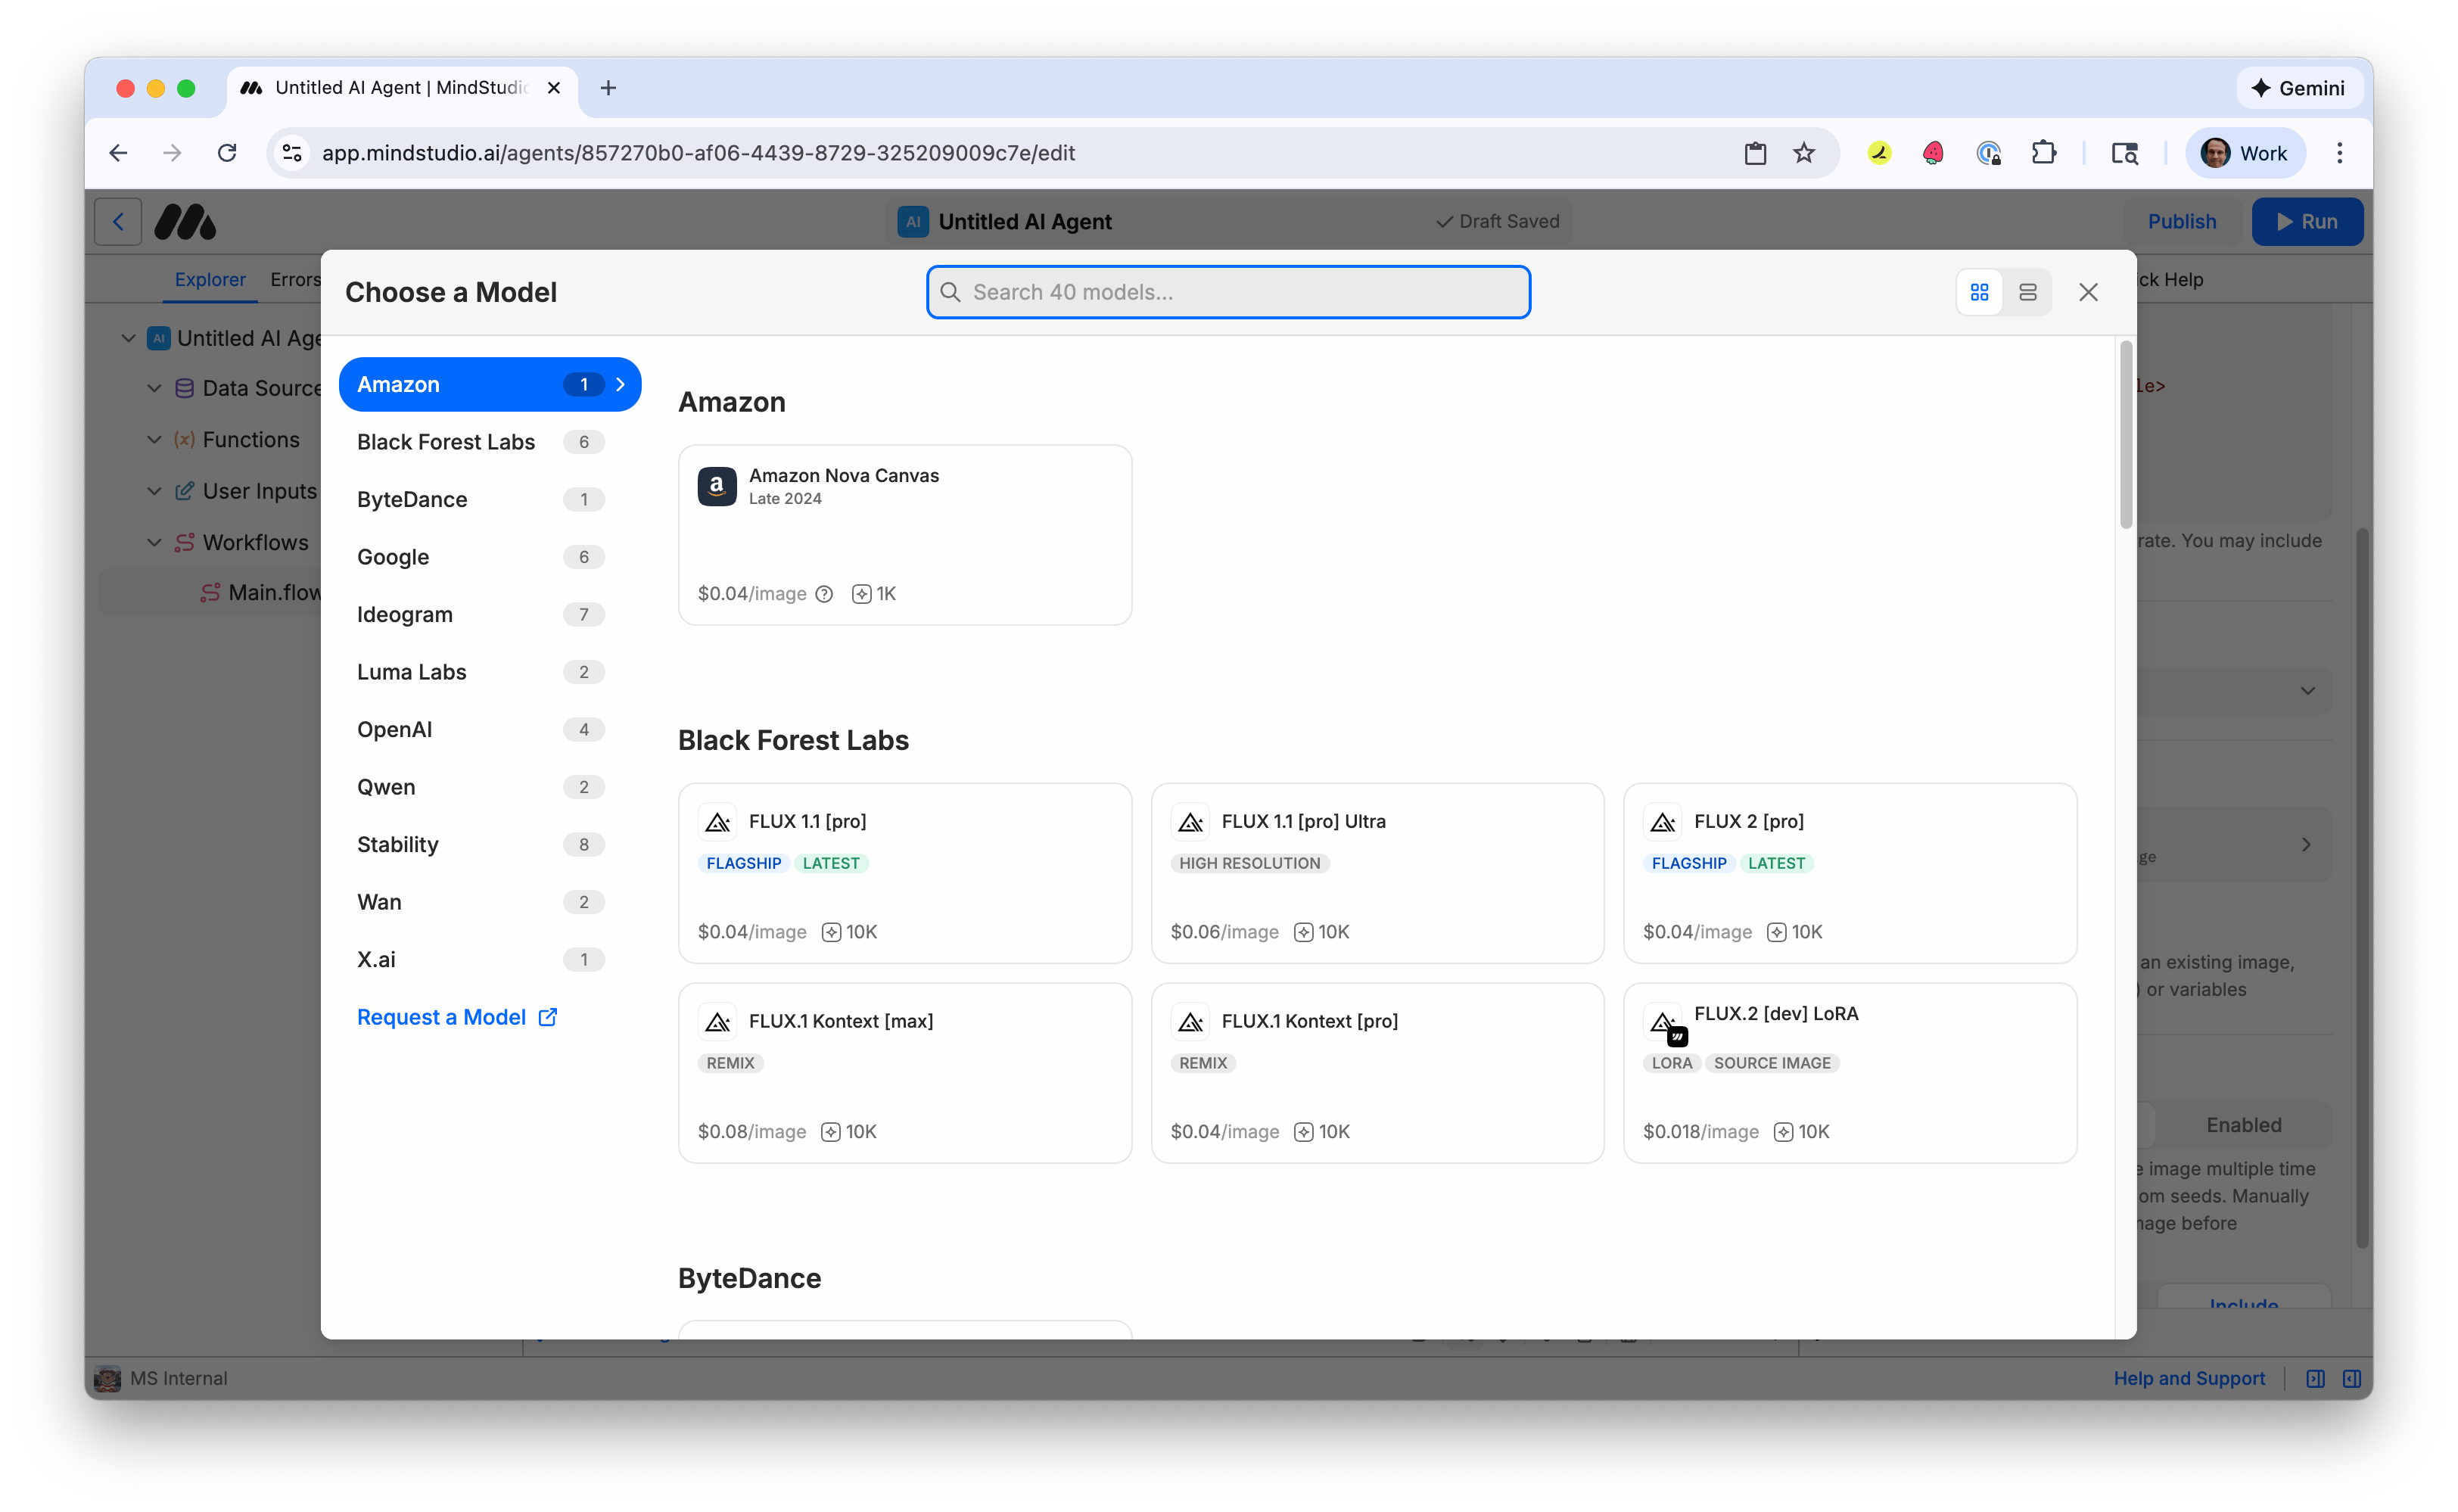
- Click the “Use” button for “FLUX.2 [dev] LoRA”.
![Select FLUX.2 [dev] LoRA AI model to generate the image](https://i.mscdn.ai/images/76b81a63-51ec-43f4-b4ea-0b5023be600a_1772490676096.png?fm=auto)
- In the “Behavior” setting, select “Save to Variable”.
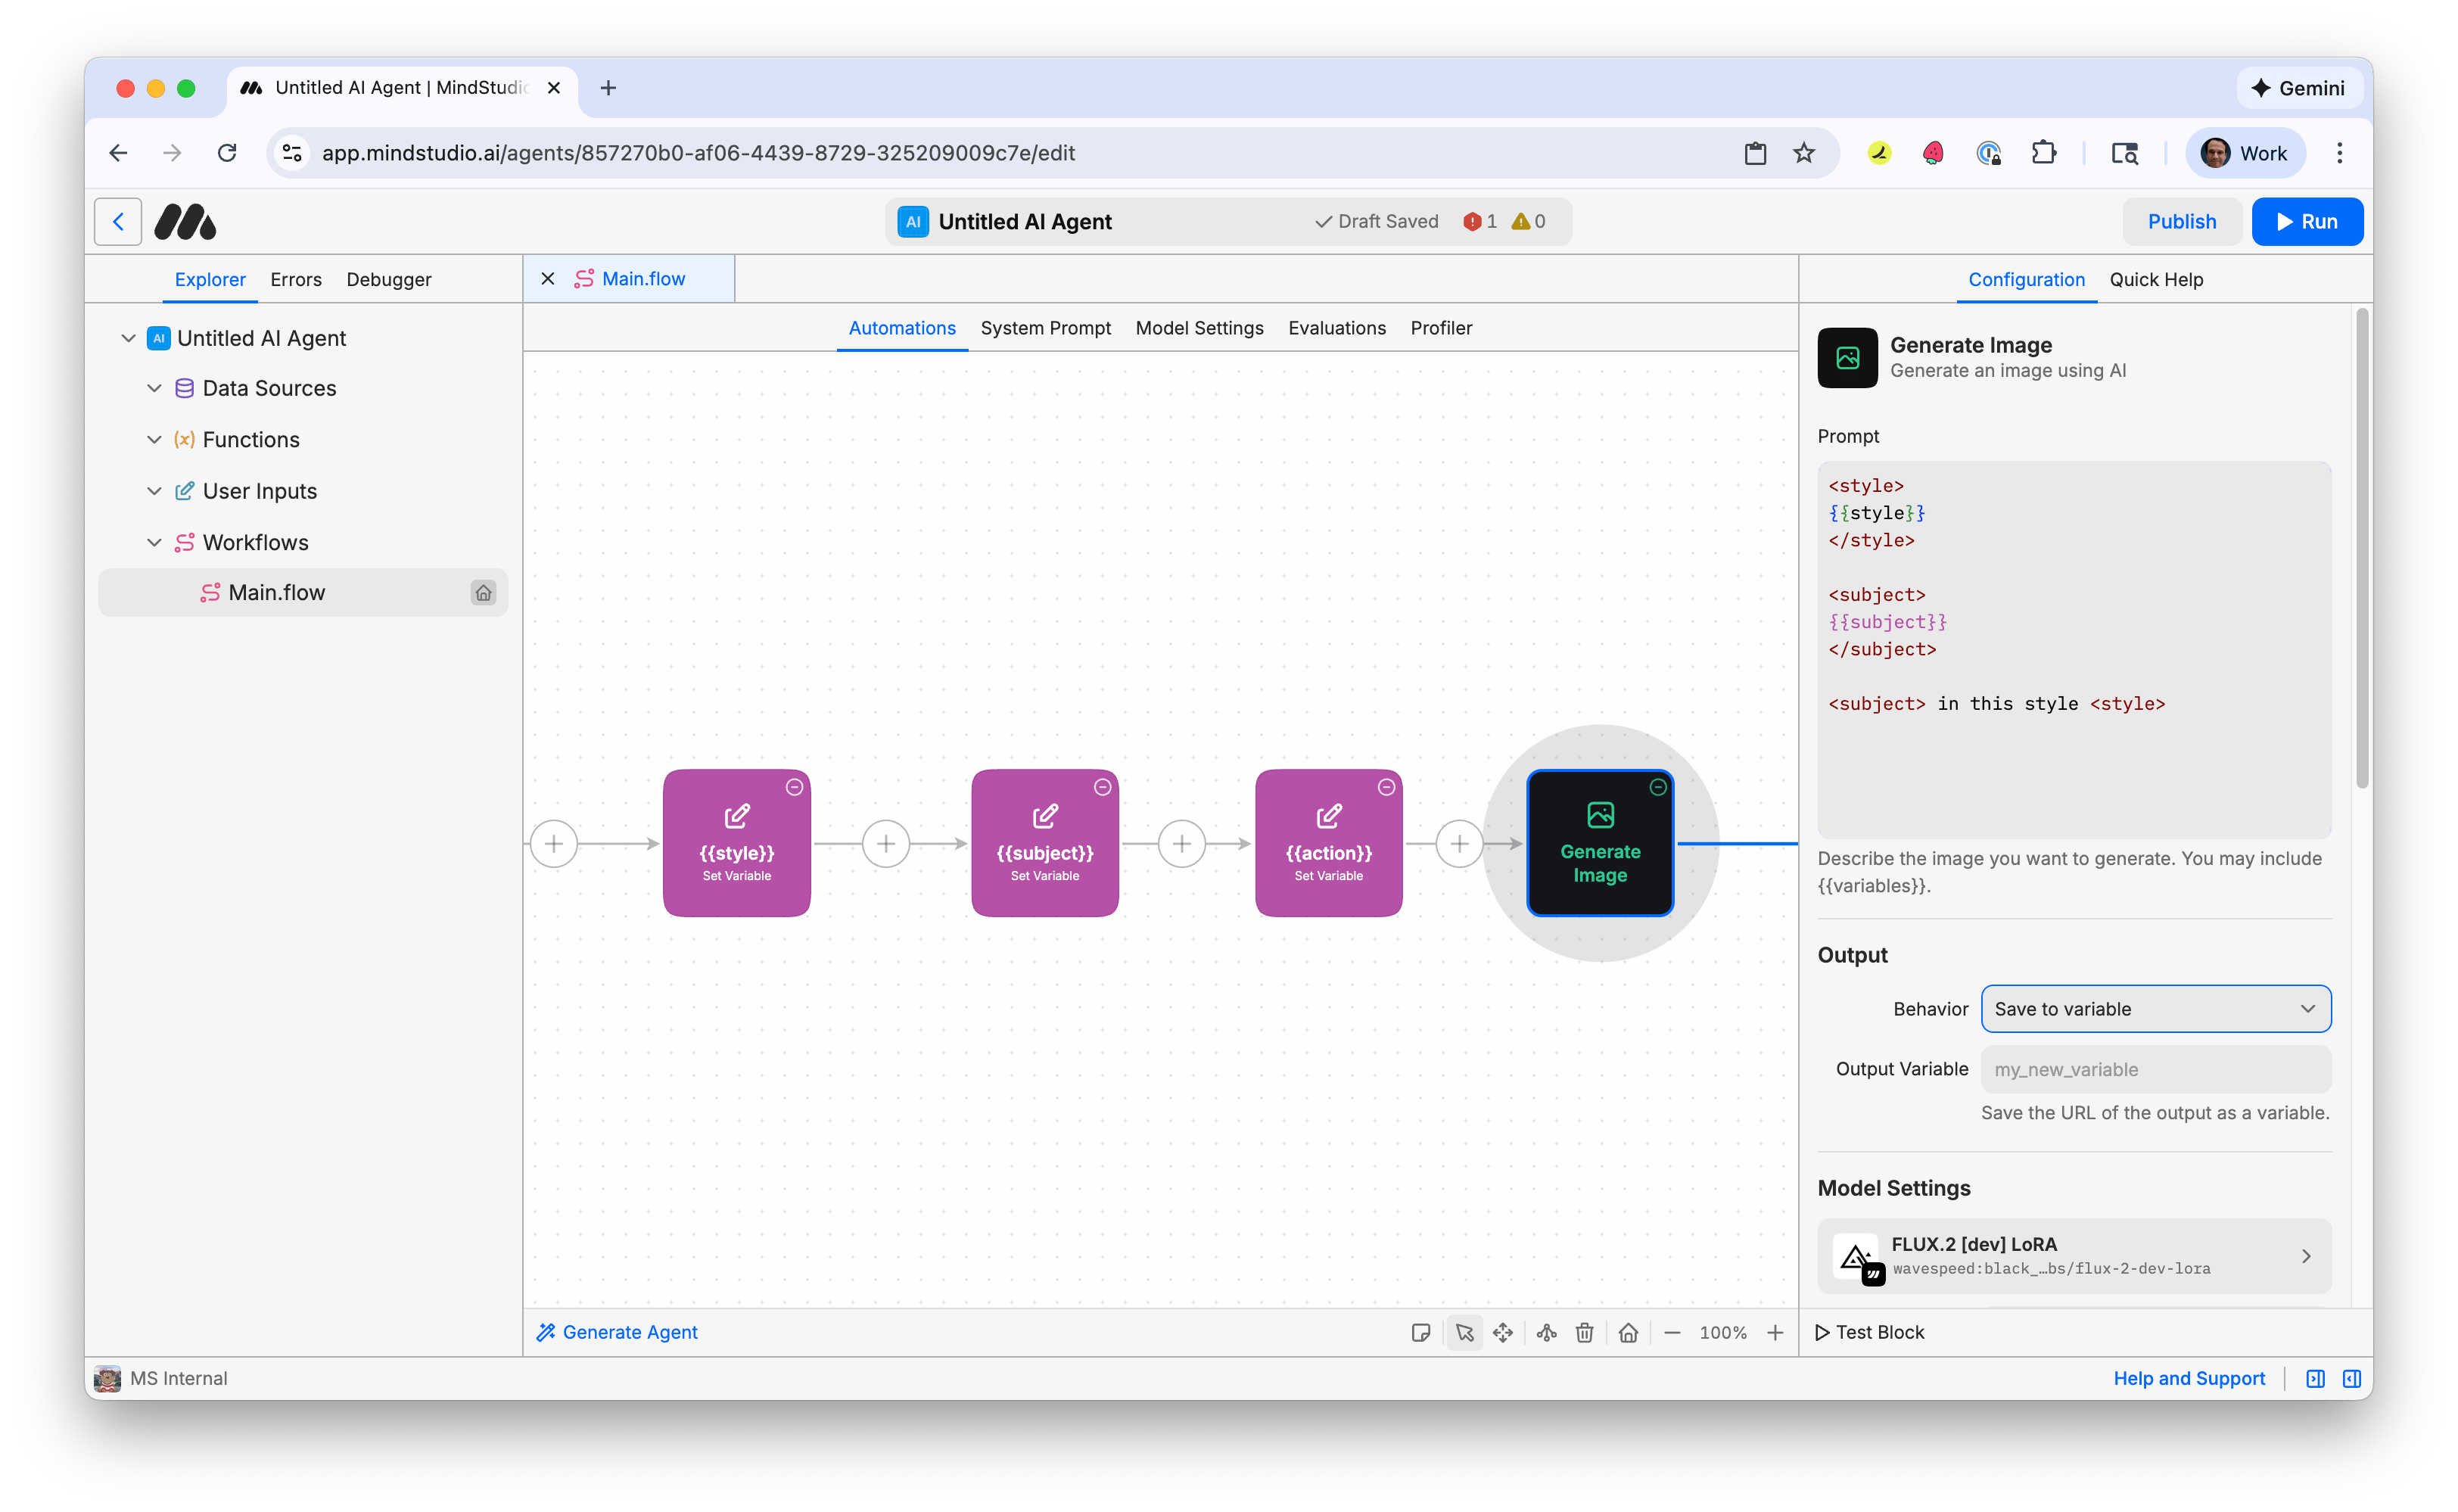
- In the “Output Variable” setting, add “firstFrame”. This is the name of our variable for the first image frame of our video.

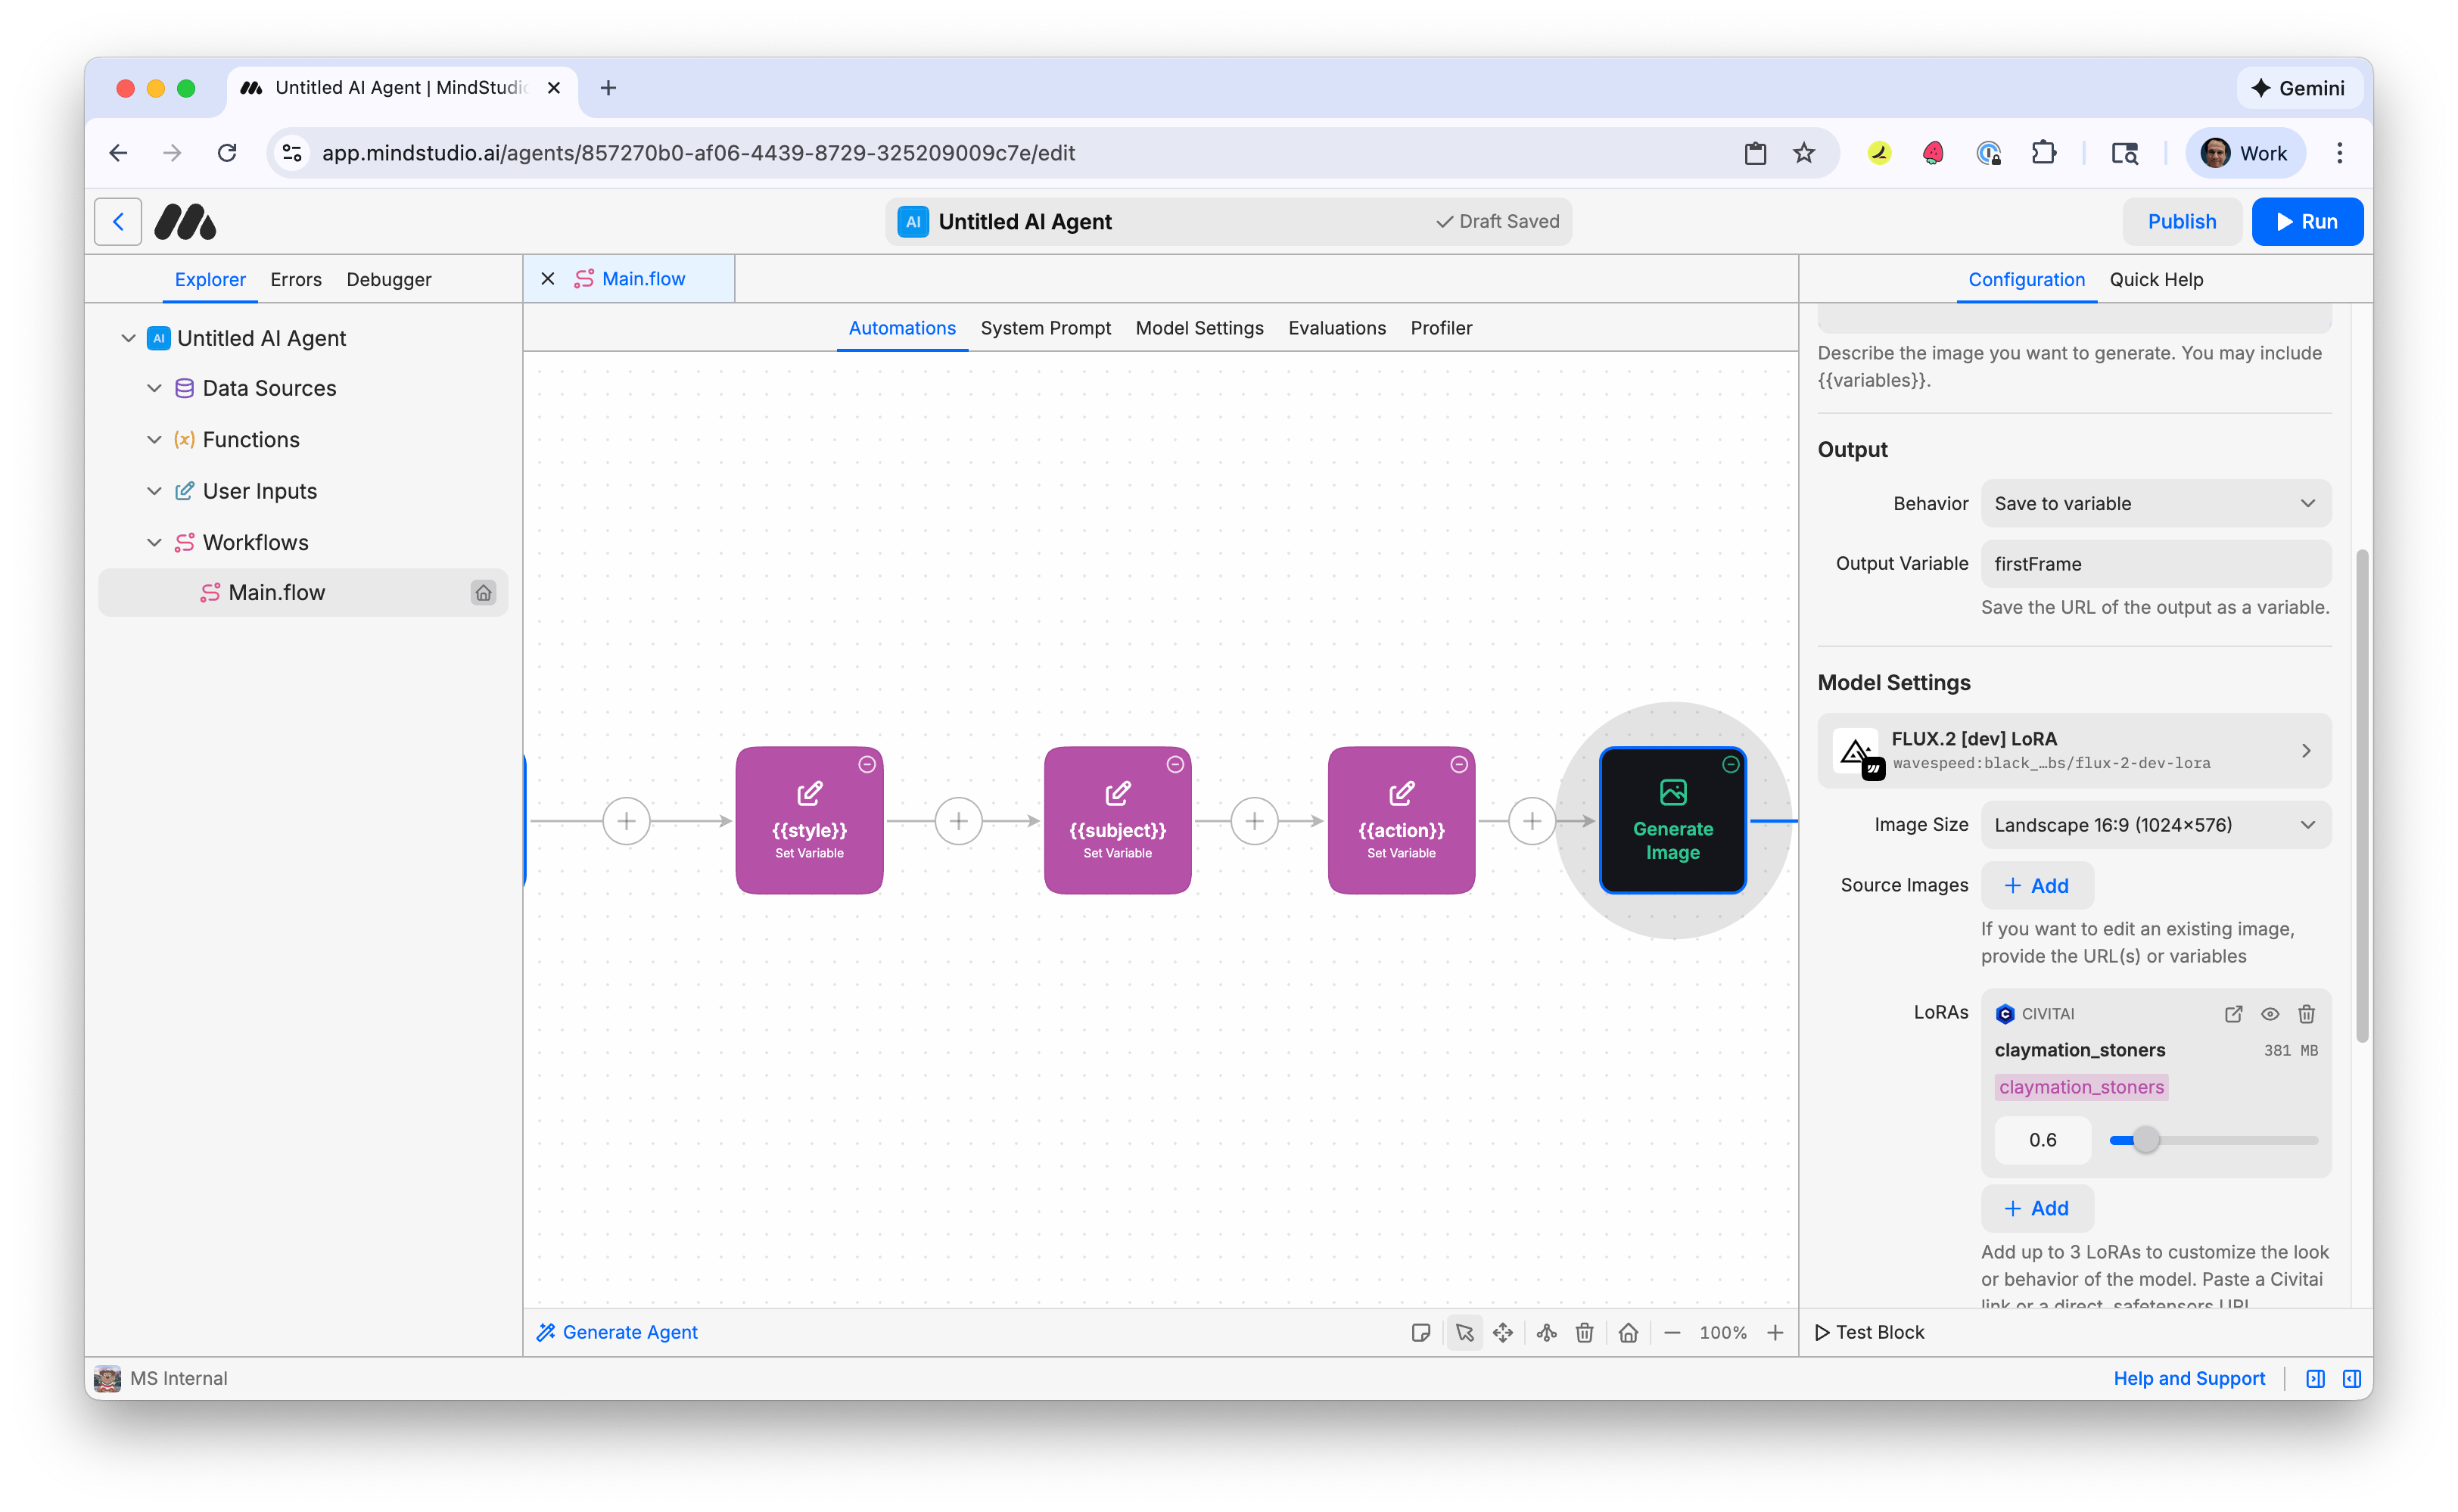
- In the “Image Size” setting, select “Landscape 16:9 (1024x576)”.
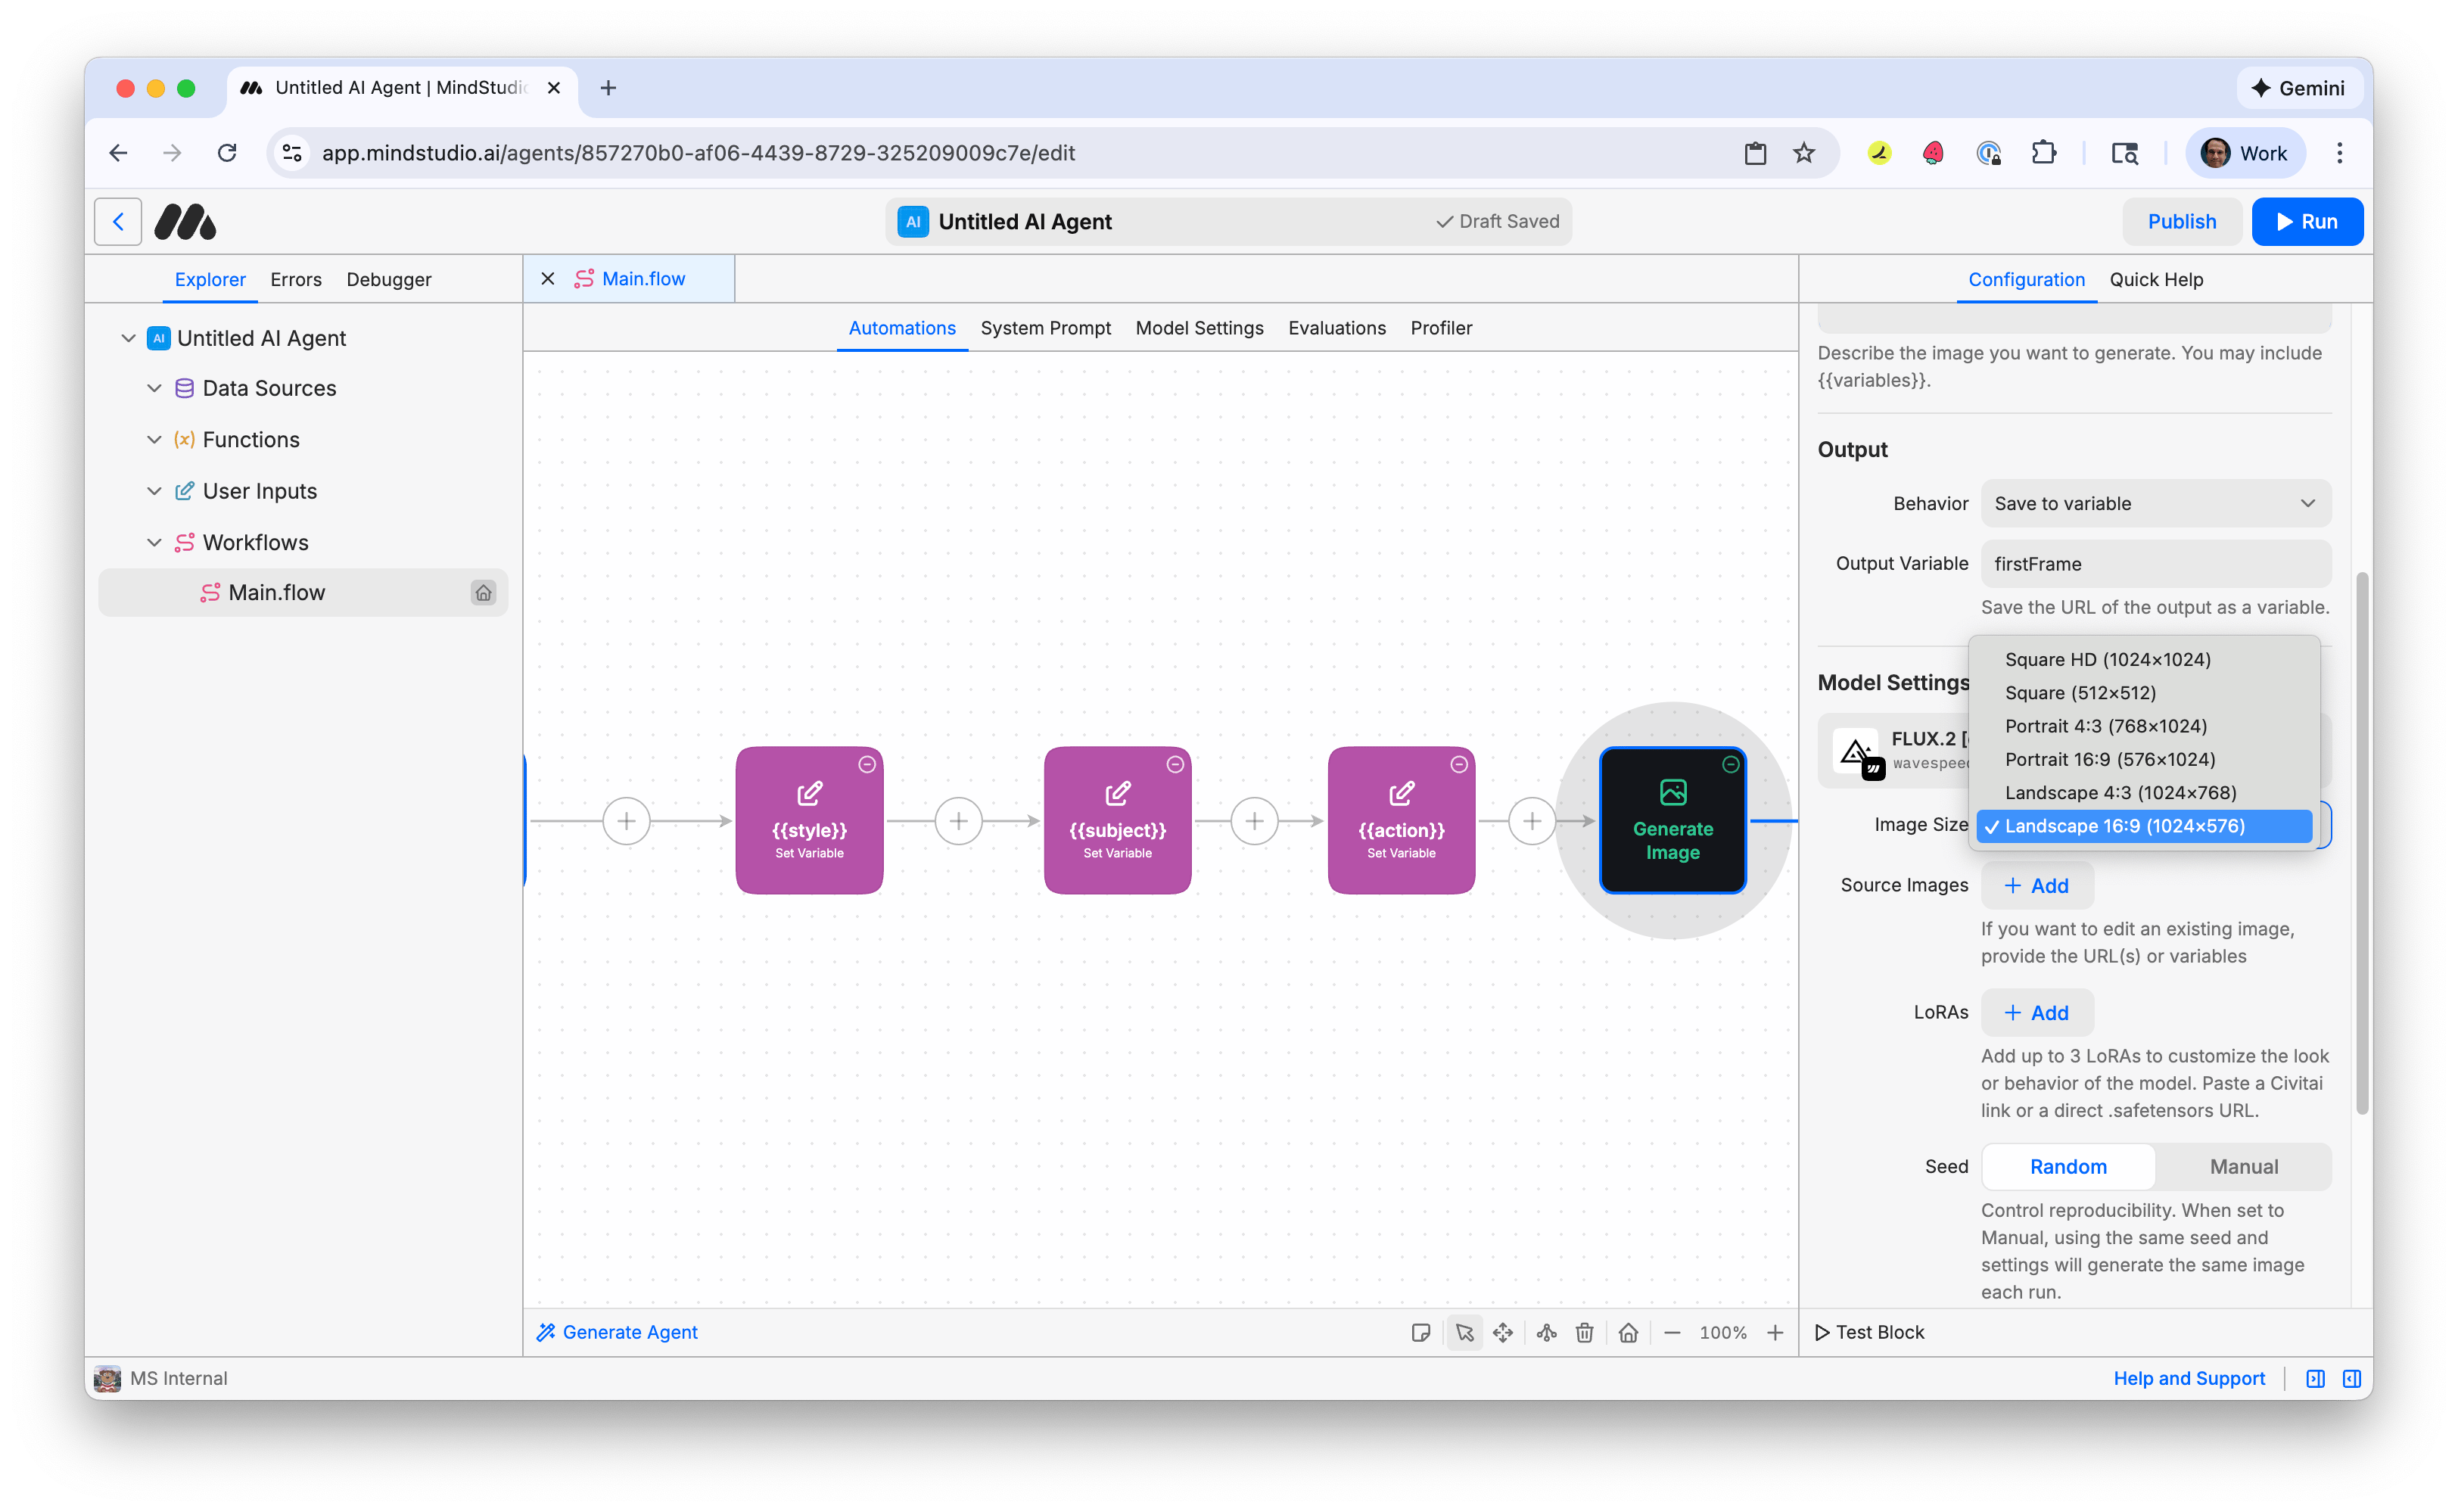
- Click the “Add” button in the “LoRAs” setting, then paste the following URL:
This is the LoRA we will use from CivitAI to generate the image for the first video frame. MindStudio makes it easy to use LoRAs from CivitAI: just paste the URL for that LoRA into the “LoRAs” setting. Use up to three LoRAs to generate an AI image. MindStudio identifies with supporting LoRA AI model automatically.
- In the configuration panel on the right, scroll down to “Advanced”, then select “Enabled” toggle on the “Multiple Variants” option. This is disabled by default. This allows you to generate multiple variations of this image at once.
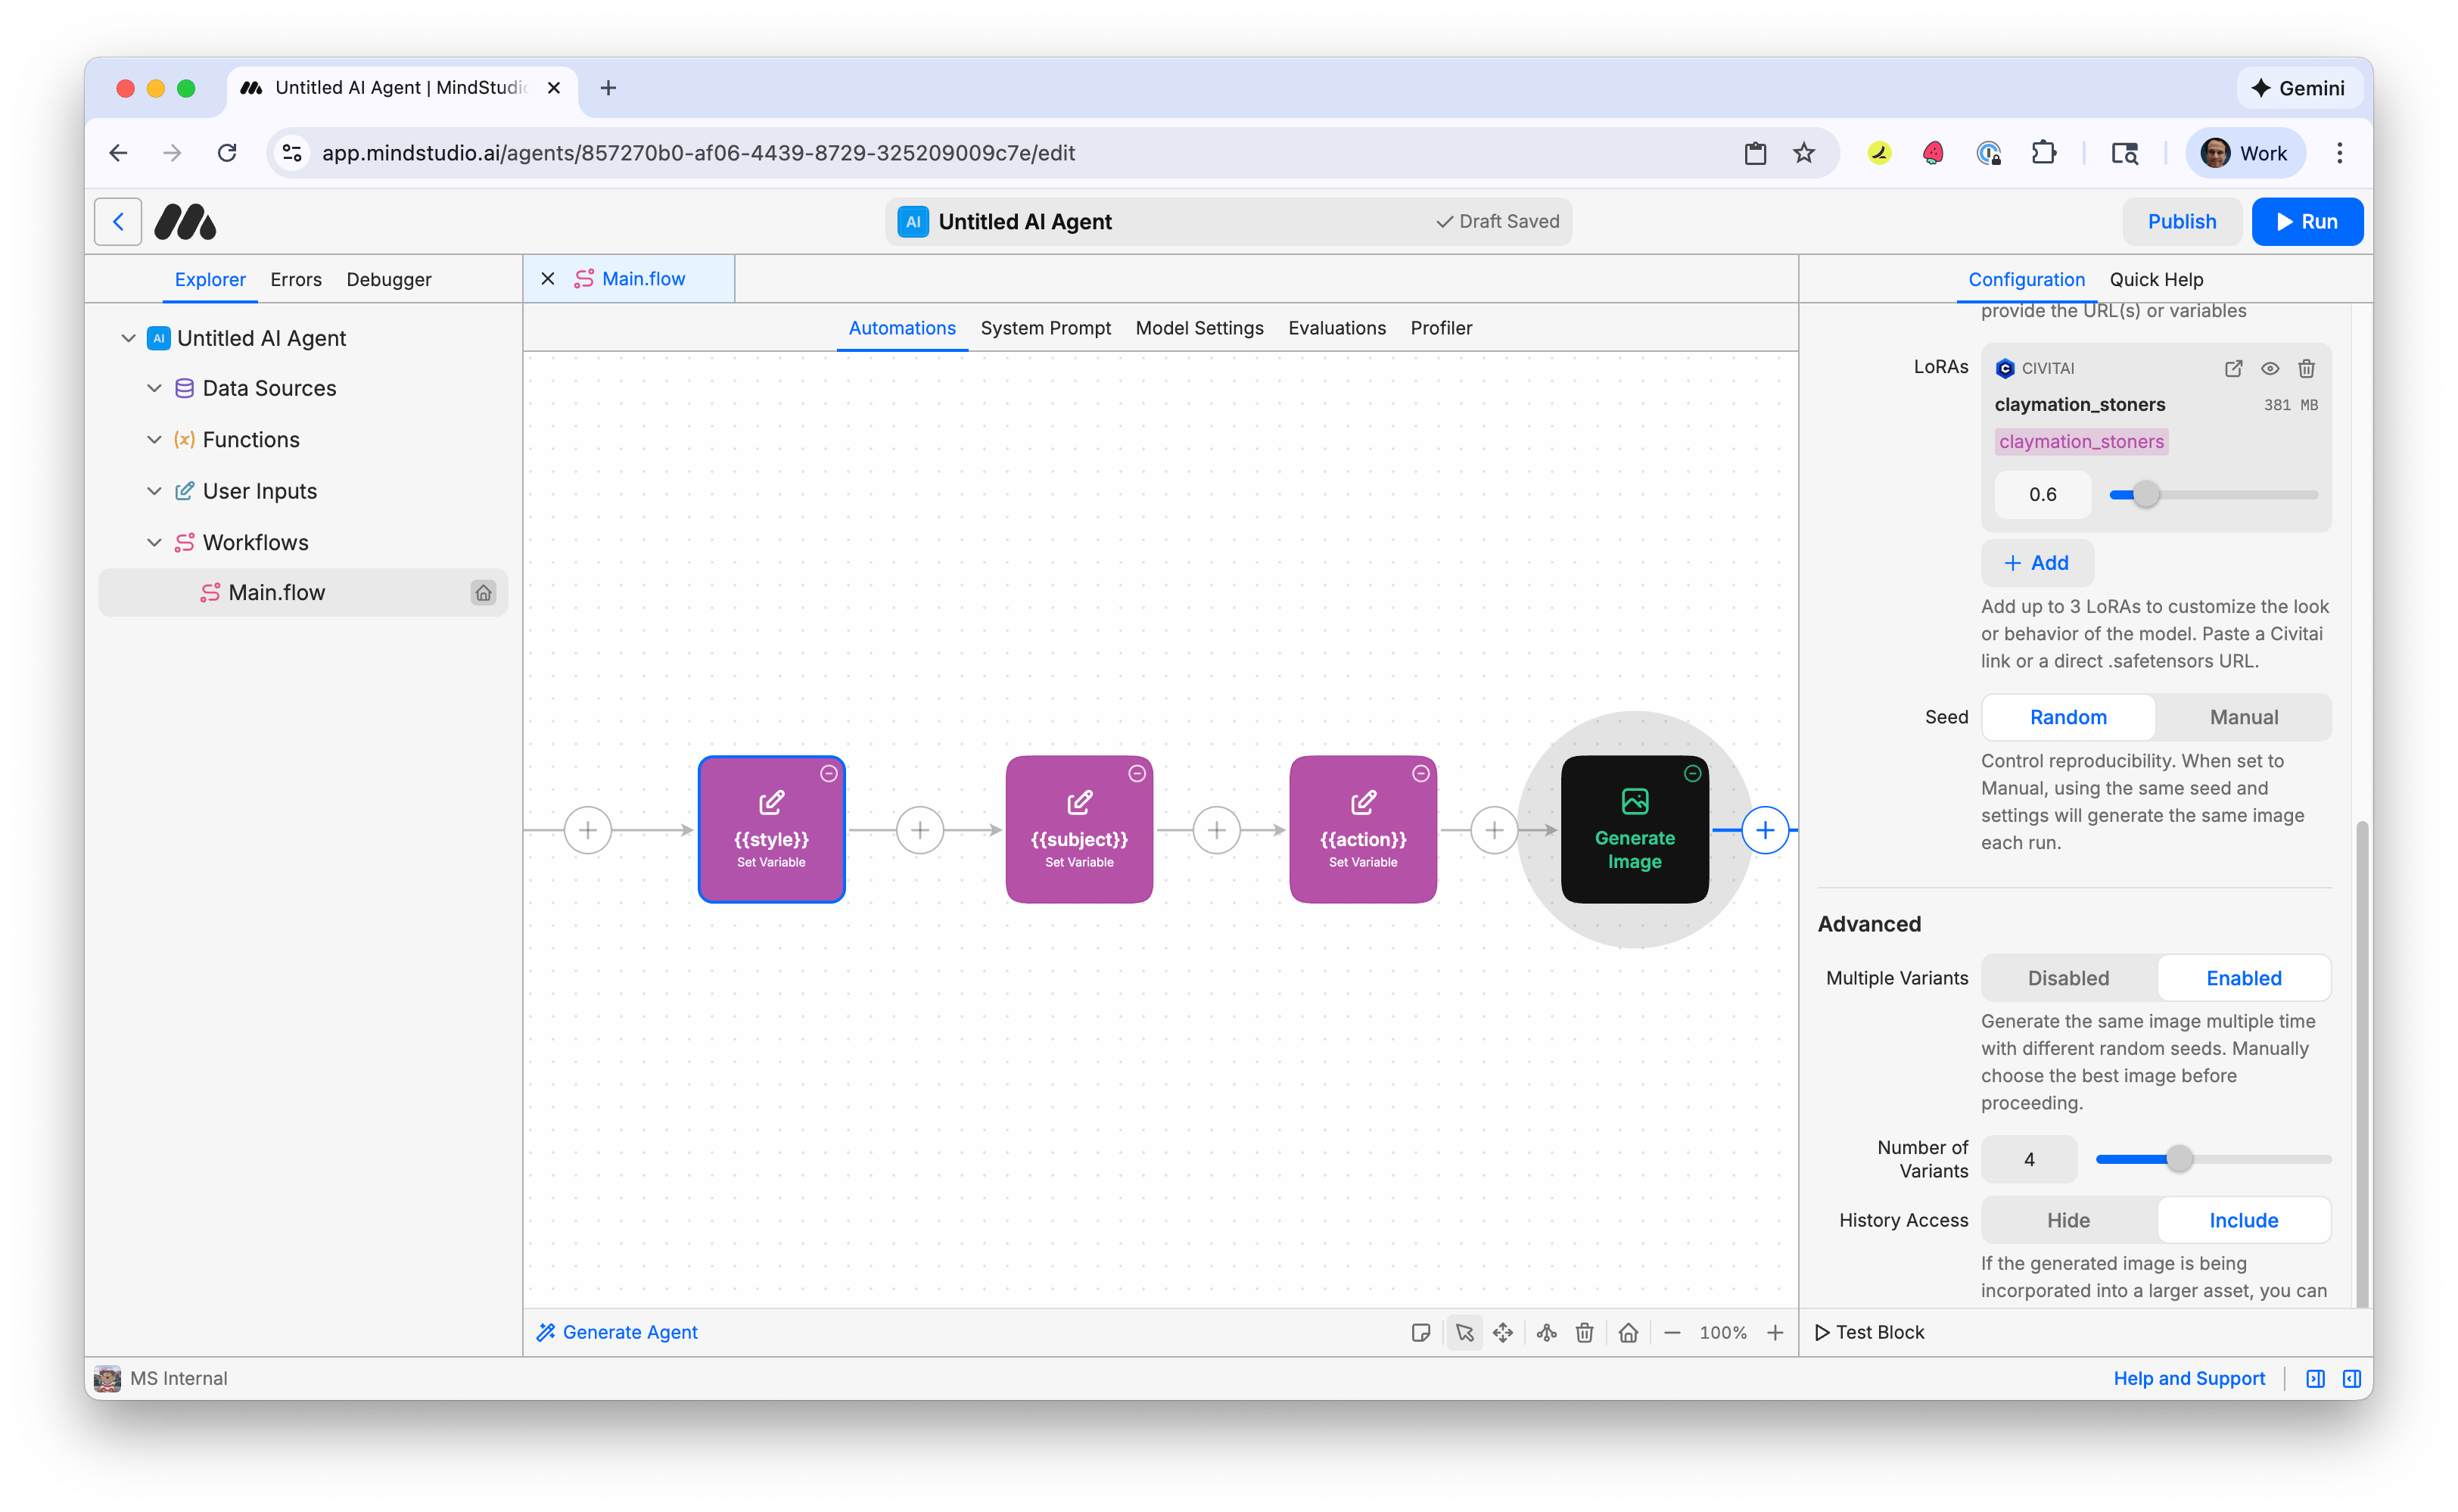
-
Adjust how many variations to make when you run this workbench. 4 is default. This is a good setting to start with so you do not pay for too many videos at once.
-
Click the + again and add a “Generate Video” block.
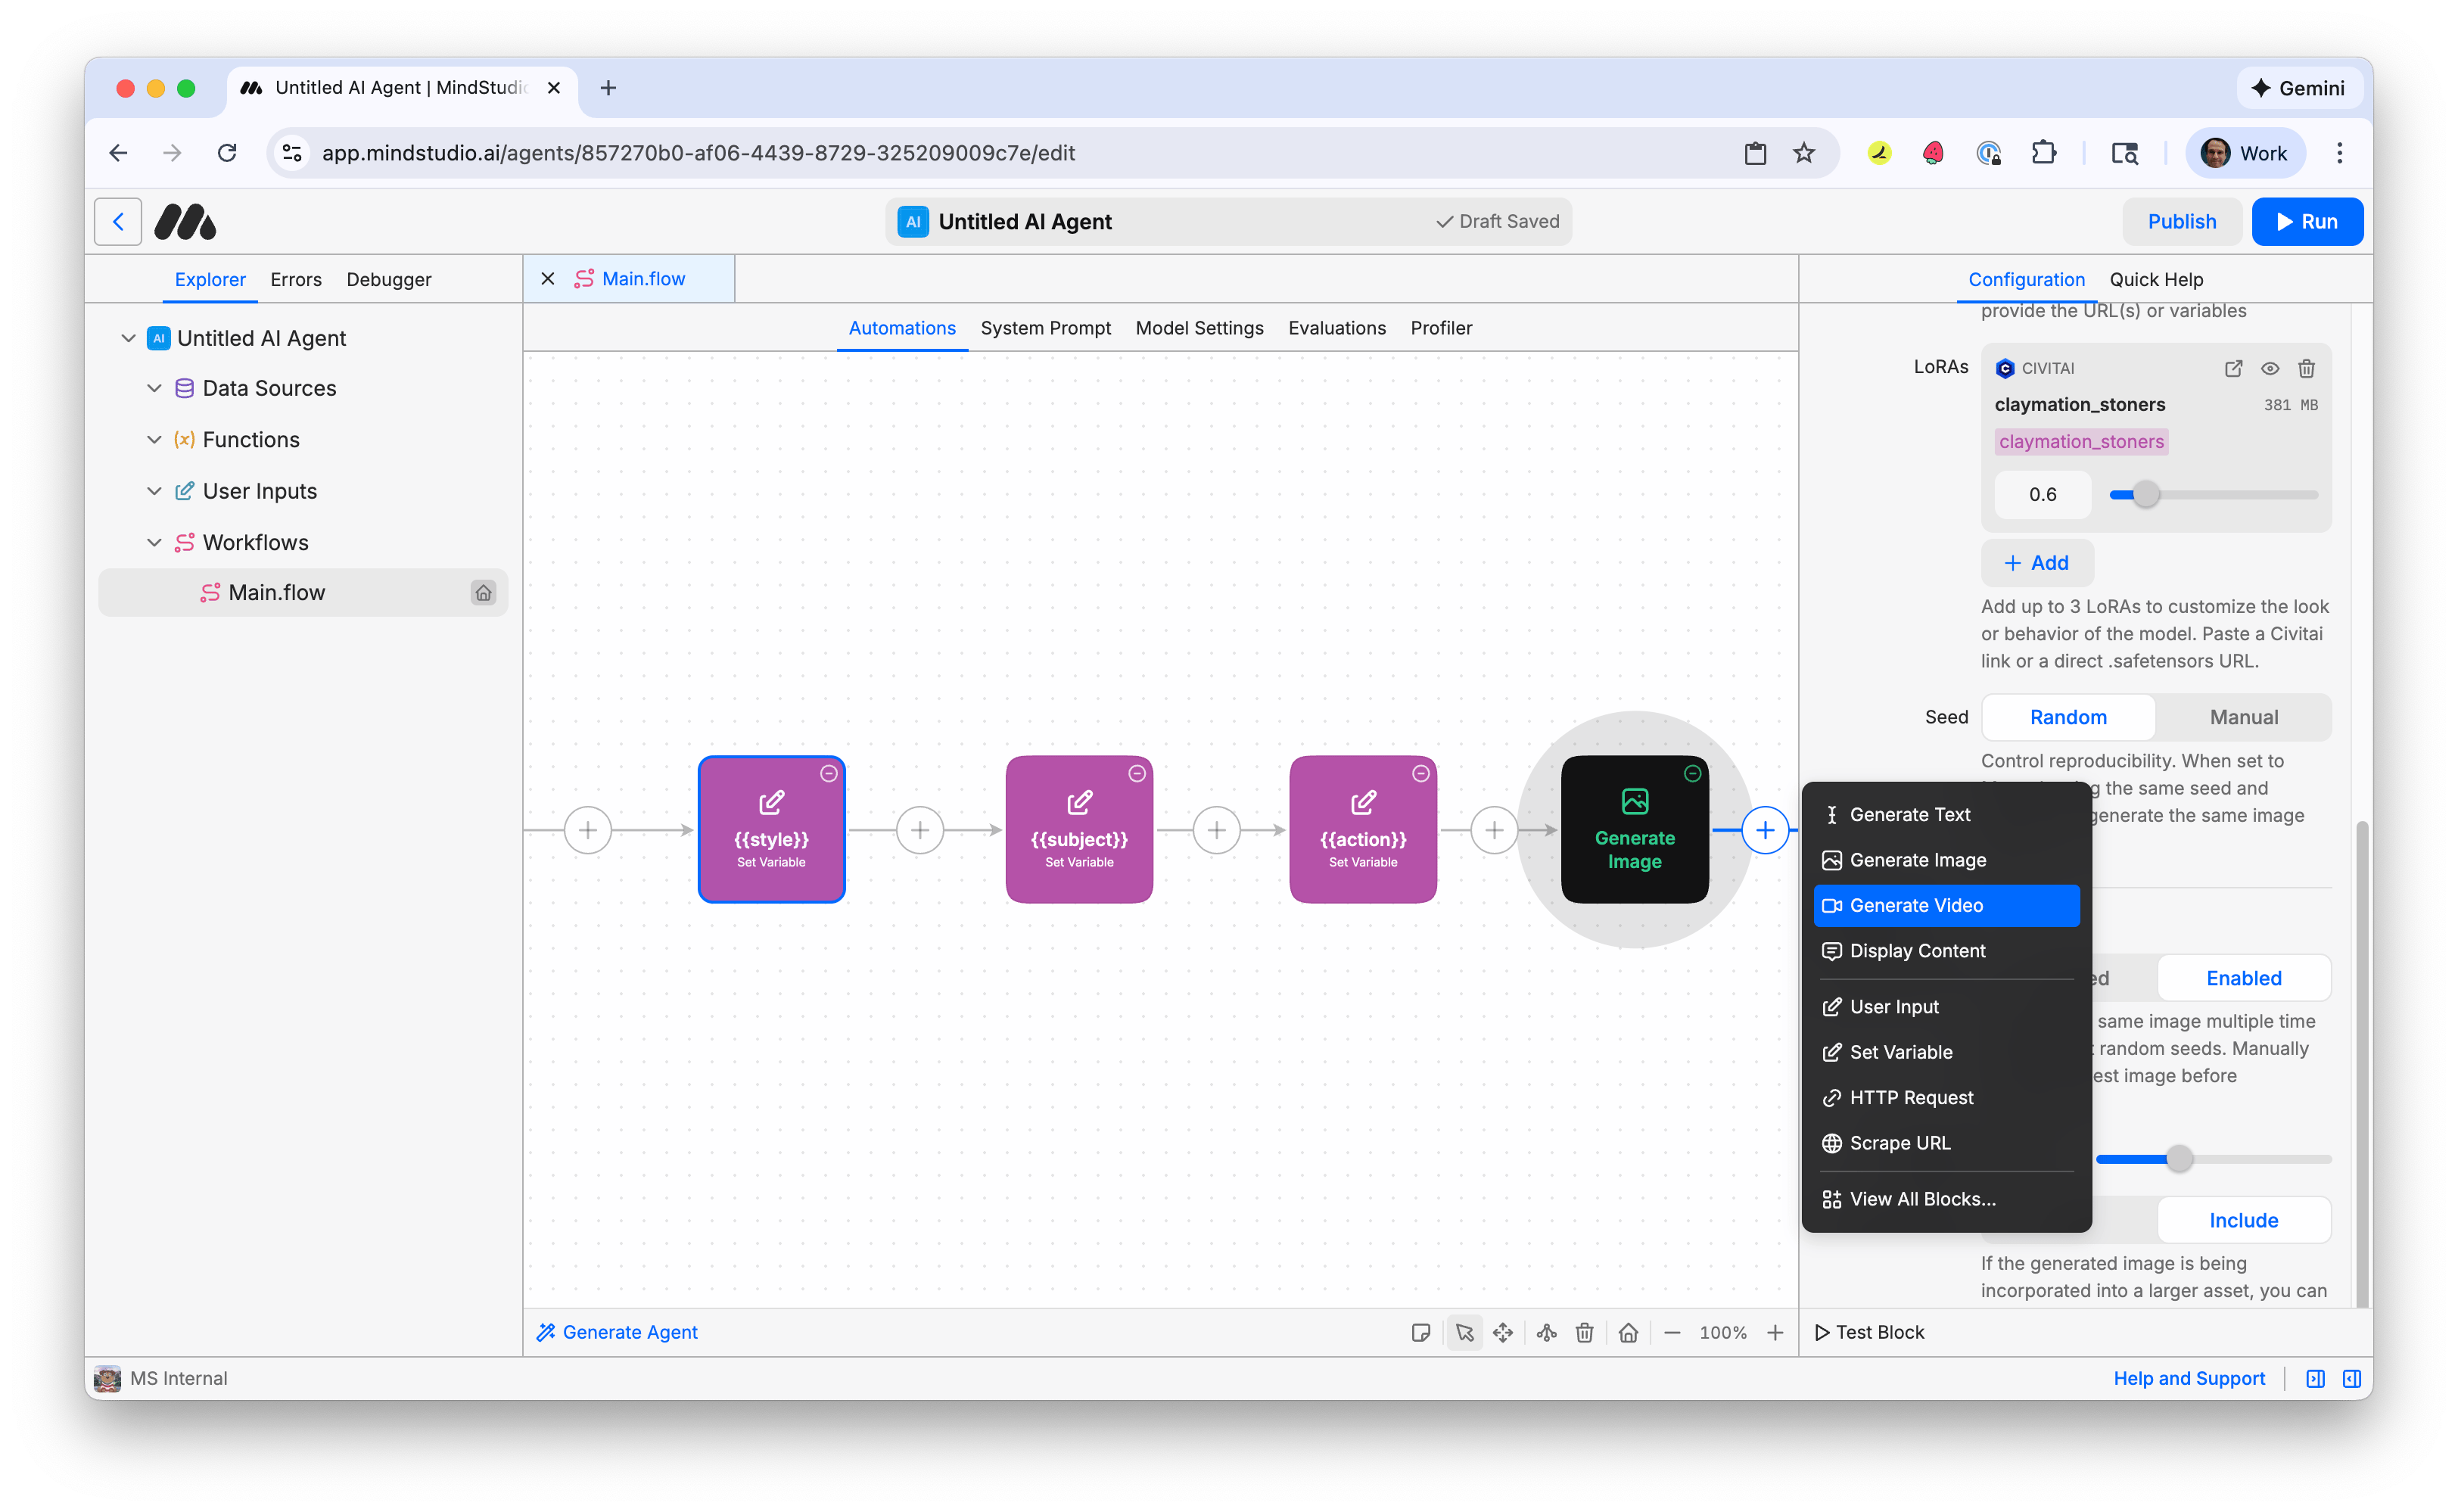
- Add the following prompt:
{{action}}
This is the variable containing the action for the video we specified.
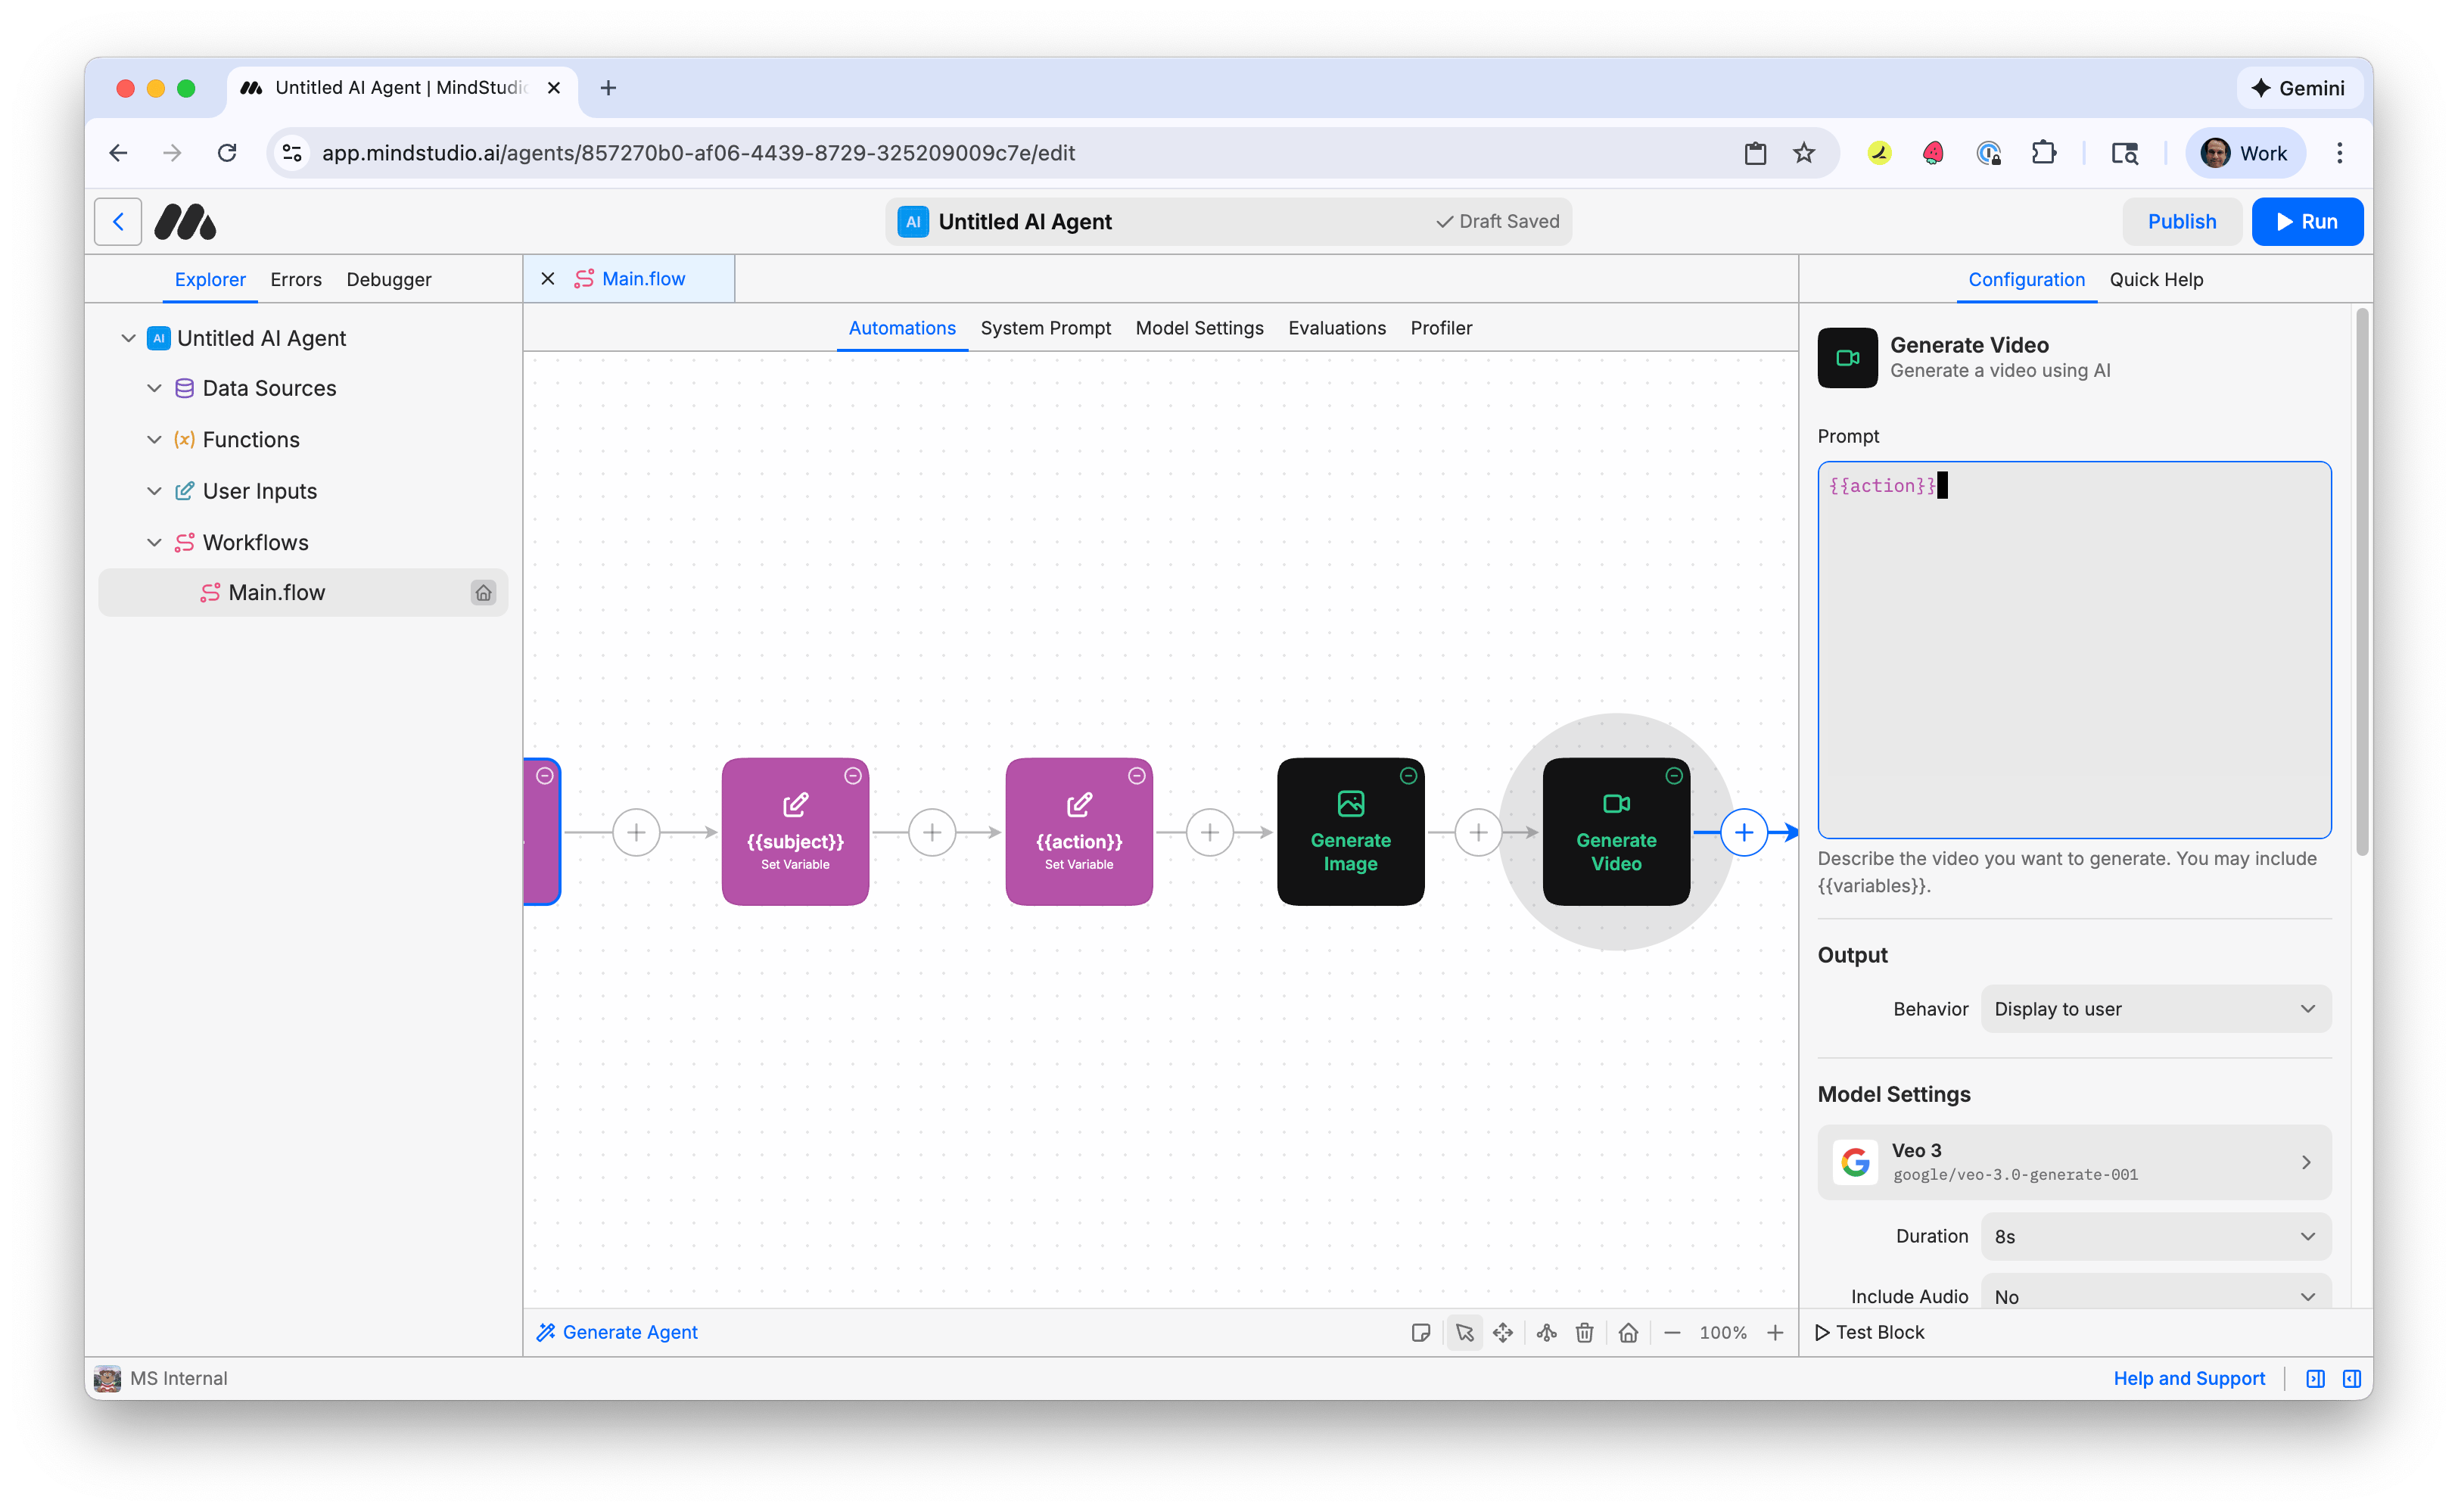
- Click “Veo 3” under “Model Settings” to open the Video Model picker.
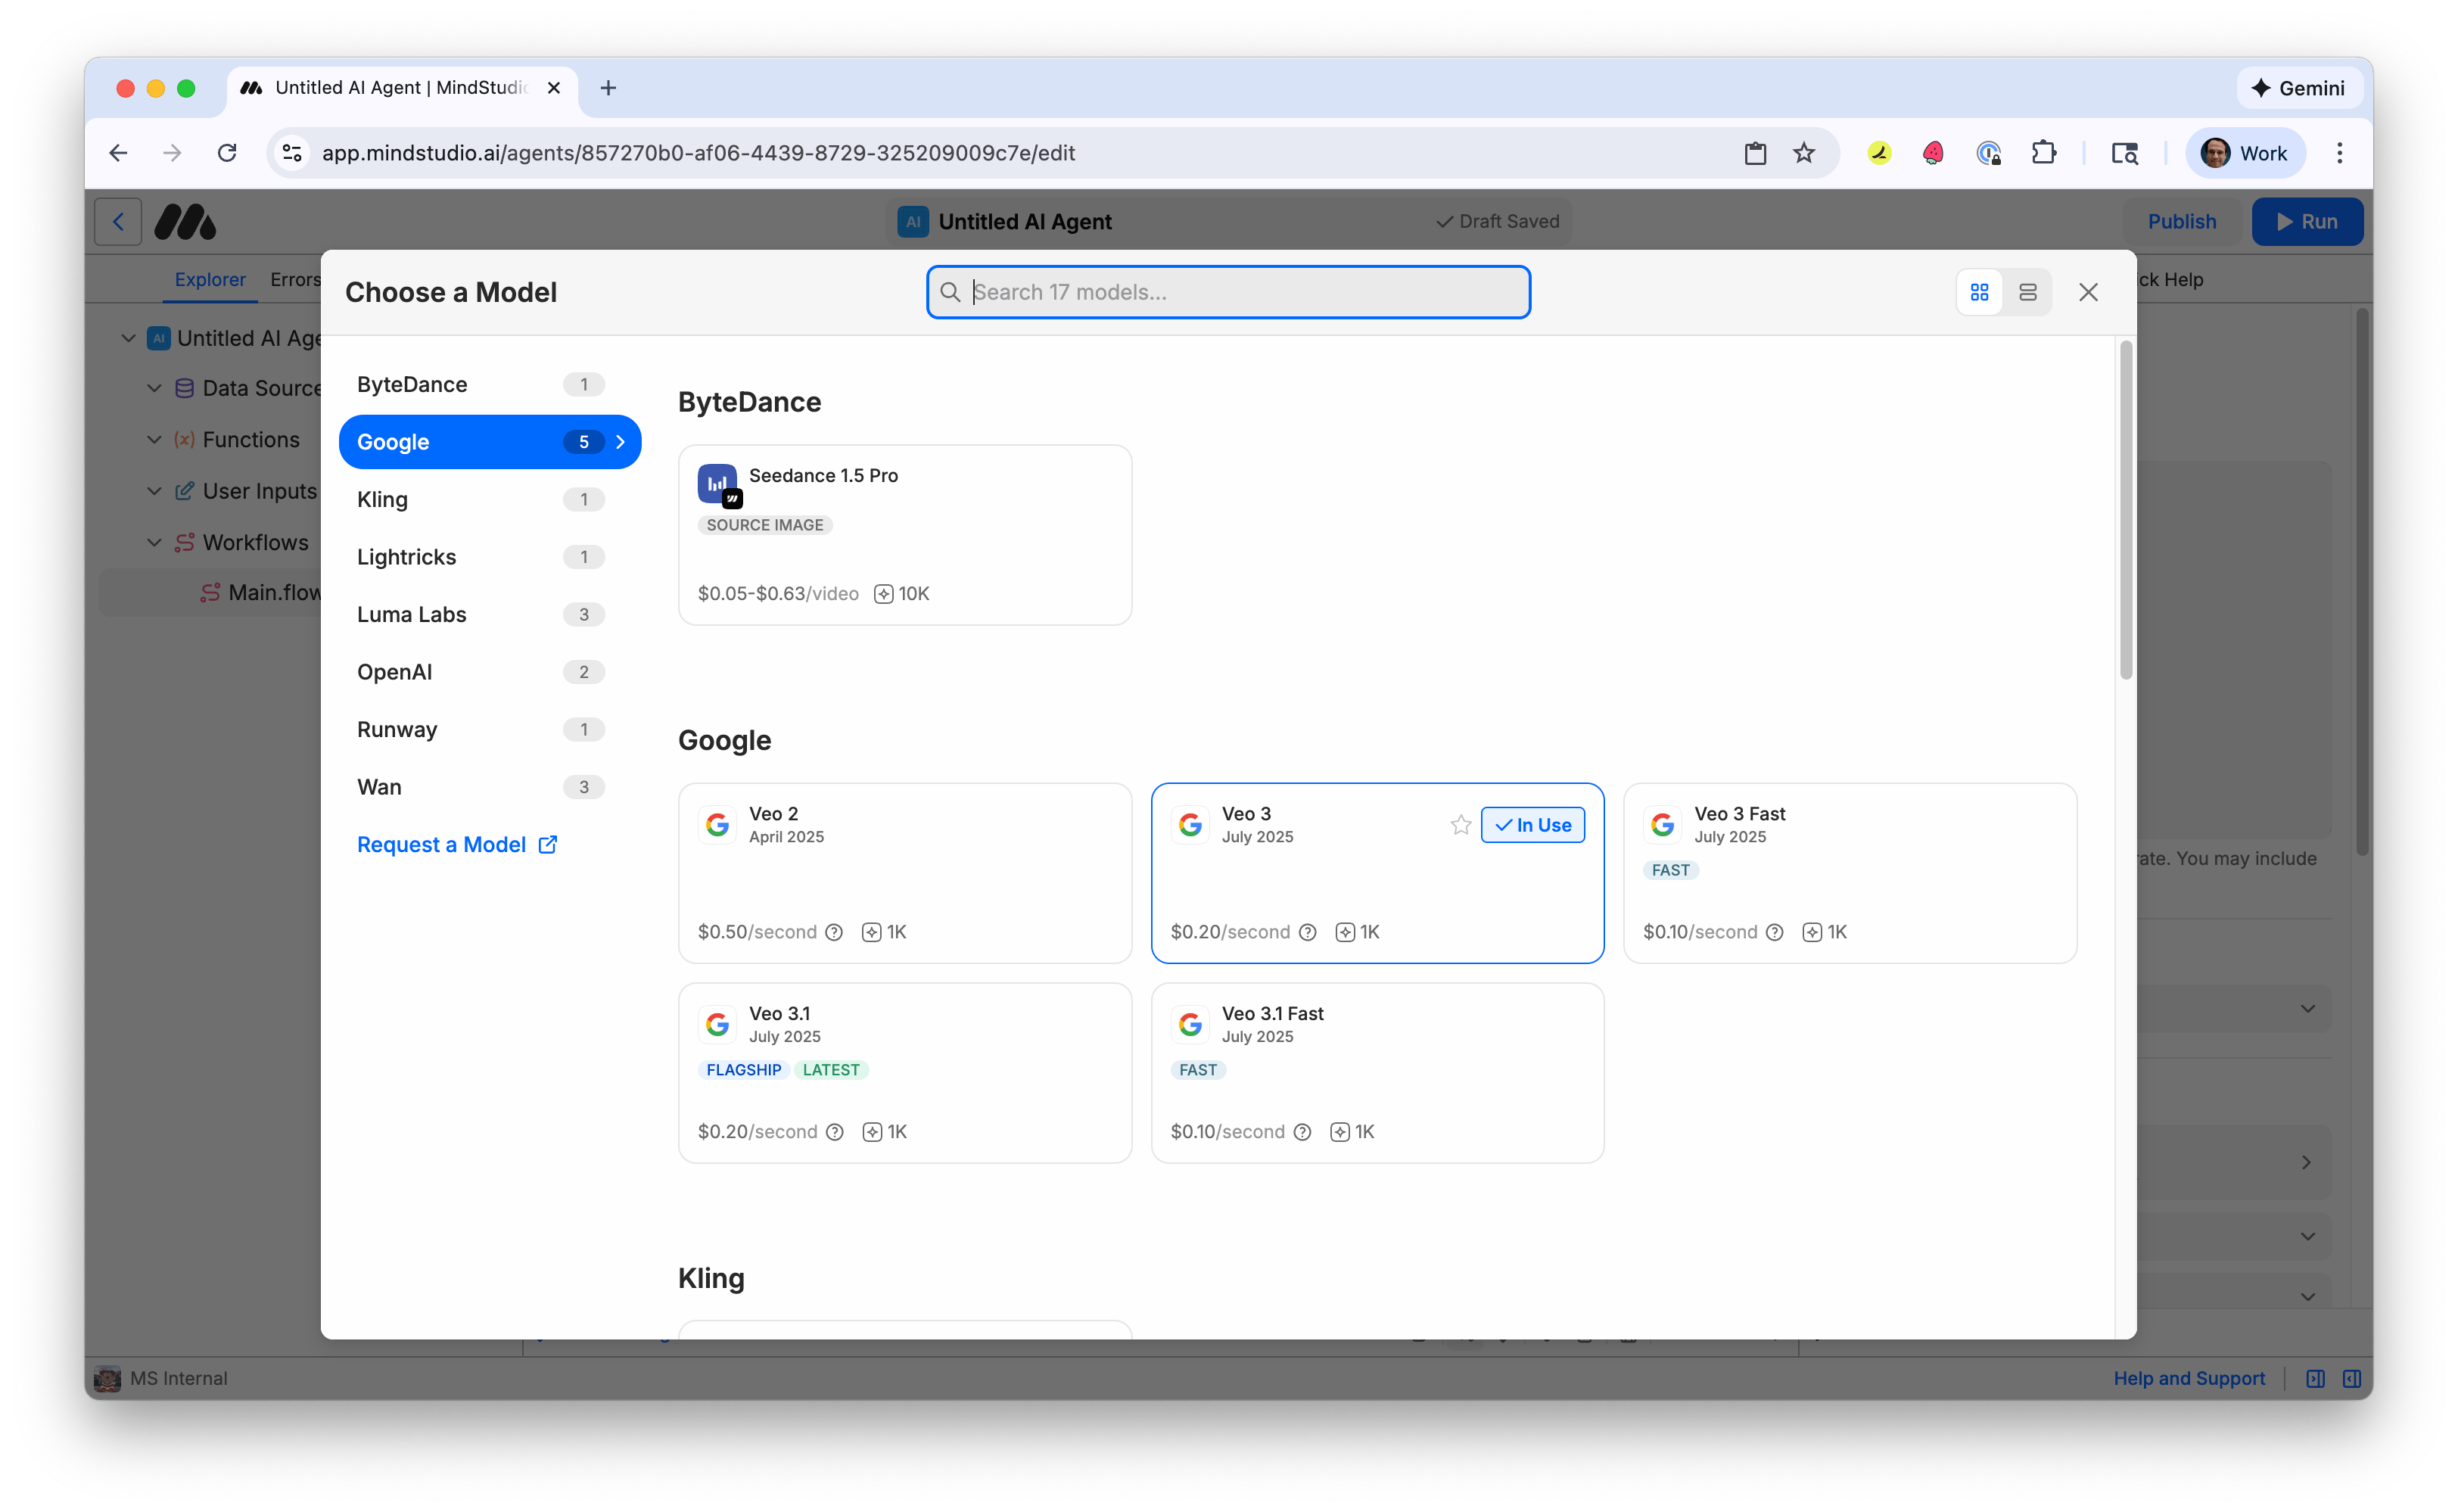
- Click the “Use” button for “Seedance 1.5 Pro”.
- In the “Image” setting, add “{{firstFrame}}”. This accesses the AI generated image from the “Generate Image” block that we named as the output variable. As the first frame of the video, this provides the visual style of the video.
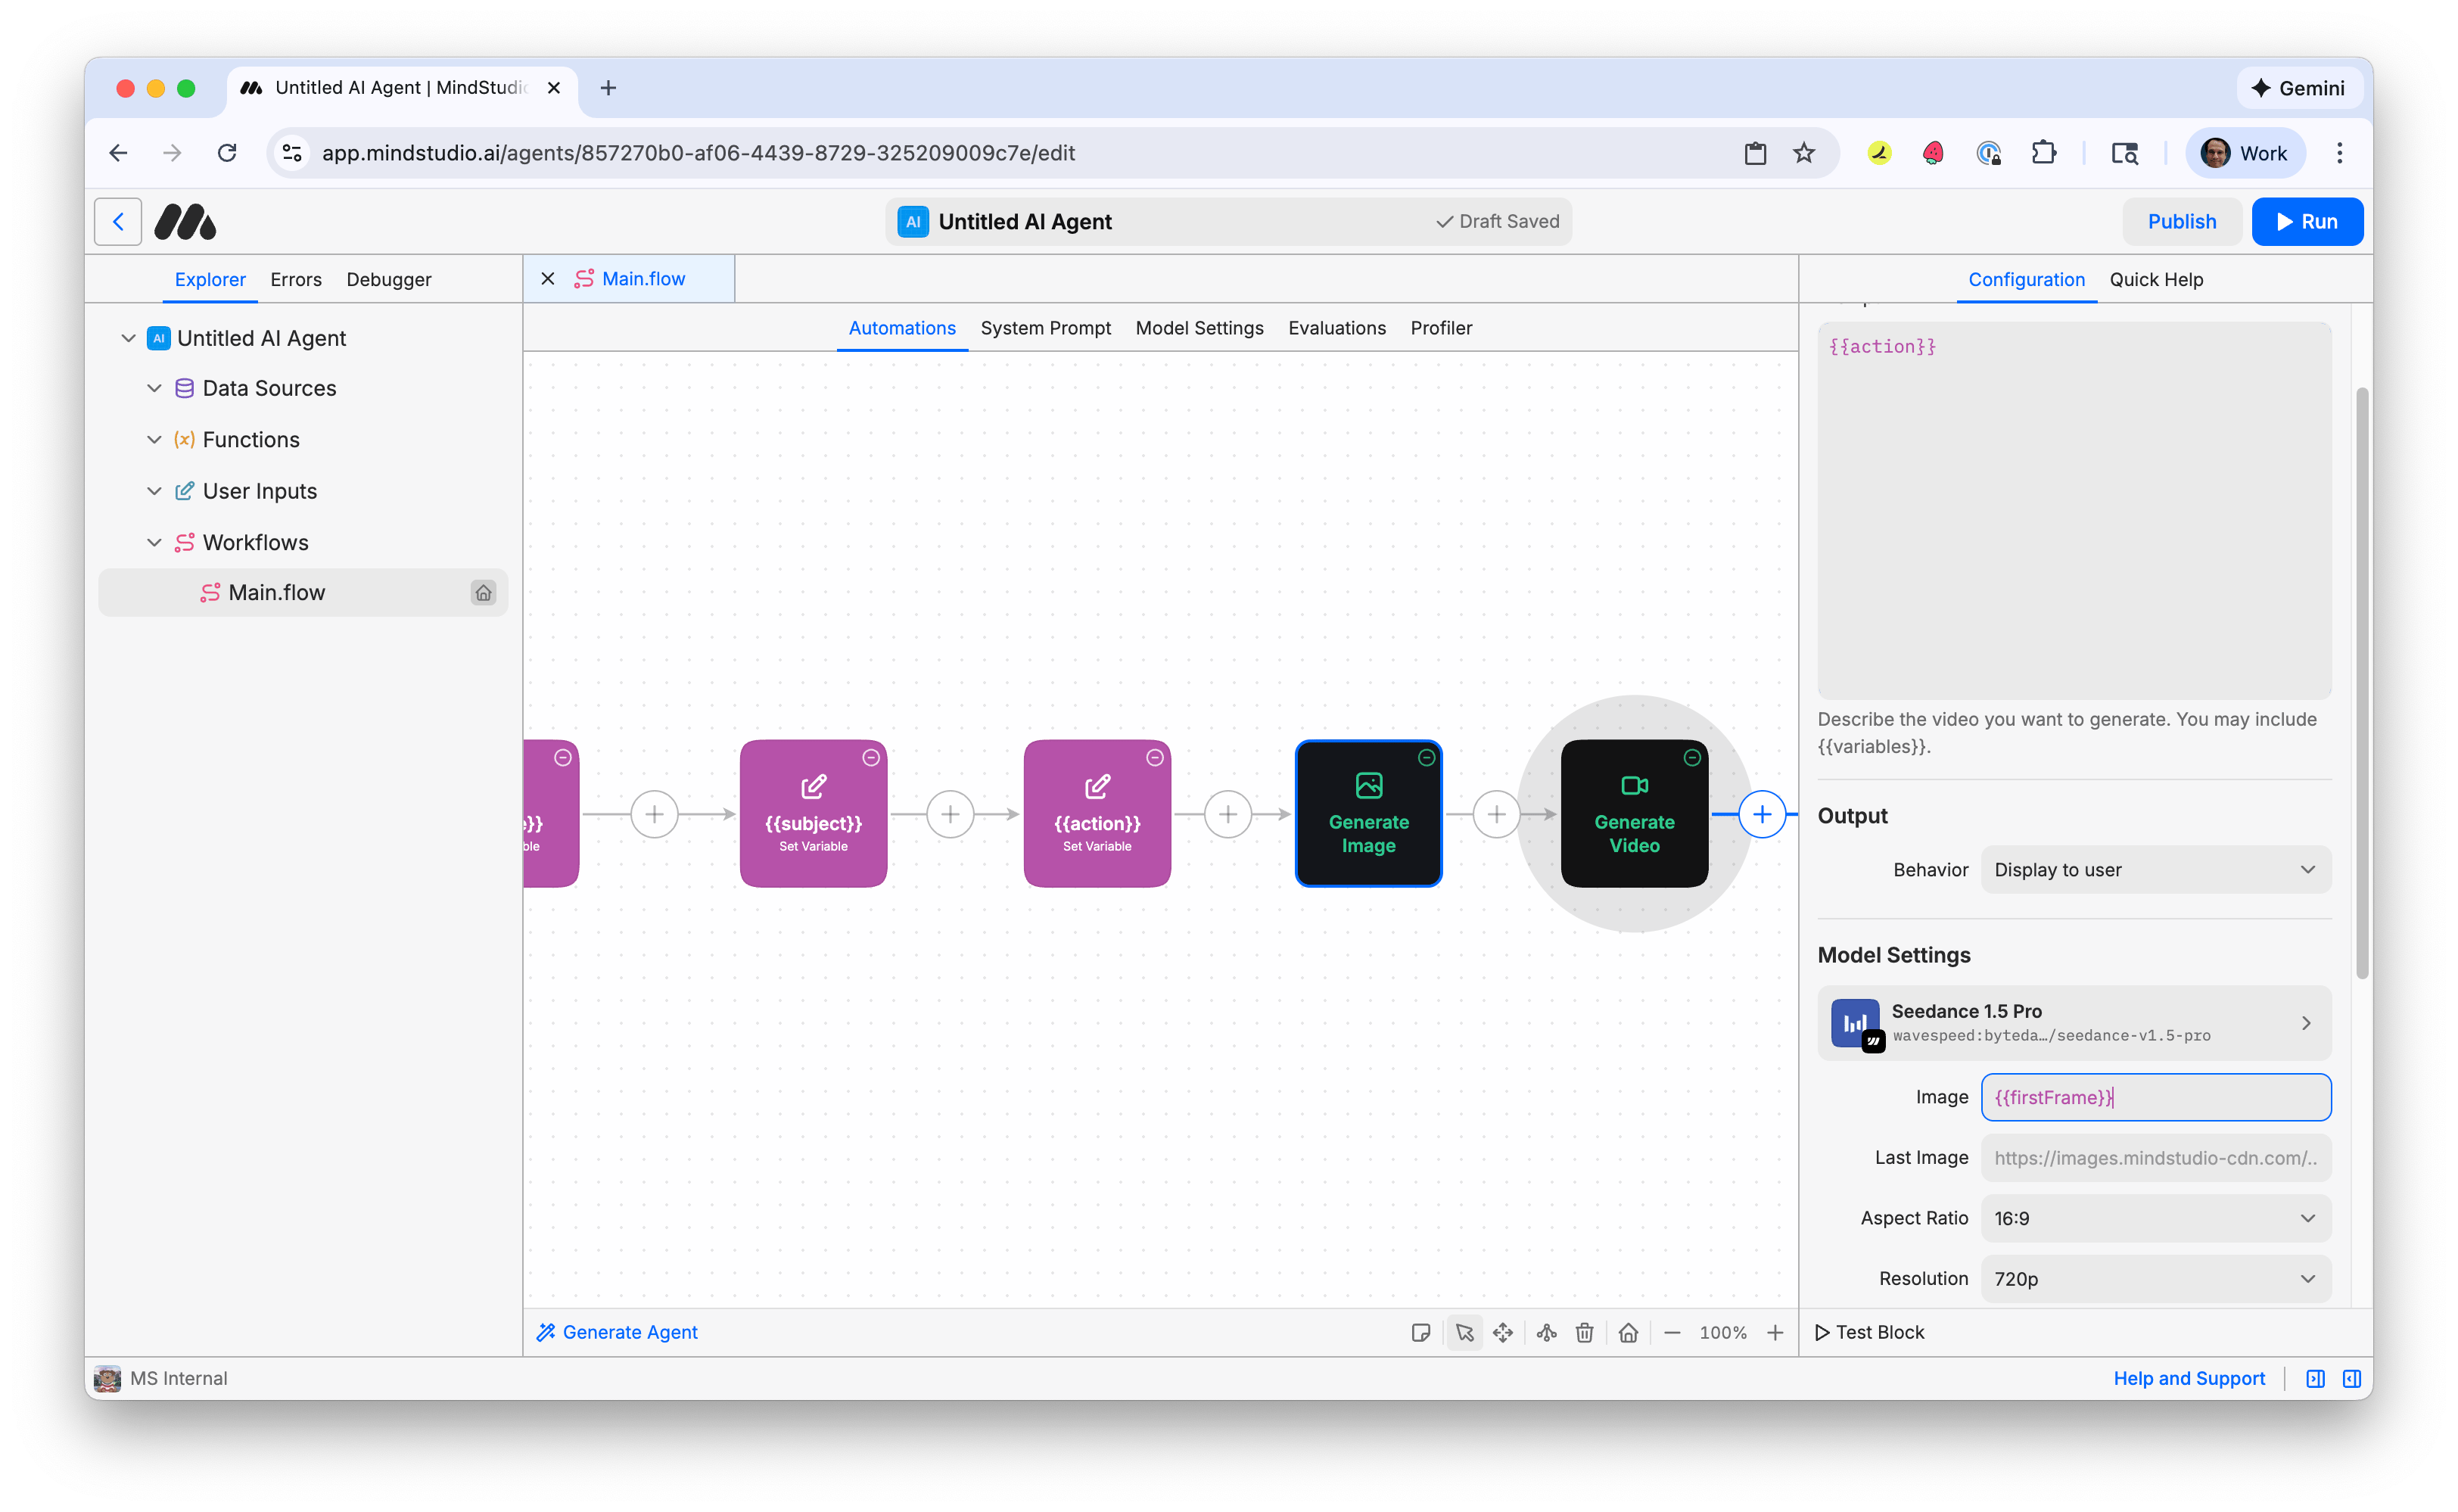
- Optionally, in the “Duration” setting, set the duration from the default 5 seconds to 12 seconds, or anywhere in between.
Other agents start typing. Remy starts asking.
Scoping, trade-offs, edge cases — the real work. Before a line of code.
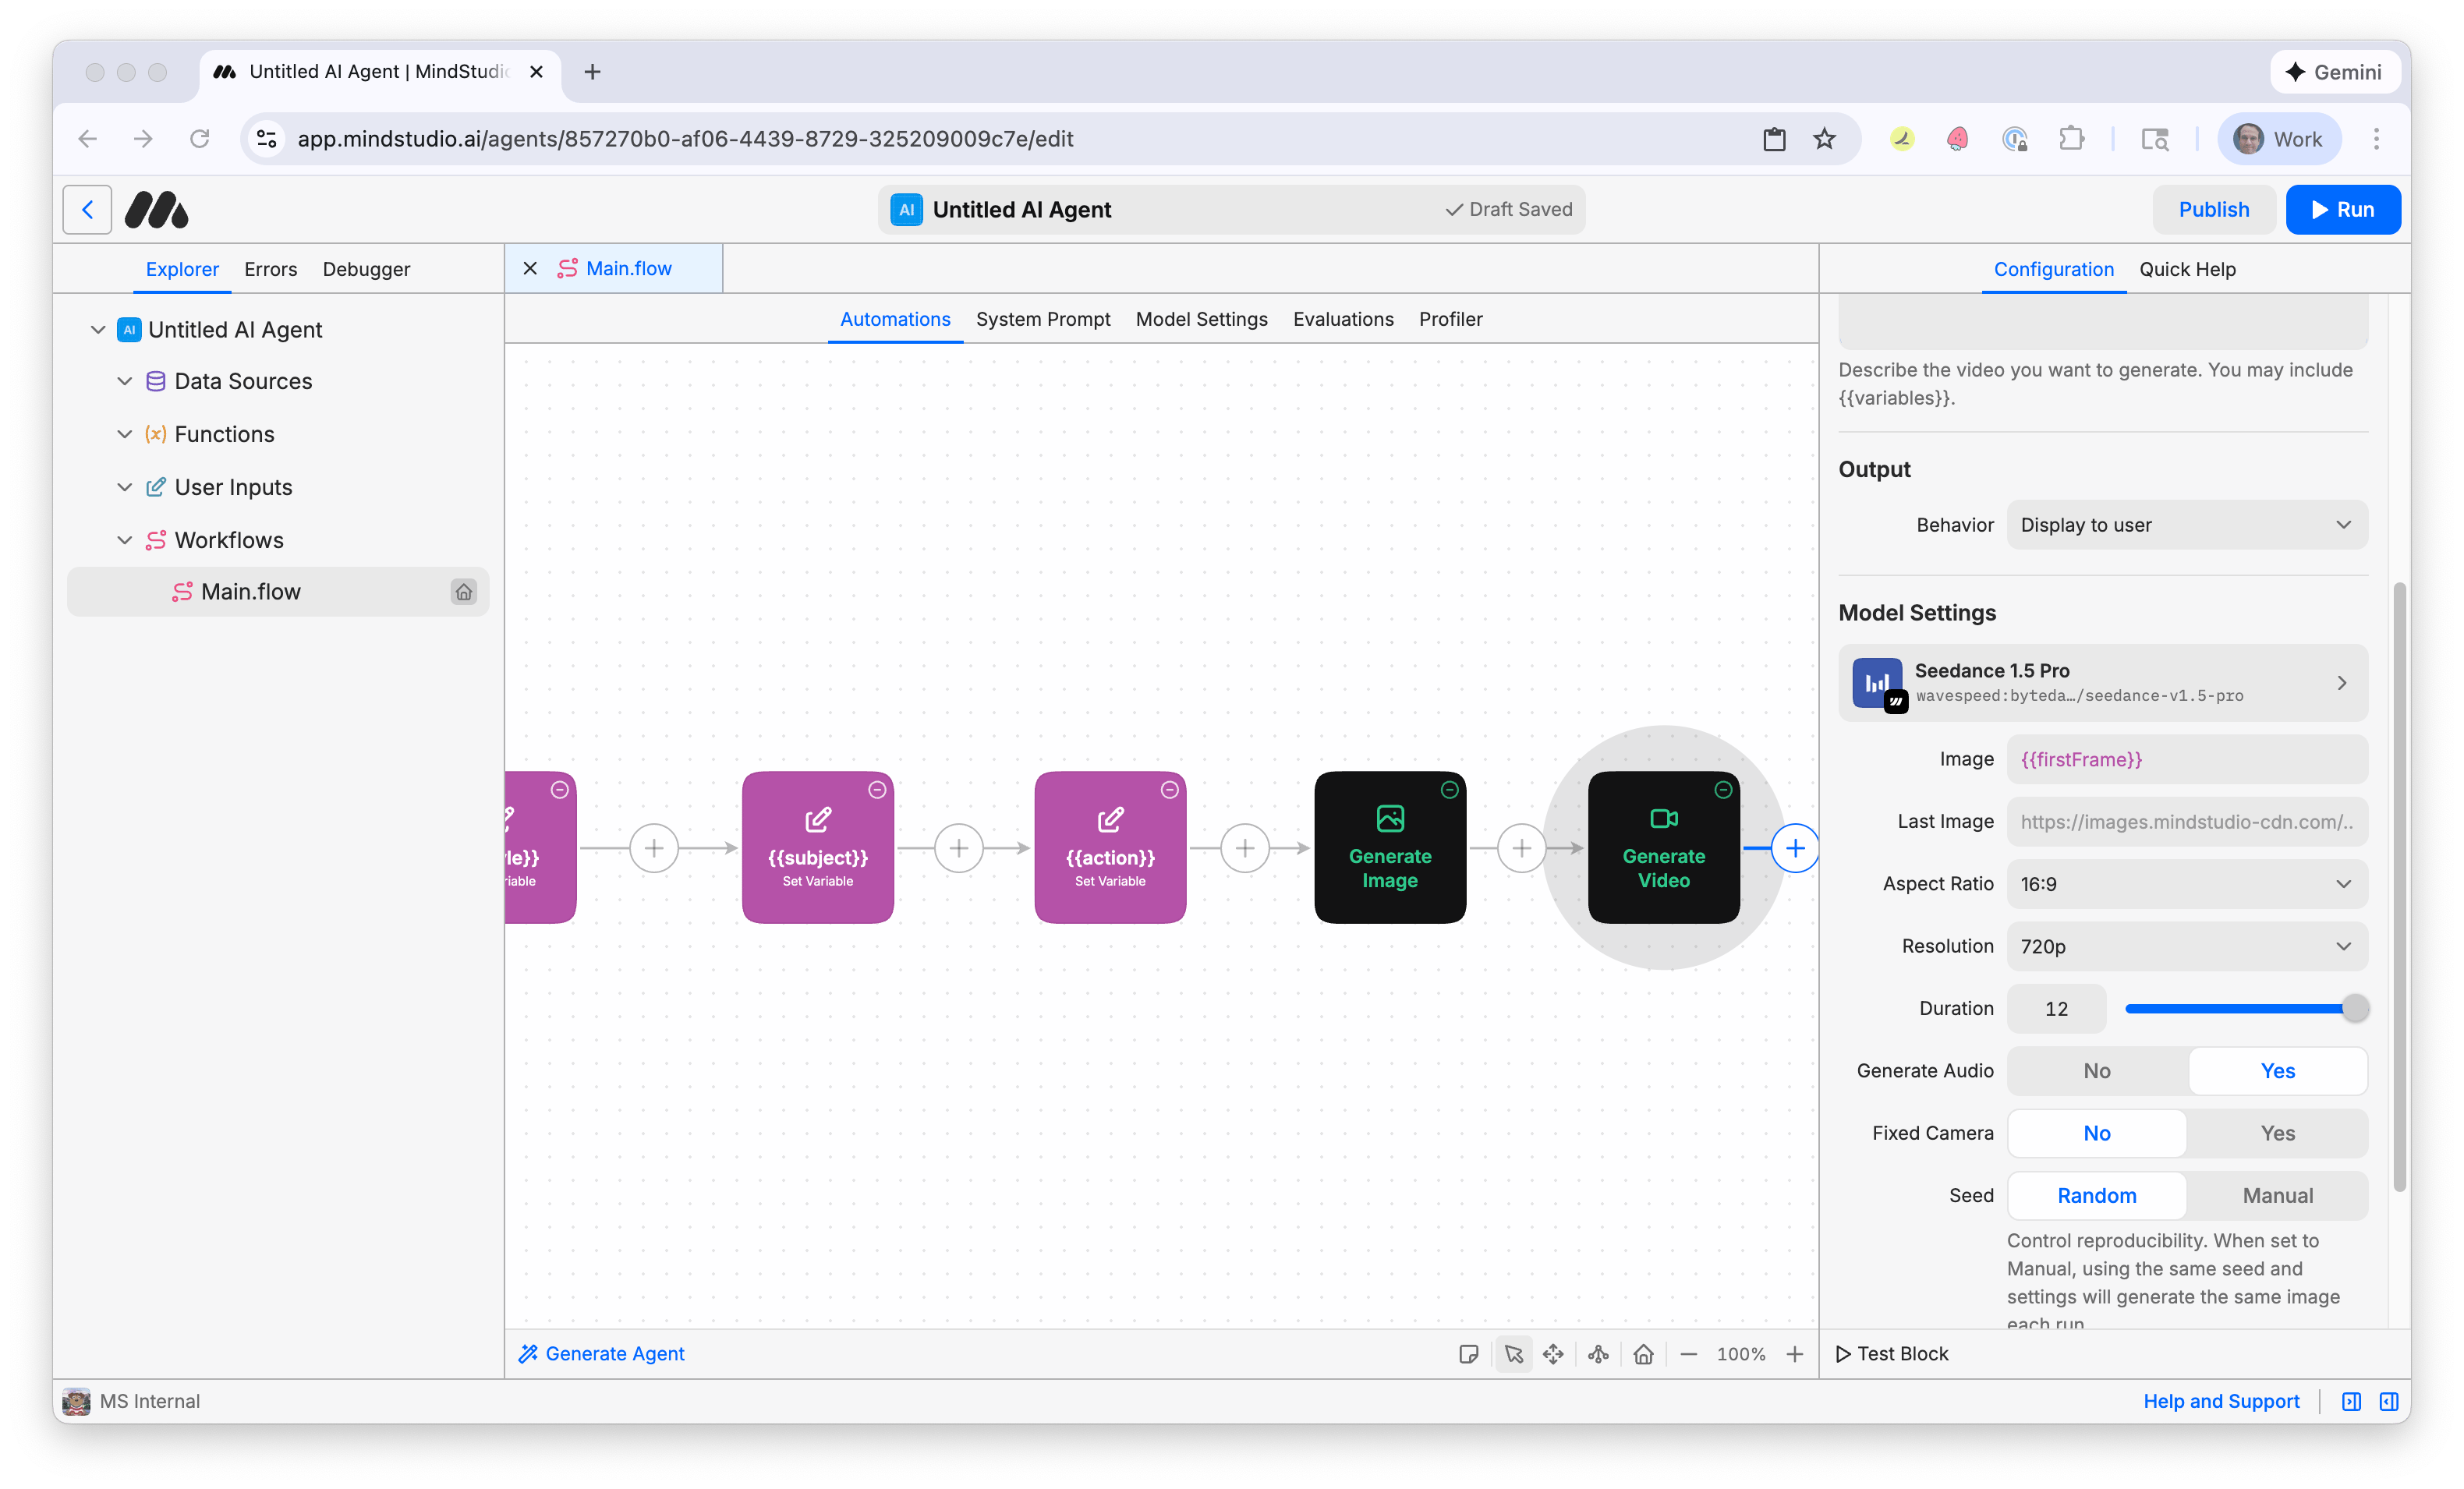
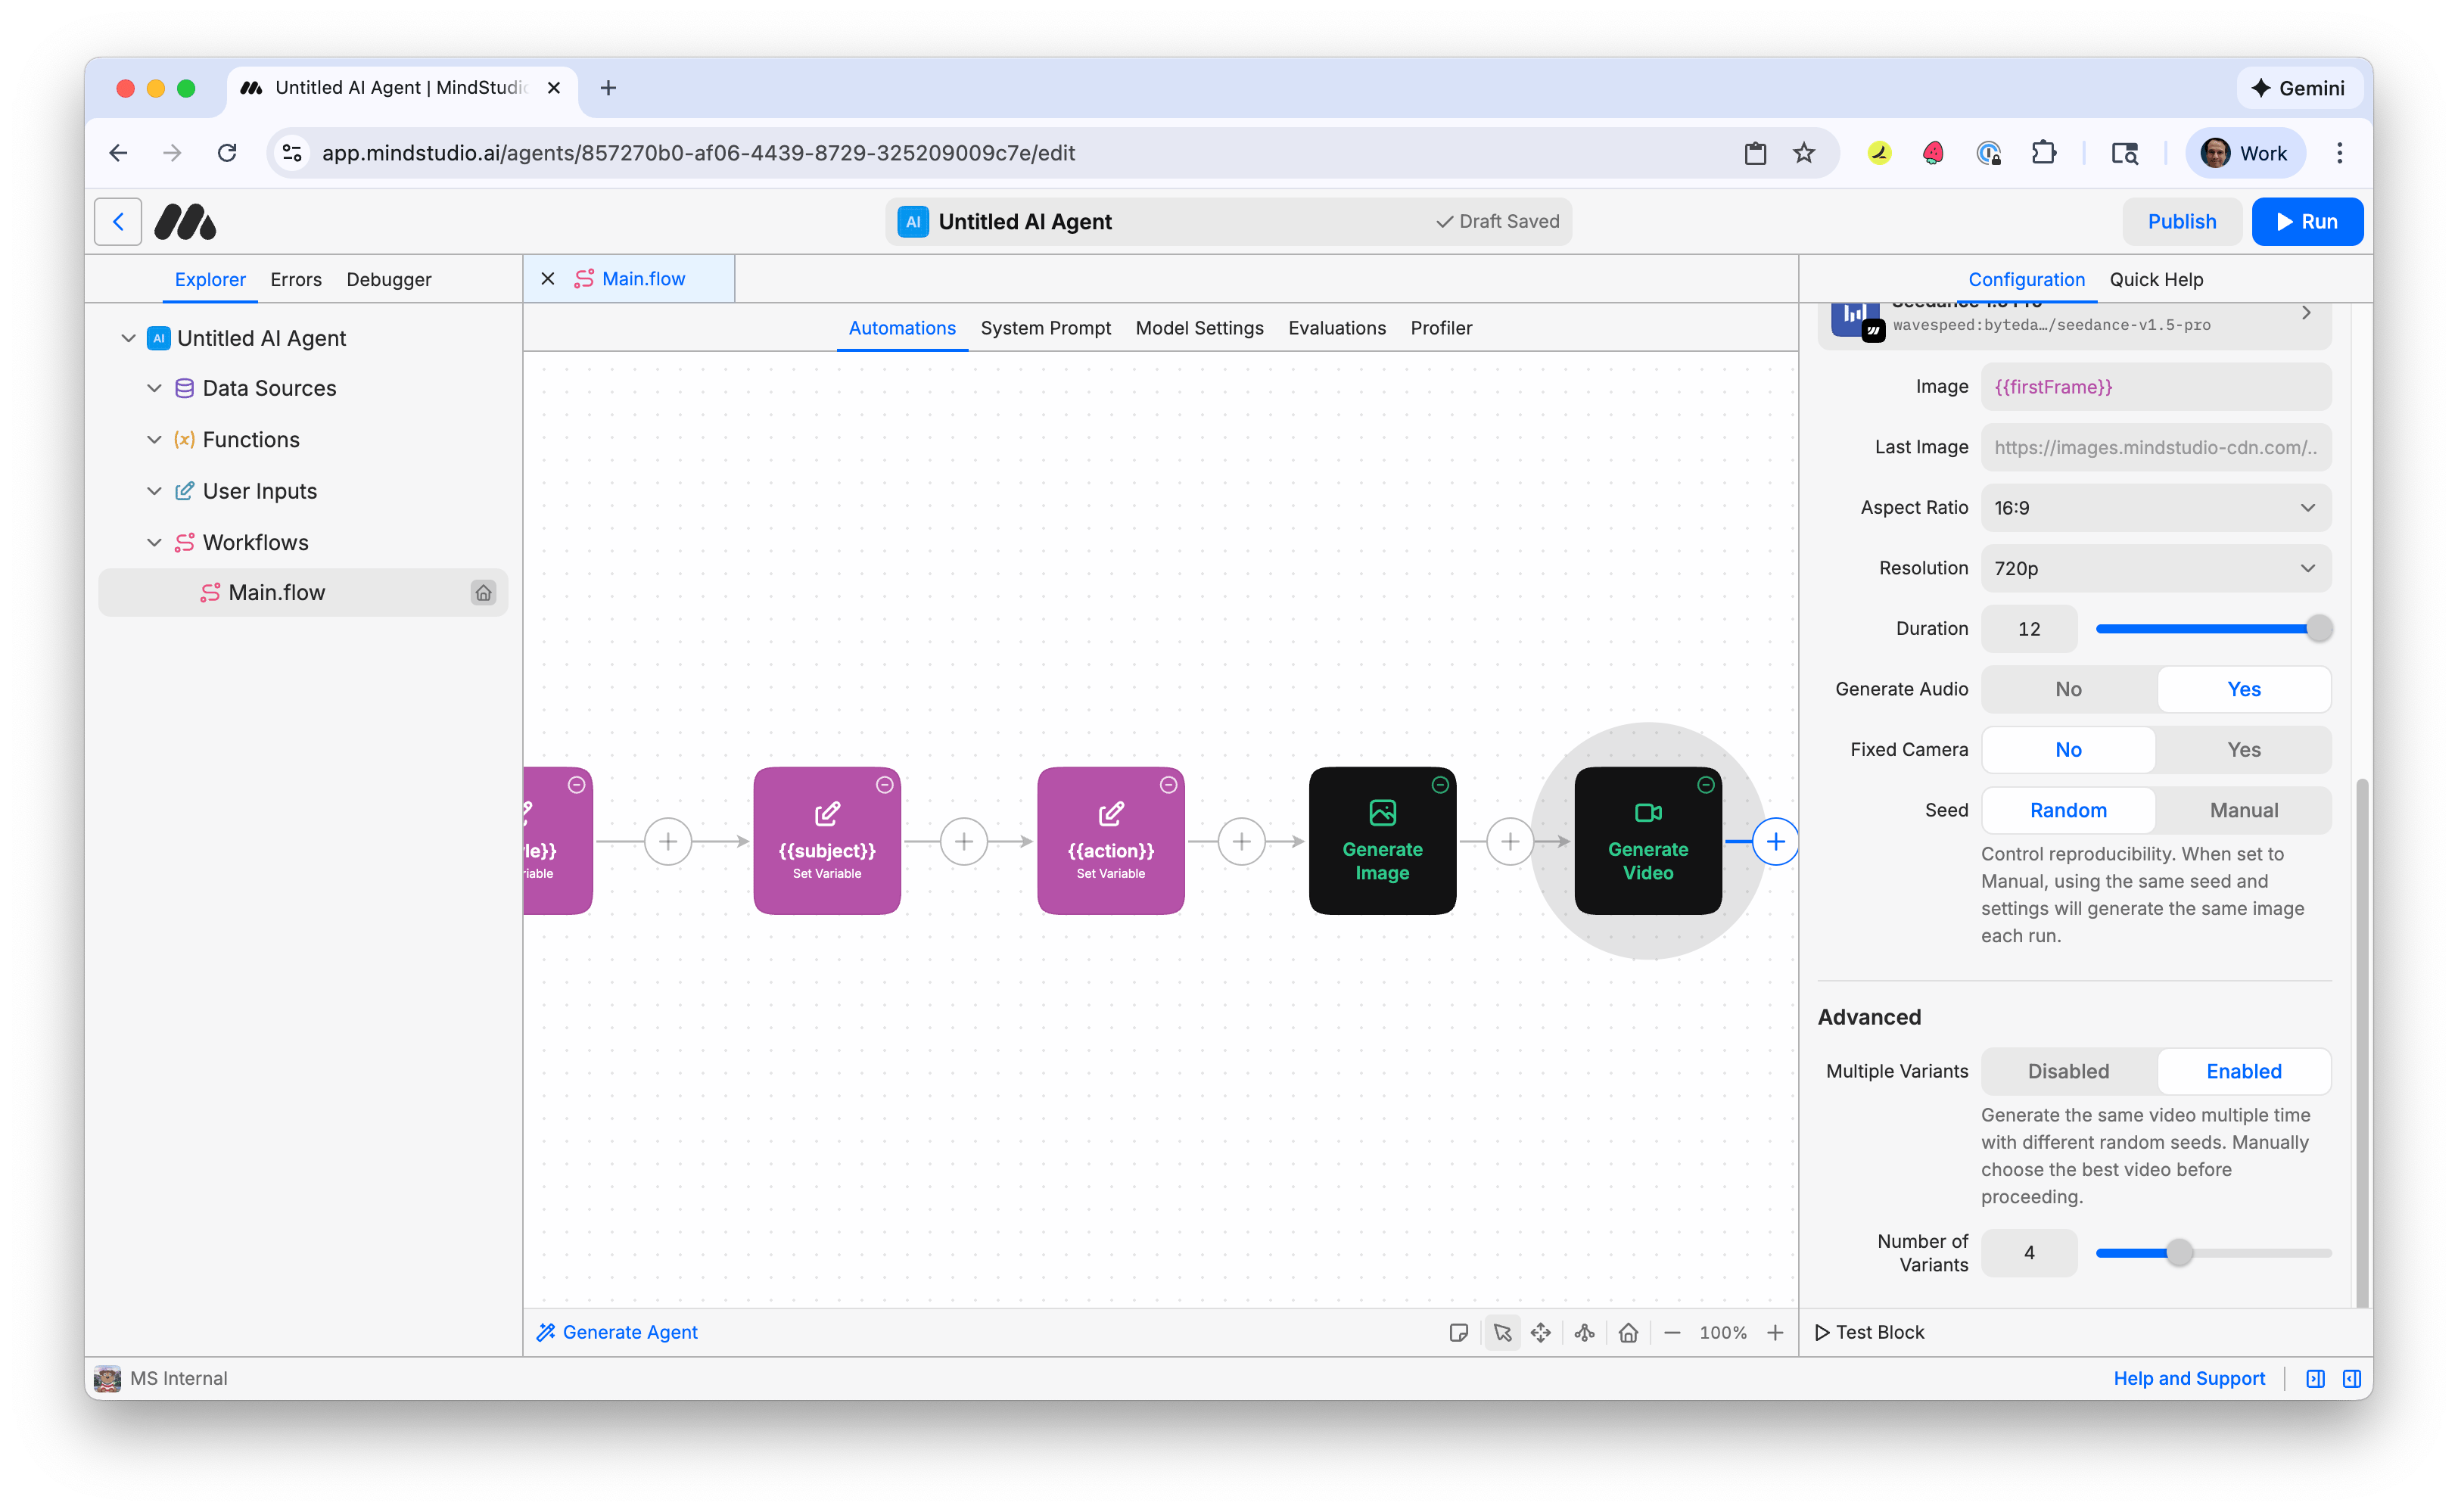
- In the configuration panel on the right, scroll down to “Advanced”, then select “Enabled” toggle on the “Multiple Variants” option. This is disabled by default. This allows you to generate multiple variations of this video at once.
-
Adjust how many variations to make when you run this workbench. 4 is default. This is a good setting to start with so you do not pay for too many videos at once.
-
Click the “Zoom Out” icon in the Automation Canvas to zoom out (80%), so you can see your entire workflow on-screen. If necessary, click “Auto Arrange” (or A) to automatically arrange the workflow for better viewing.
- Press “Run” in the top right (or Cmd/Ctrl+R) to start the workbench.
The MindStudio workbench runs in Debugger.
Troubleshooting tip! If you receive an error that reads, in part, “429 Client Error: Too Many Requests for url”, that simply means that your LoRA is really popular! There are too many requests to access it from the CiviAI website when the AI image generates. Just try running the workflow again by clicking “Run” (or Cmd/Ctrl+R).
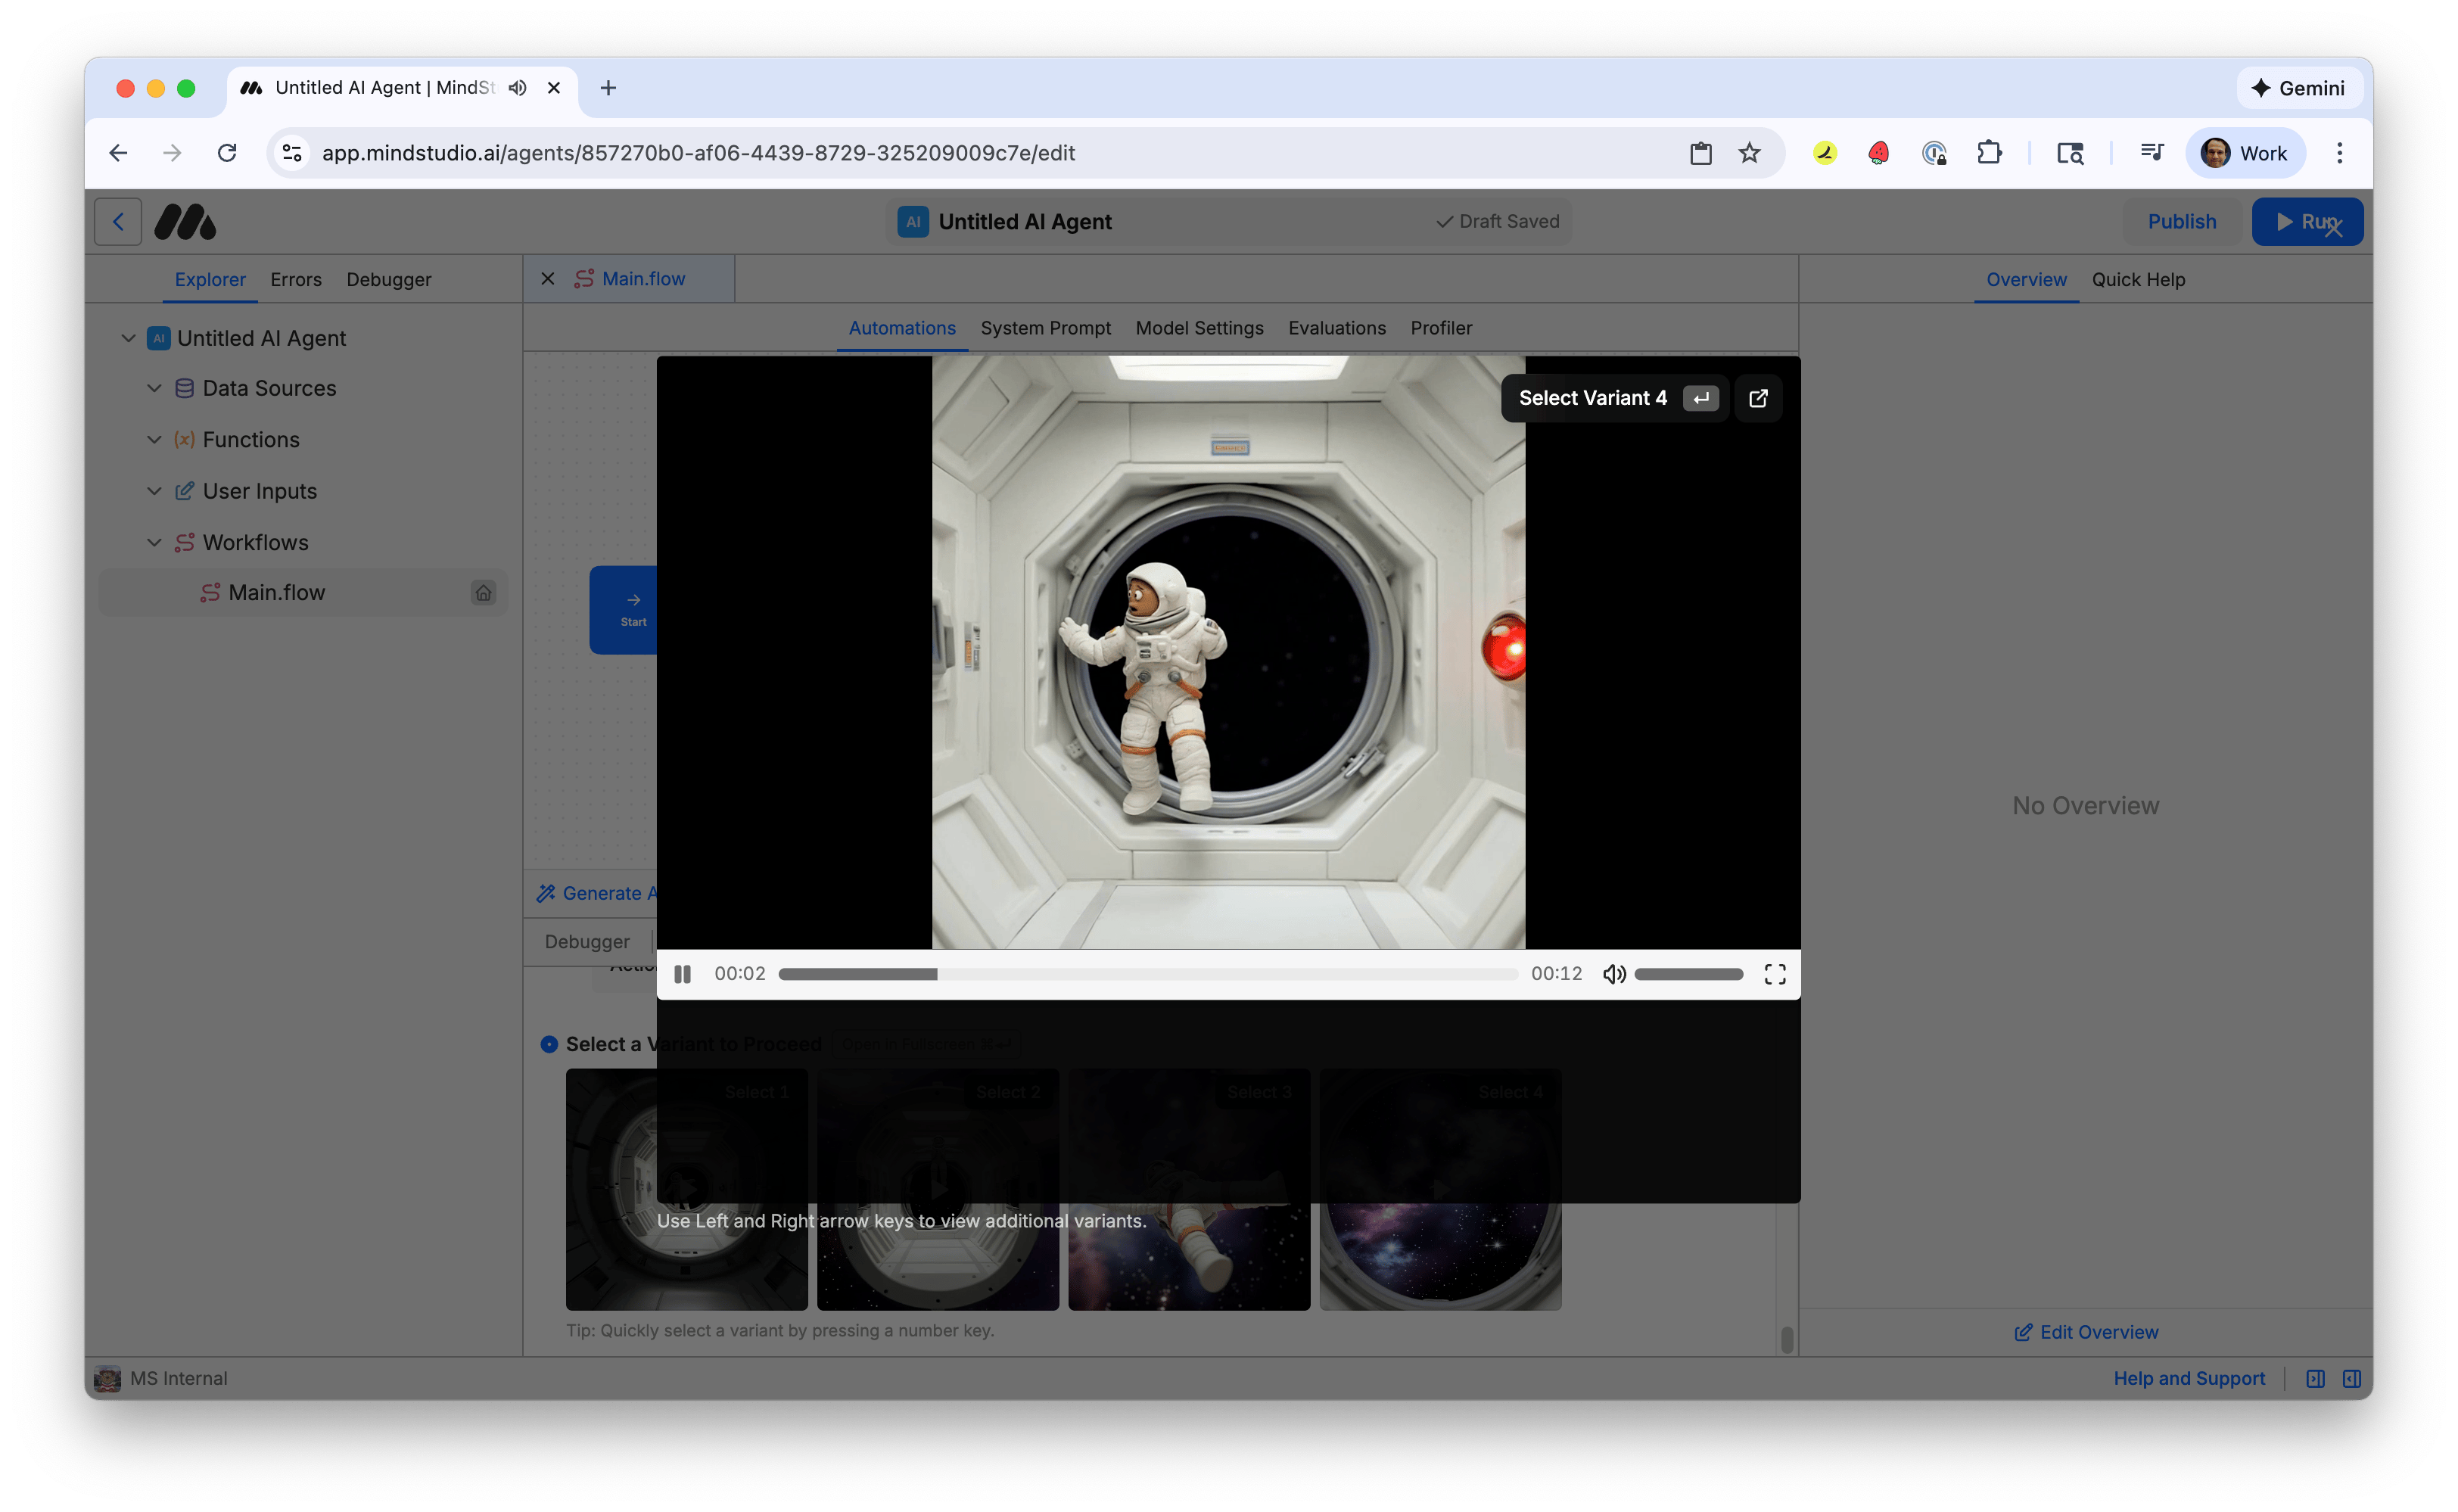
- When the generations finish, four variants are displayed. Click one to open in full screen.
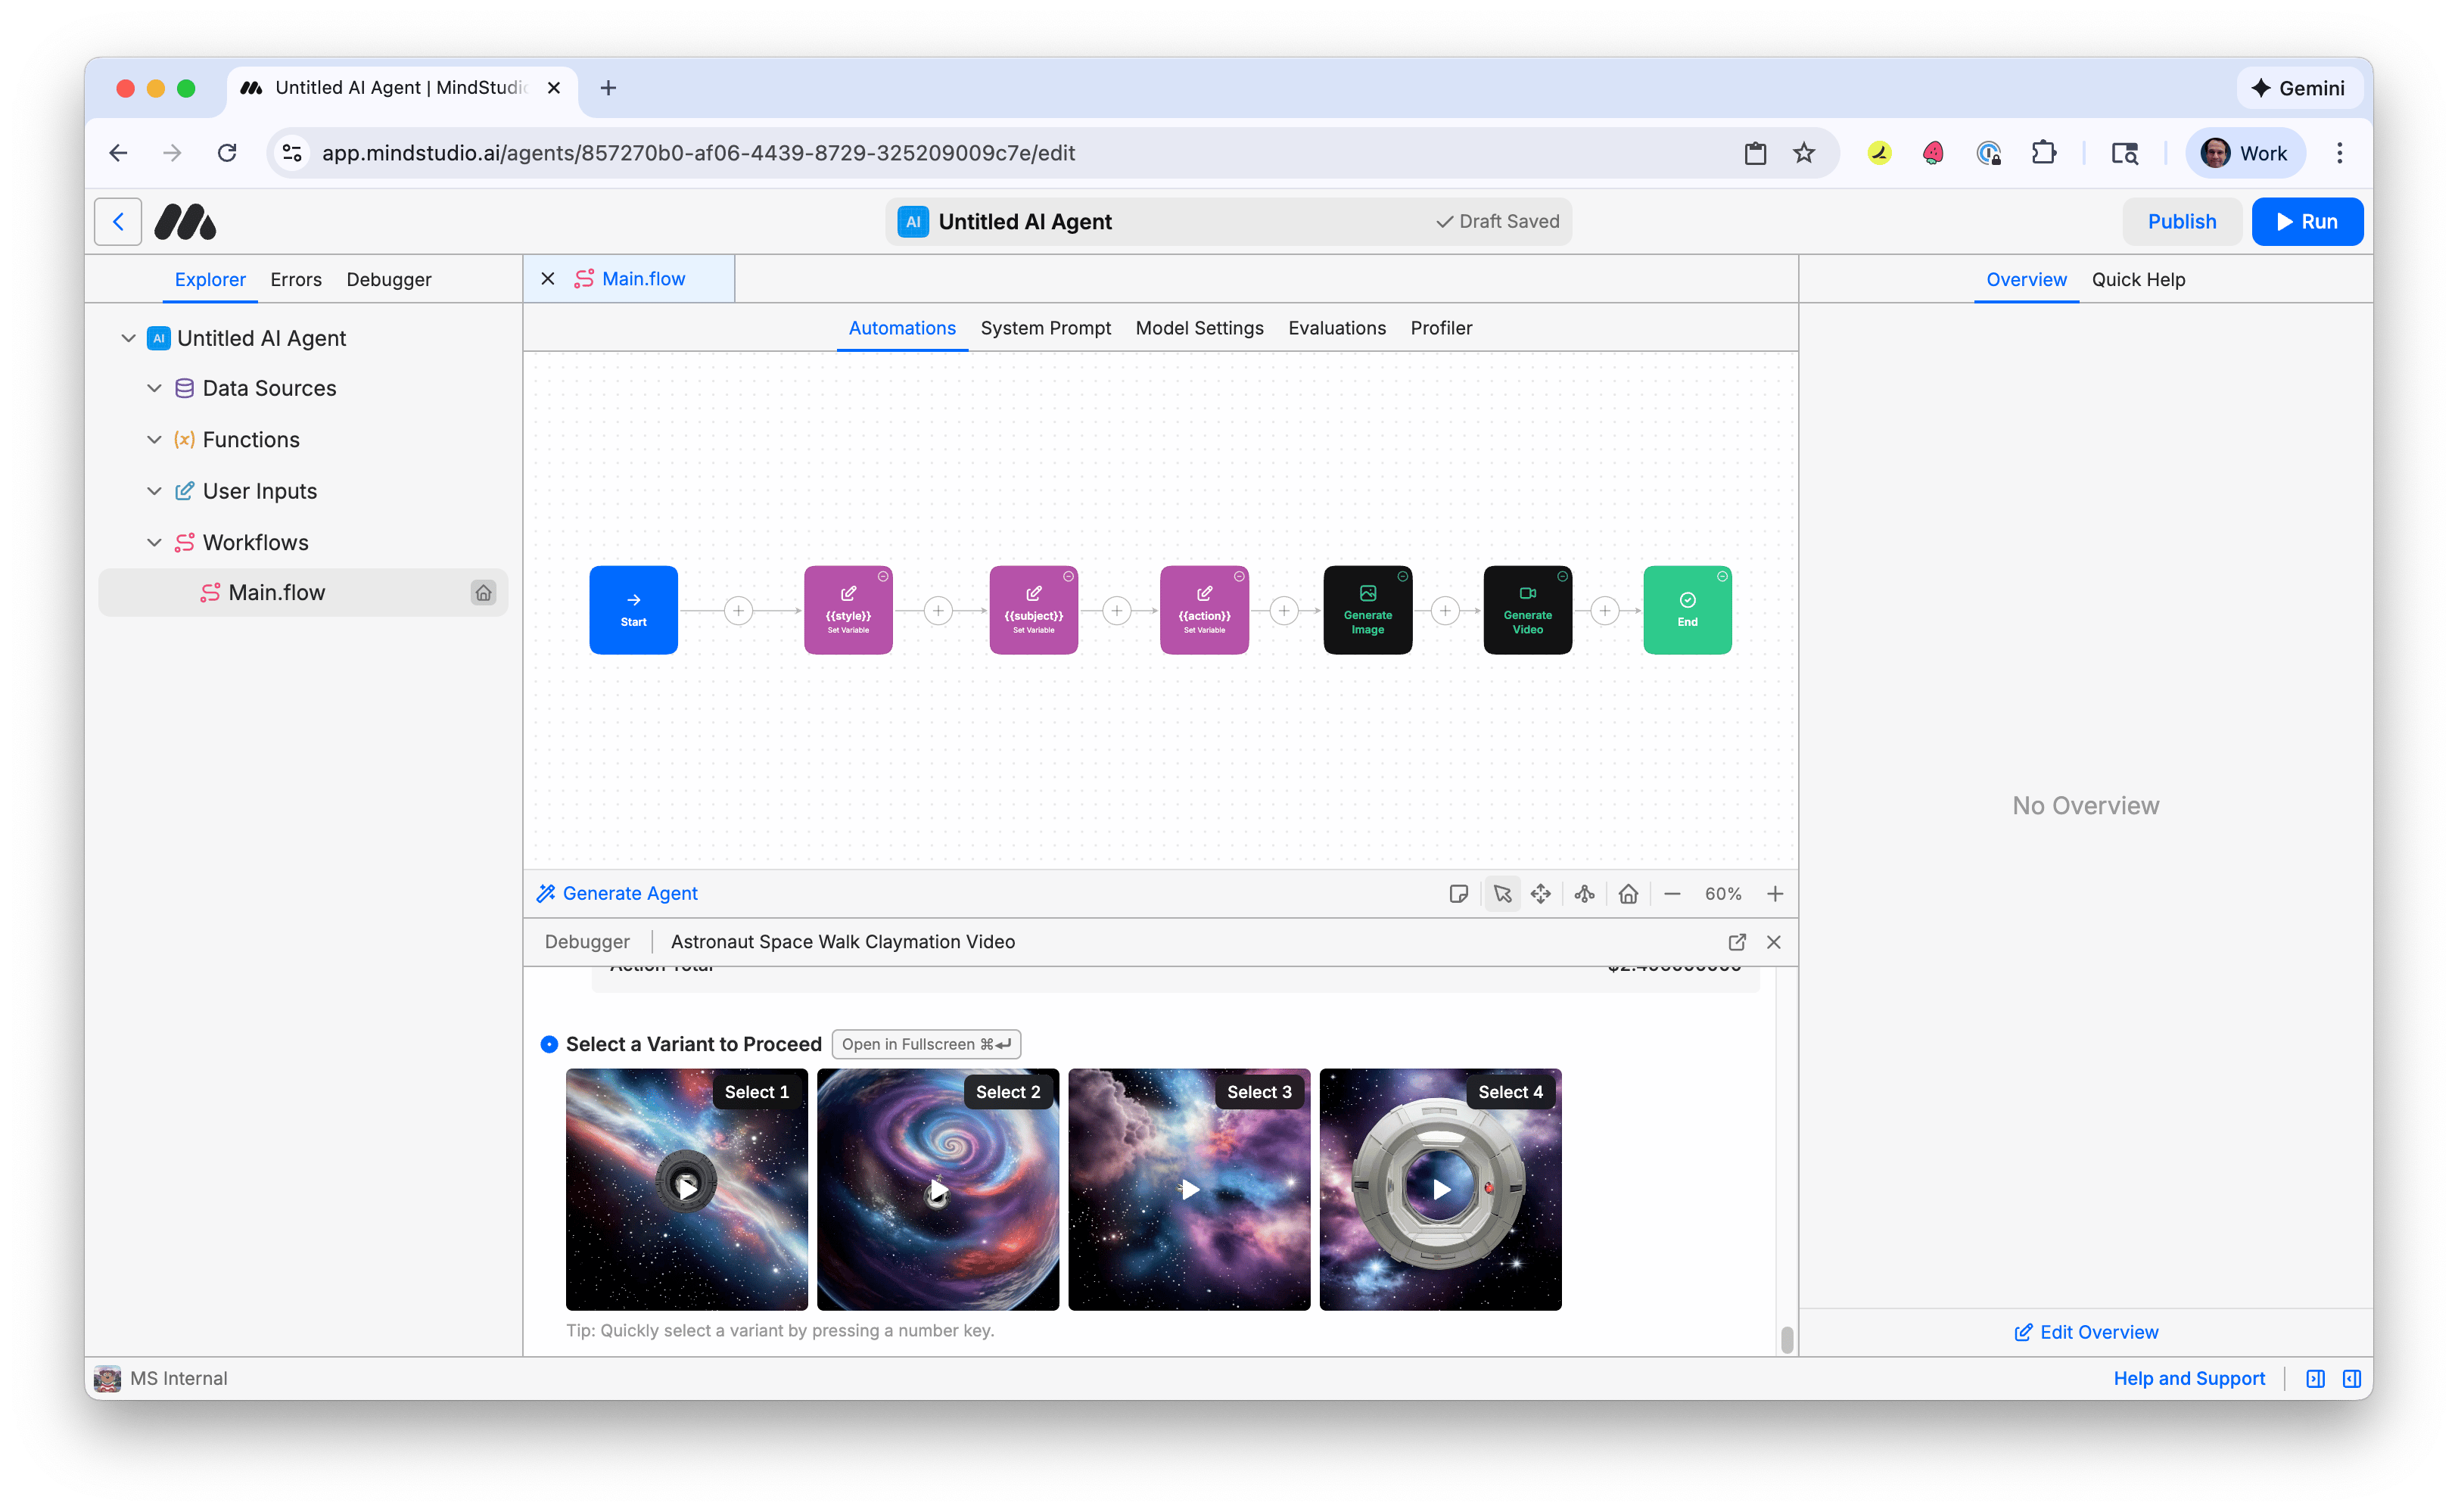
- Choose the best variant and select it to finish the workbench. Note that videos are already hosted on MindStudio CDN and ready to be shared or used in other workbenches. There are many other ways to work with videos! Check out other tutorials to learn how to continue!