How to Build an AI Agent for Website Change Monitoring
Use the Track Website Changes block to build a MindStudio AI agent that automatically tracks changes to a webpage. Only when changes occur to that site does the AI agent email you a summary of the changes to that site.

How to Build an AI Agent for Website Change Monitoring
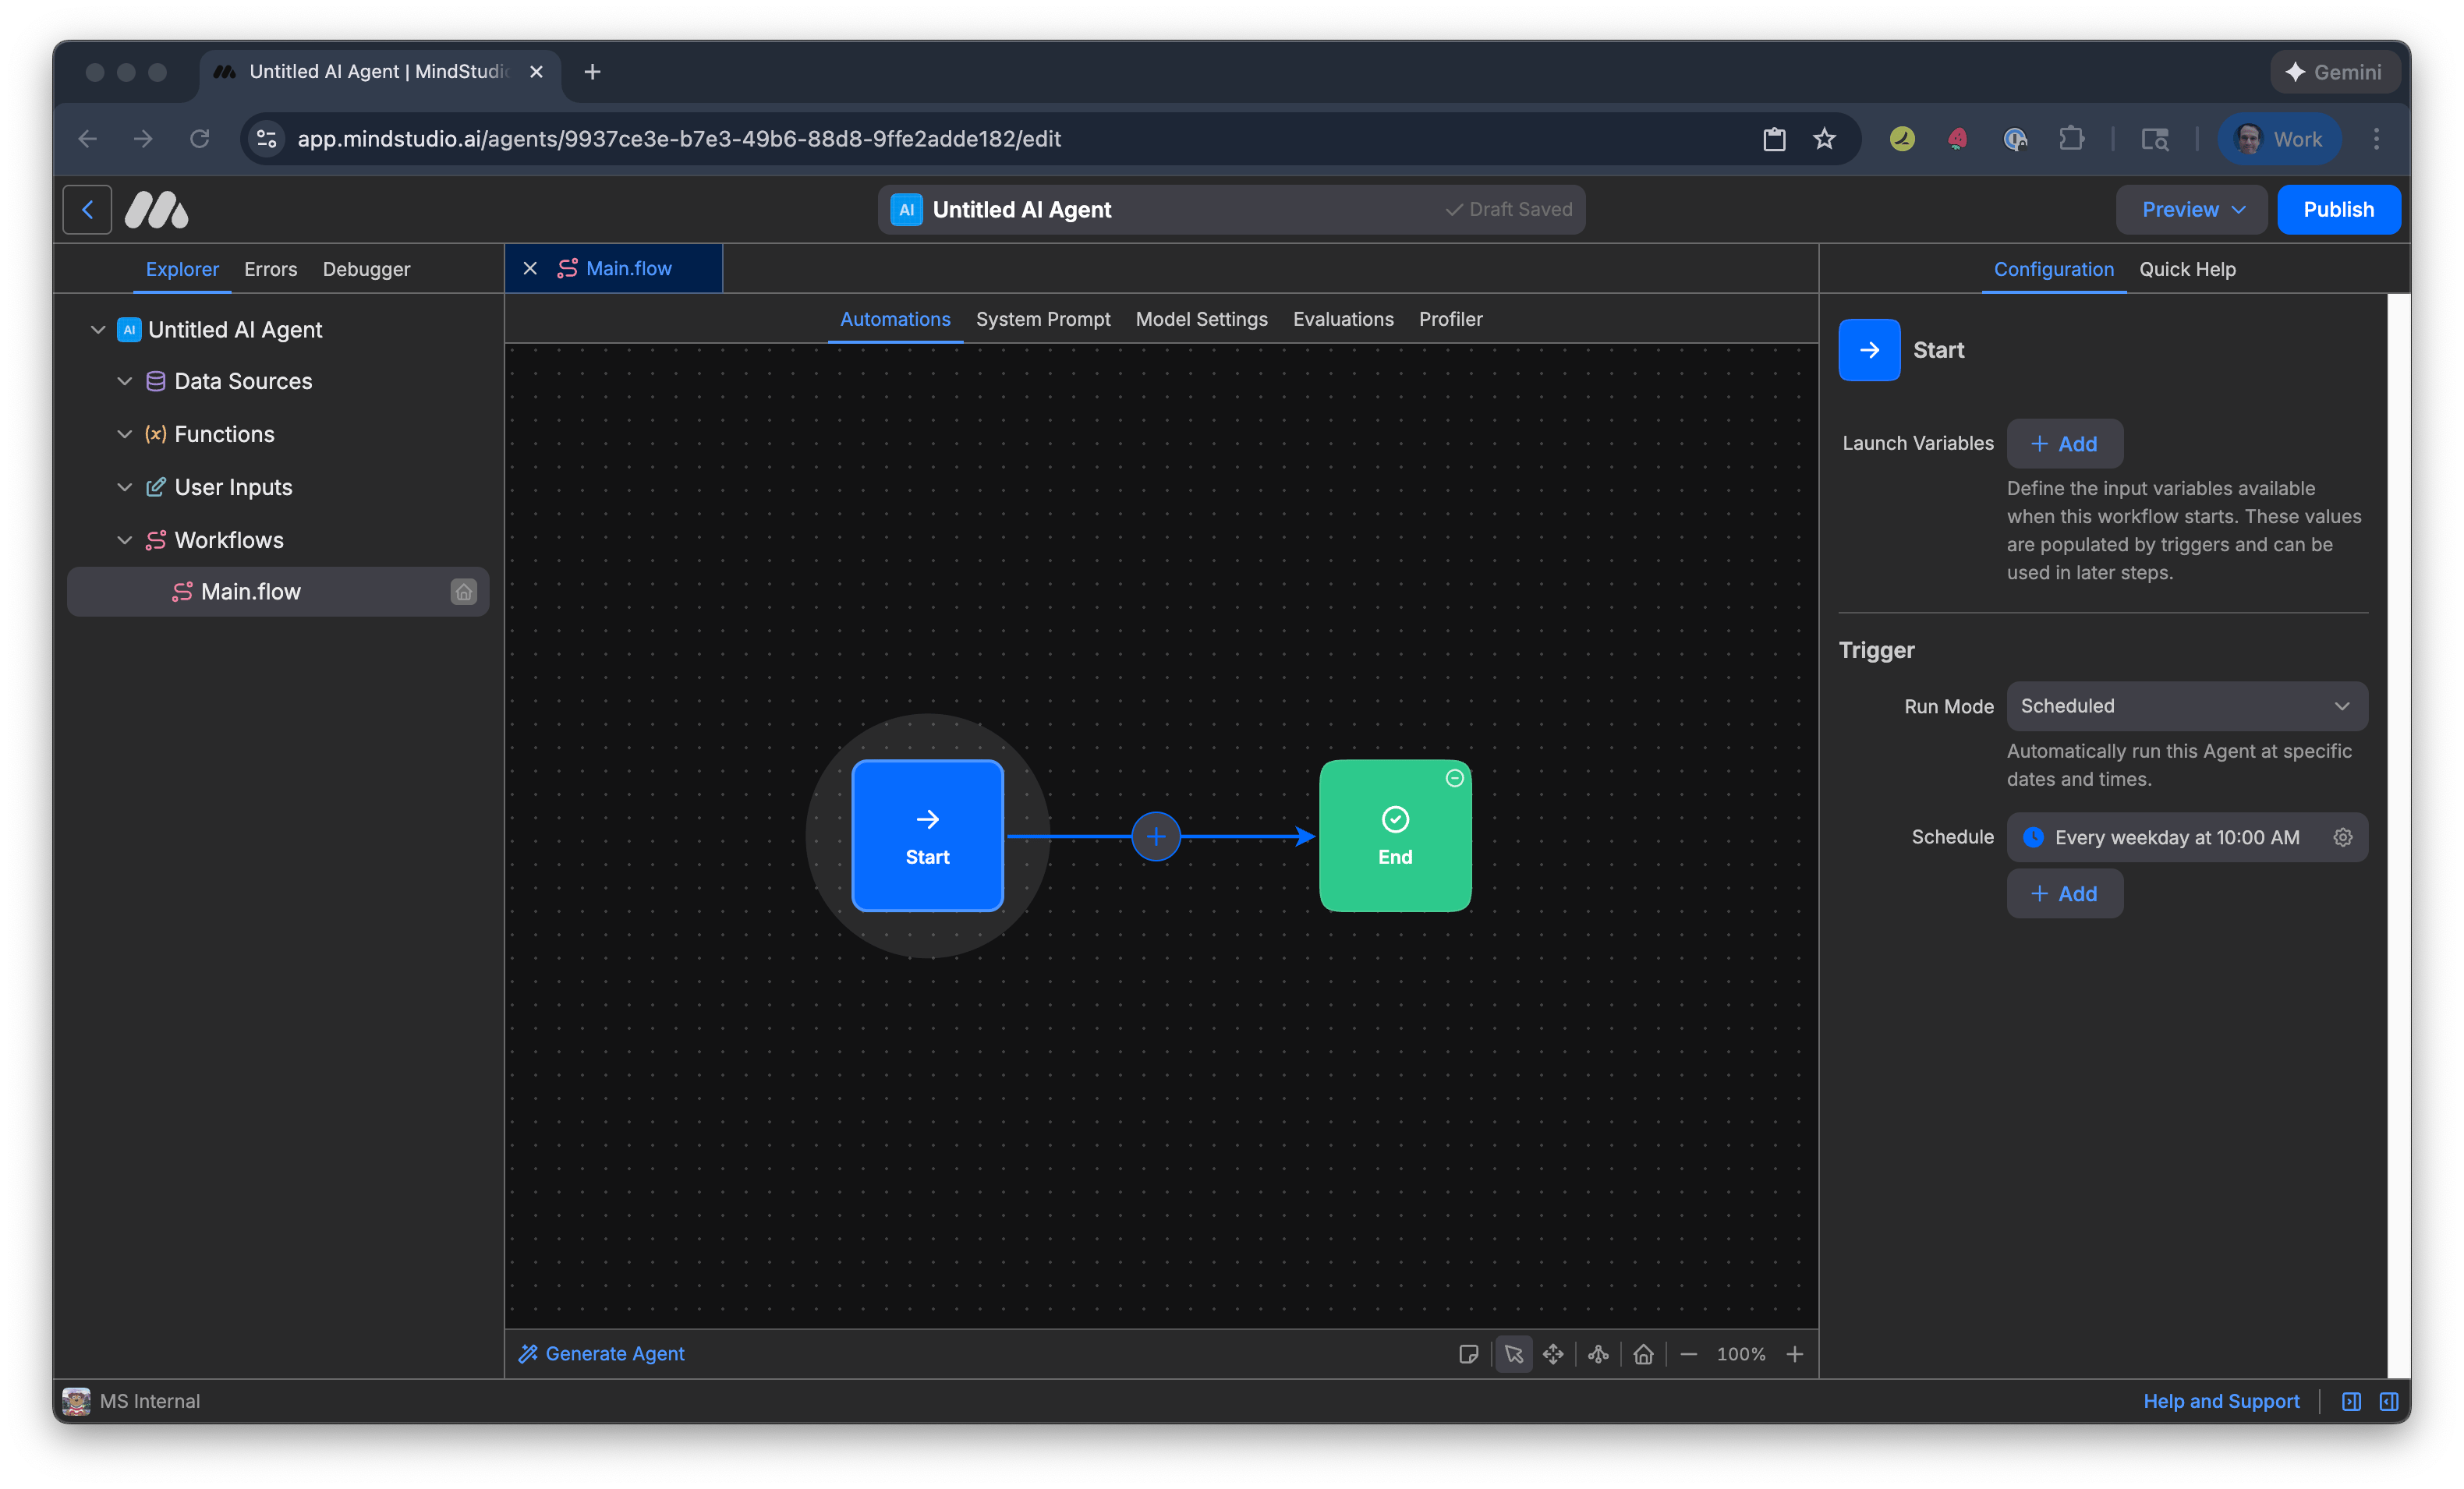
MindStudio makes it quick and easy to build an AI agent that monitors for changes to a website that you specify. Only when changes occur to that site does the AI agent email you a summary of those changes. Otherwise, the AI agent ends quietly. This AI agent runs on a scheduled interval of your choosing.
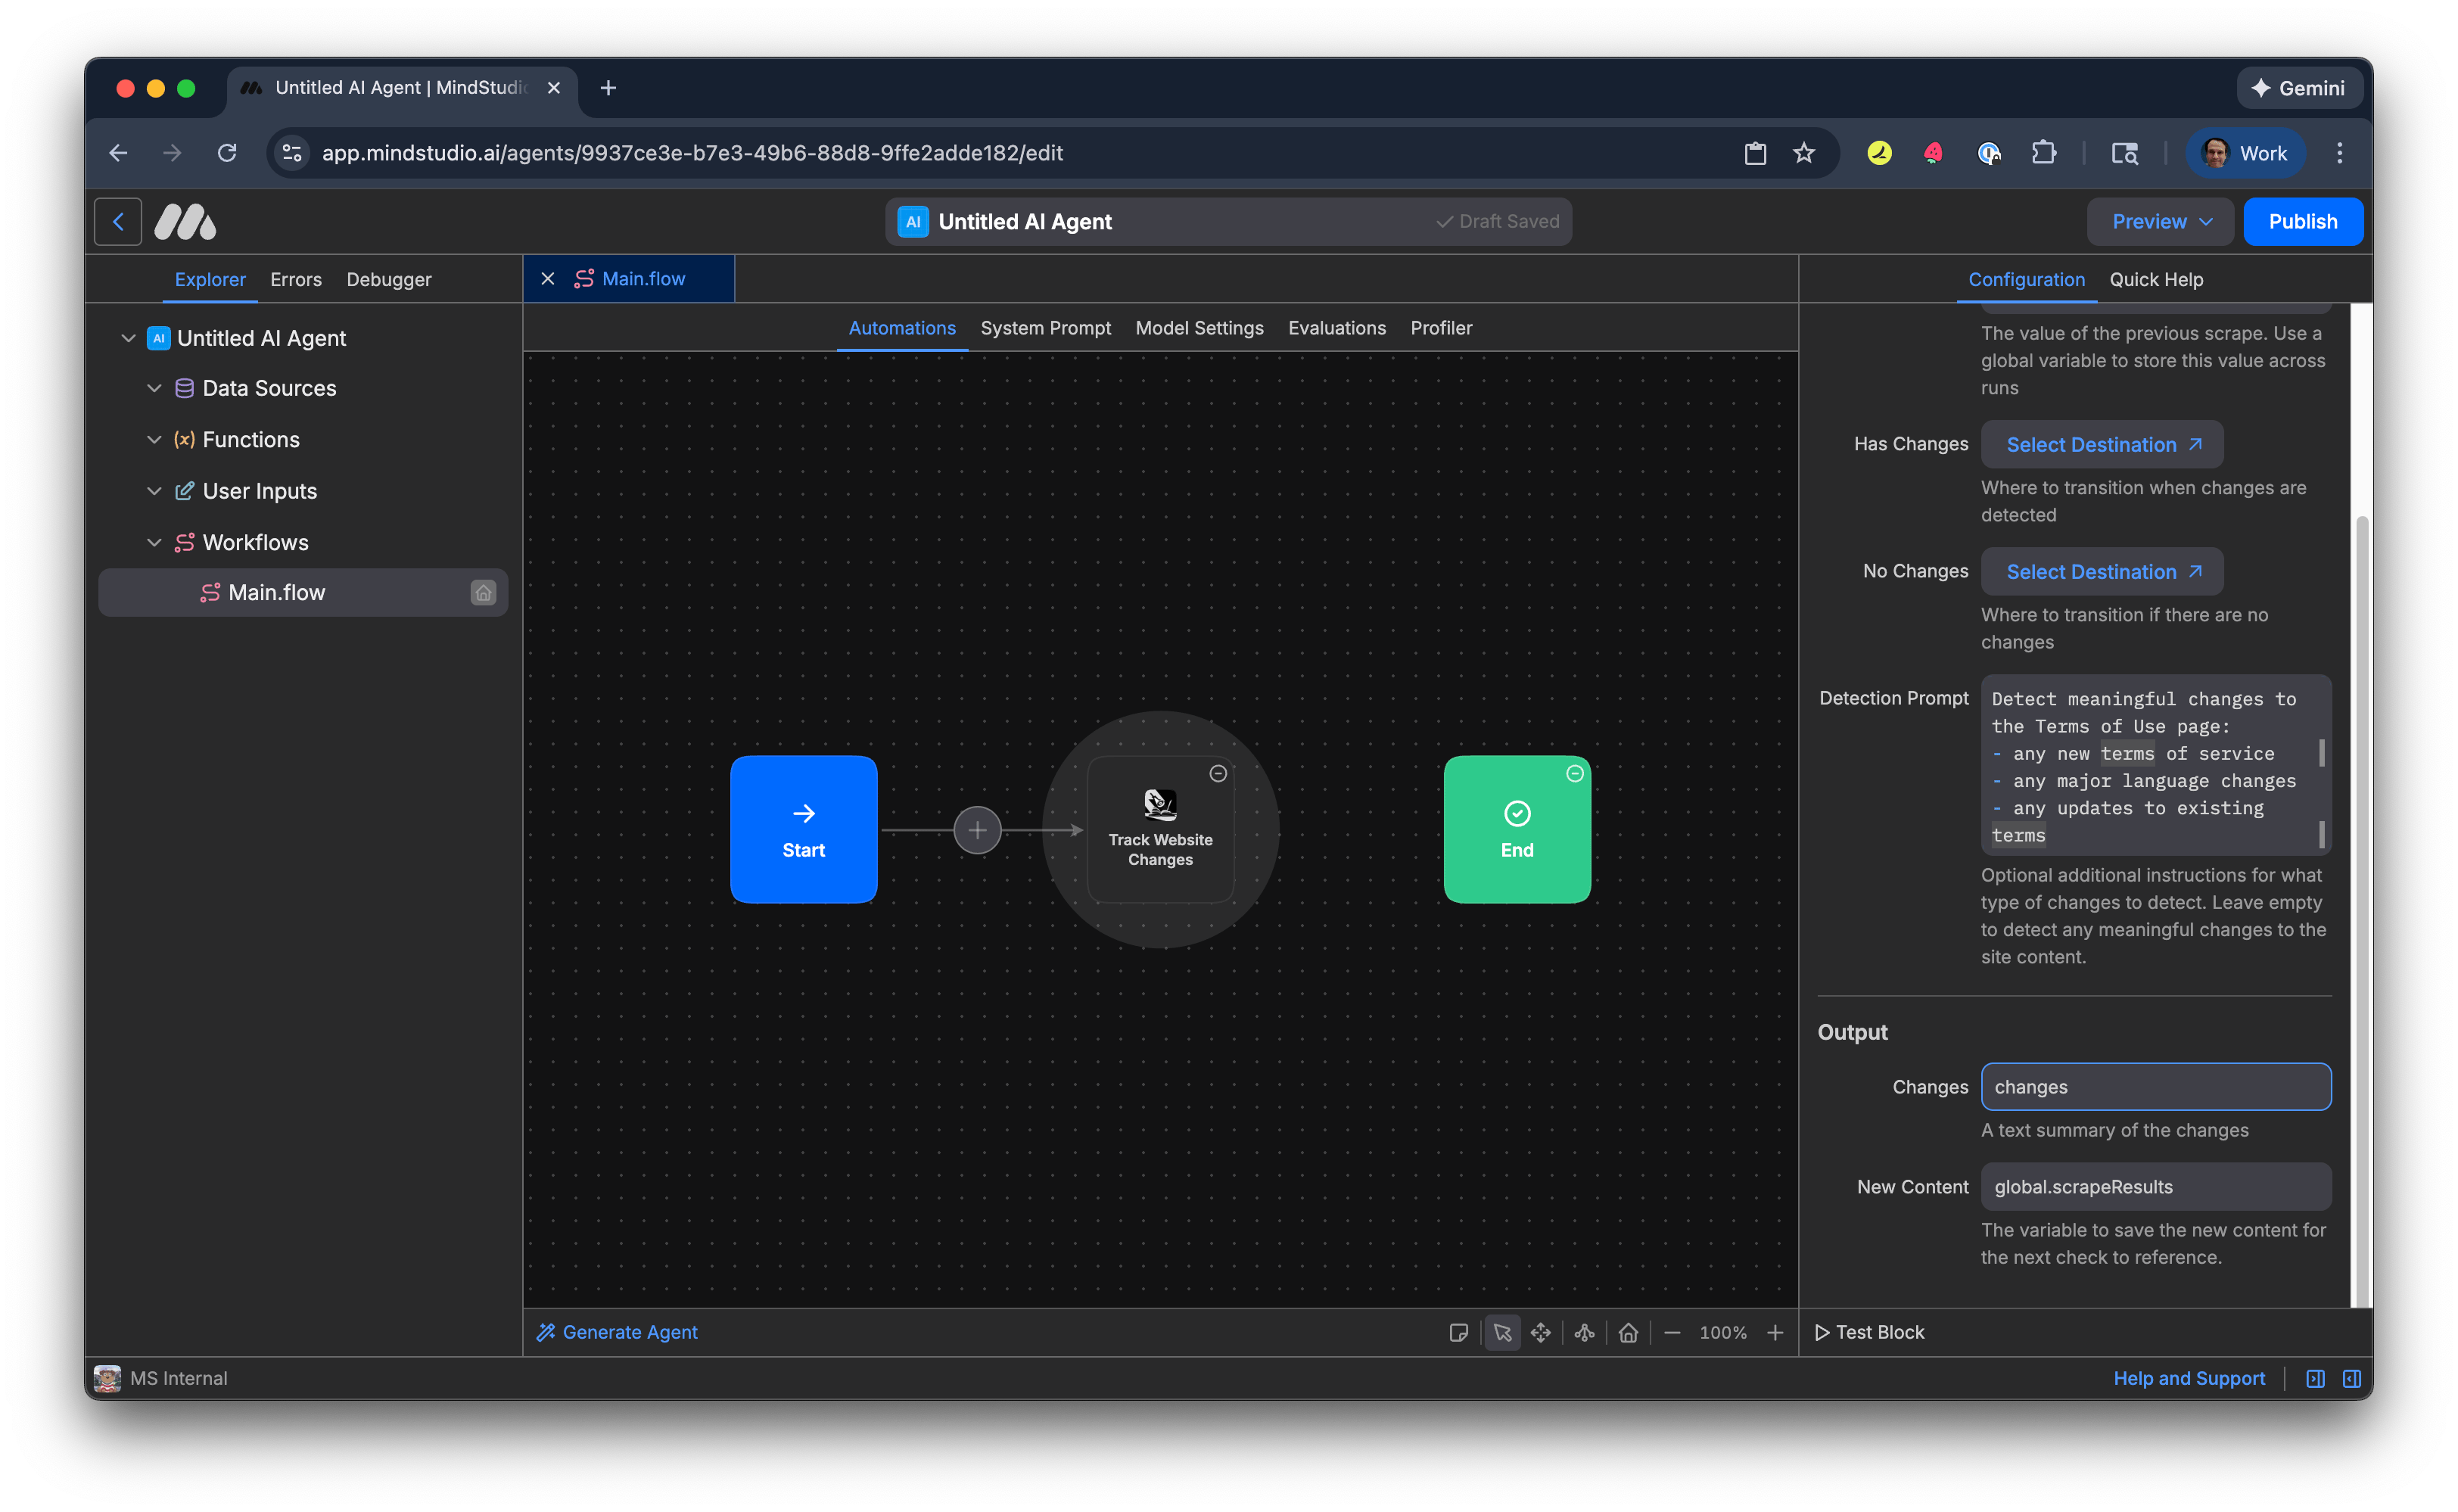
This AI agent uses the Track Website Changes block. This block makes it easy to configure what changes to monitor for on the specified website and route the workflow when changes are detected.
MindStudio Link
Instructions
Follow these steps to build an AI agent that monitors for website changes:
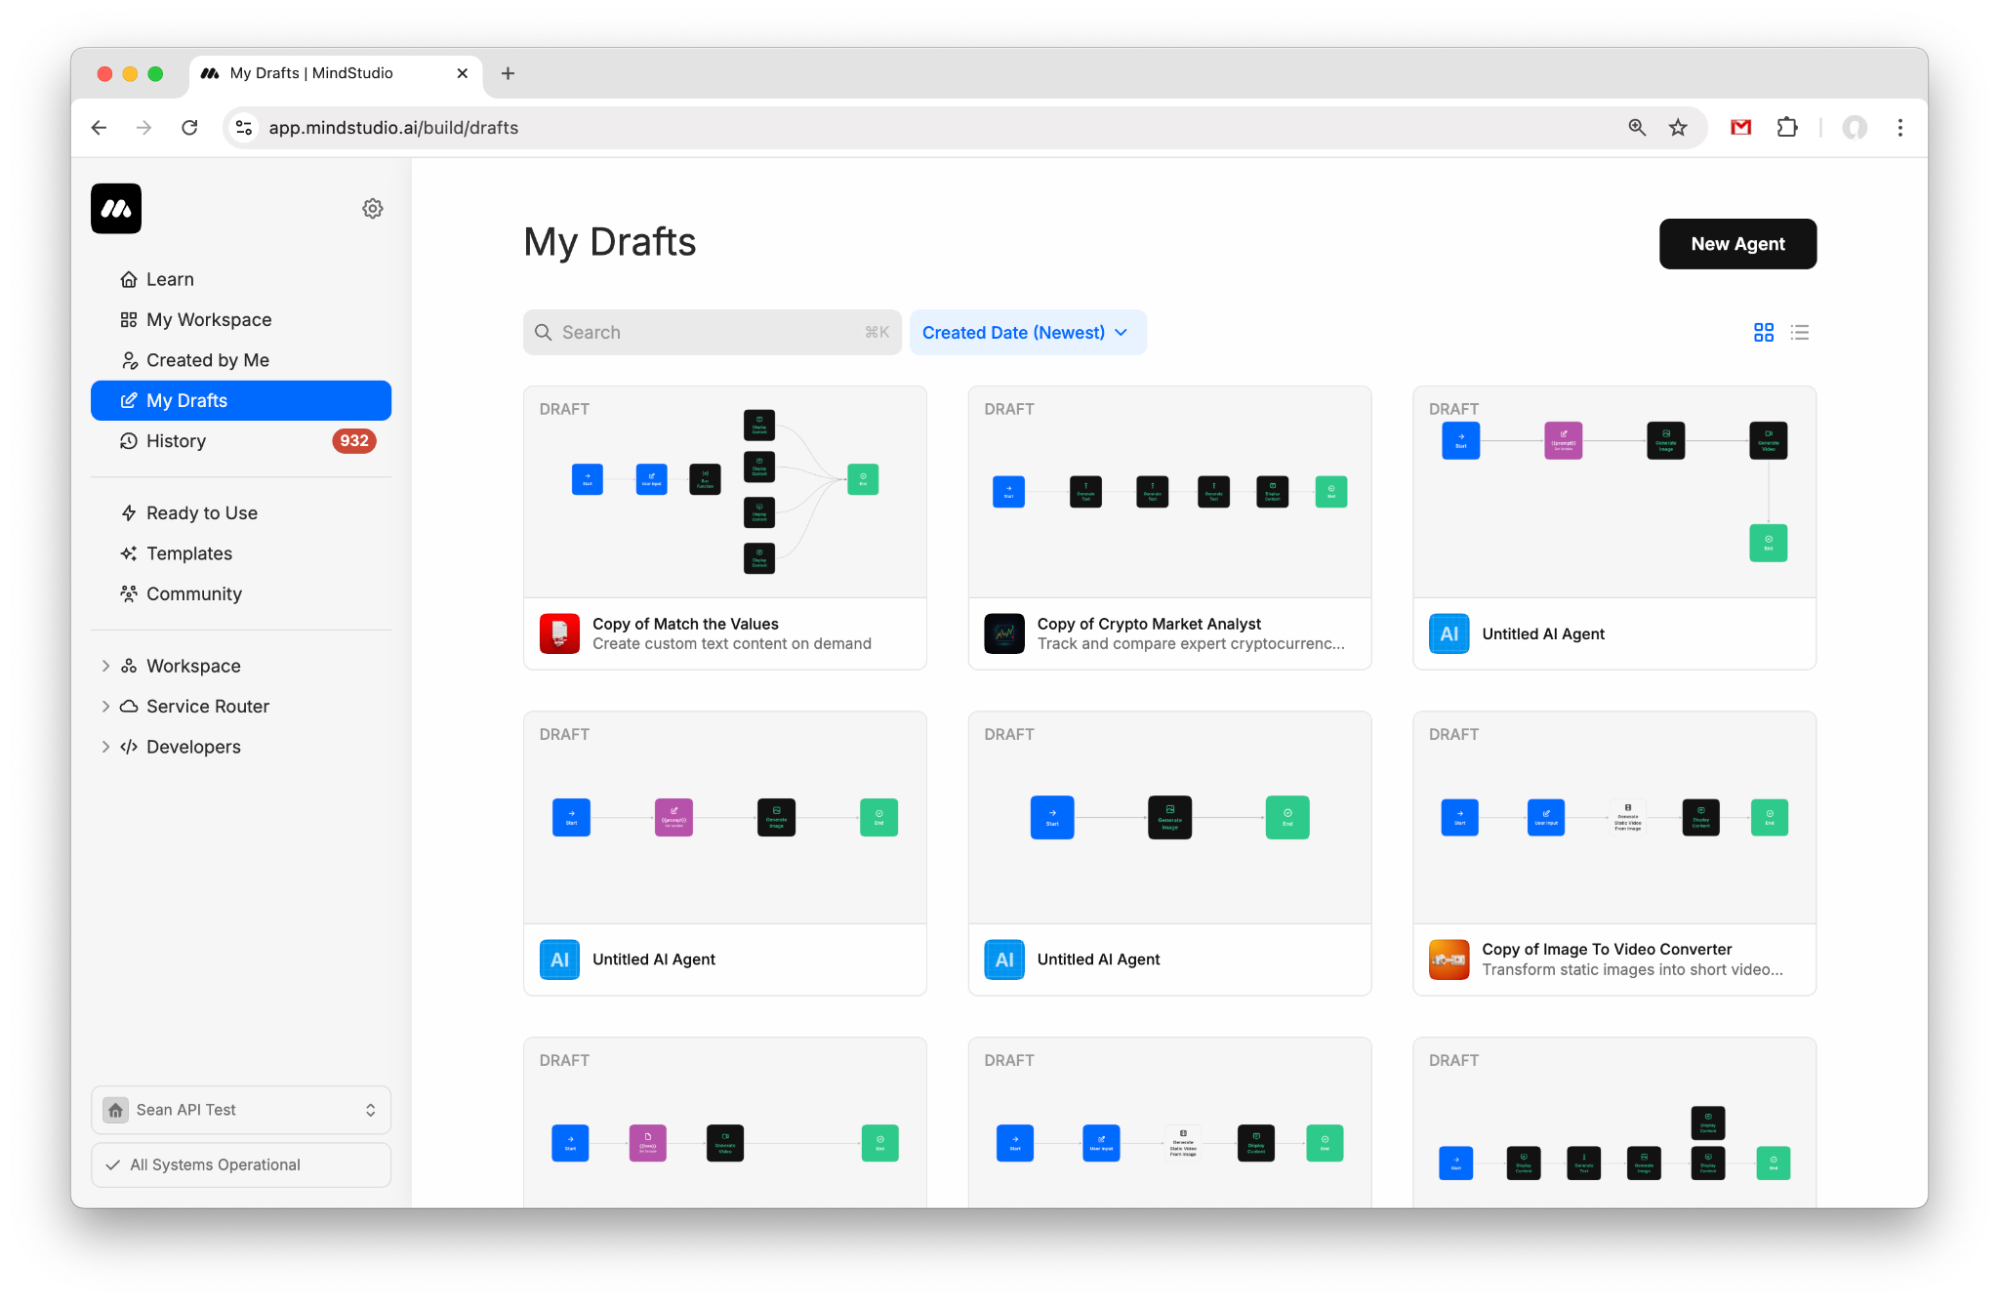
- Create a new agent from My Drafts.
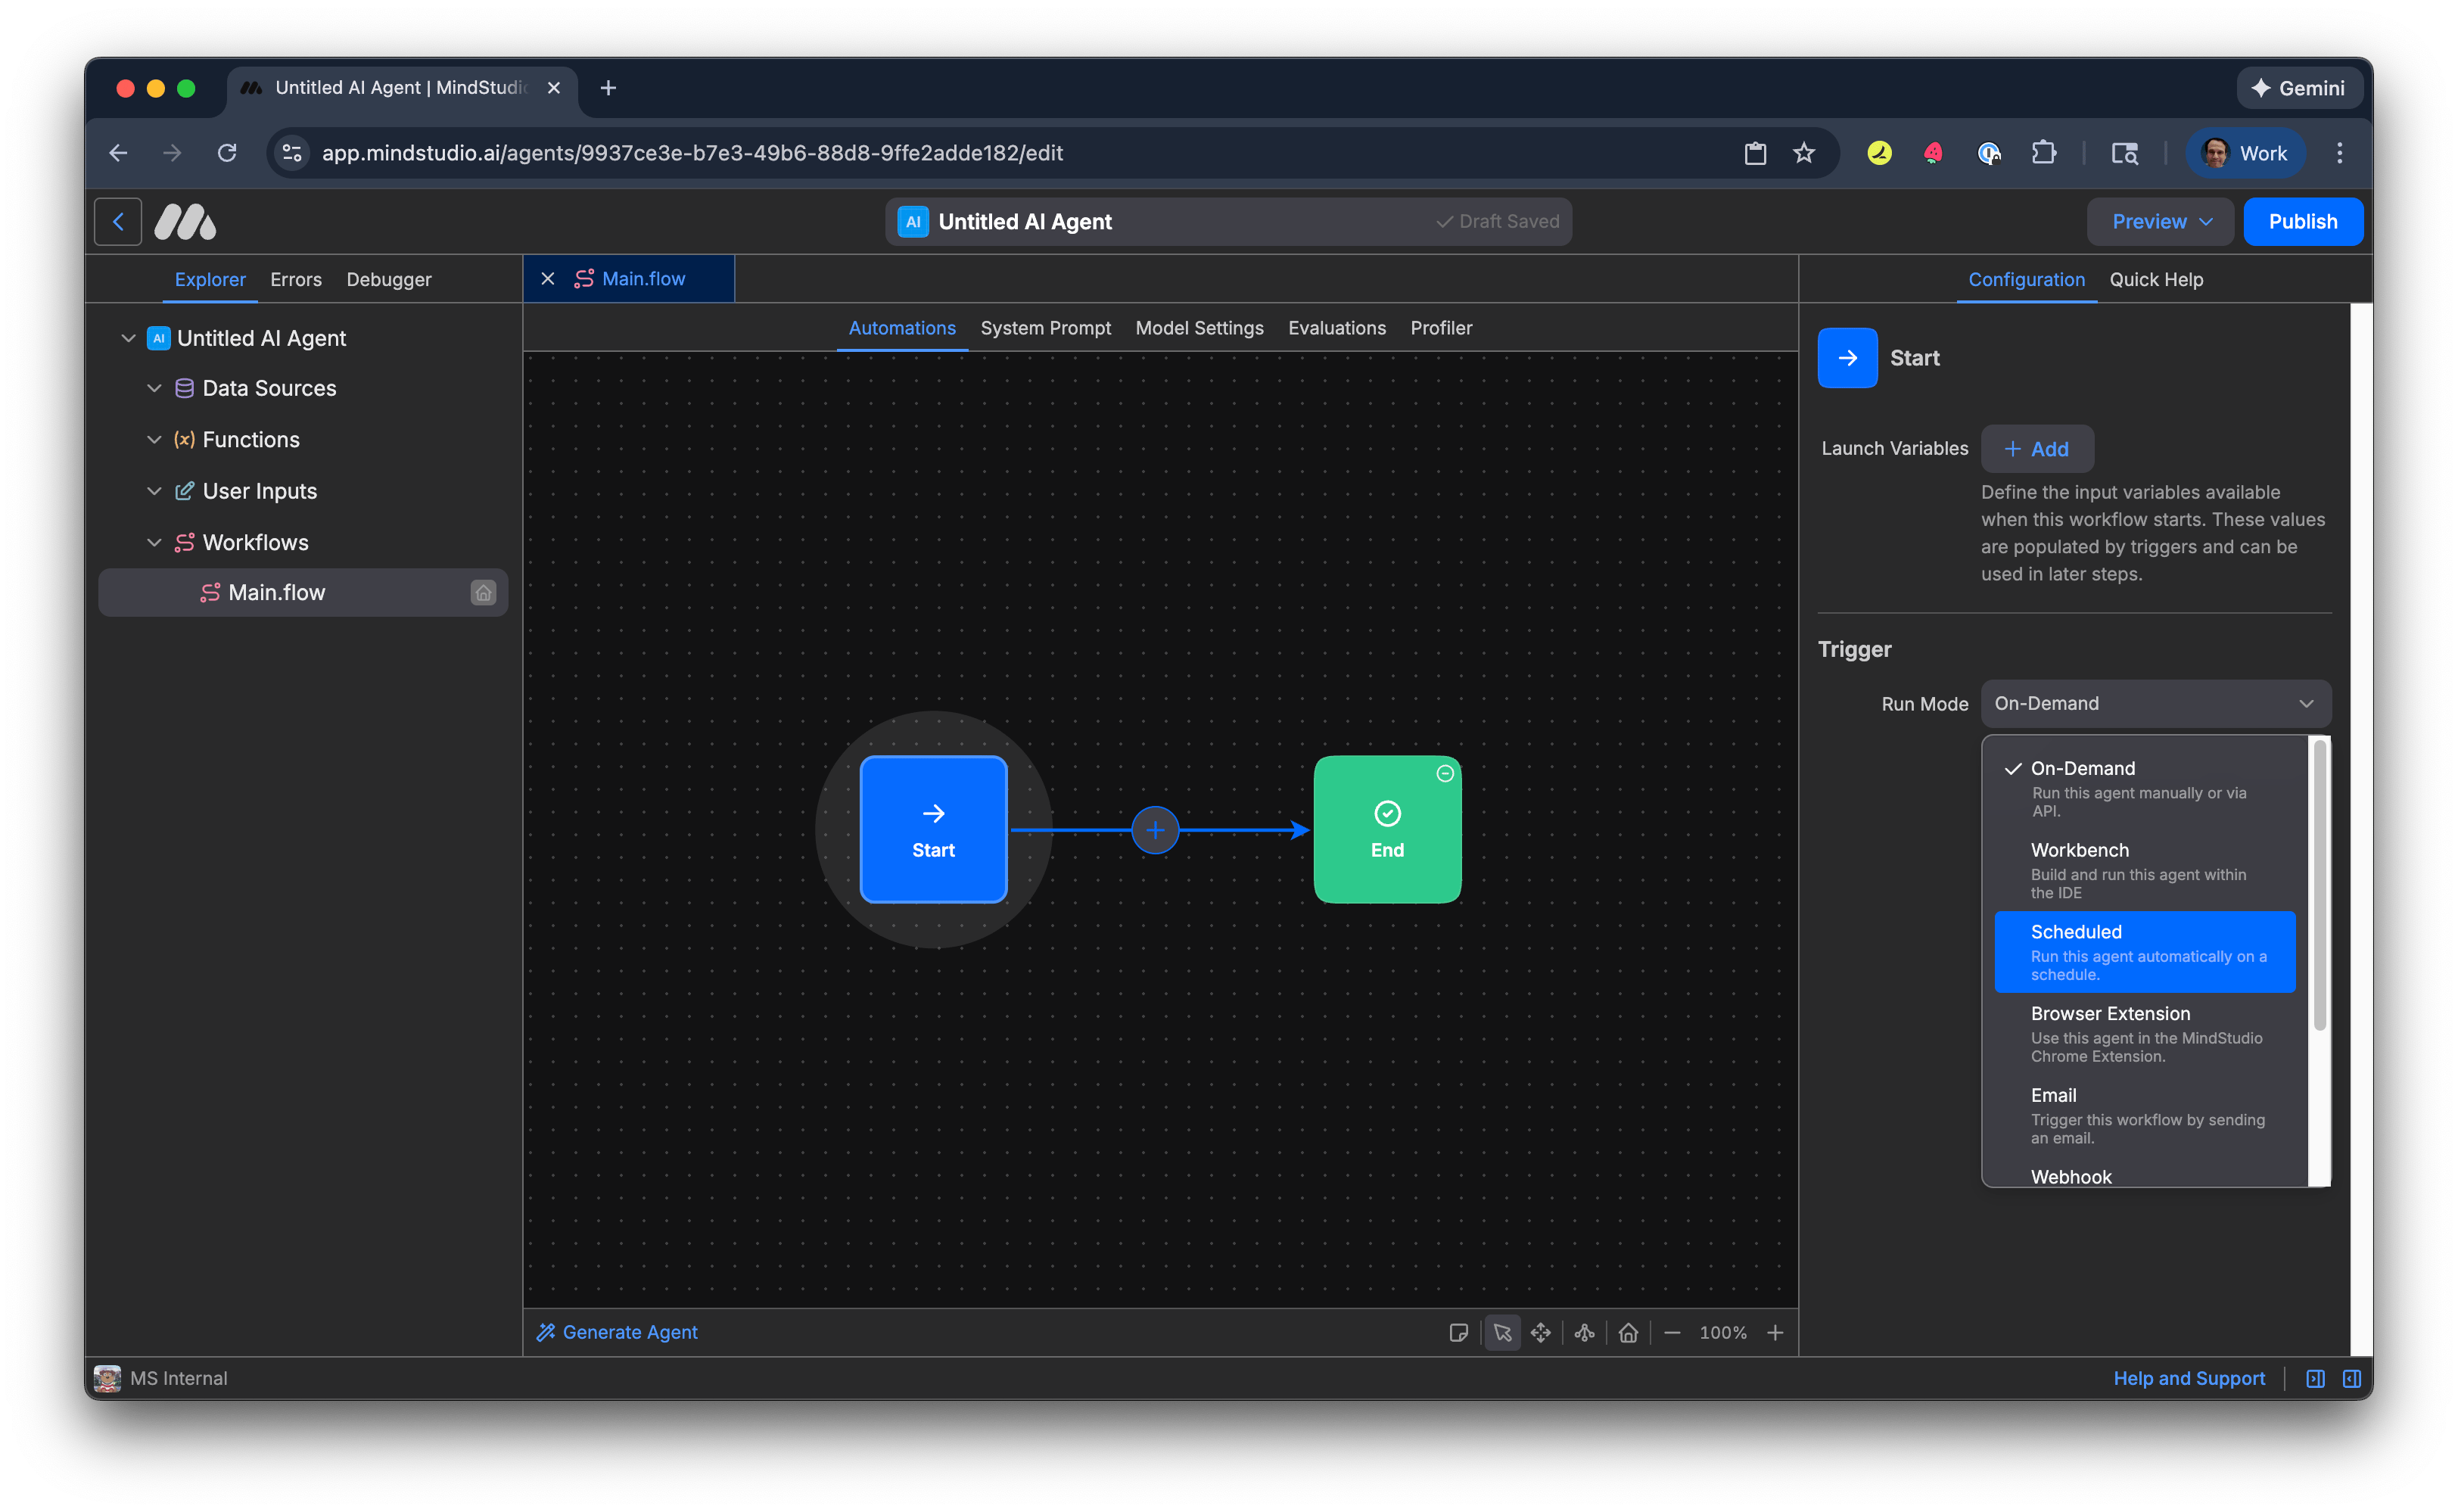
- Click the “Start” block and change the Run Mode to “Scheduled”.
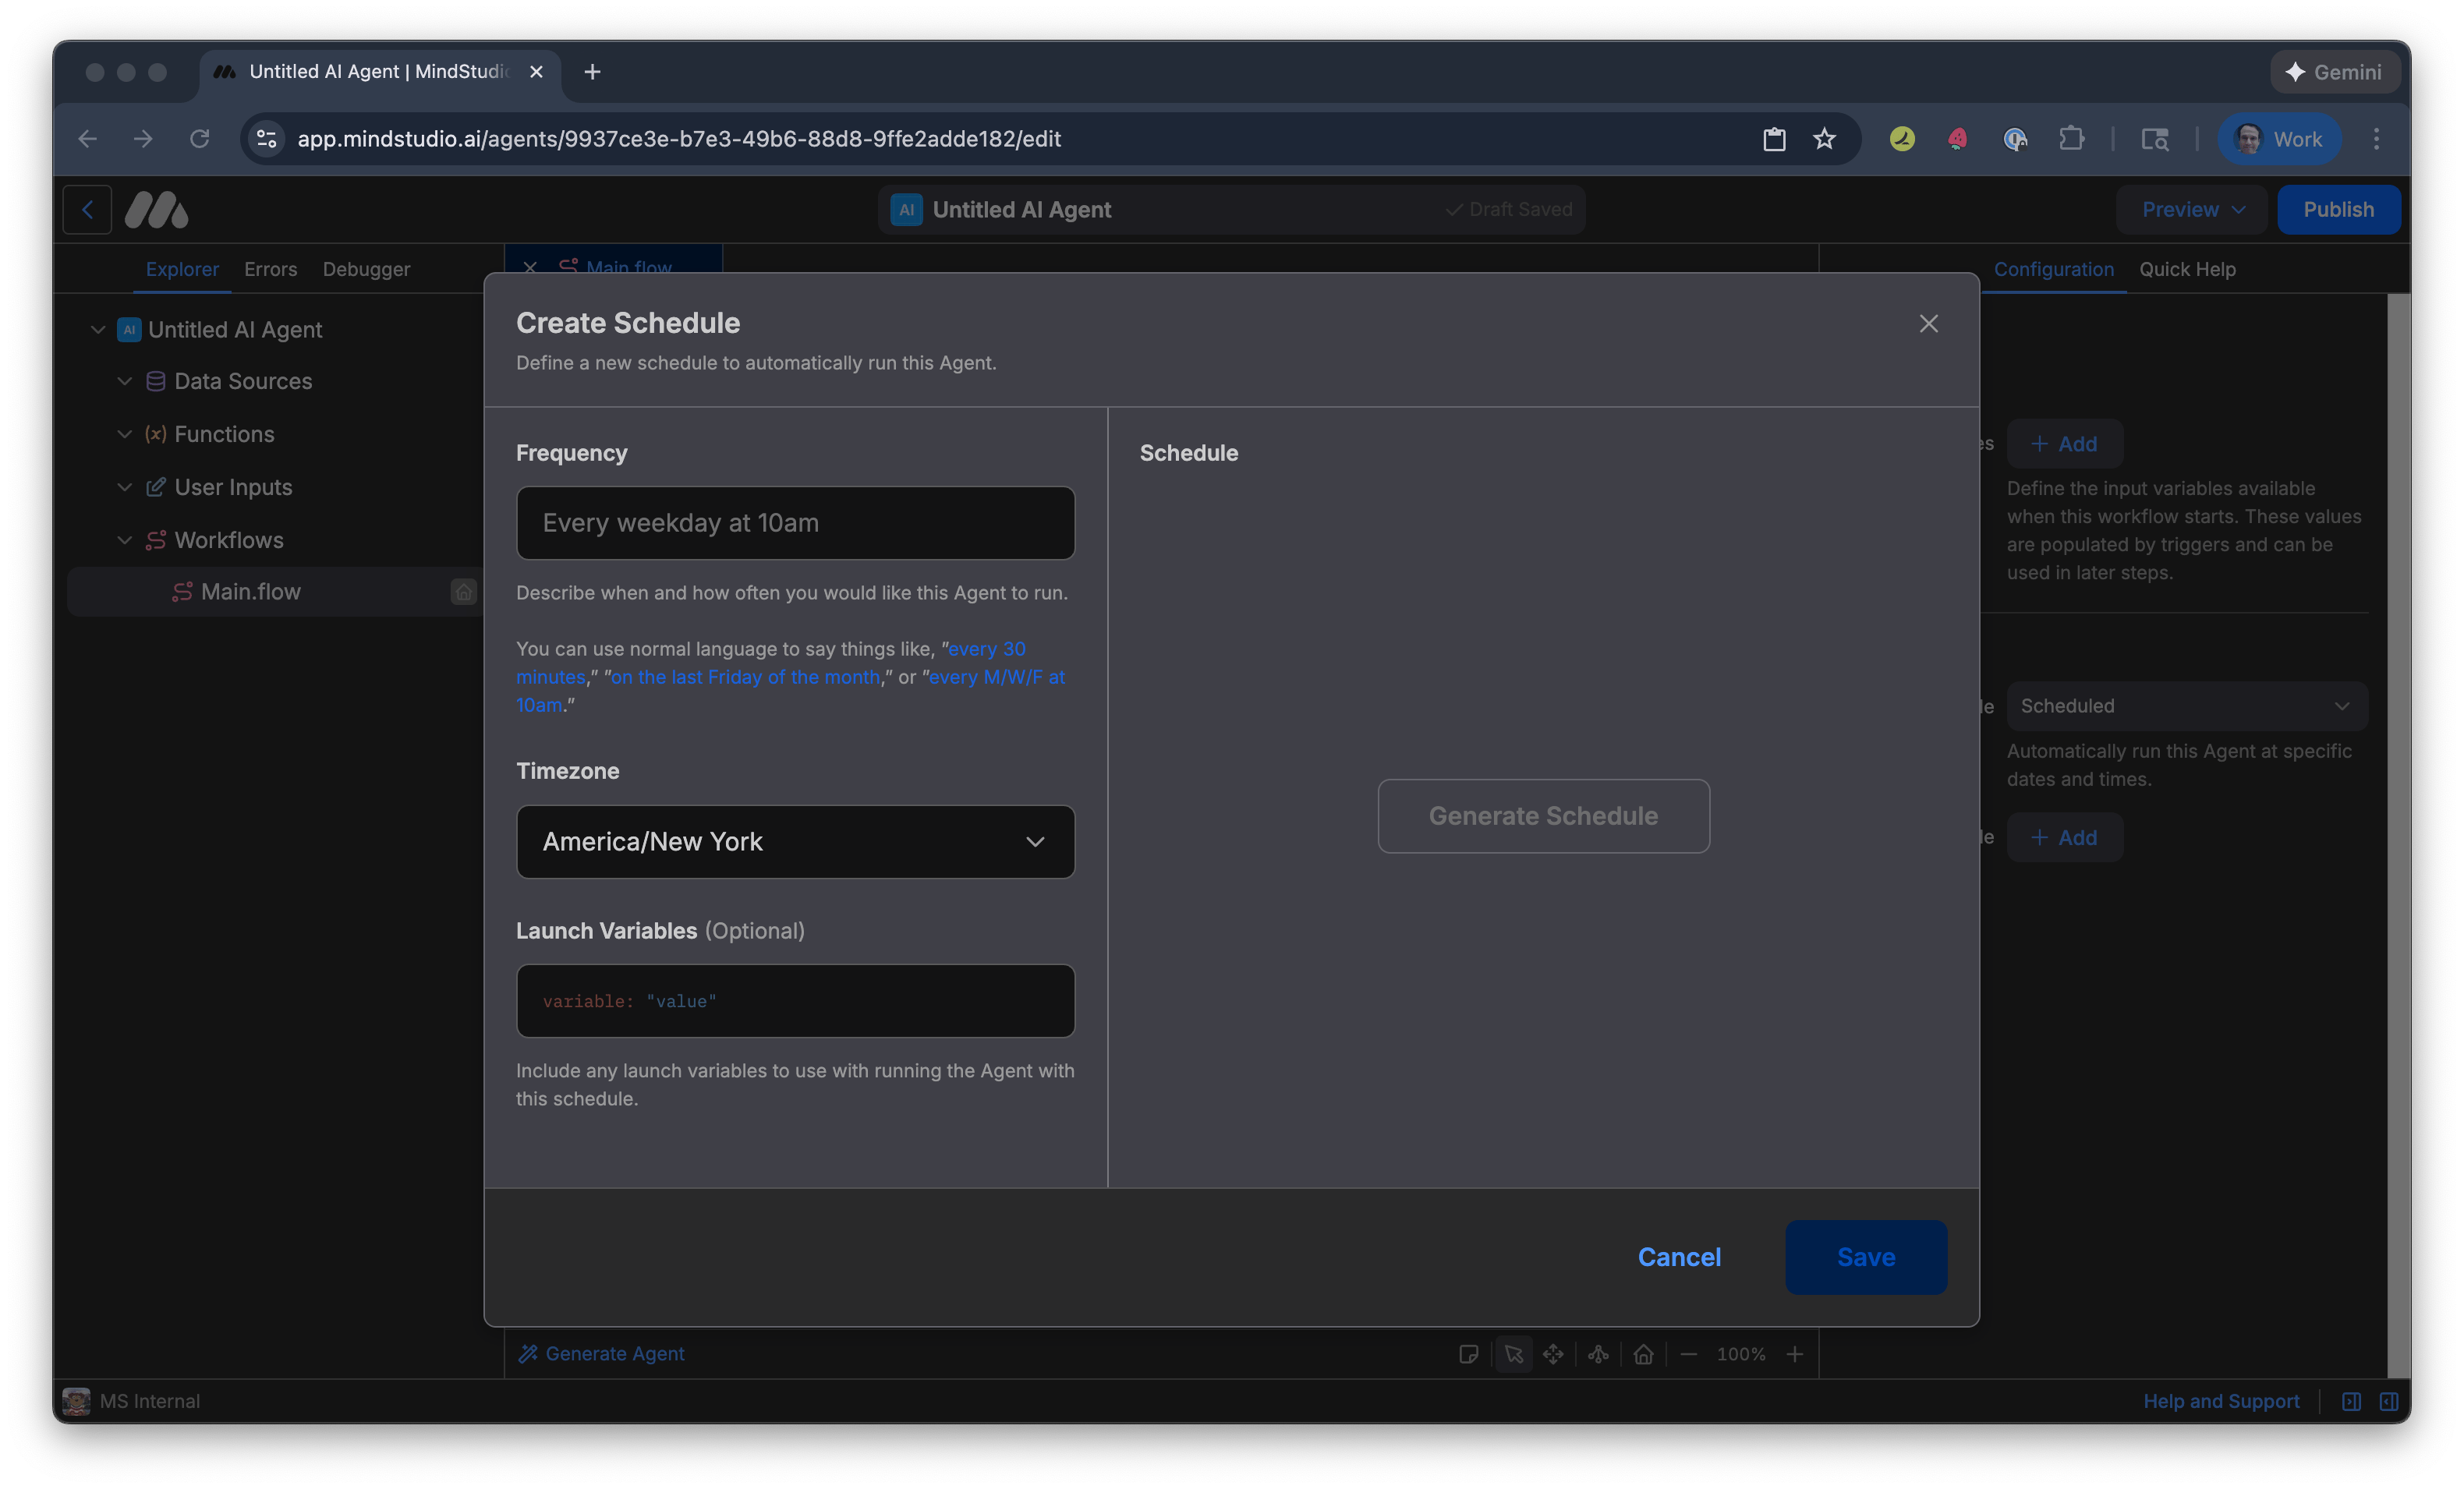
- Click “Add” to add a new schedule.
-
In “Frequency”, describe using everyday language when and how often to run this AI agent. For example, “every week day at 10 AM.”
-
Click “Generate Schedule”. MindStudio builds a schedule at your specified interval.
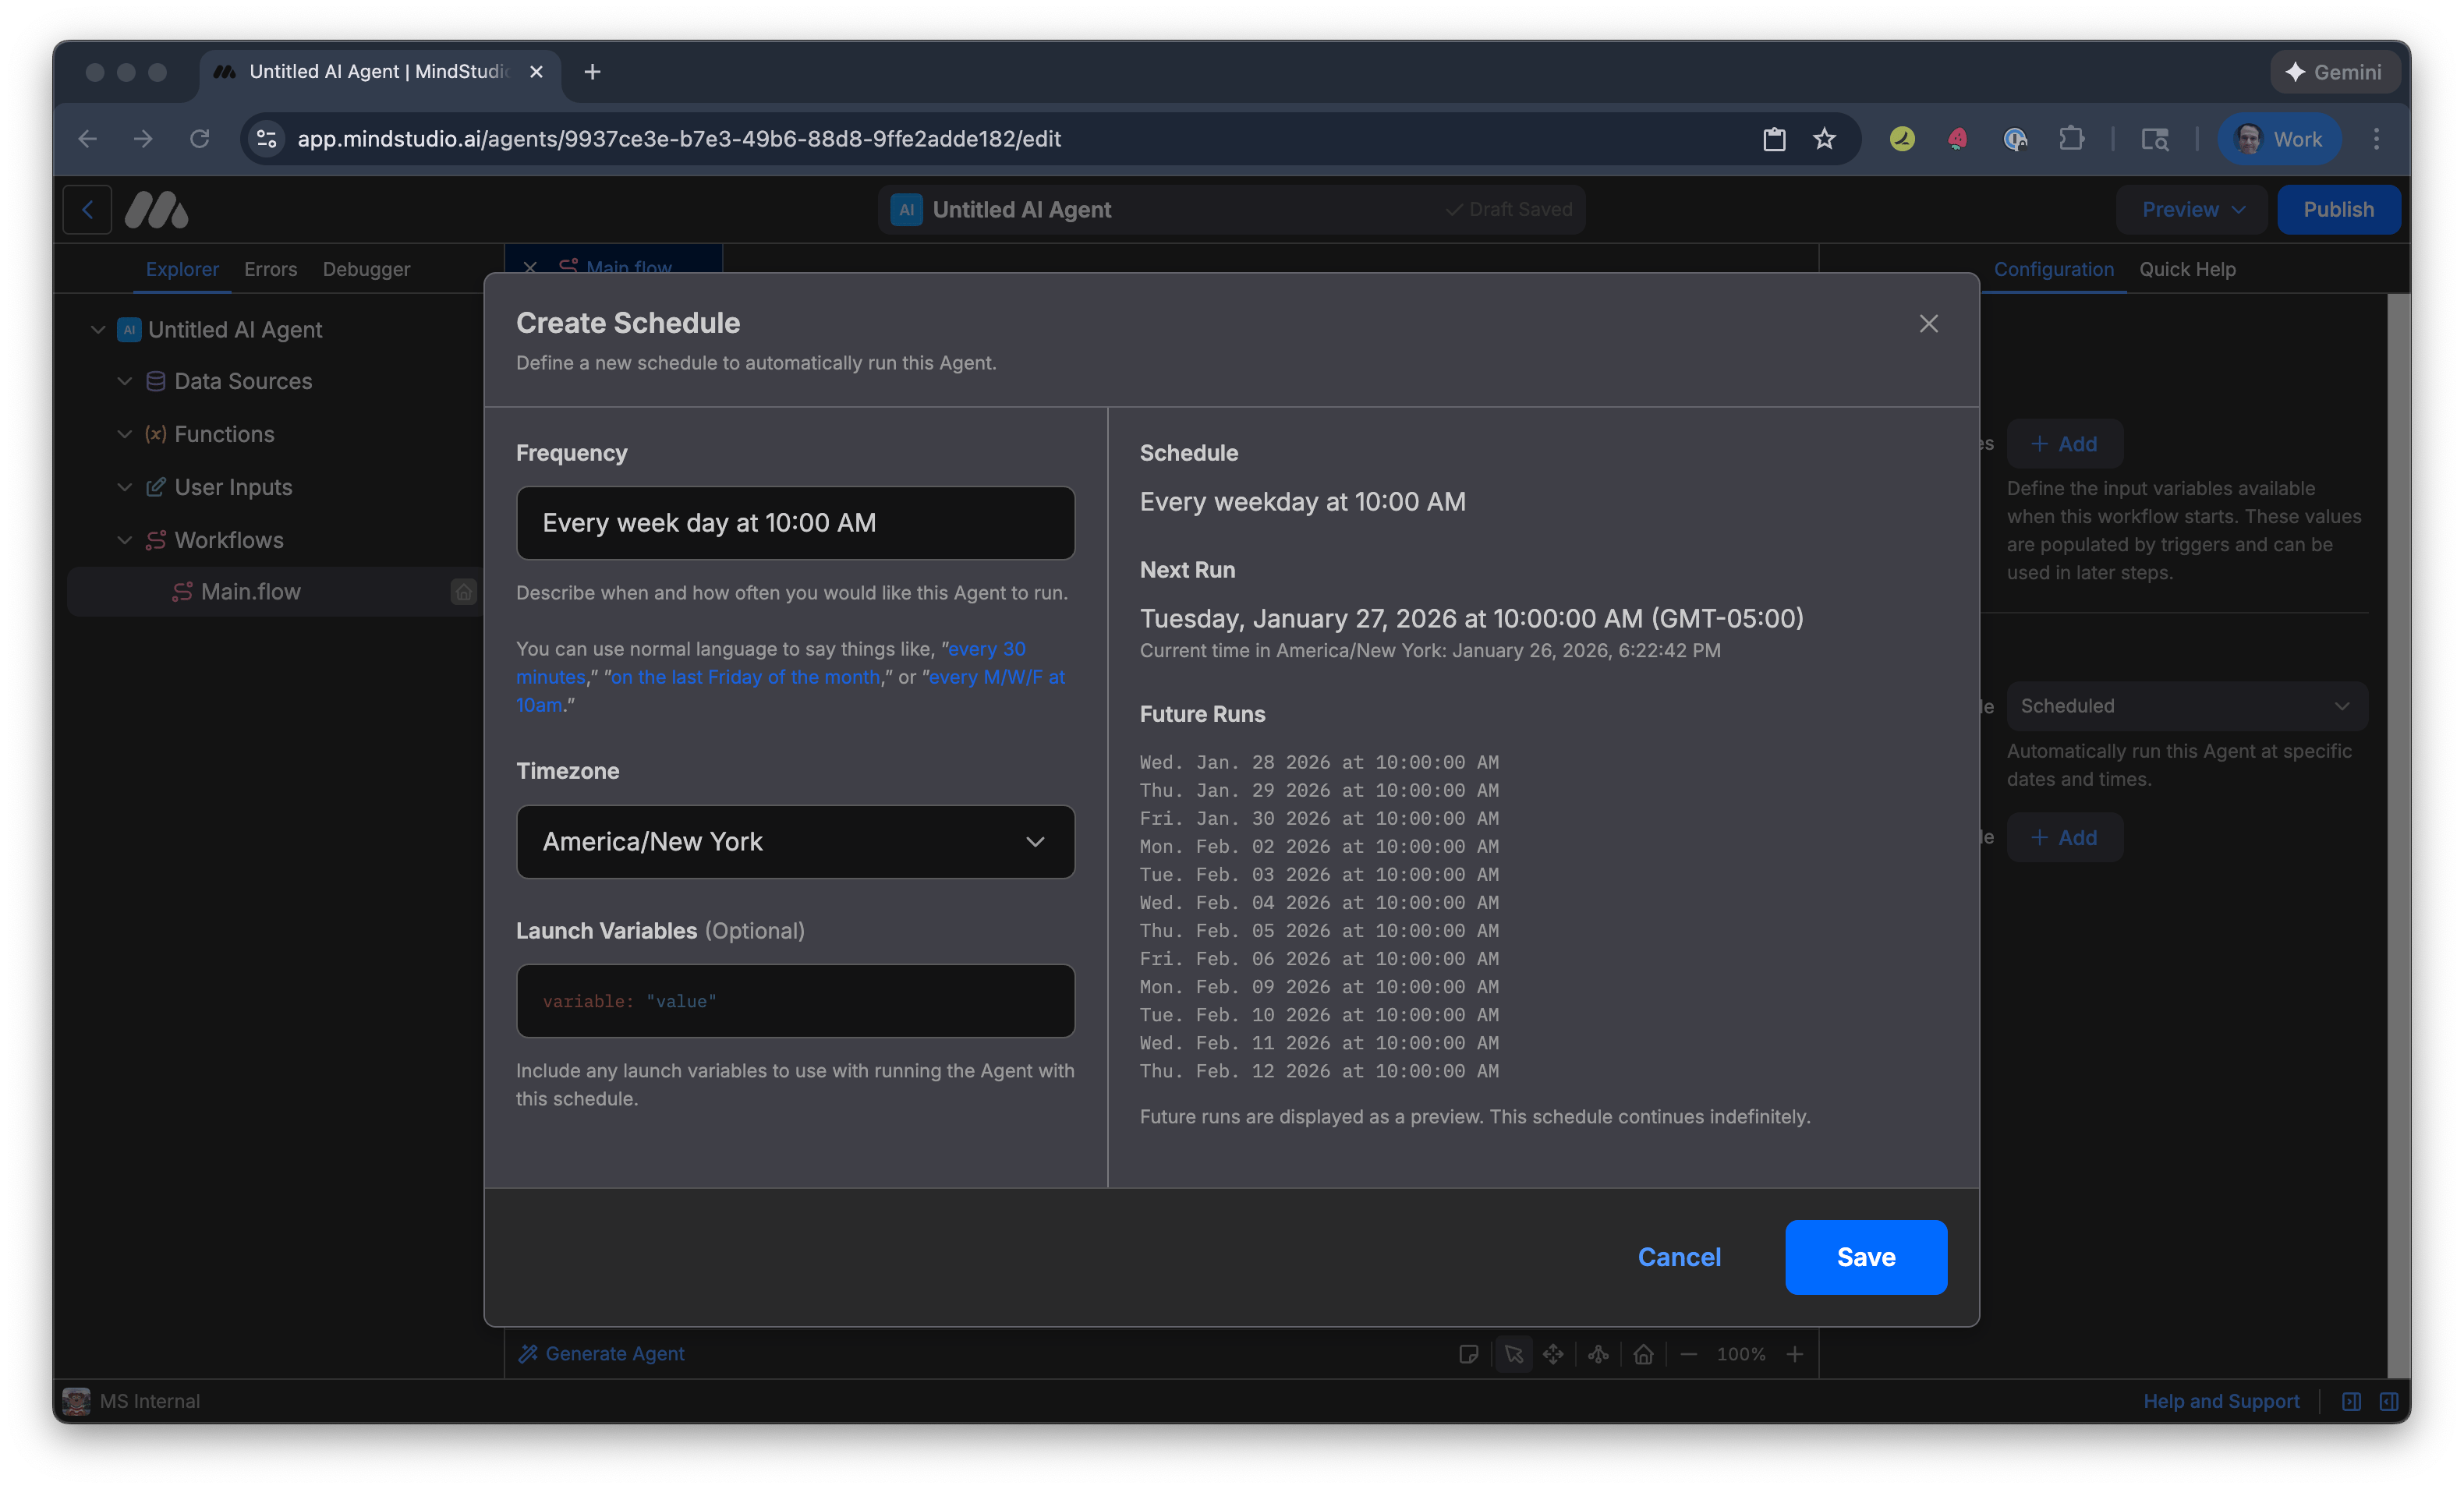
- Click “Save”. The generated schedule is displayed.
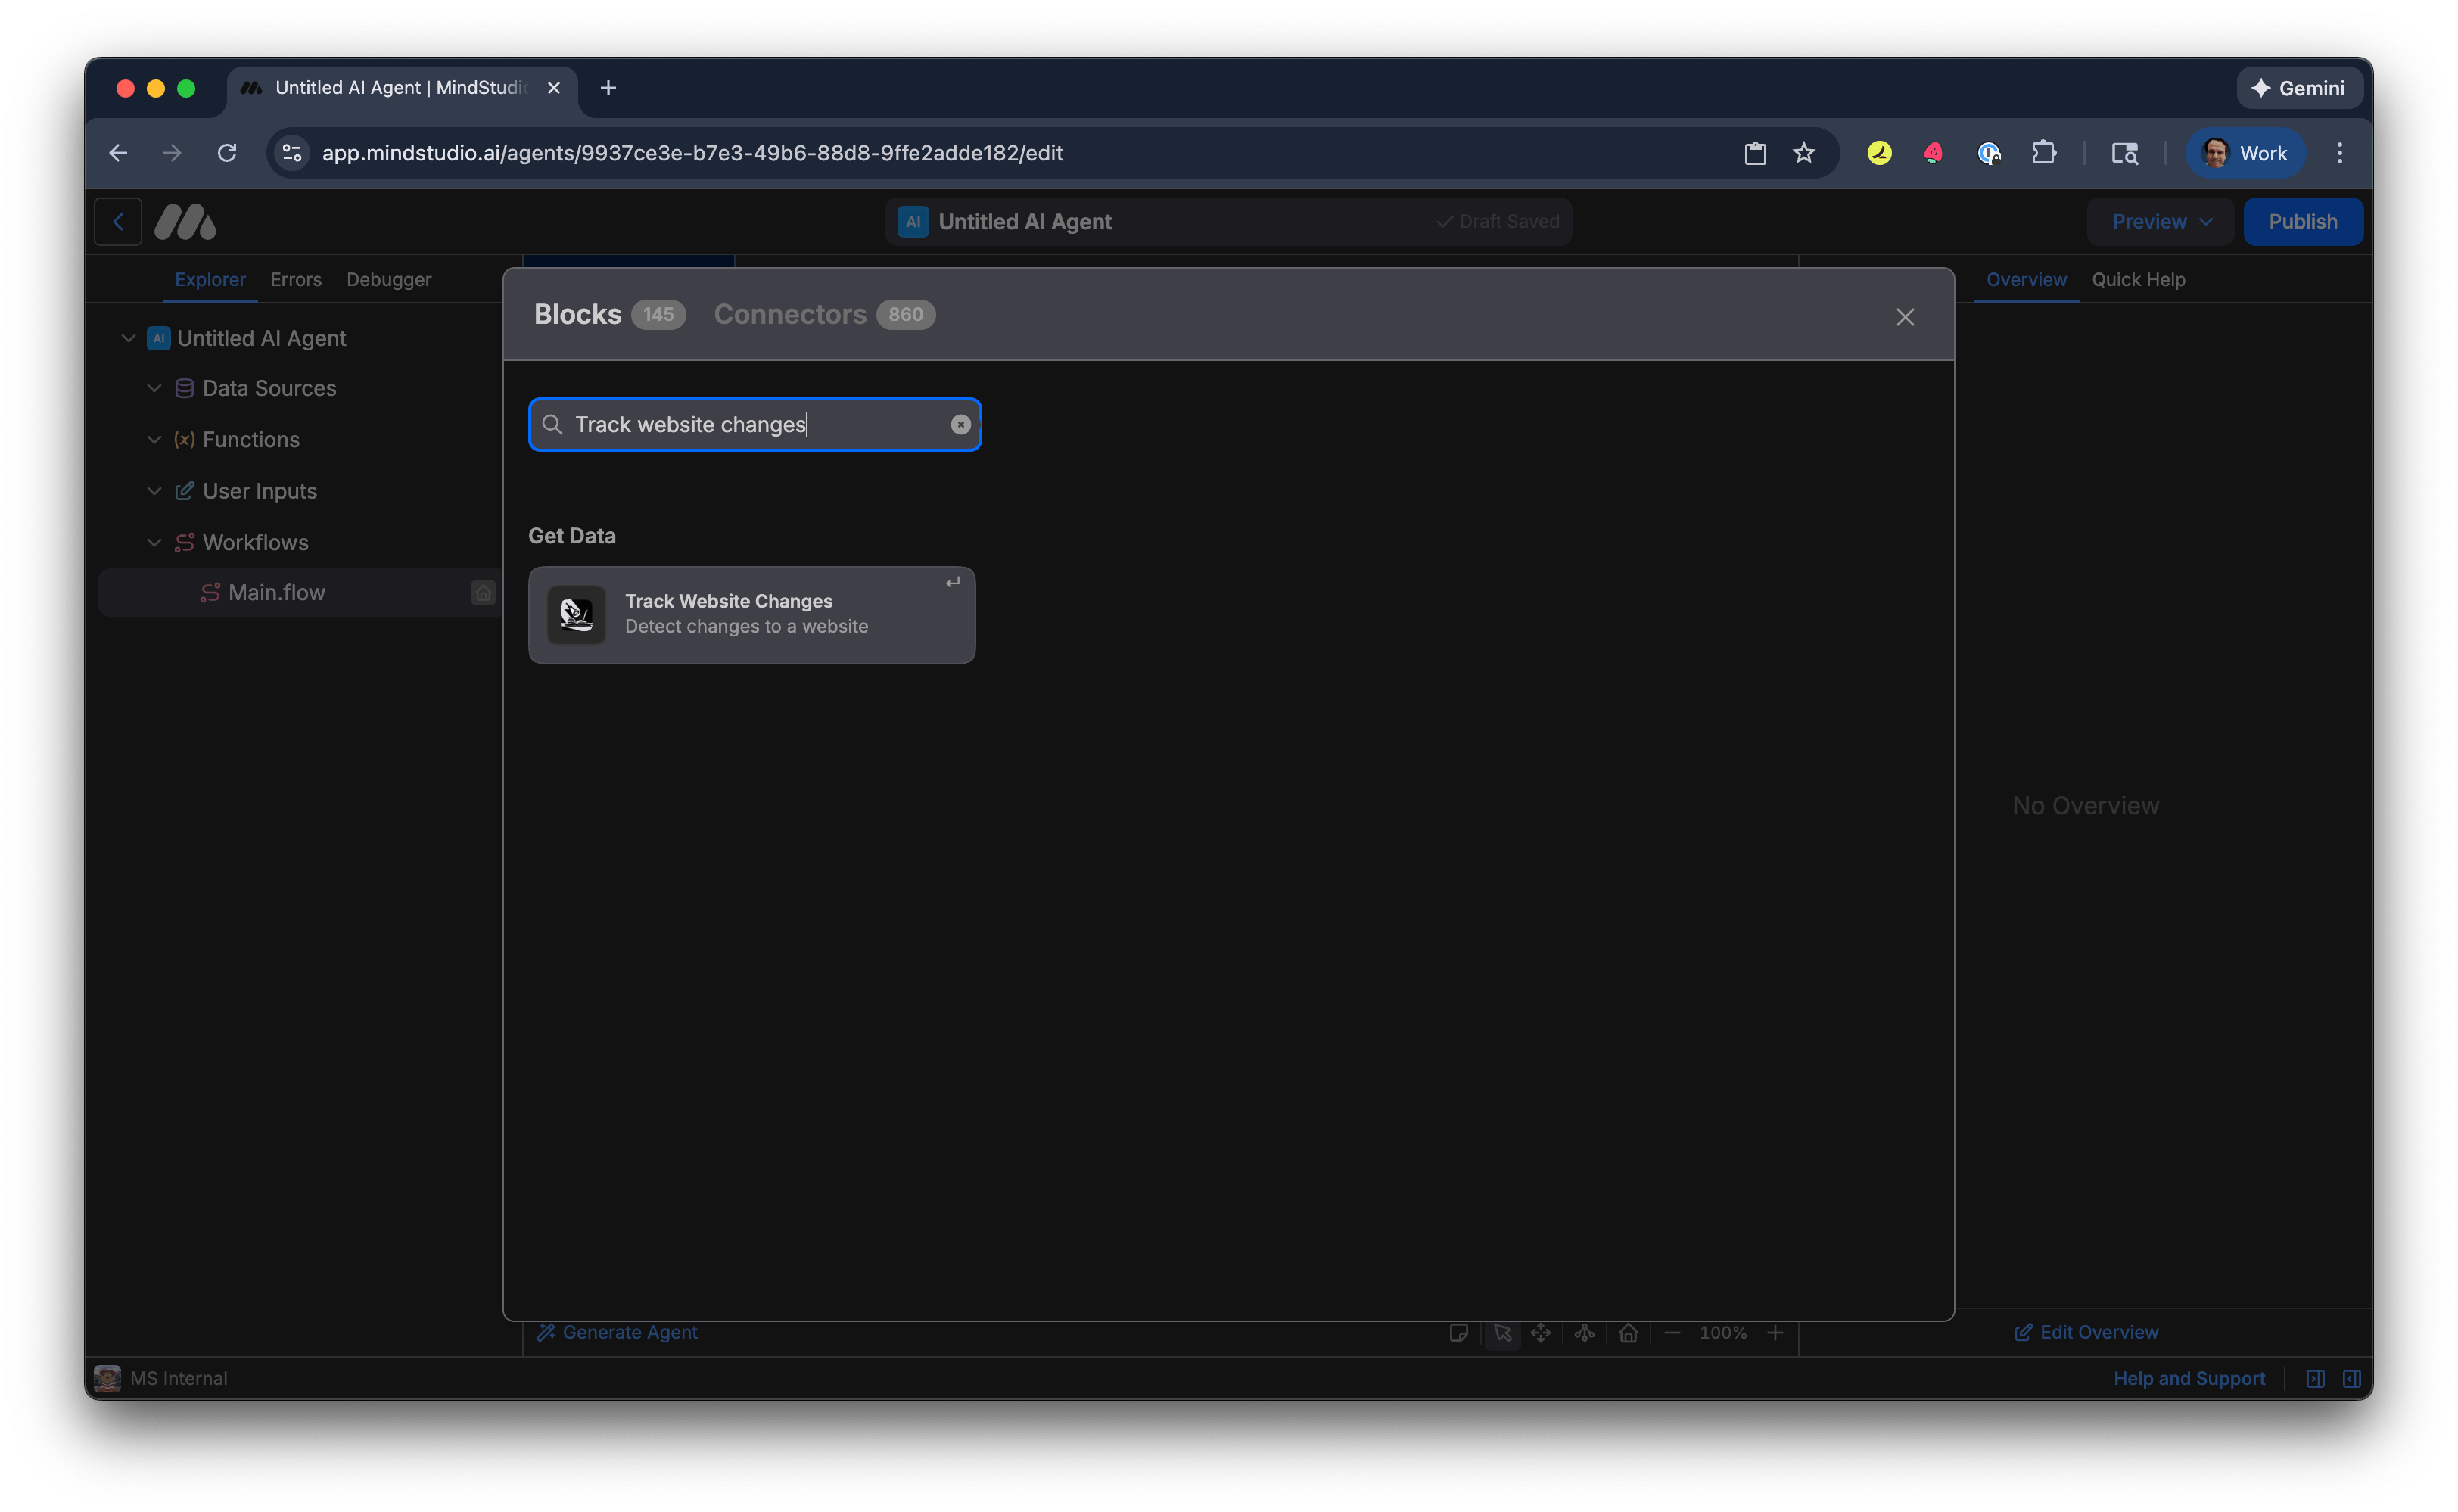
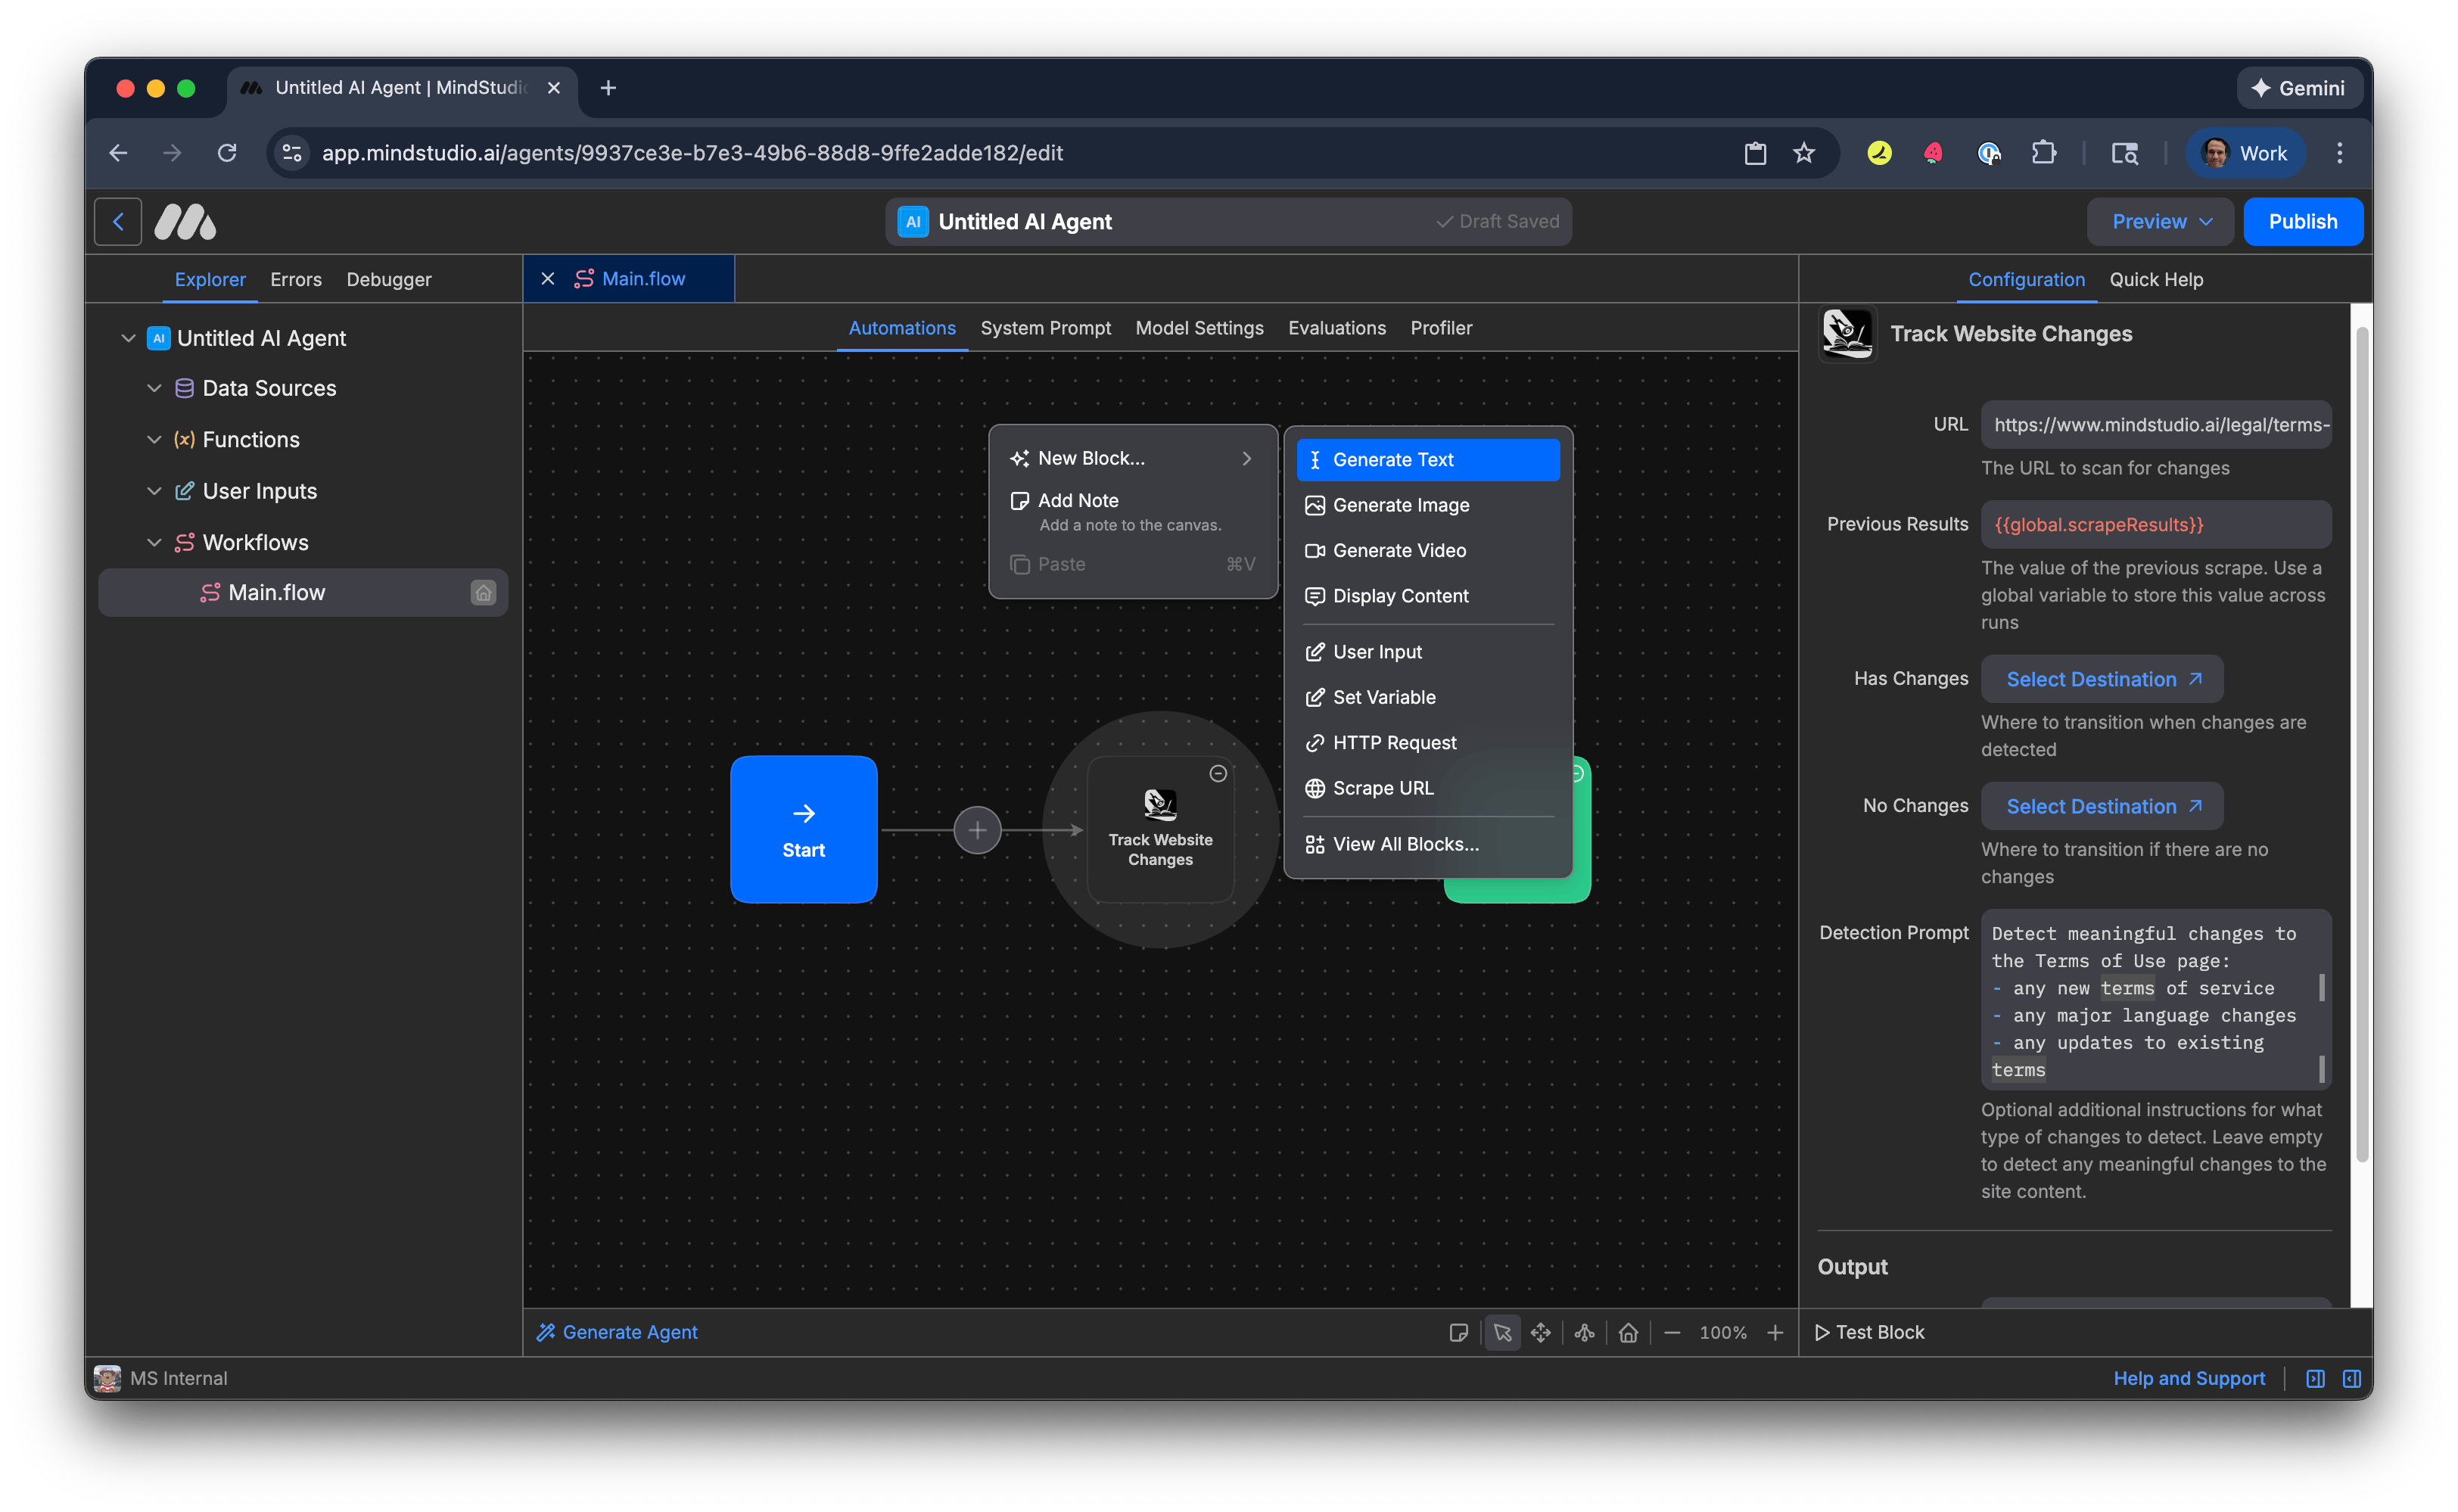
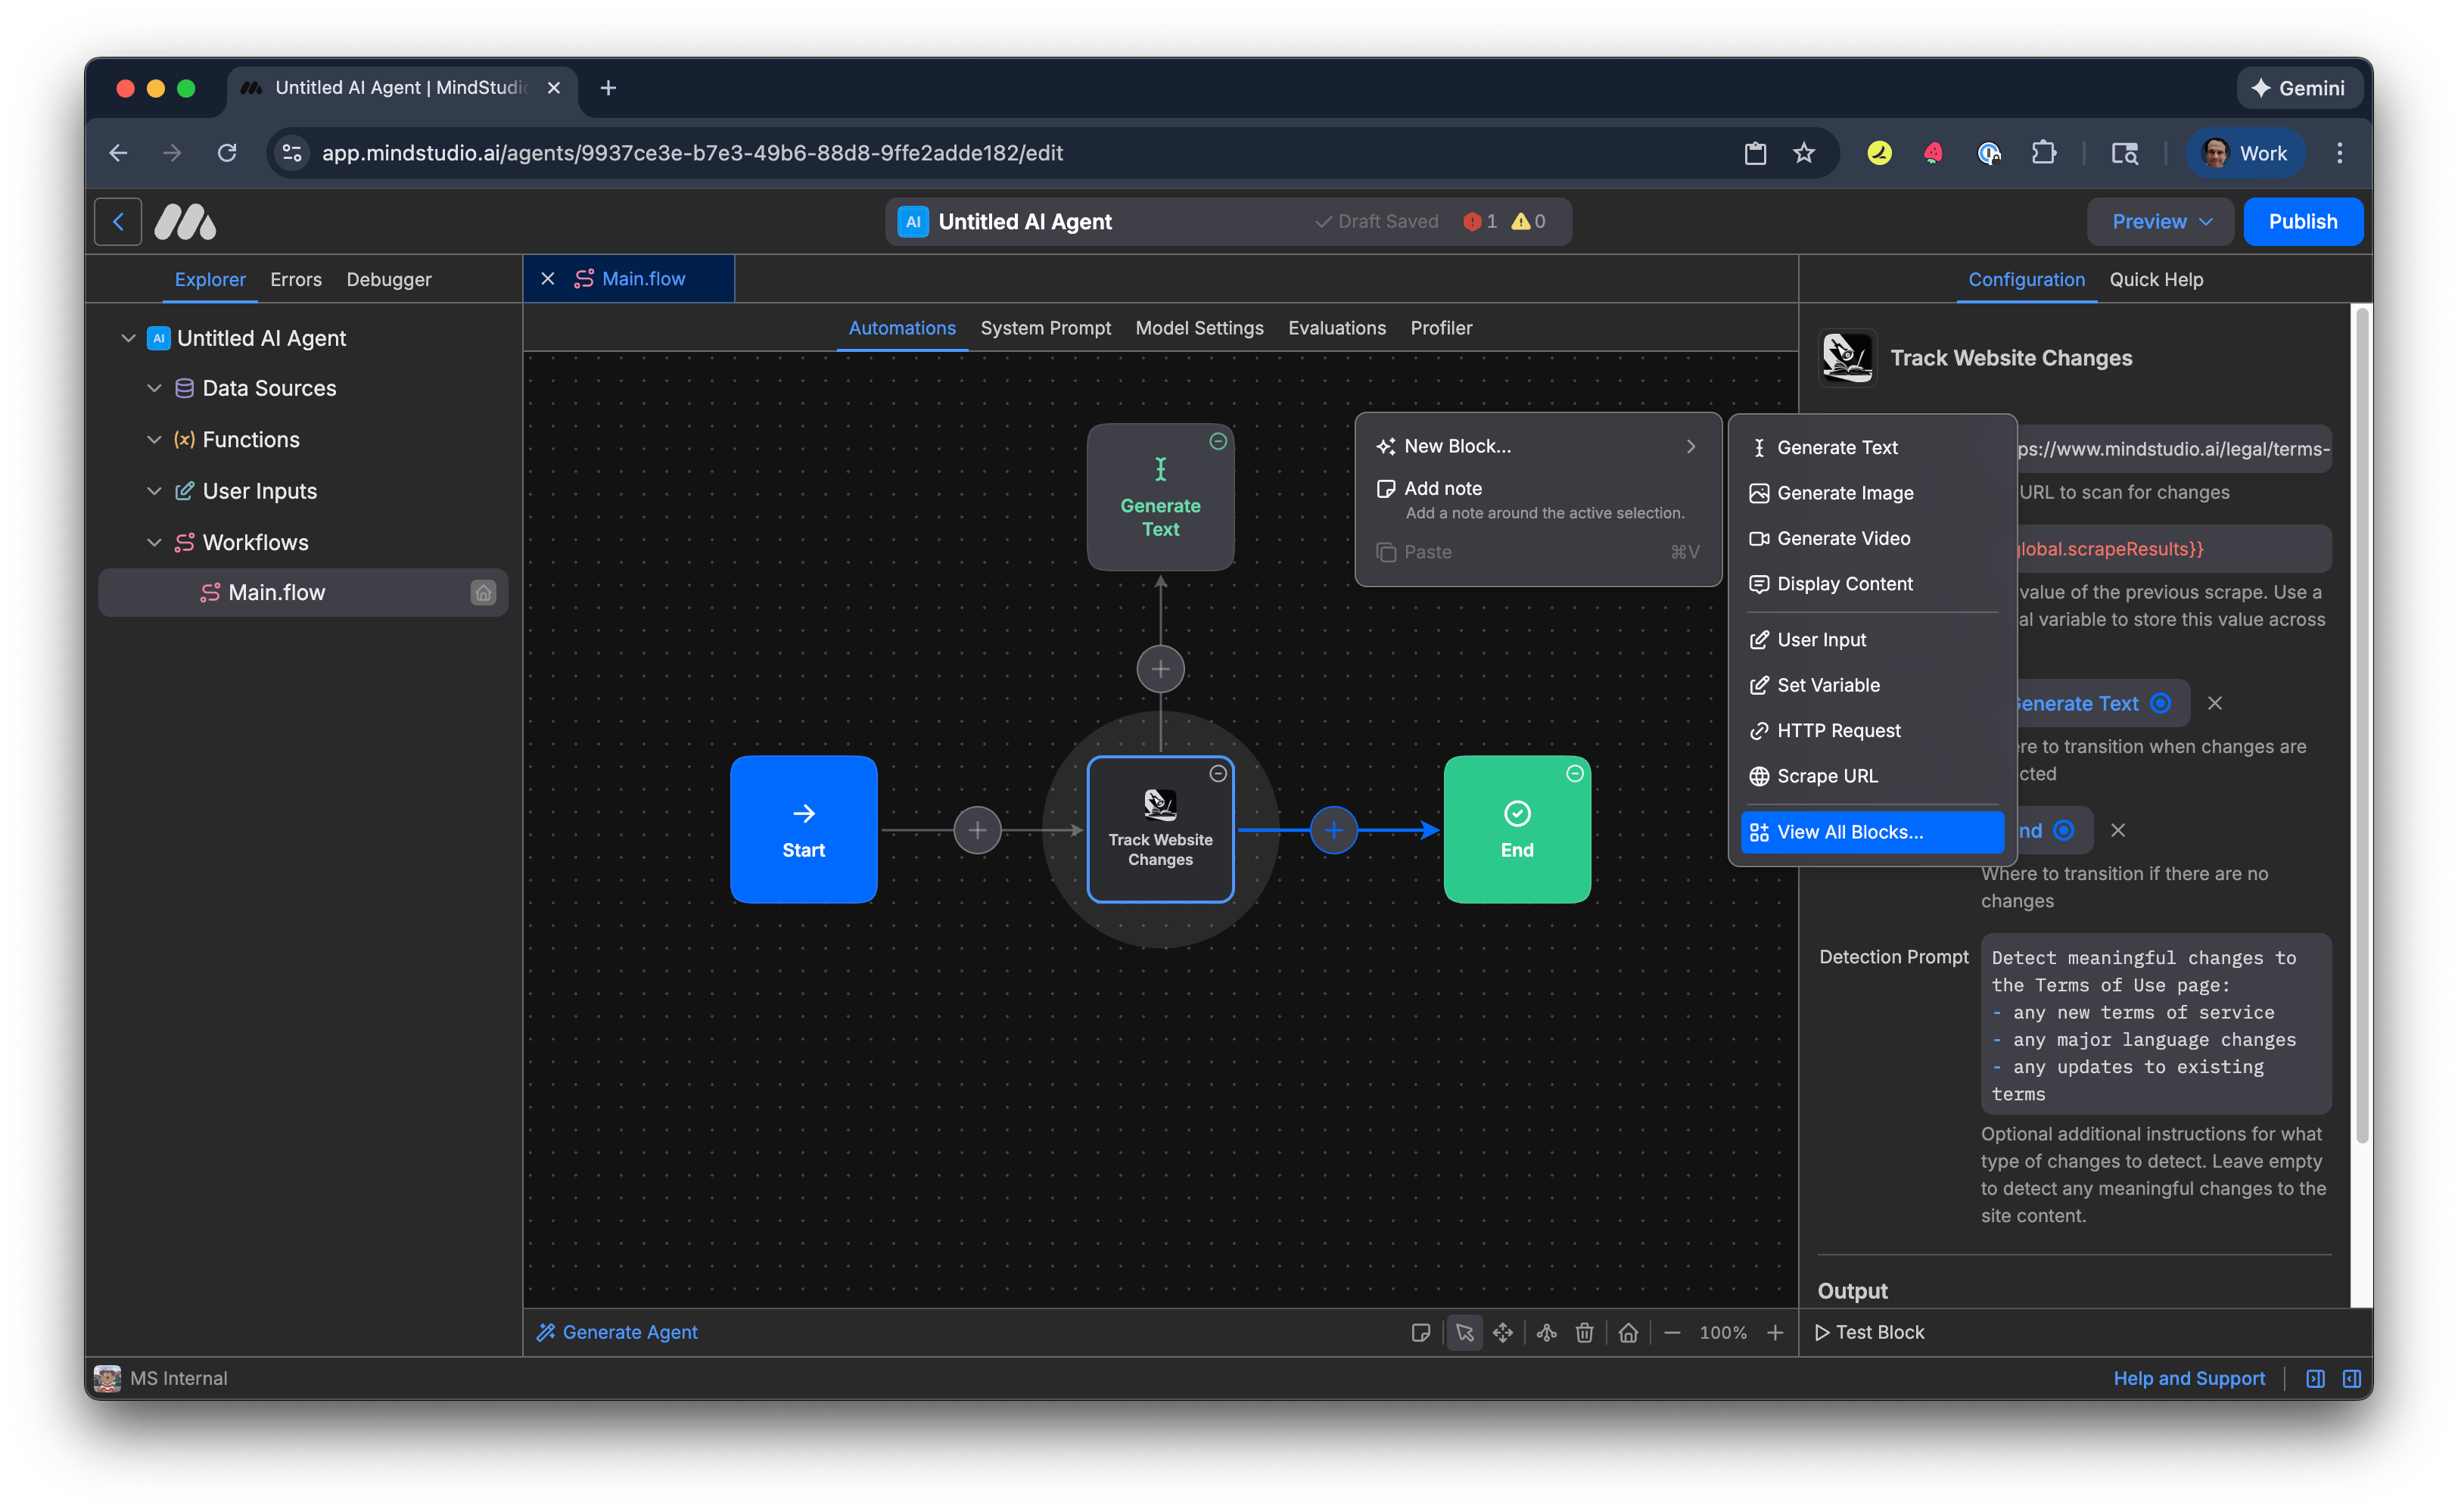
- Click the + button to add a new block and choose “View All Blocks”.
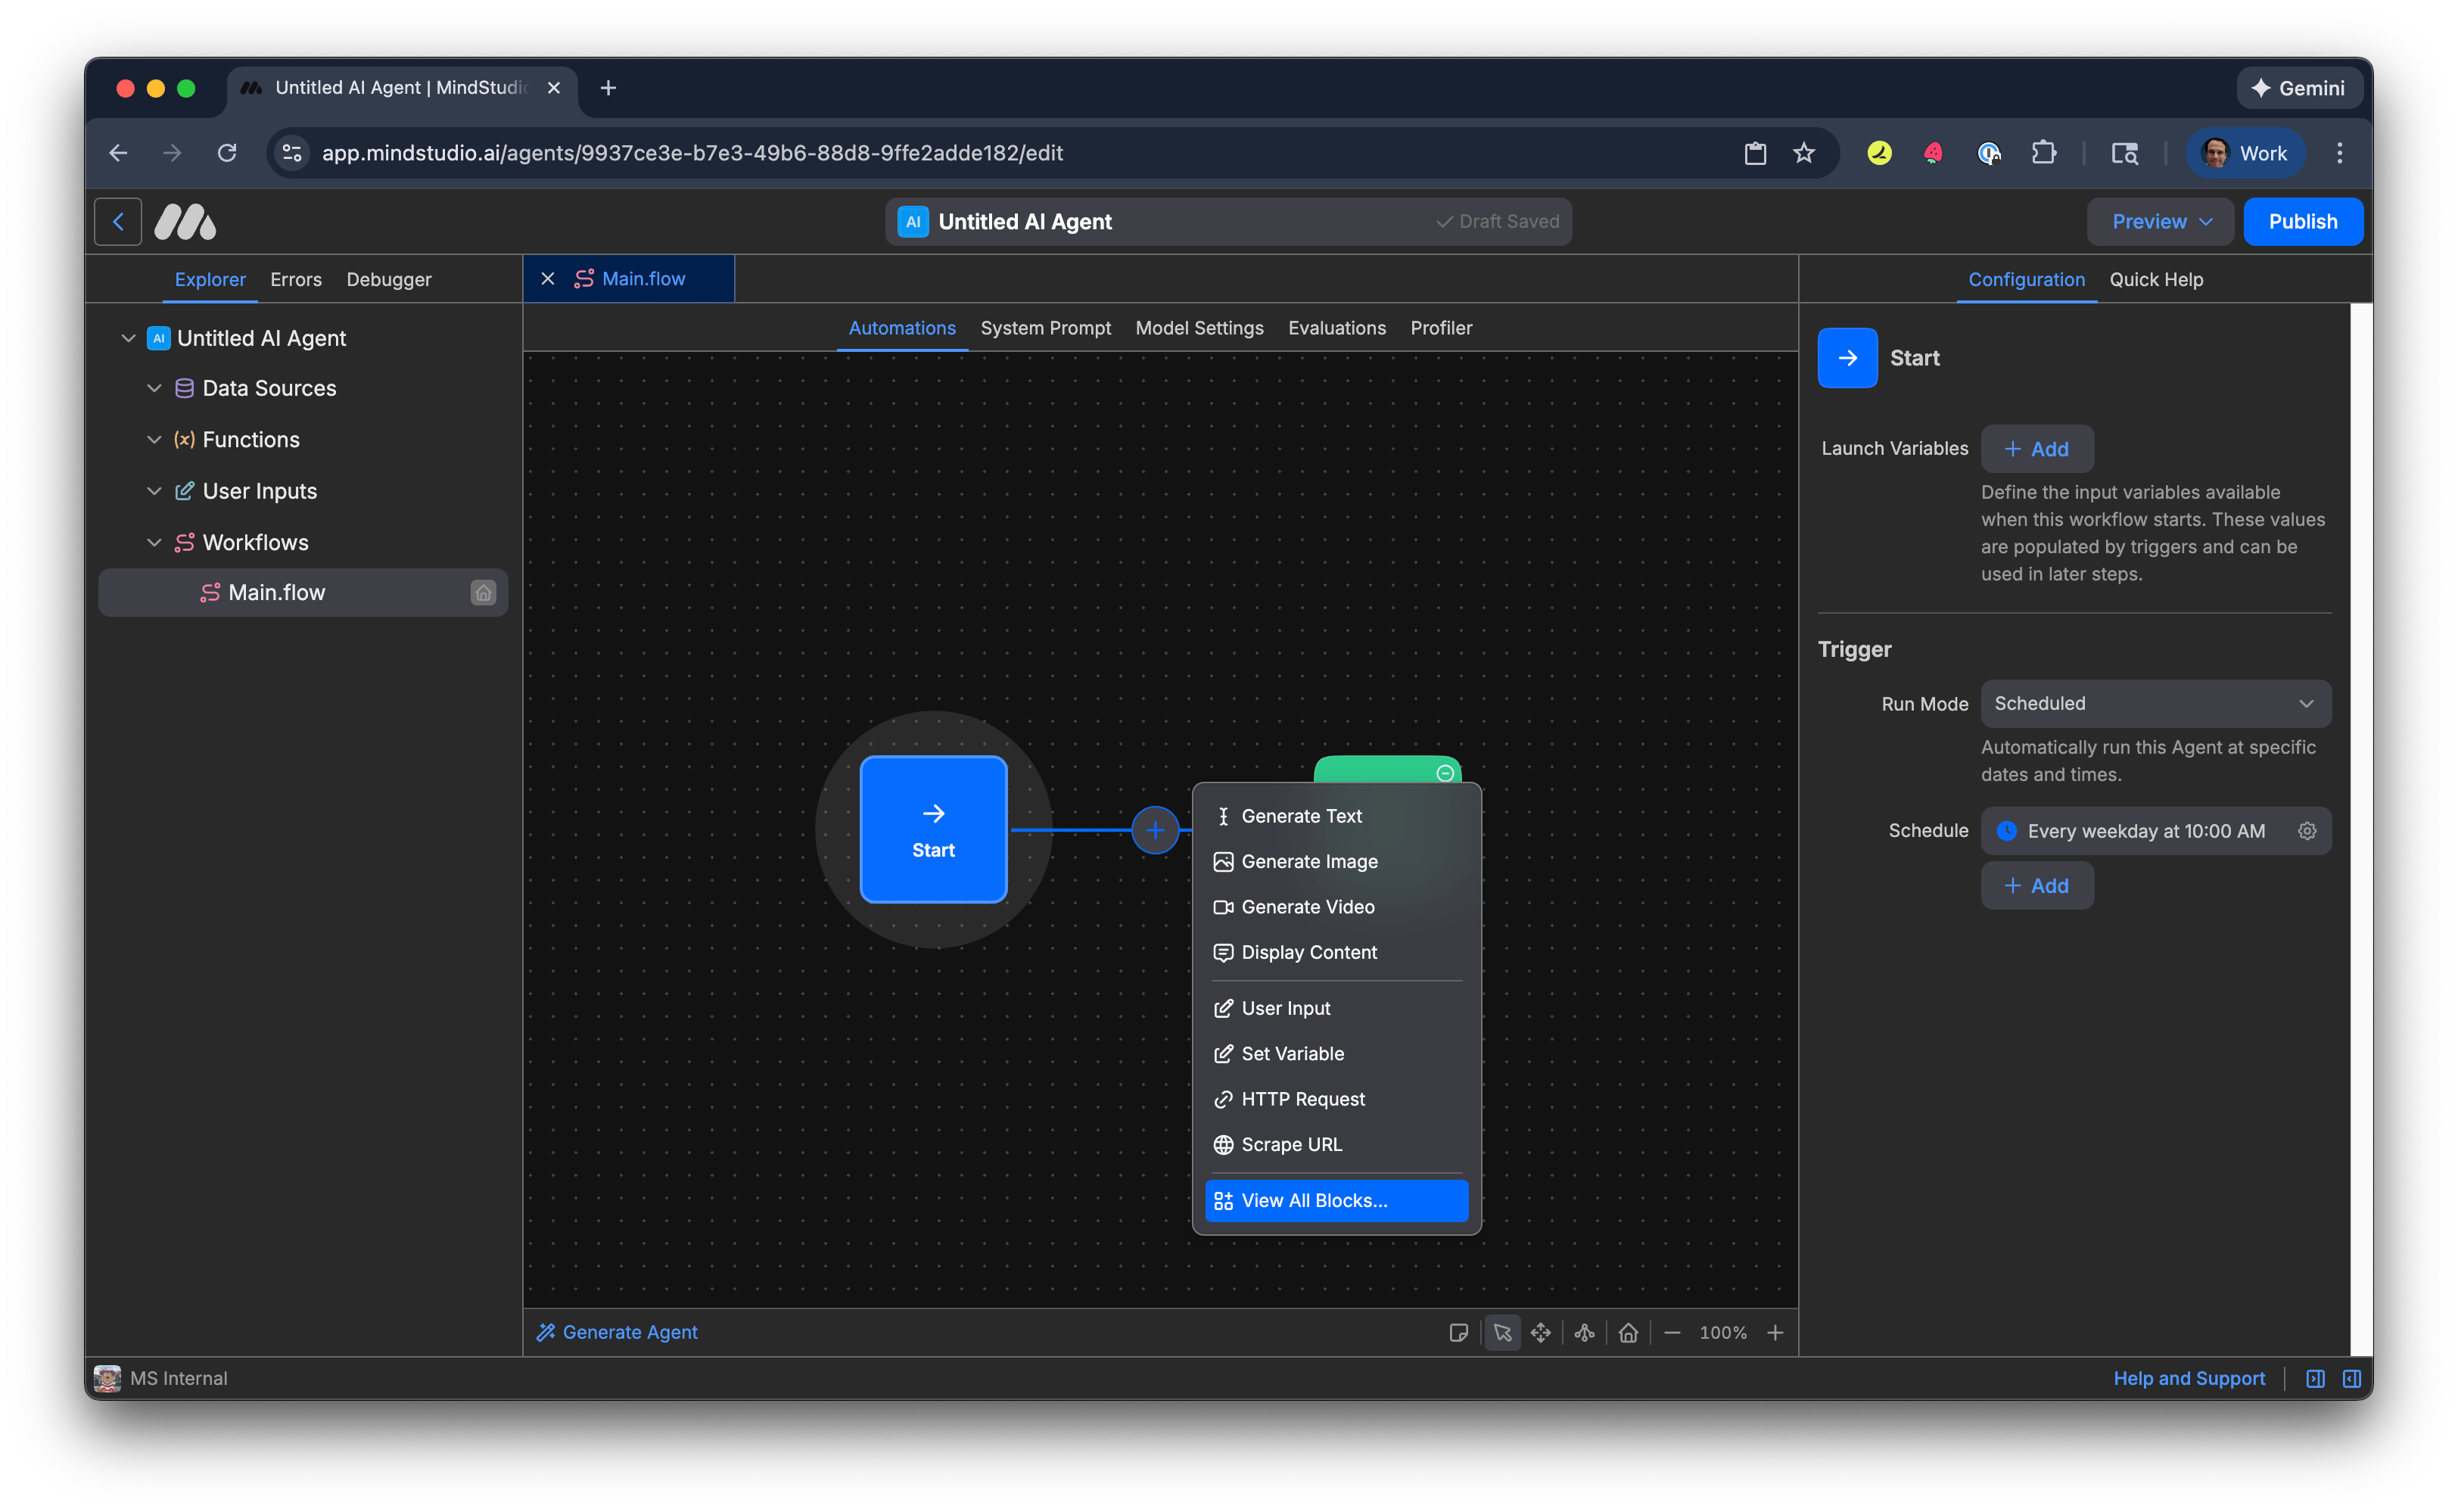
- Search for “Track Website Changes”, then select that block.
- In “URL”, add the webpage to monitor for changes. For example:
https://www.mindstudio.ai/legal/terms-of-use.
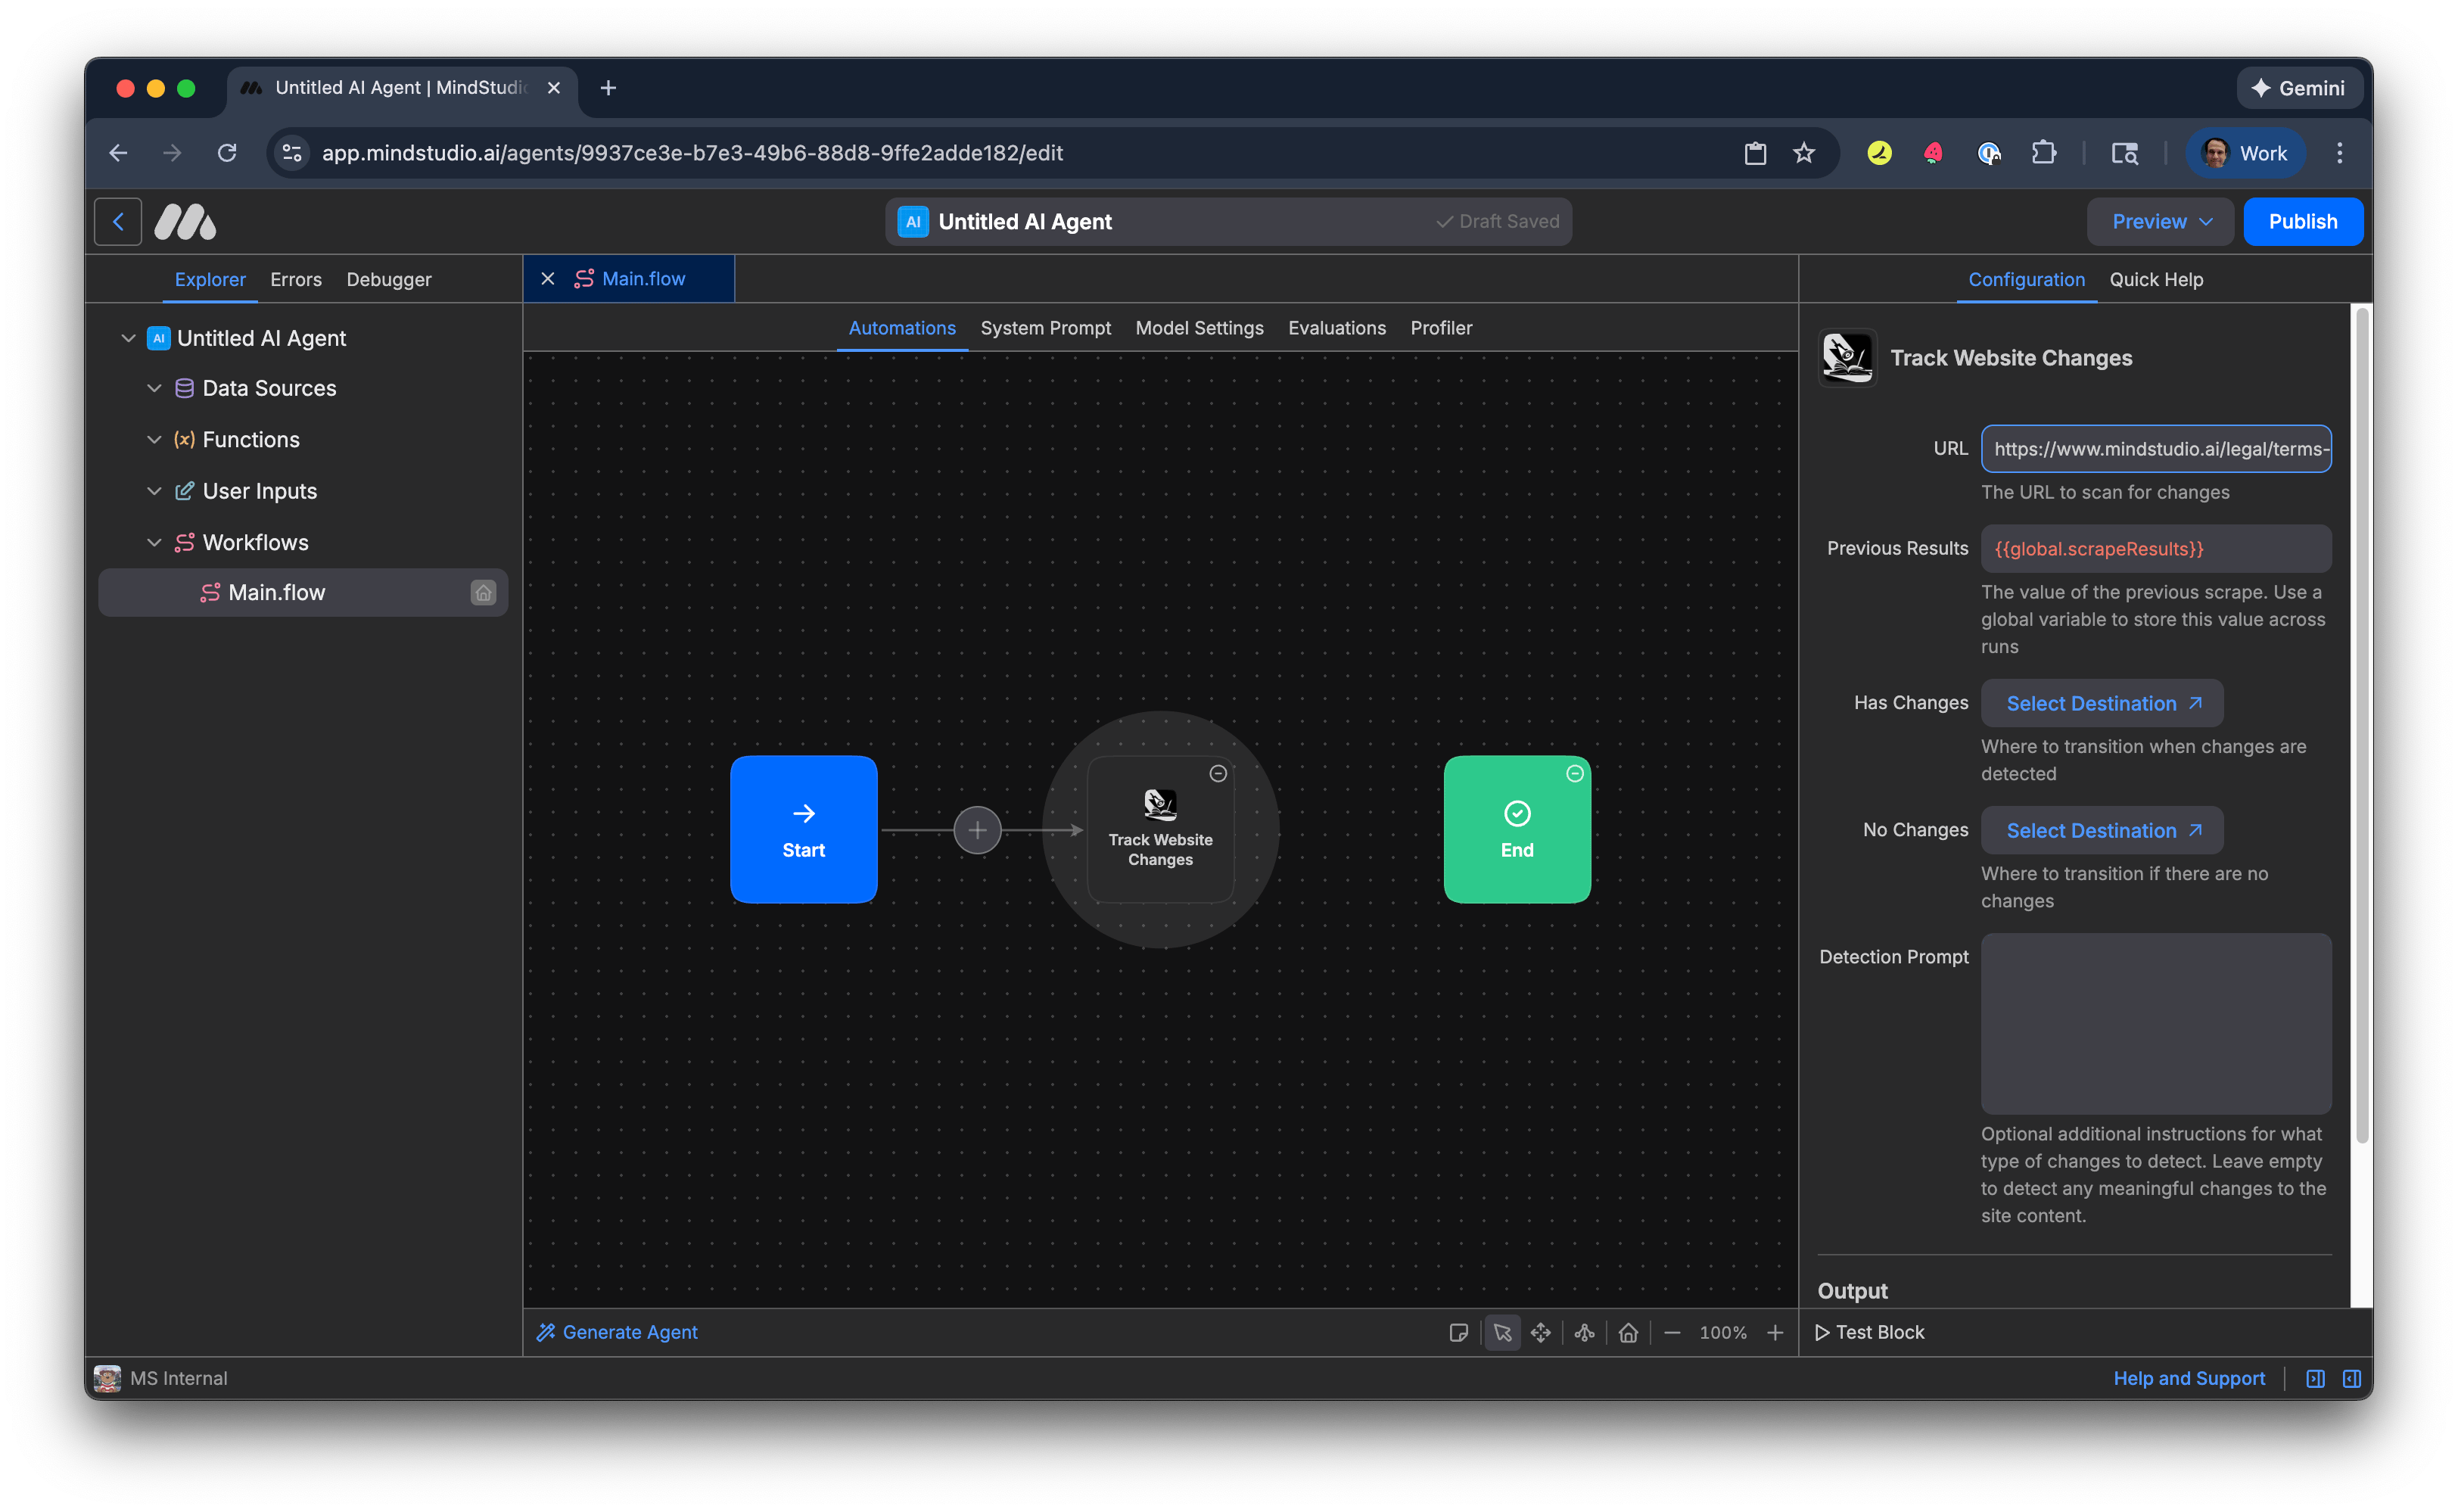
- In “Detection Prompt”, add the criteria to monitor for changes on the specified webpage. For example:

Detect meaningful changes to the Terms of Use page:
- any new terms of service
- any major language changes
- any updates to existing terms

- In “Changes”, add a variable to output changes to the webpage when detected. For example, “changes”.
Note: When changes are detected, these changes are saved to the global variable “global.scrapeResults”. The next time this AI agent runs, it compares the current webpage’s scraped content with the global variable to determine whether there are significant differences.
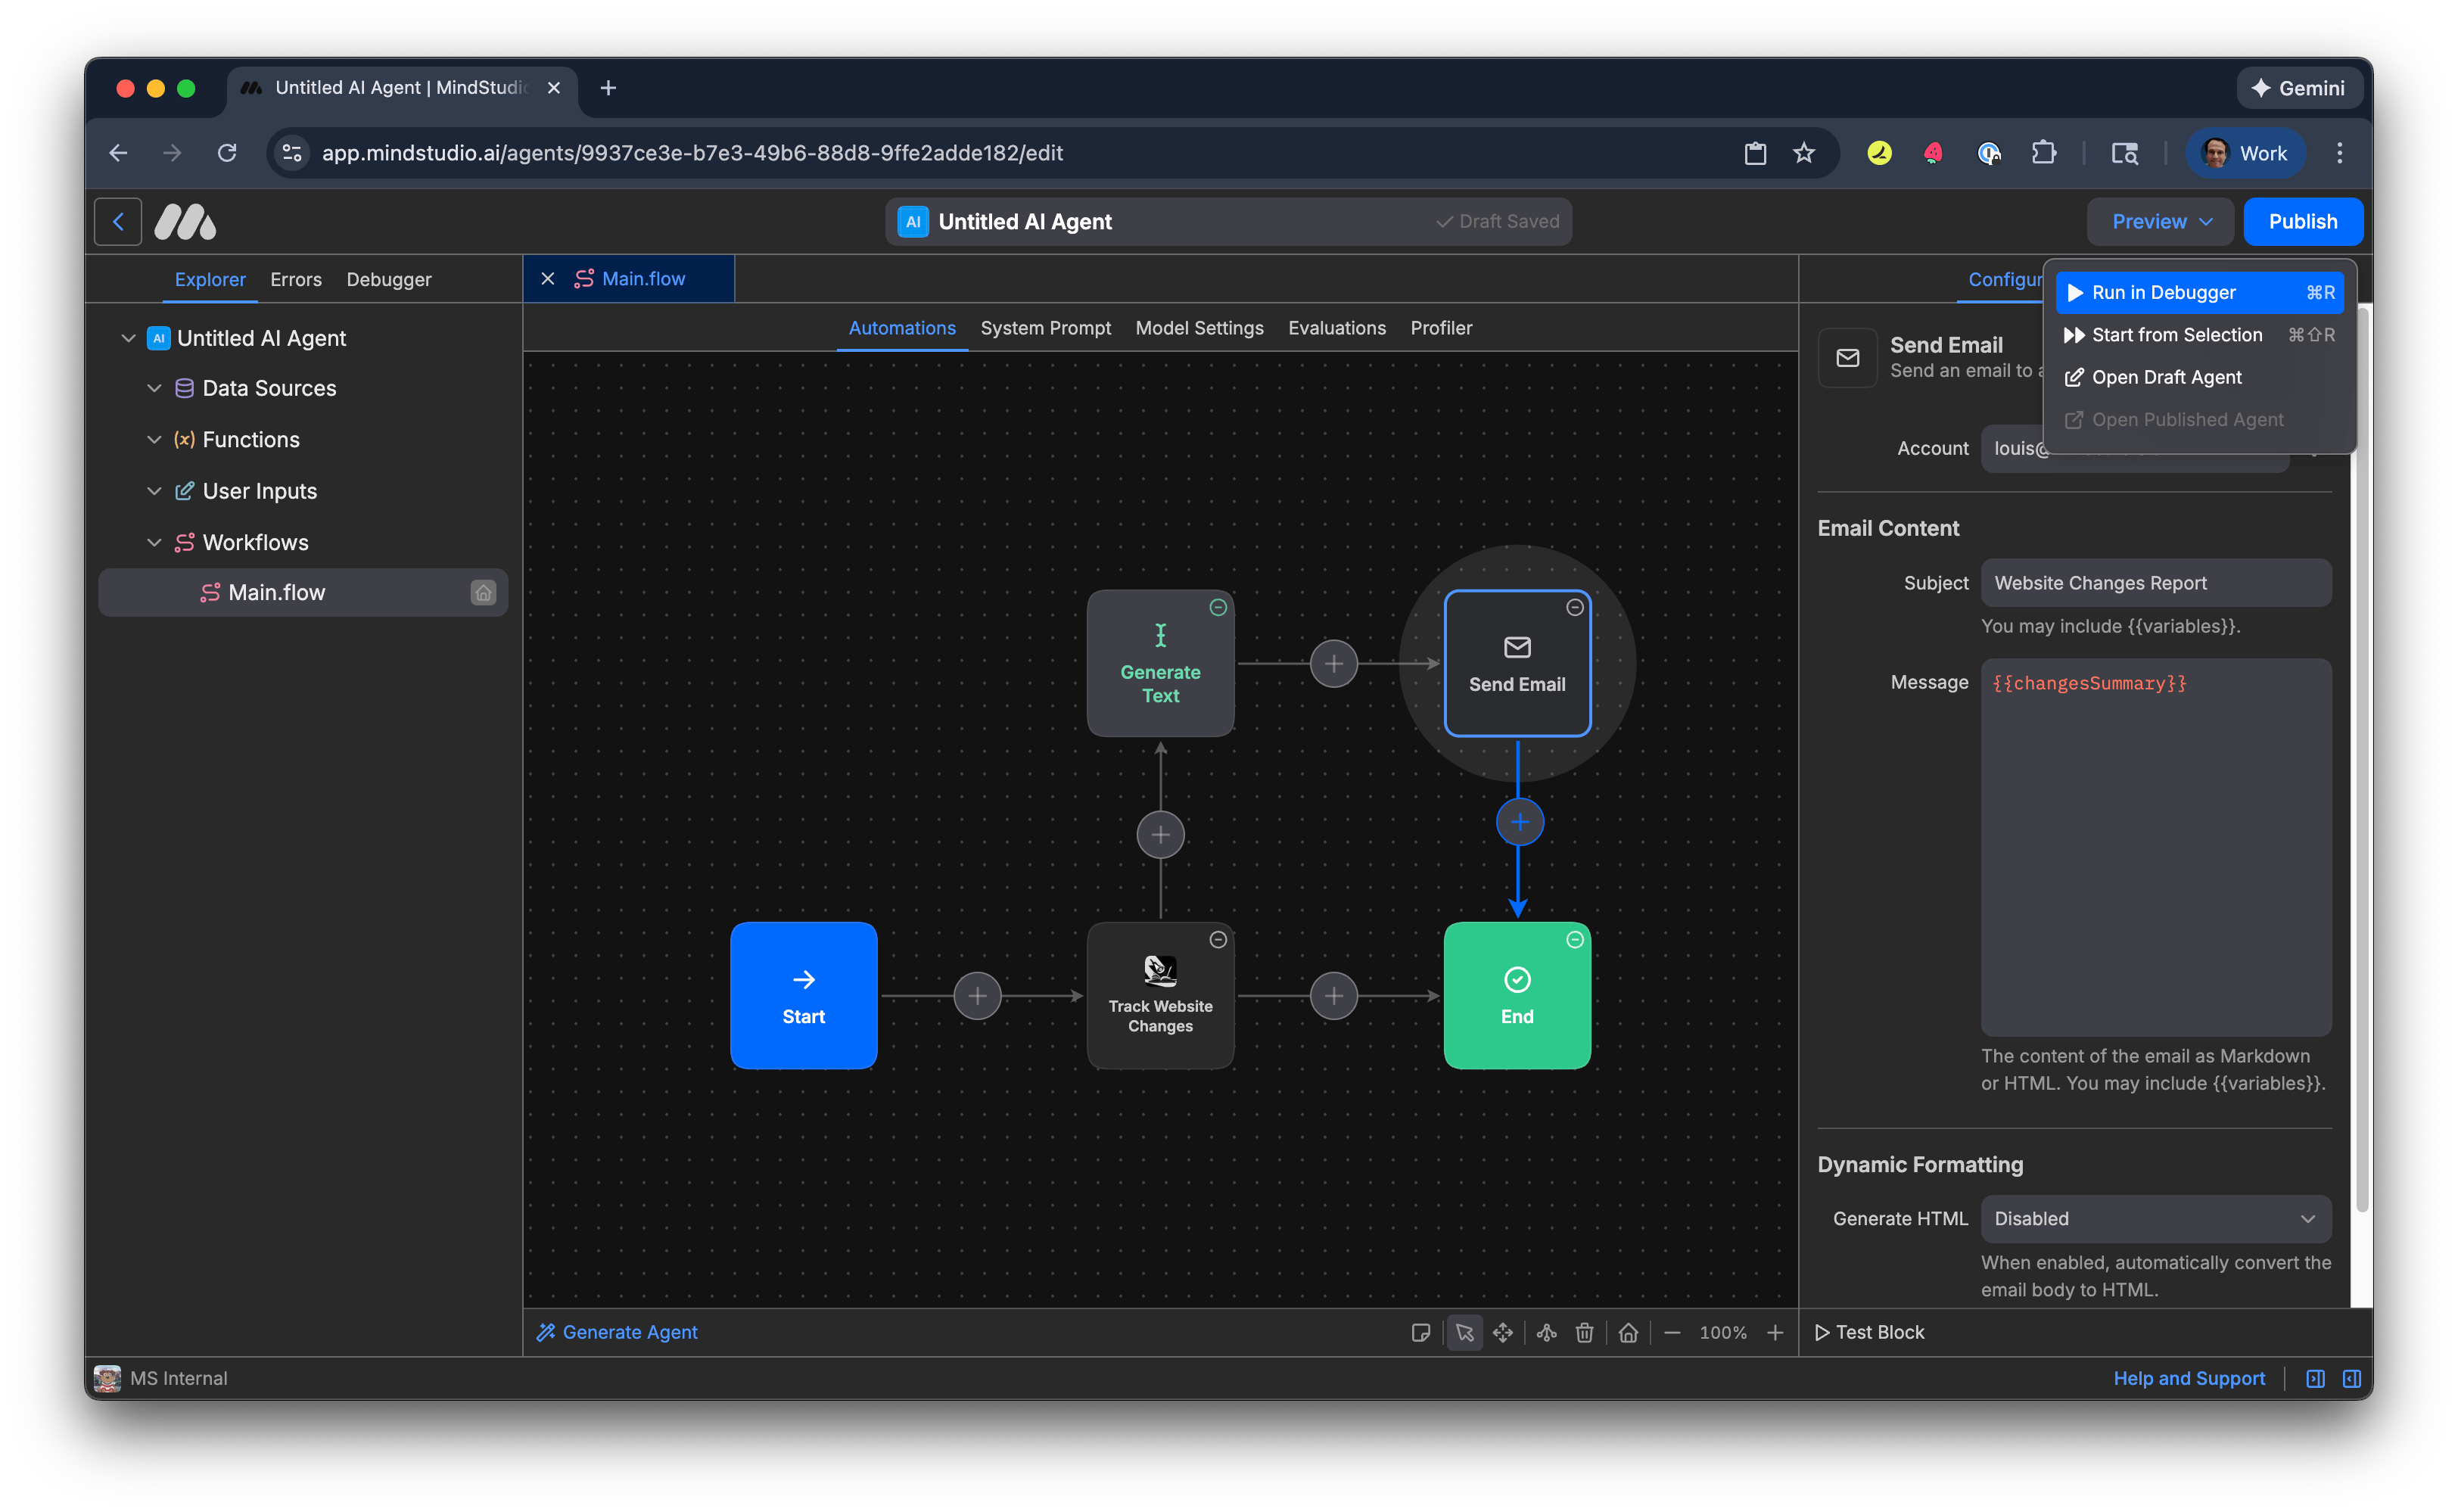
- Right-click anywhere on the Automation Canvas, hover over “New Block”, then add a “Generate Text” block.
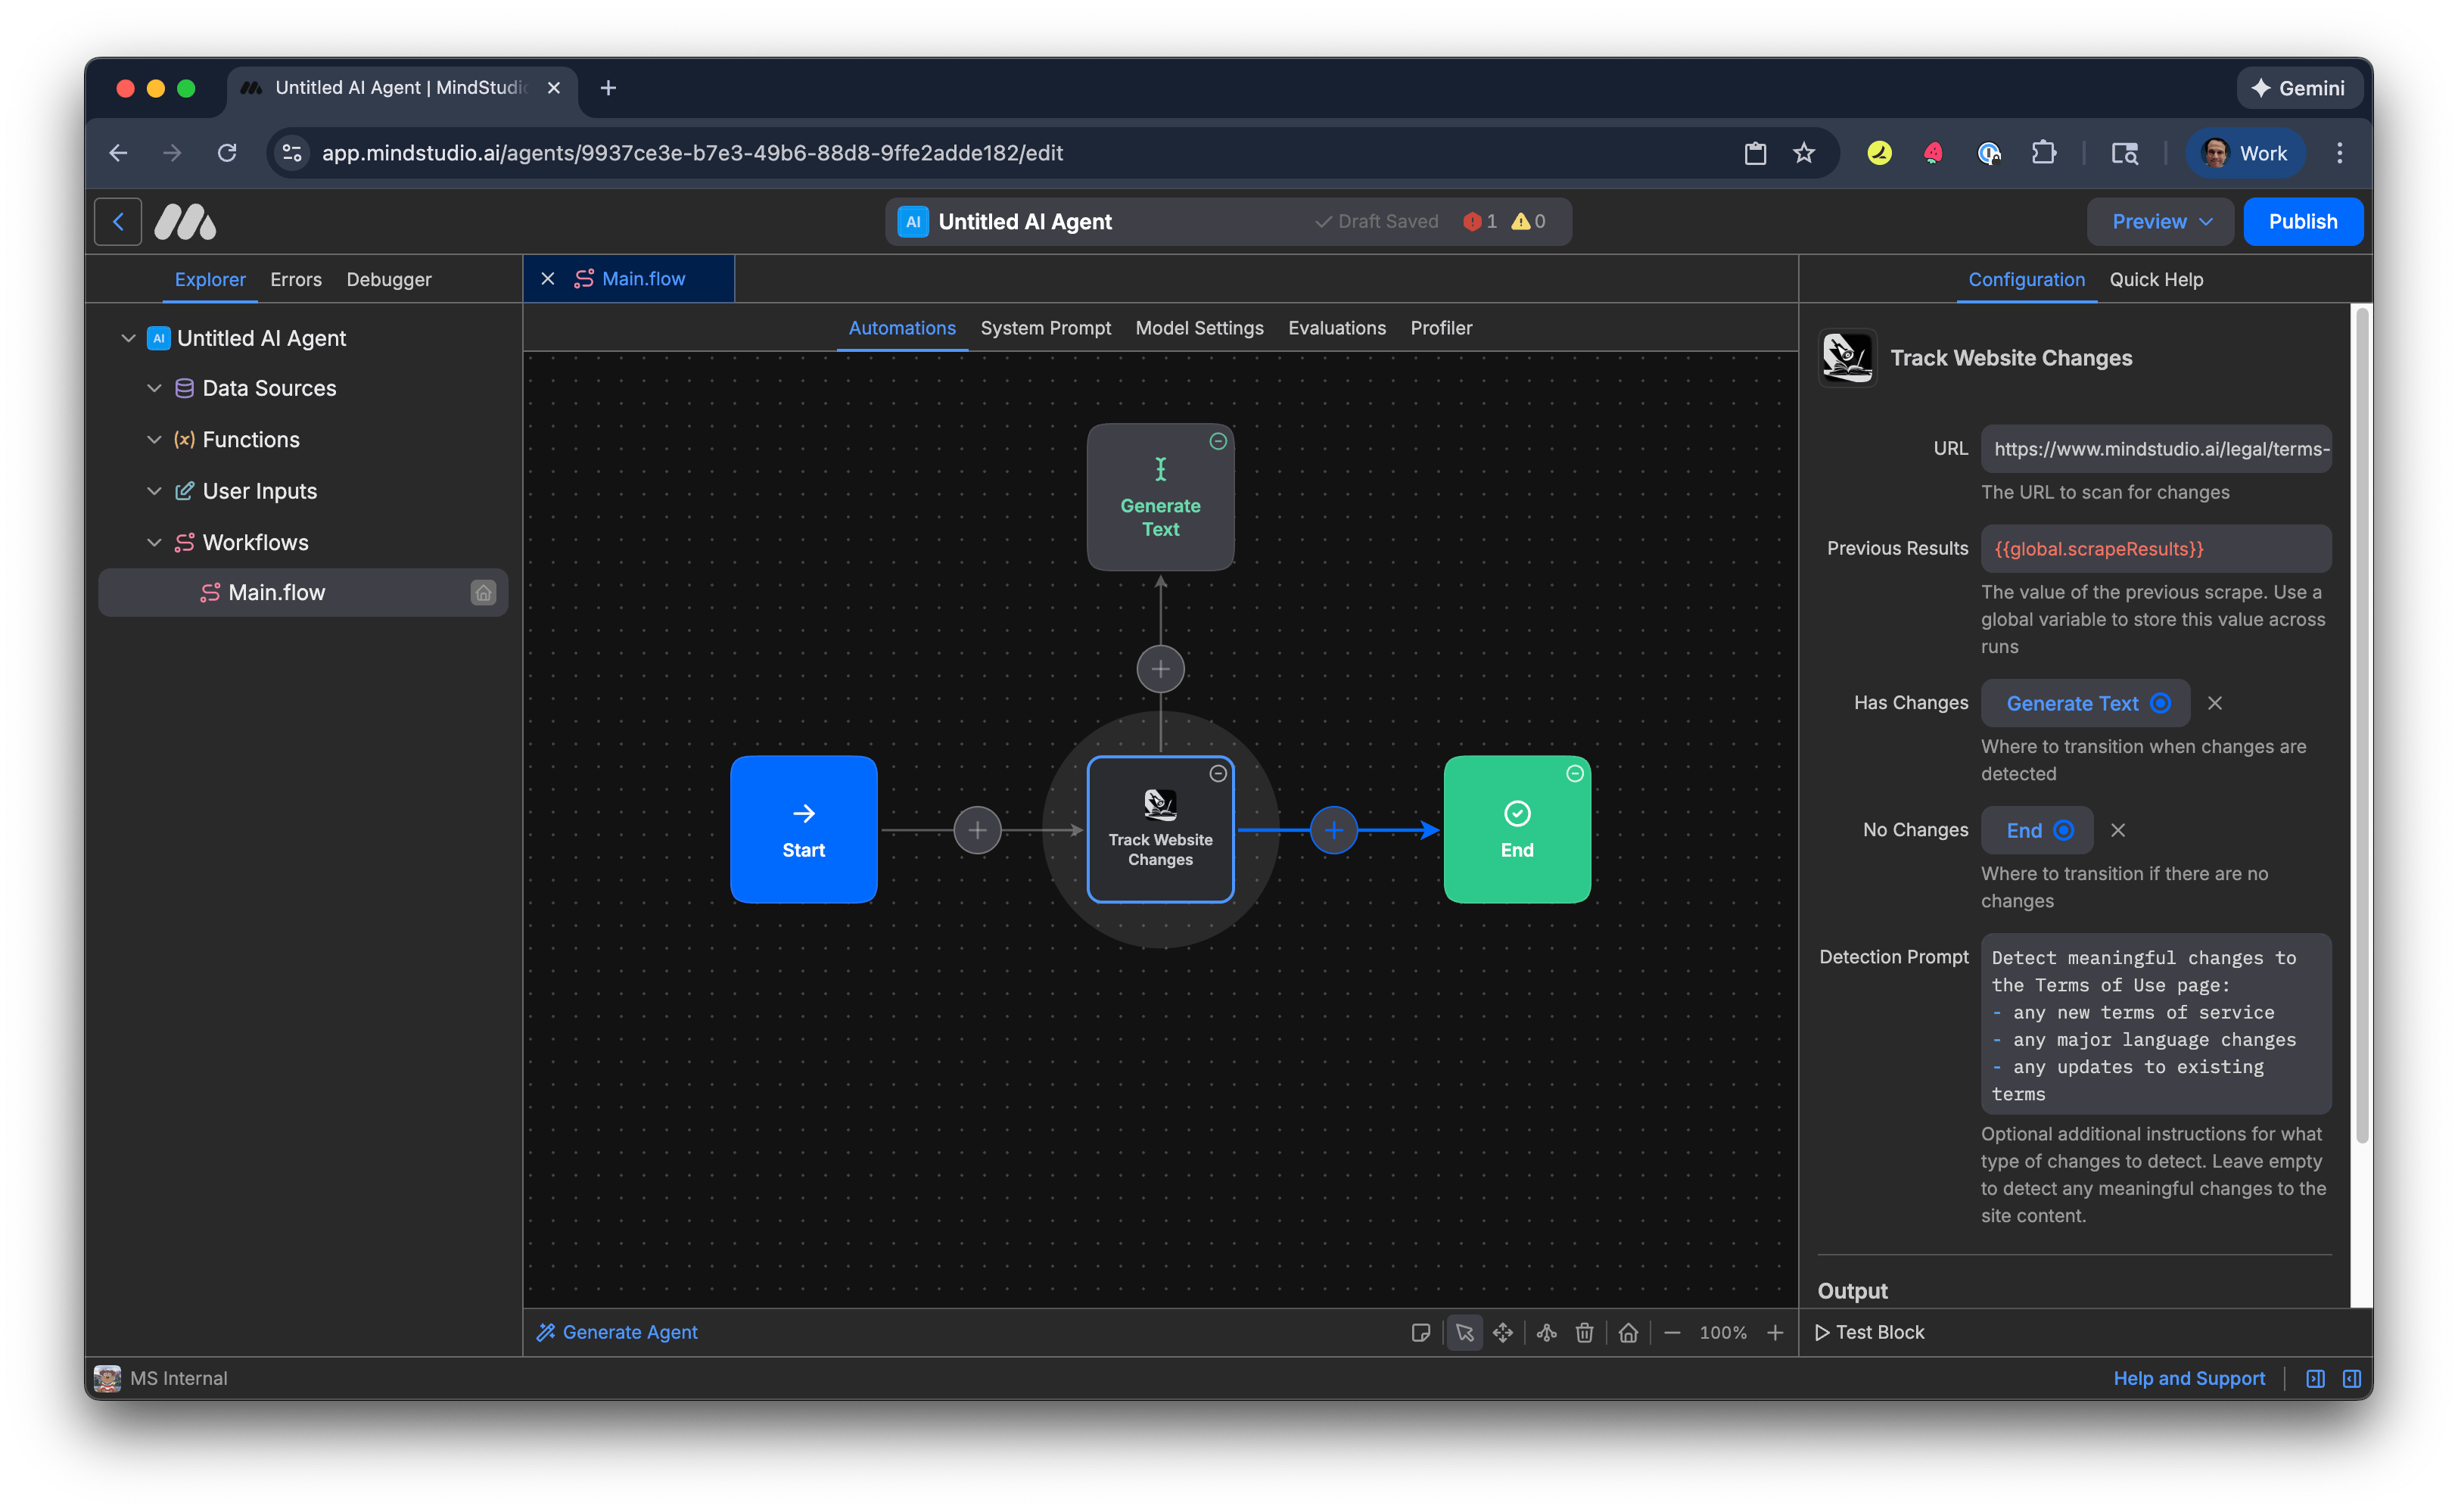
- Select the “Track Website Changes” block again. Click “Select Destination” for the “Has Changes” setting to choose which block the workflow transitions to when changes are detected on the webpage.
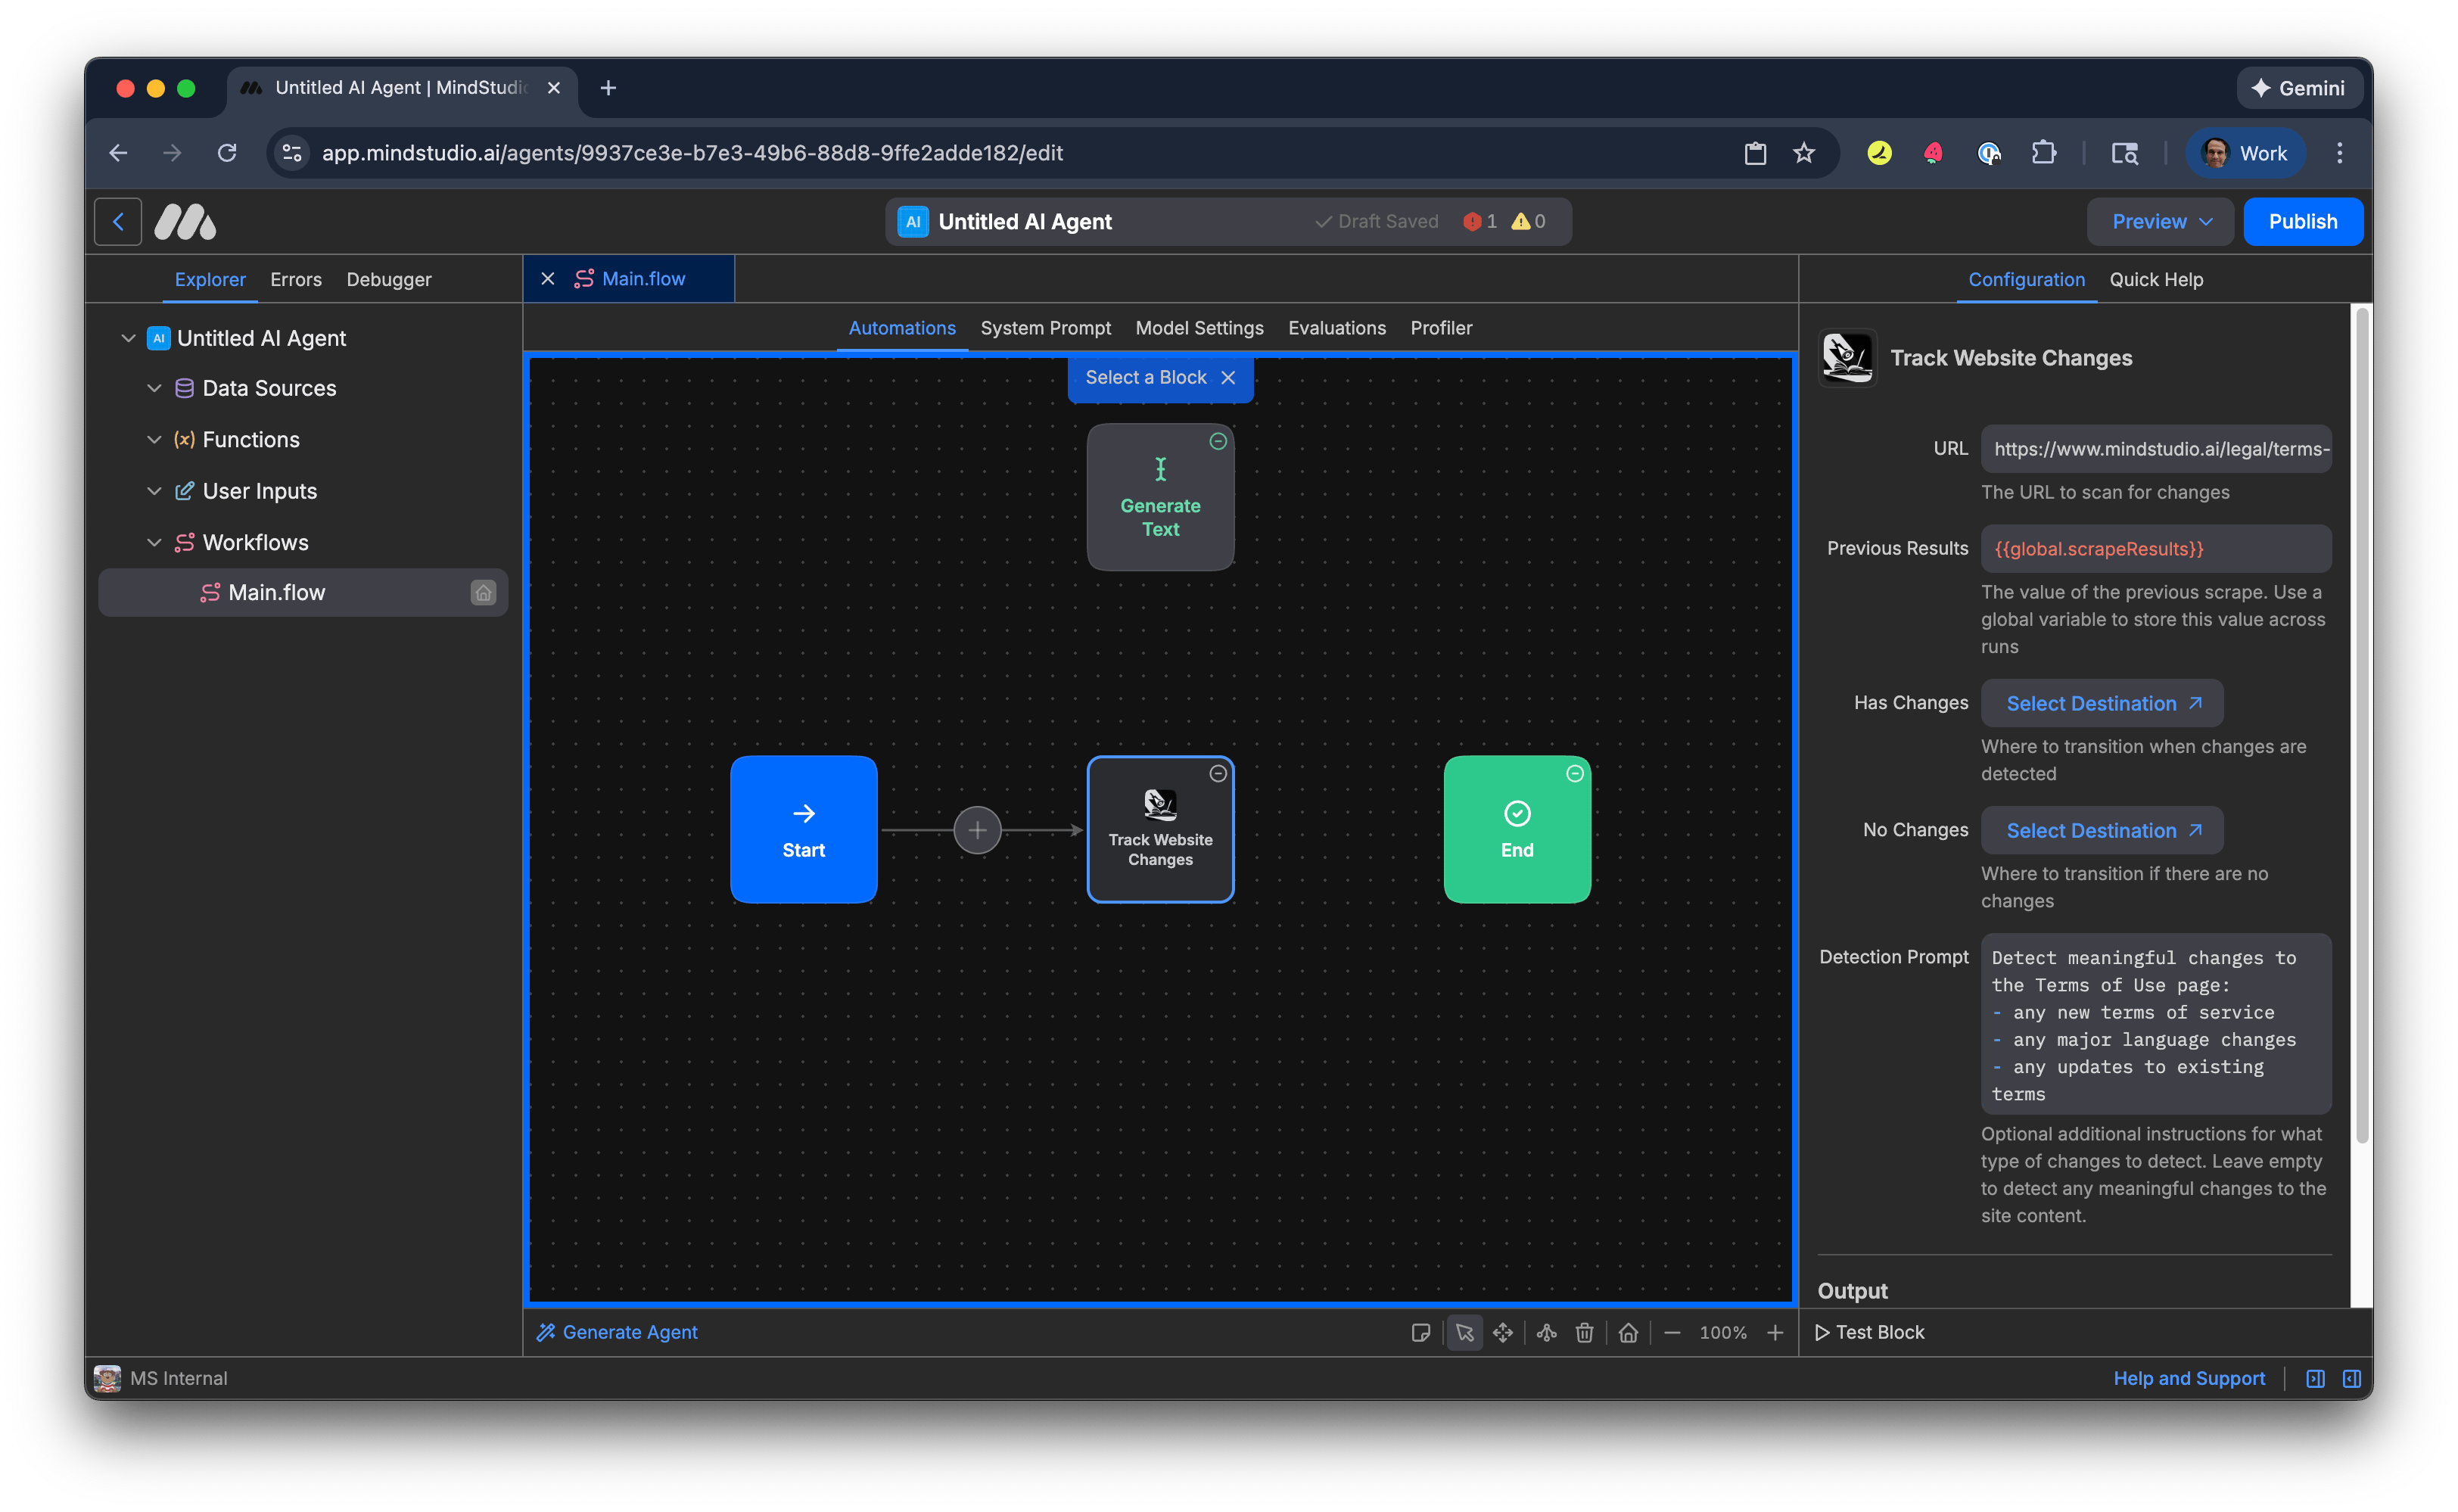
- Select the “Generate Text” block. A connection is displayed between the “Track Website Changes” block and the “Generate Text” block. The “Has Changes” setting indicates to transition to that block.

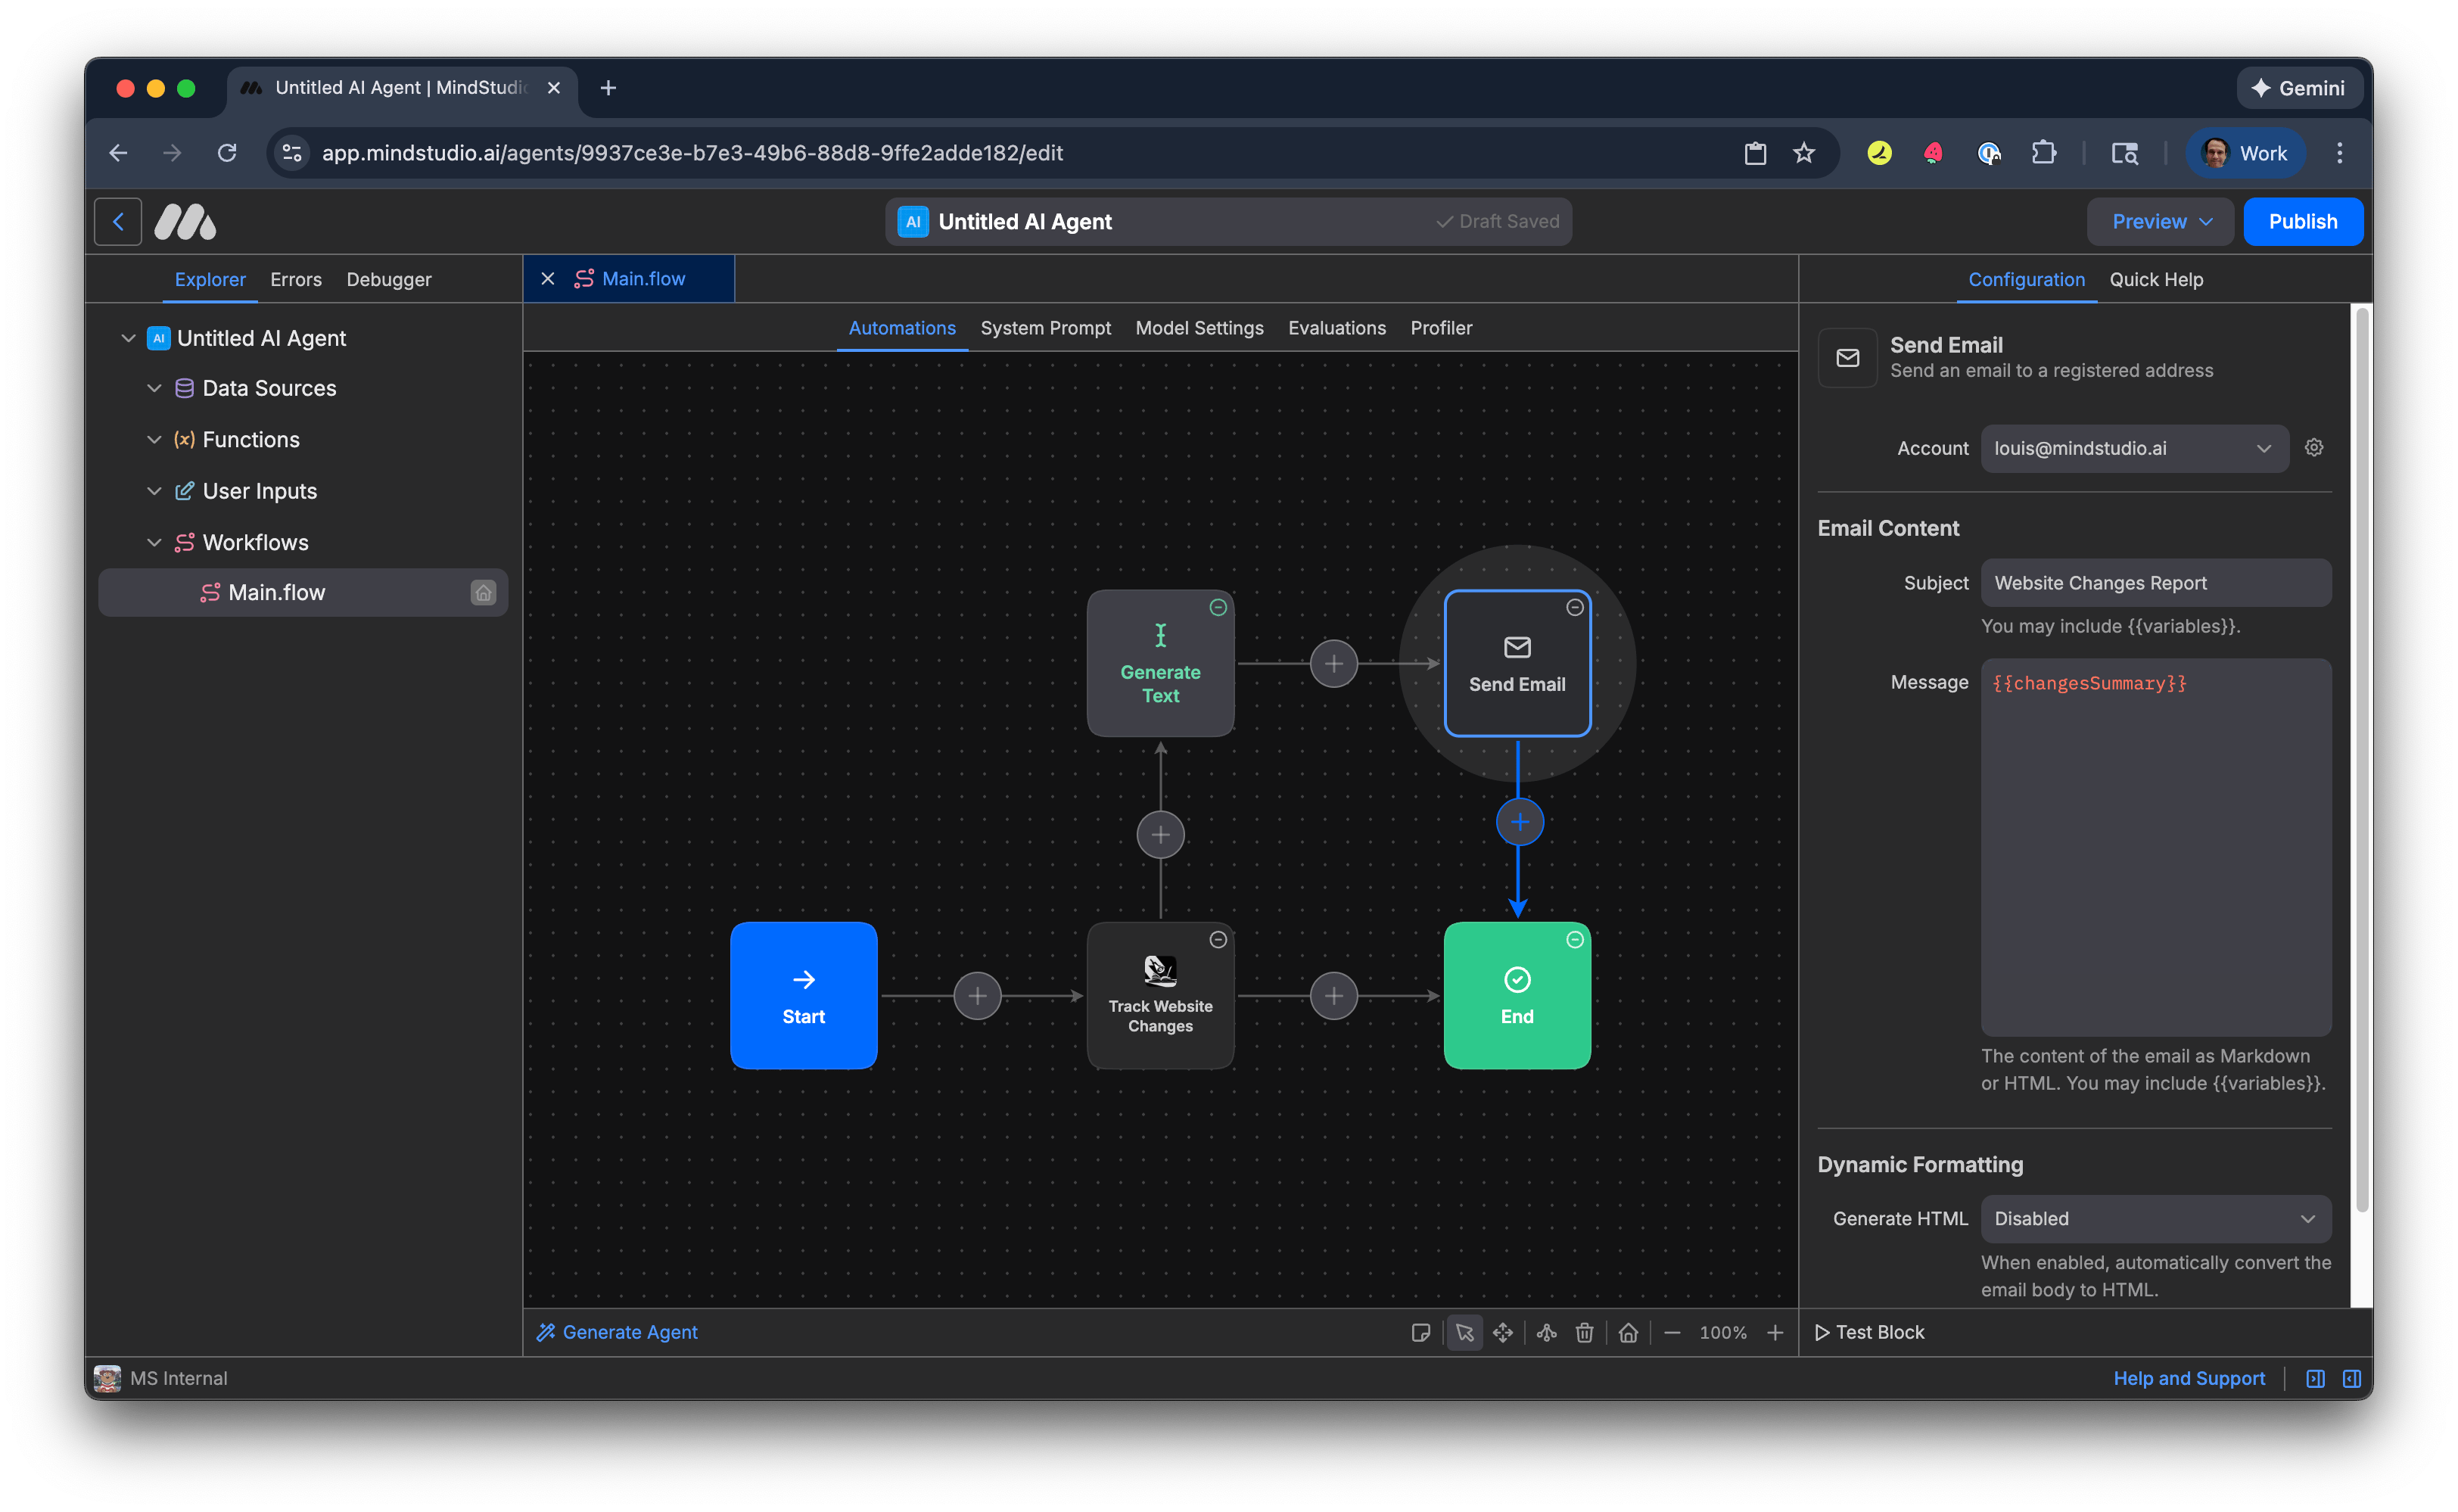
- Click “Select Destination” for the “No Changes” setting to select which block to transition the workflow when no changes are detected on the webpage.

- Select the “End” block. A connection is displayed between the “Track Website Changes” block and the “End” block. The “No Changes” setting indicates to transition to that block.
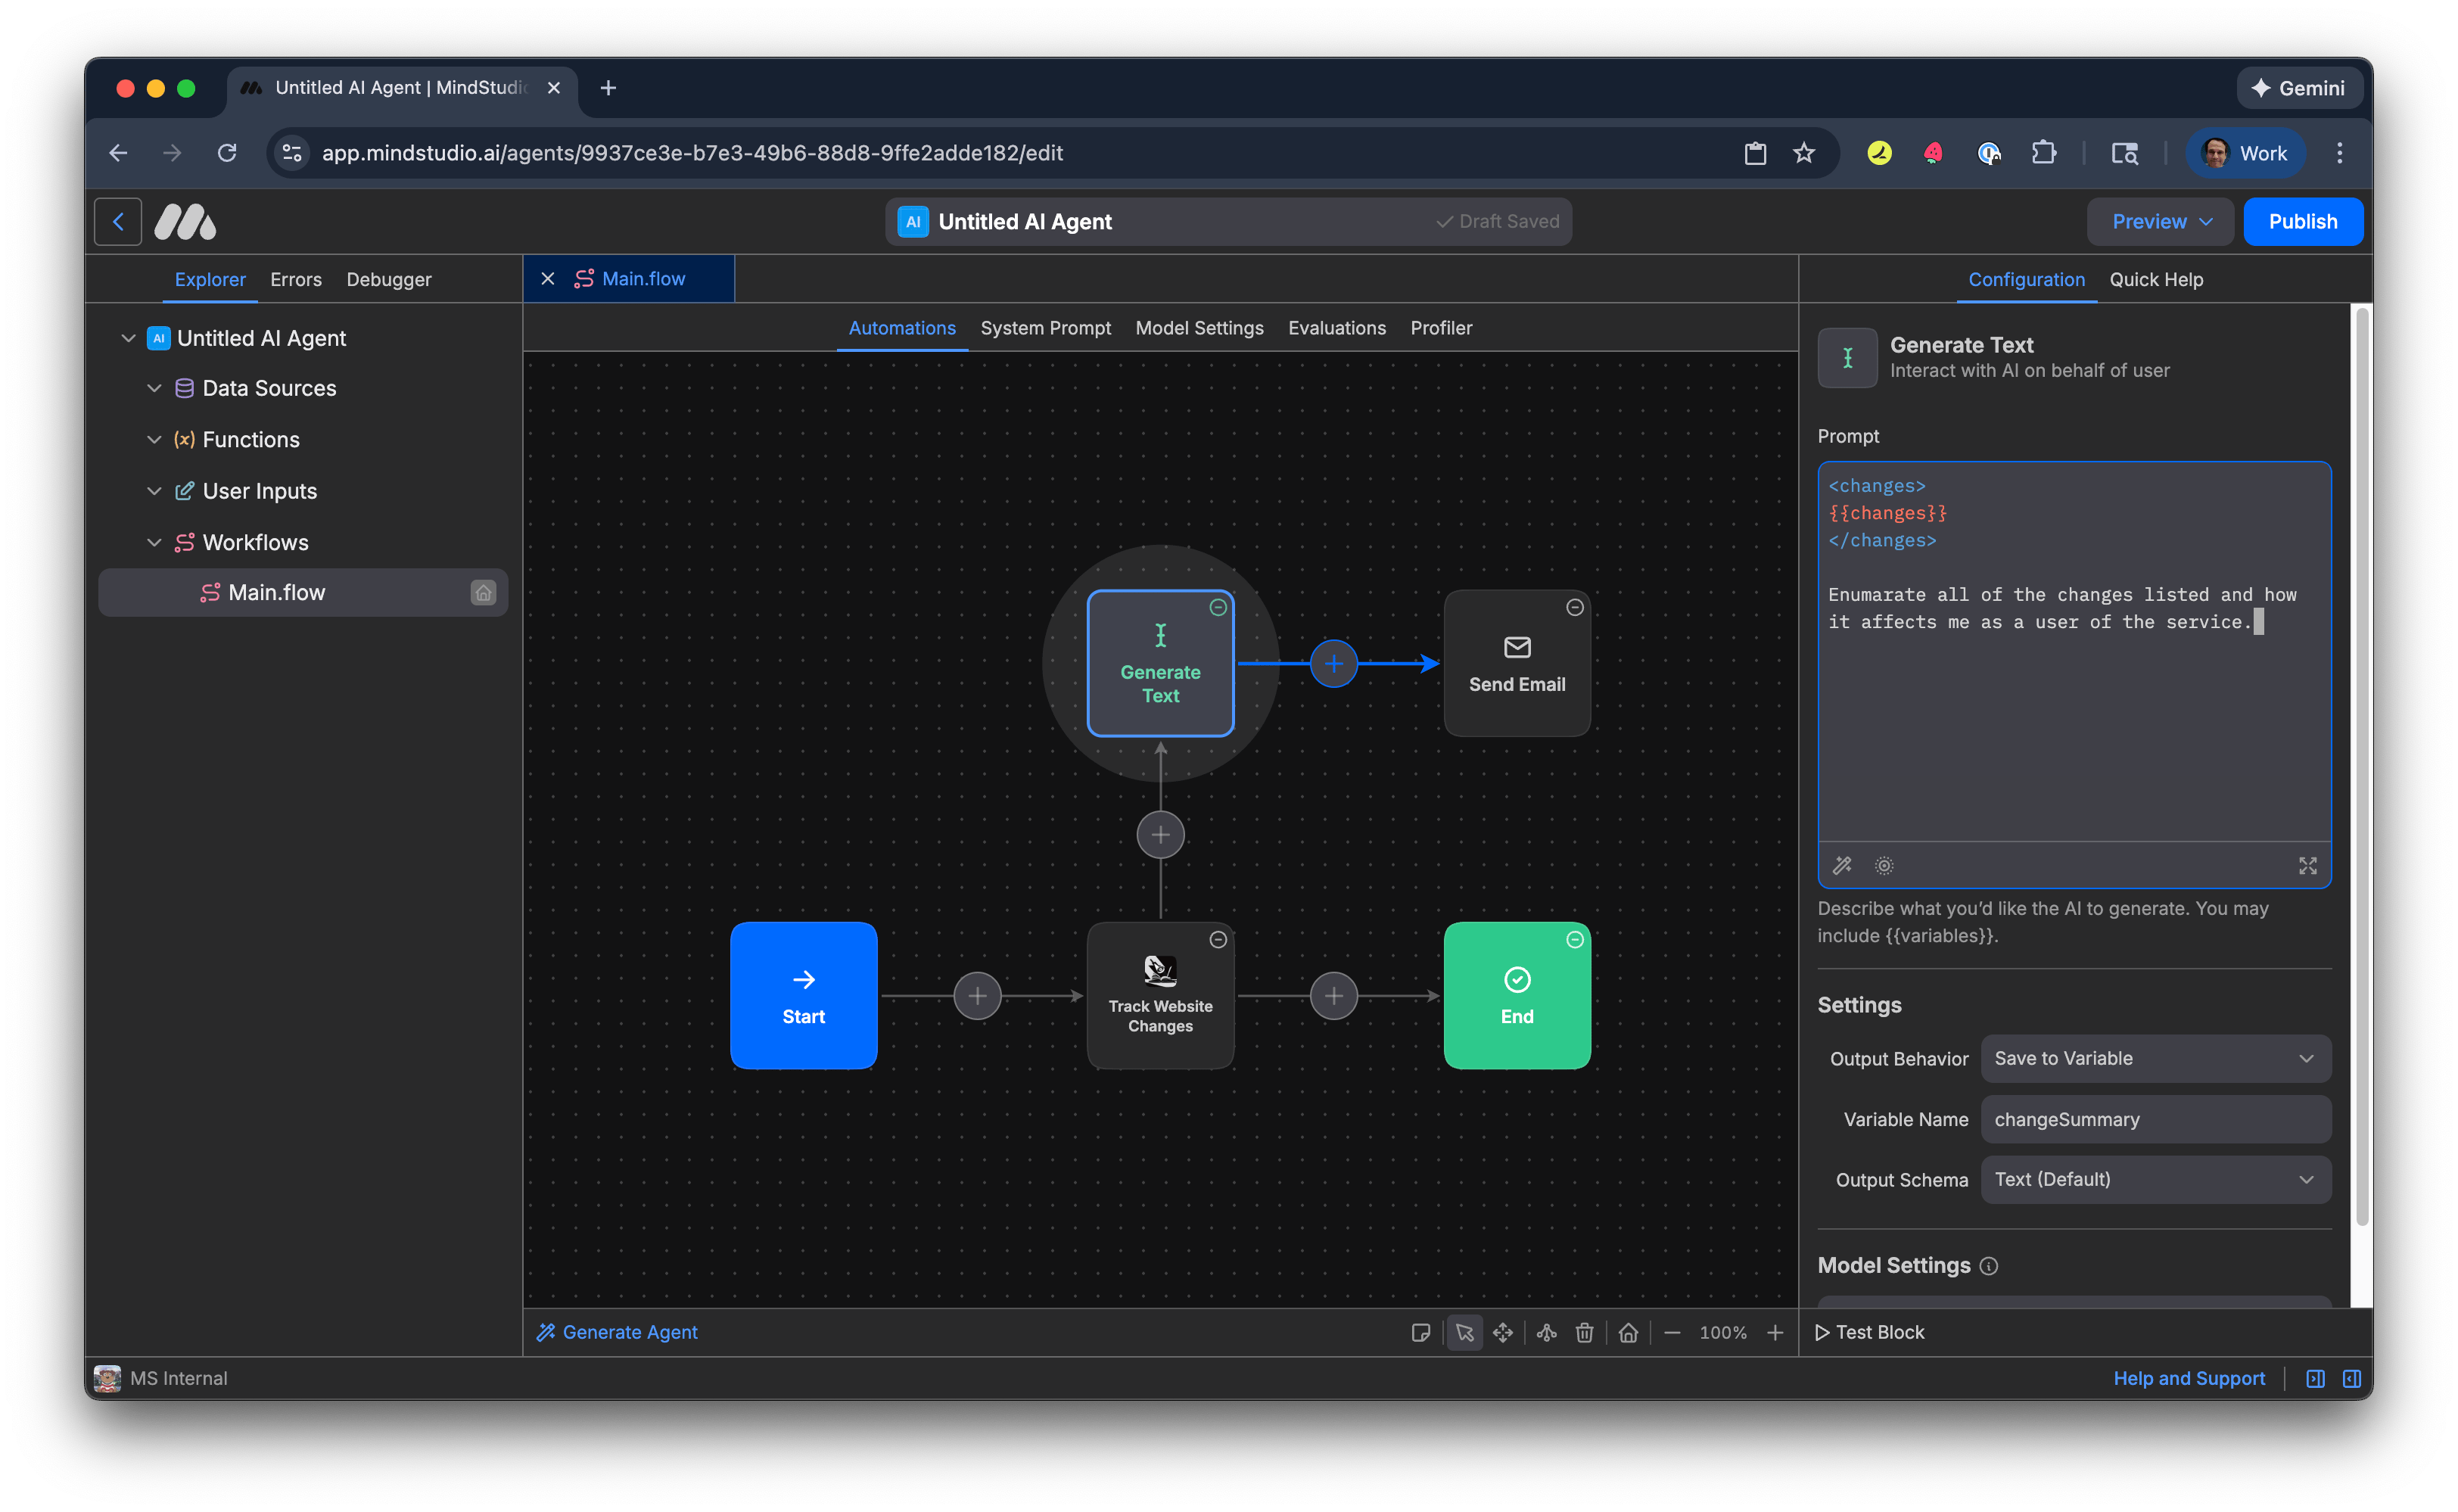
- Select the “Generate Text” block, then add the following prompt. The XML-style brackets surrounding the variable name “changes”, in double sets of curly braces, separates “the instruction” from “the variable values” that we specified. Doing this is a best practice for prompting an AI model in general. The variable “changes” is the one we specified to output the webpage-scraped content when significant changes to the webpage are detected.
Enumerate all changes listed and how they affect me as a service user.
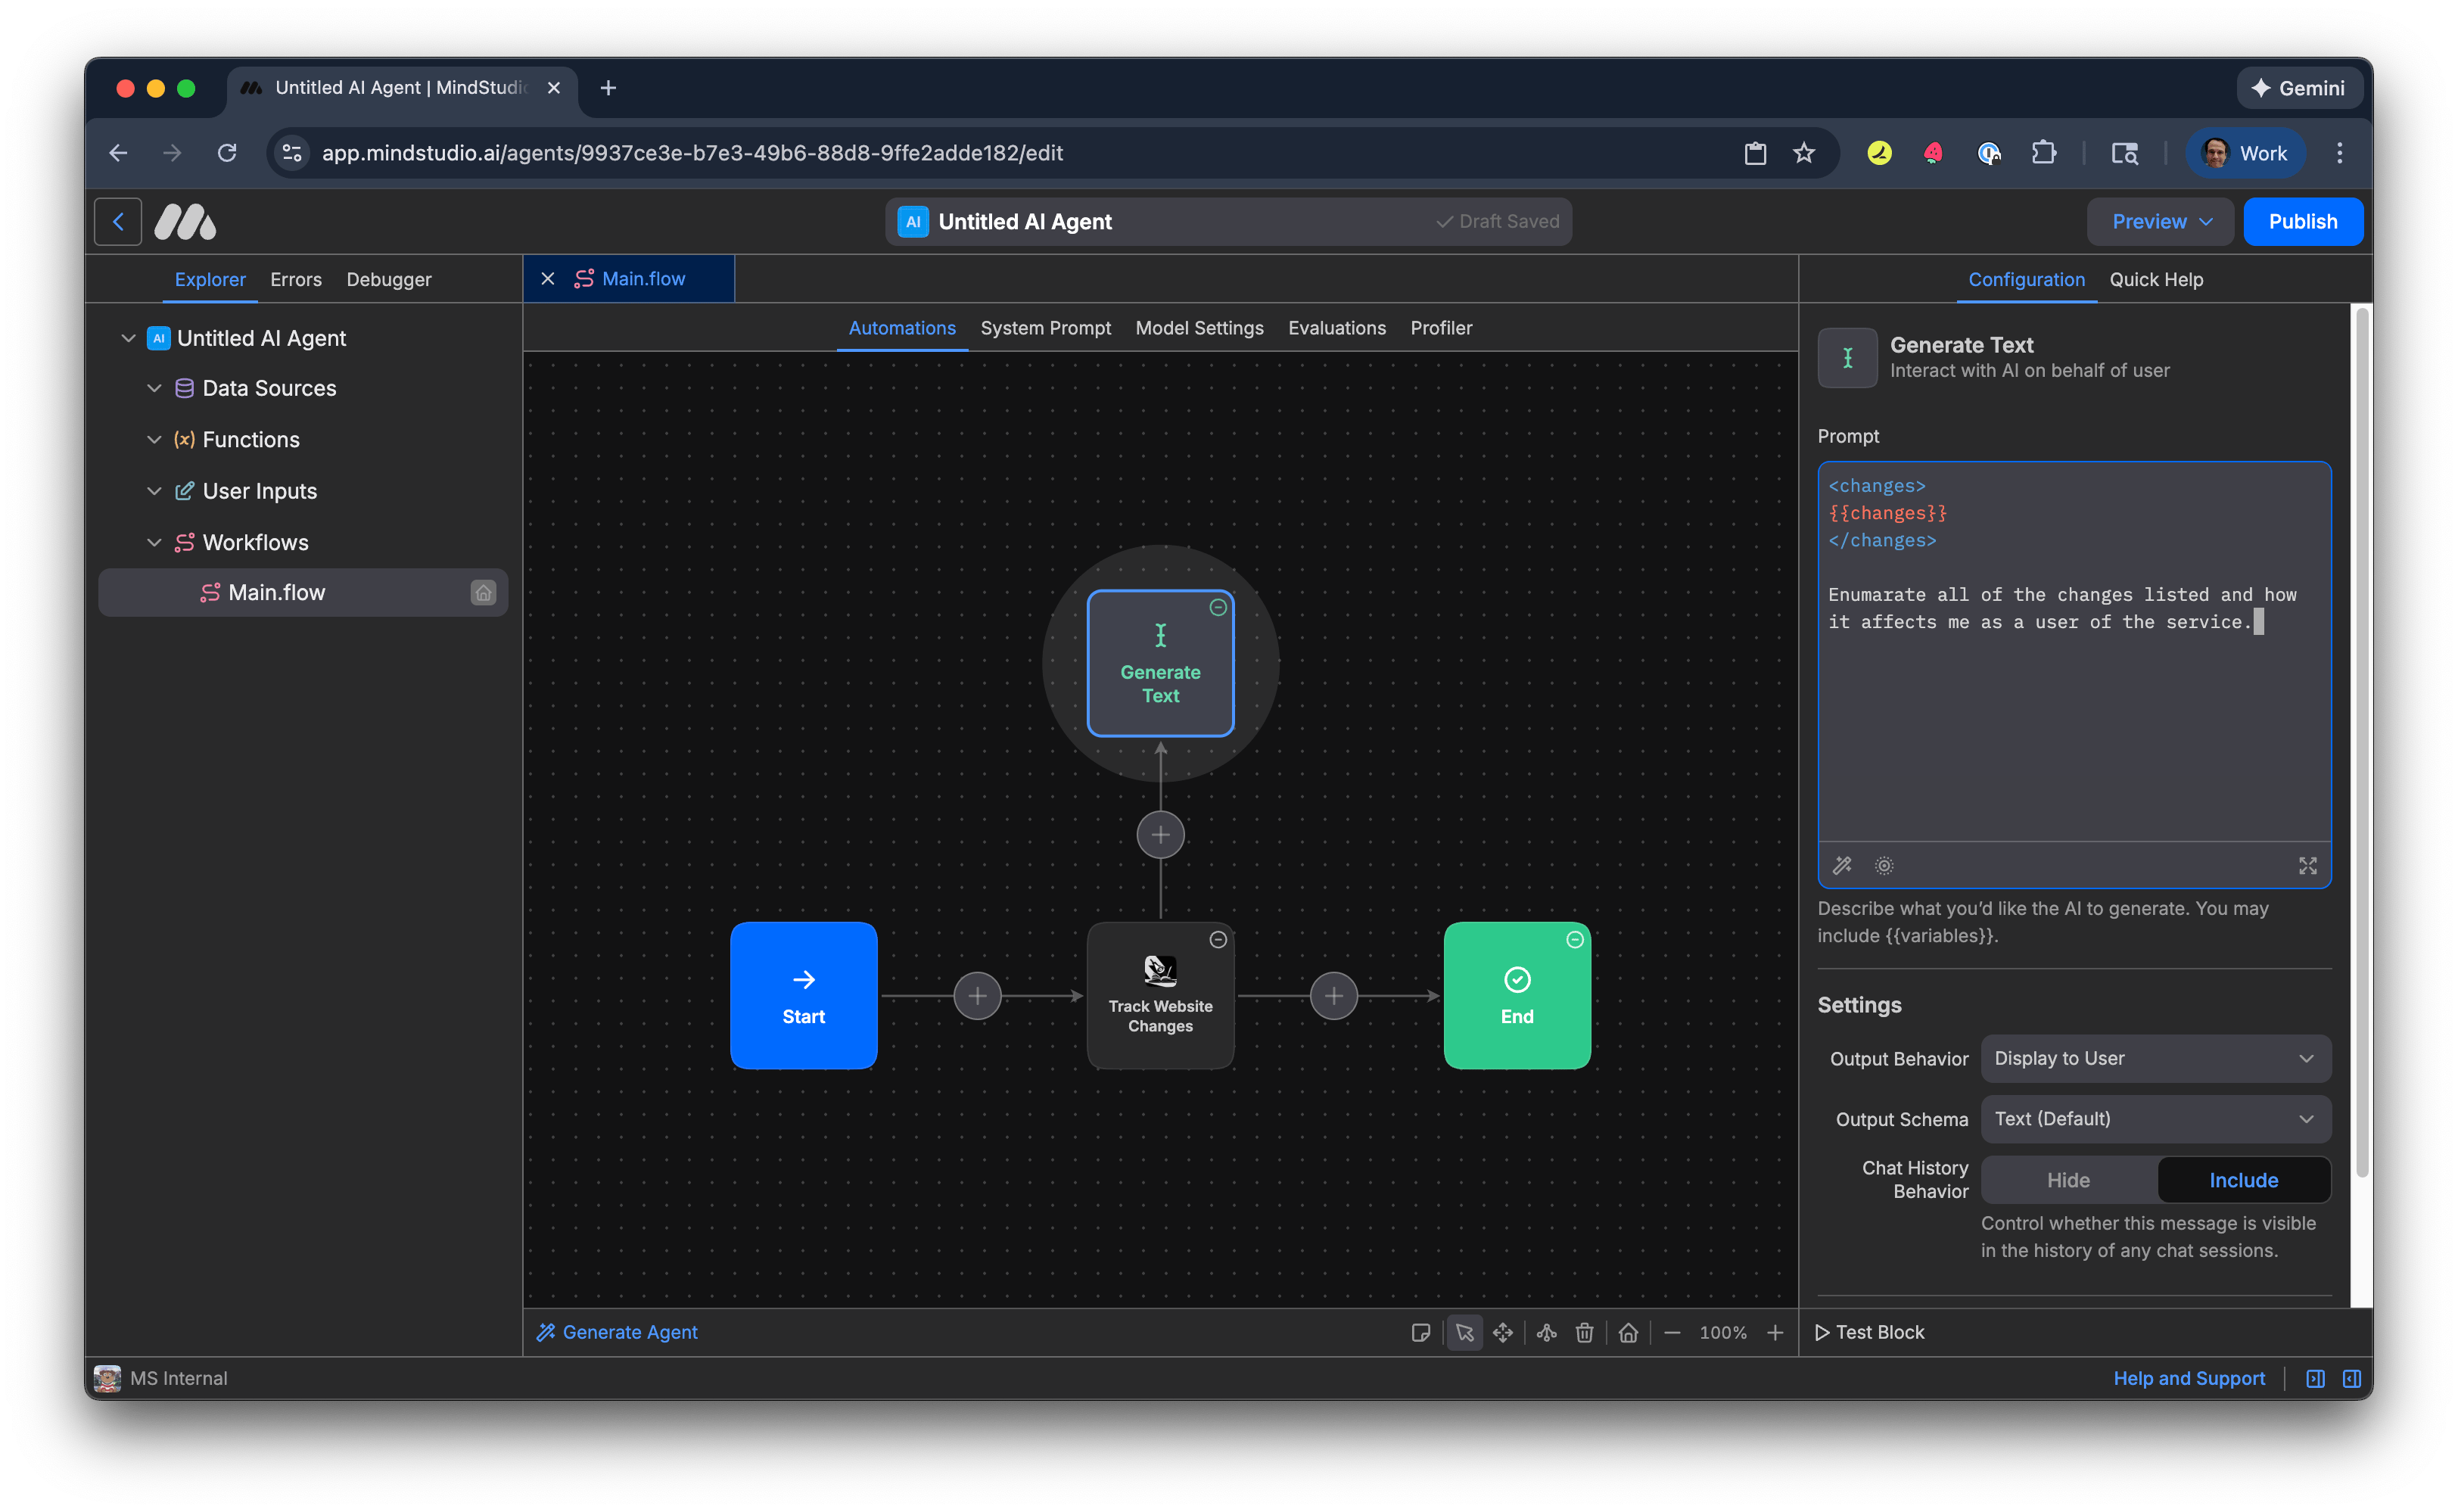
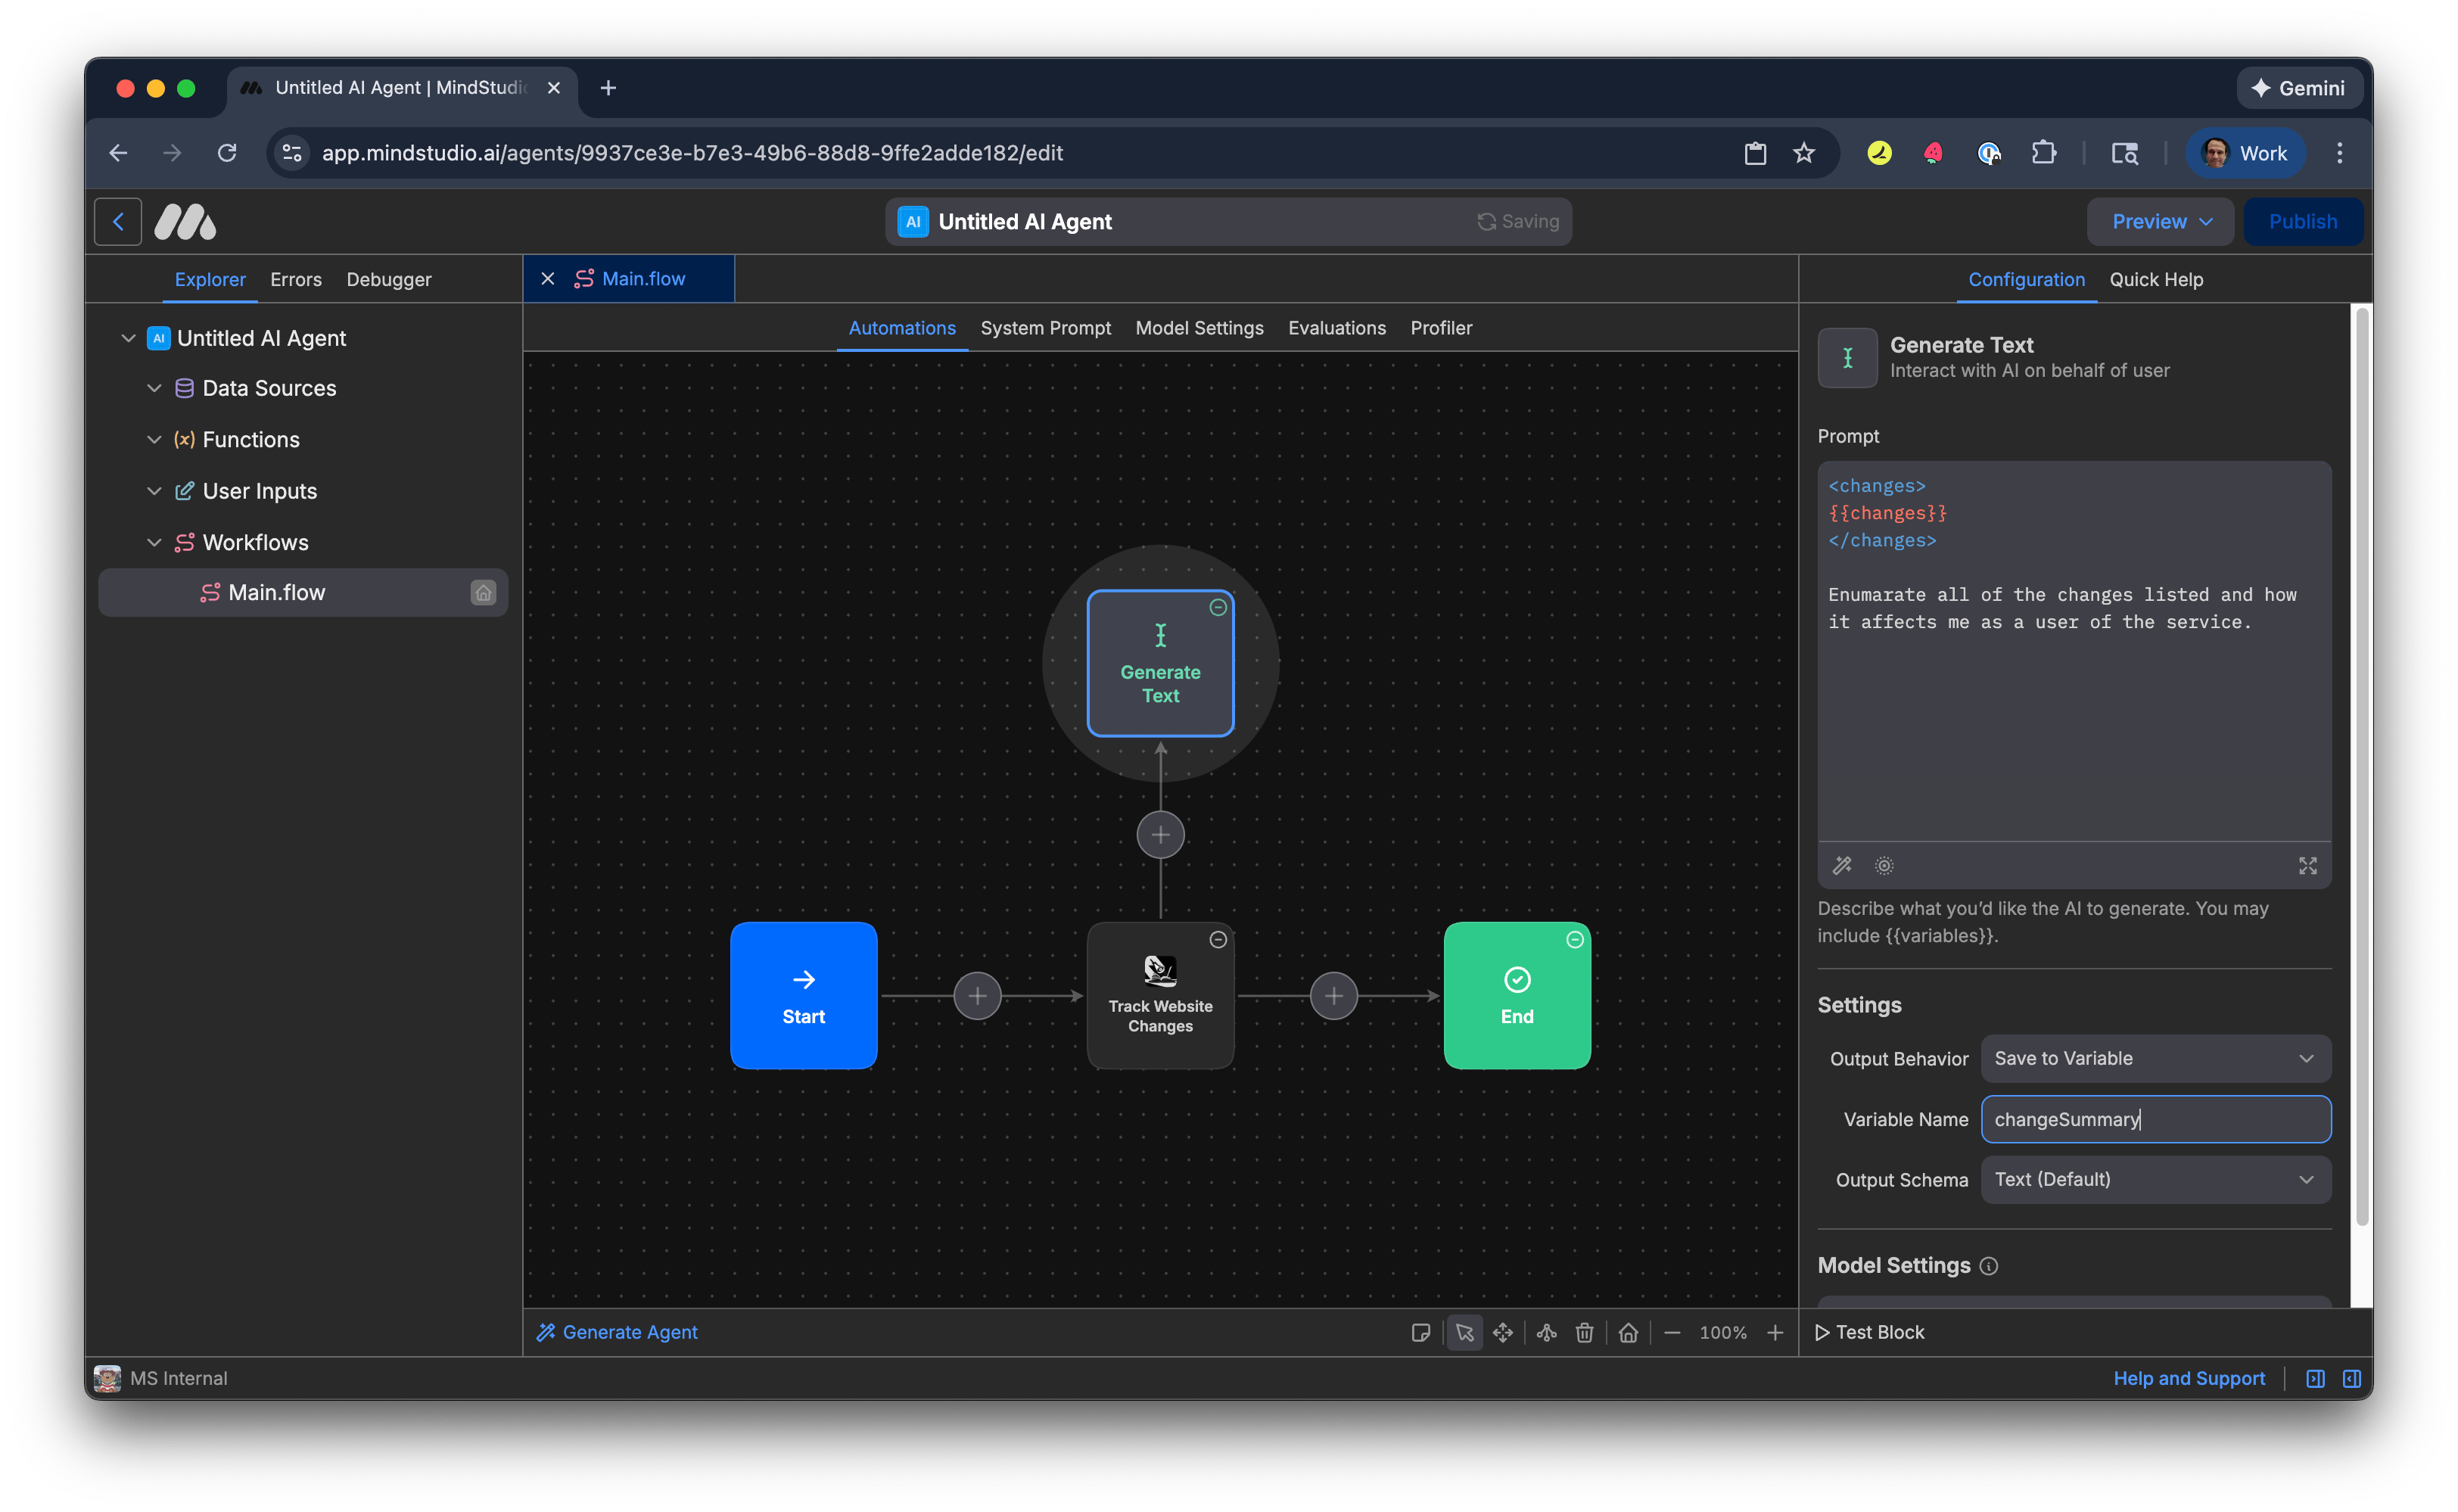
- In “Output Behavior” select “Save to Variable”.
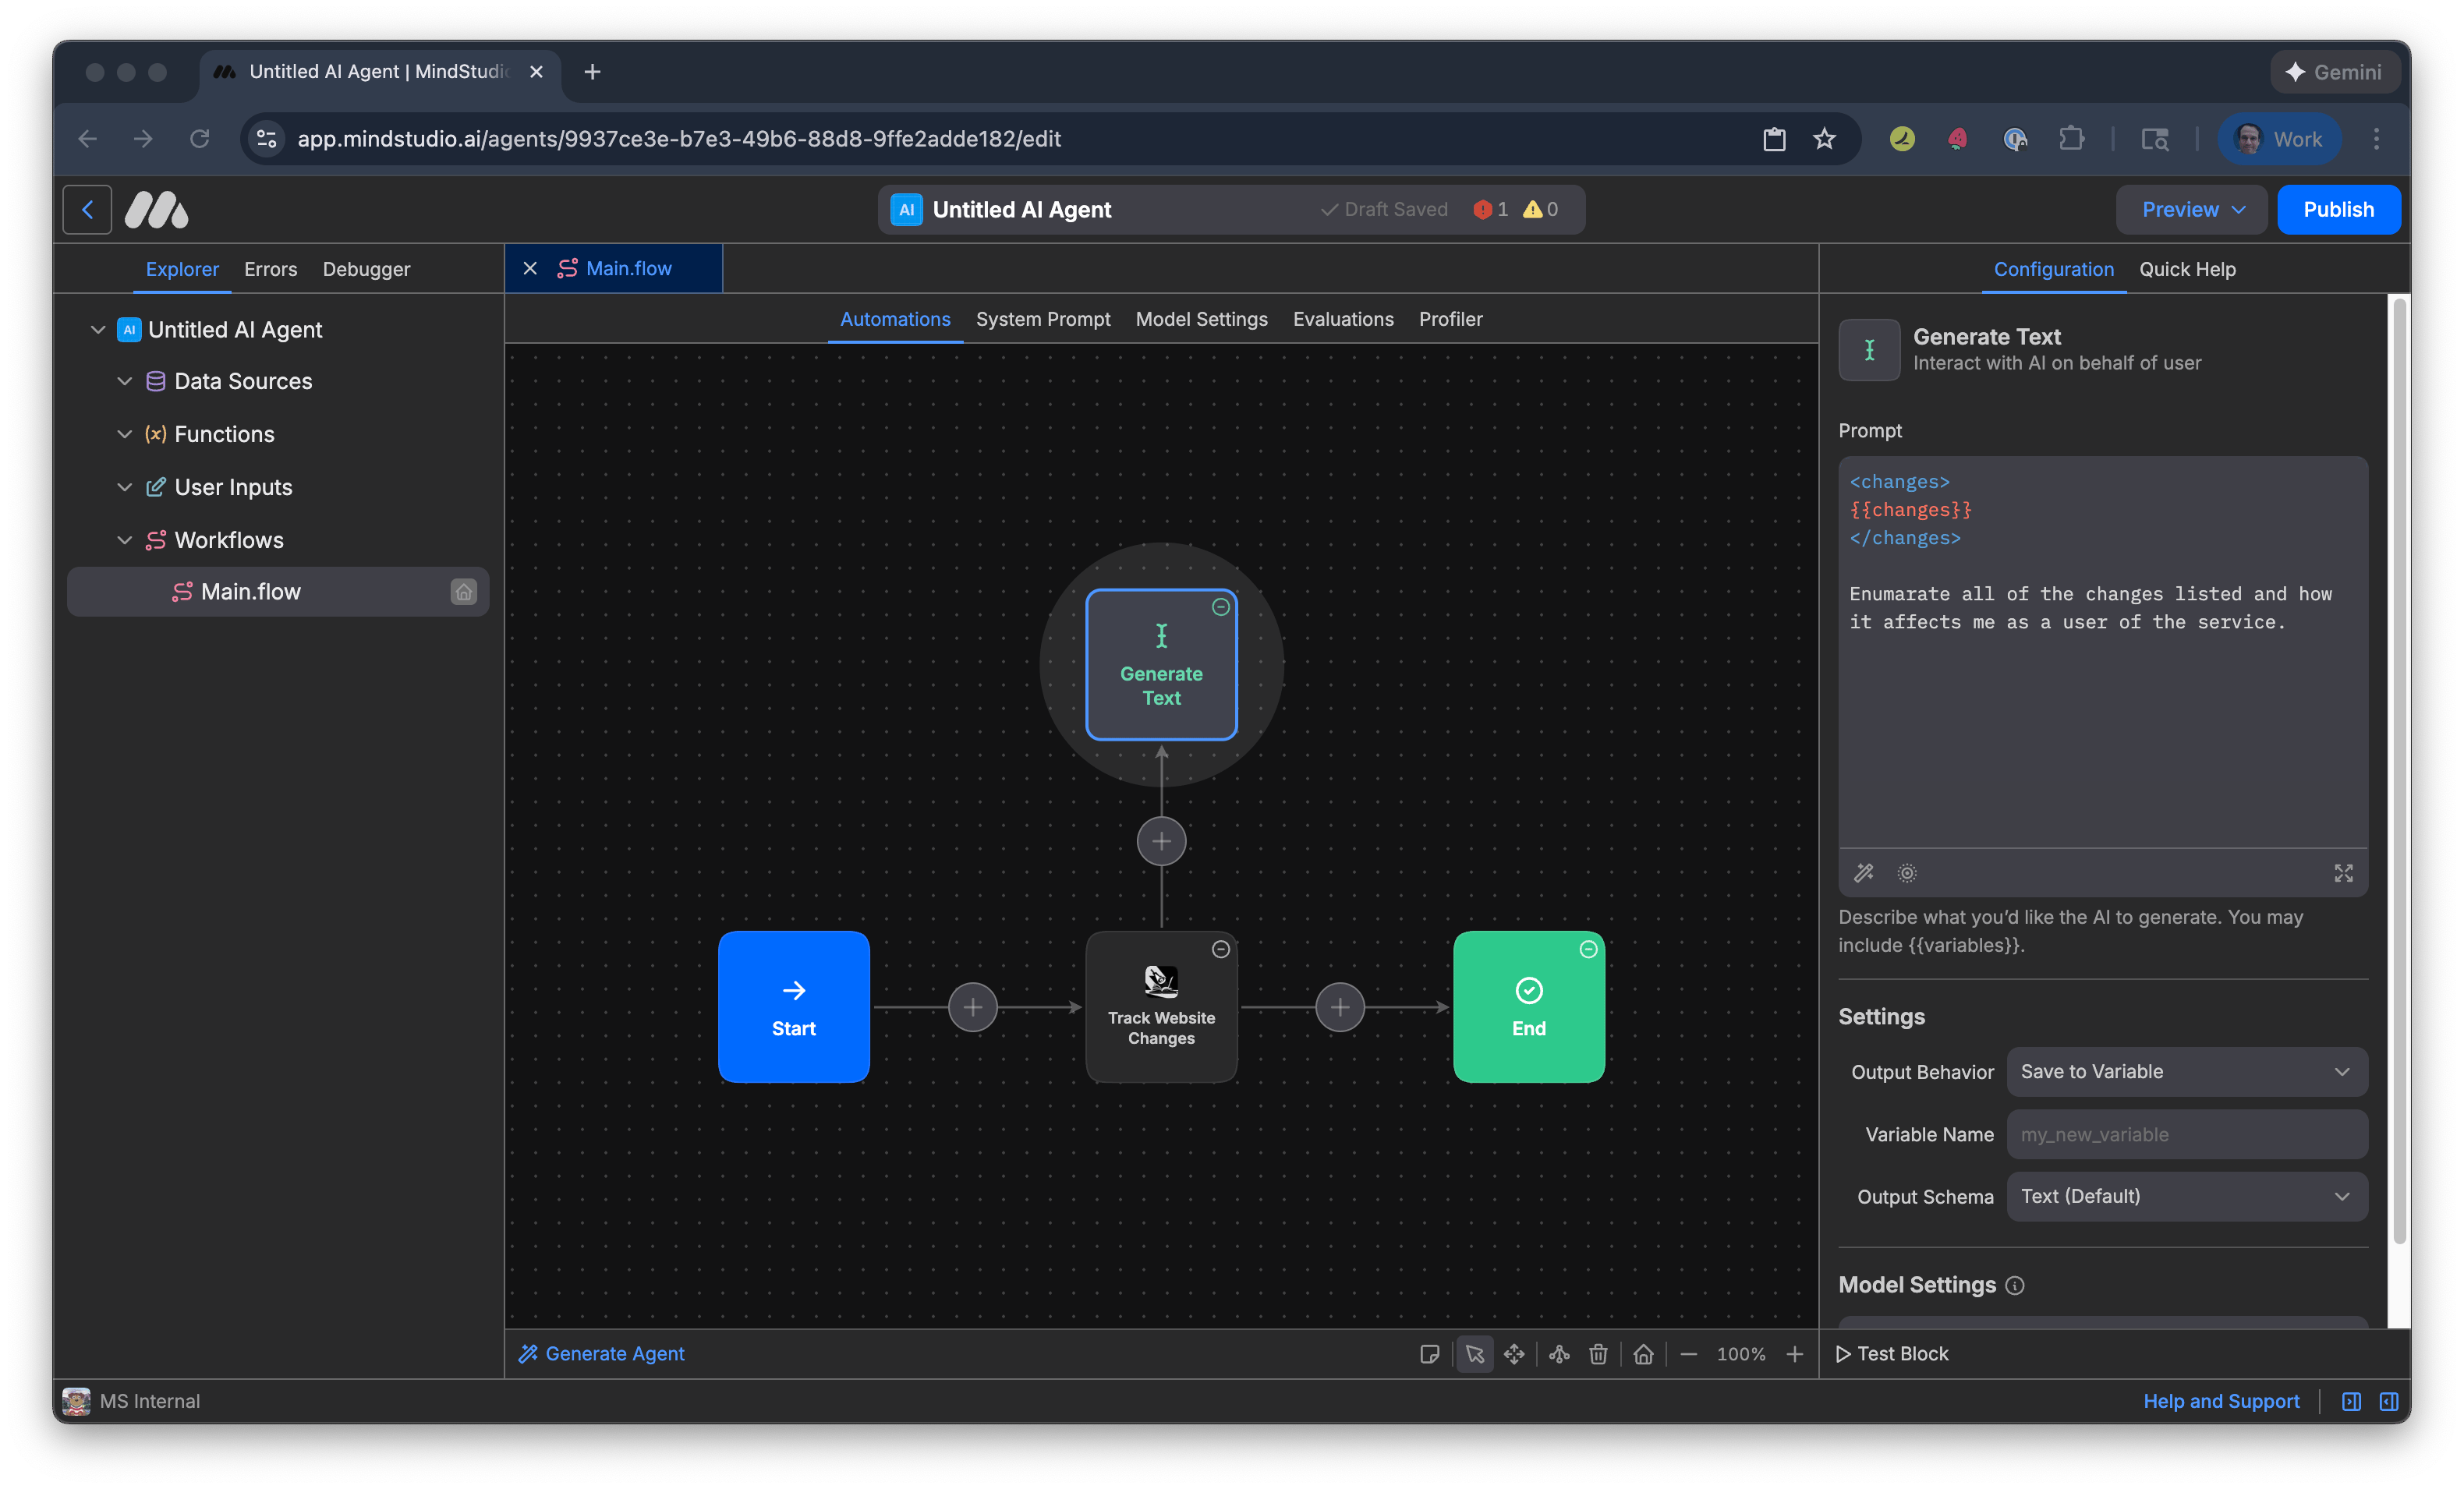
- In “Variable Name”, add “changeSummary”. This is the variable that the “Generate Text” block outputs the summary of webpage changes detected.
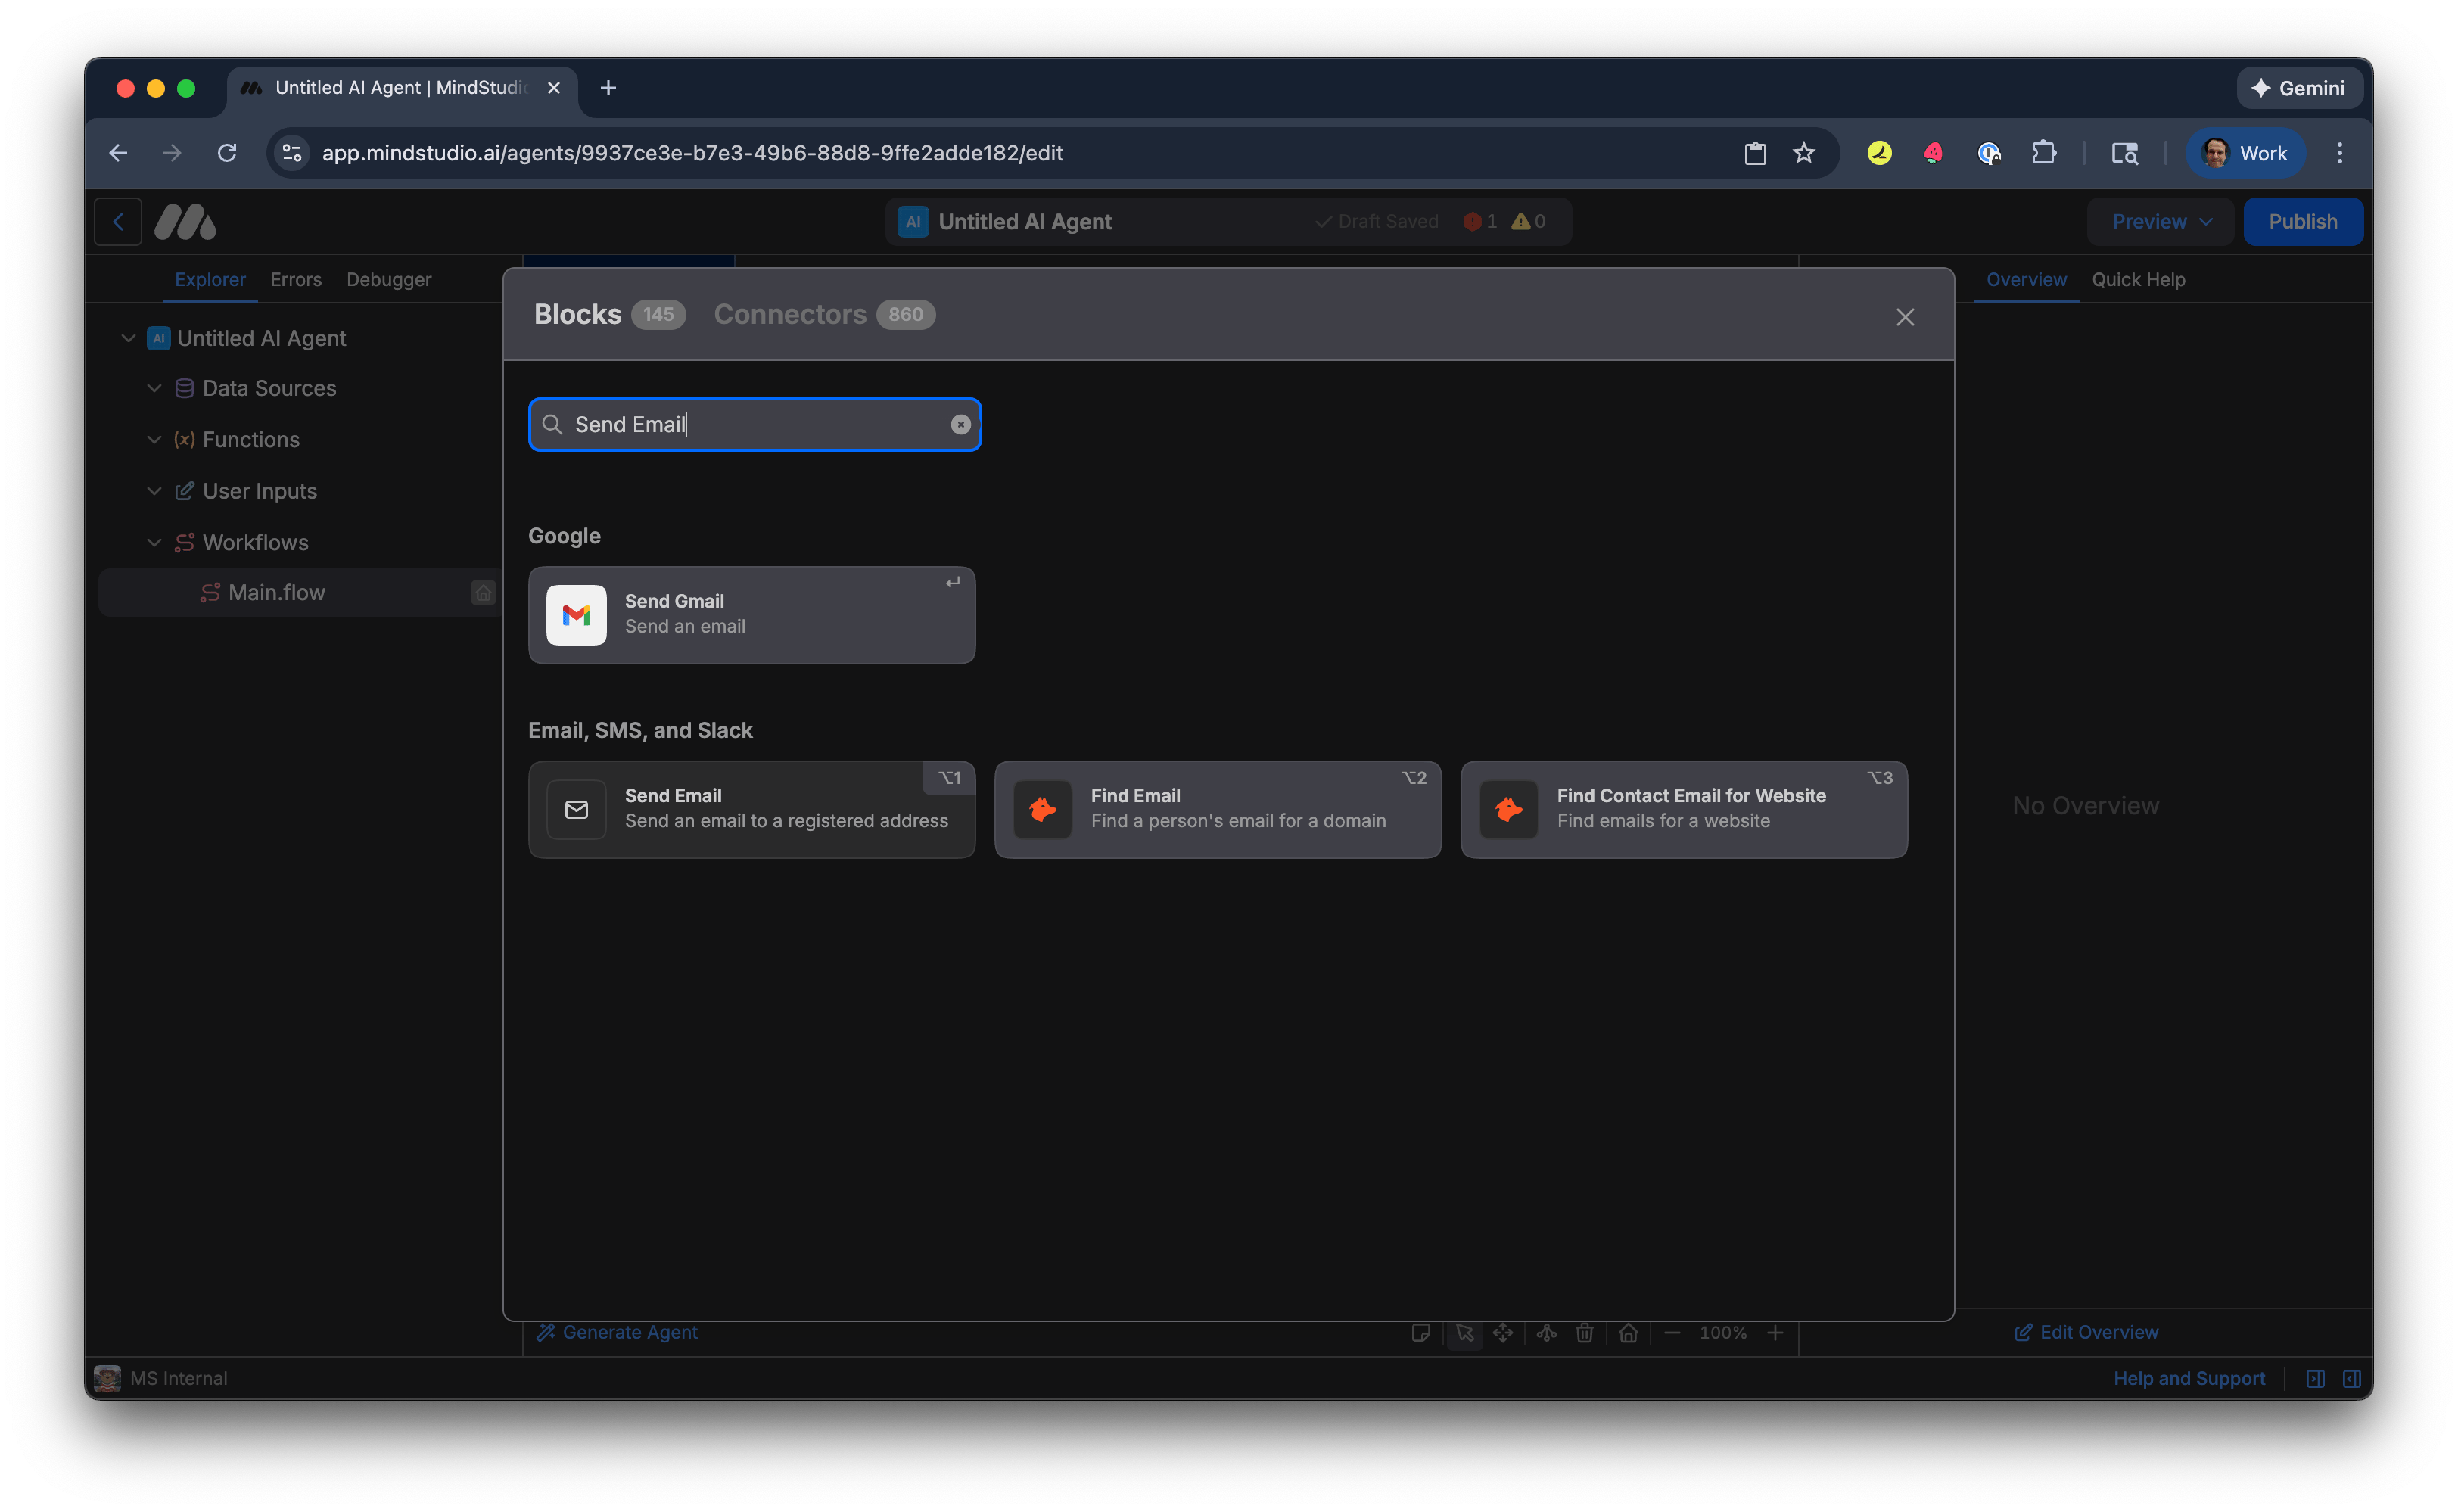
- Right-click anywhere on the Automation Canvas, hover over “New Block”, then select “View All Blocks”.
All MindStudio blocks are displayed.
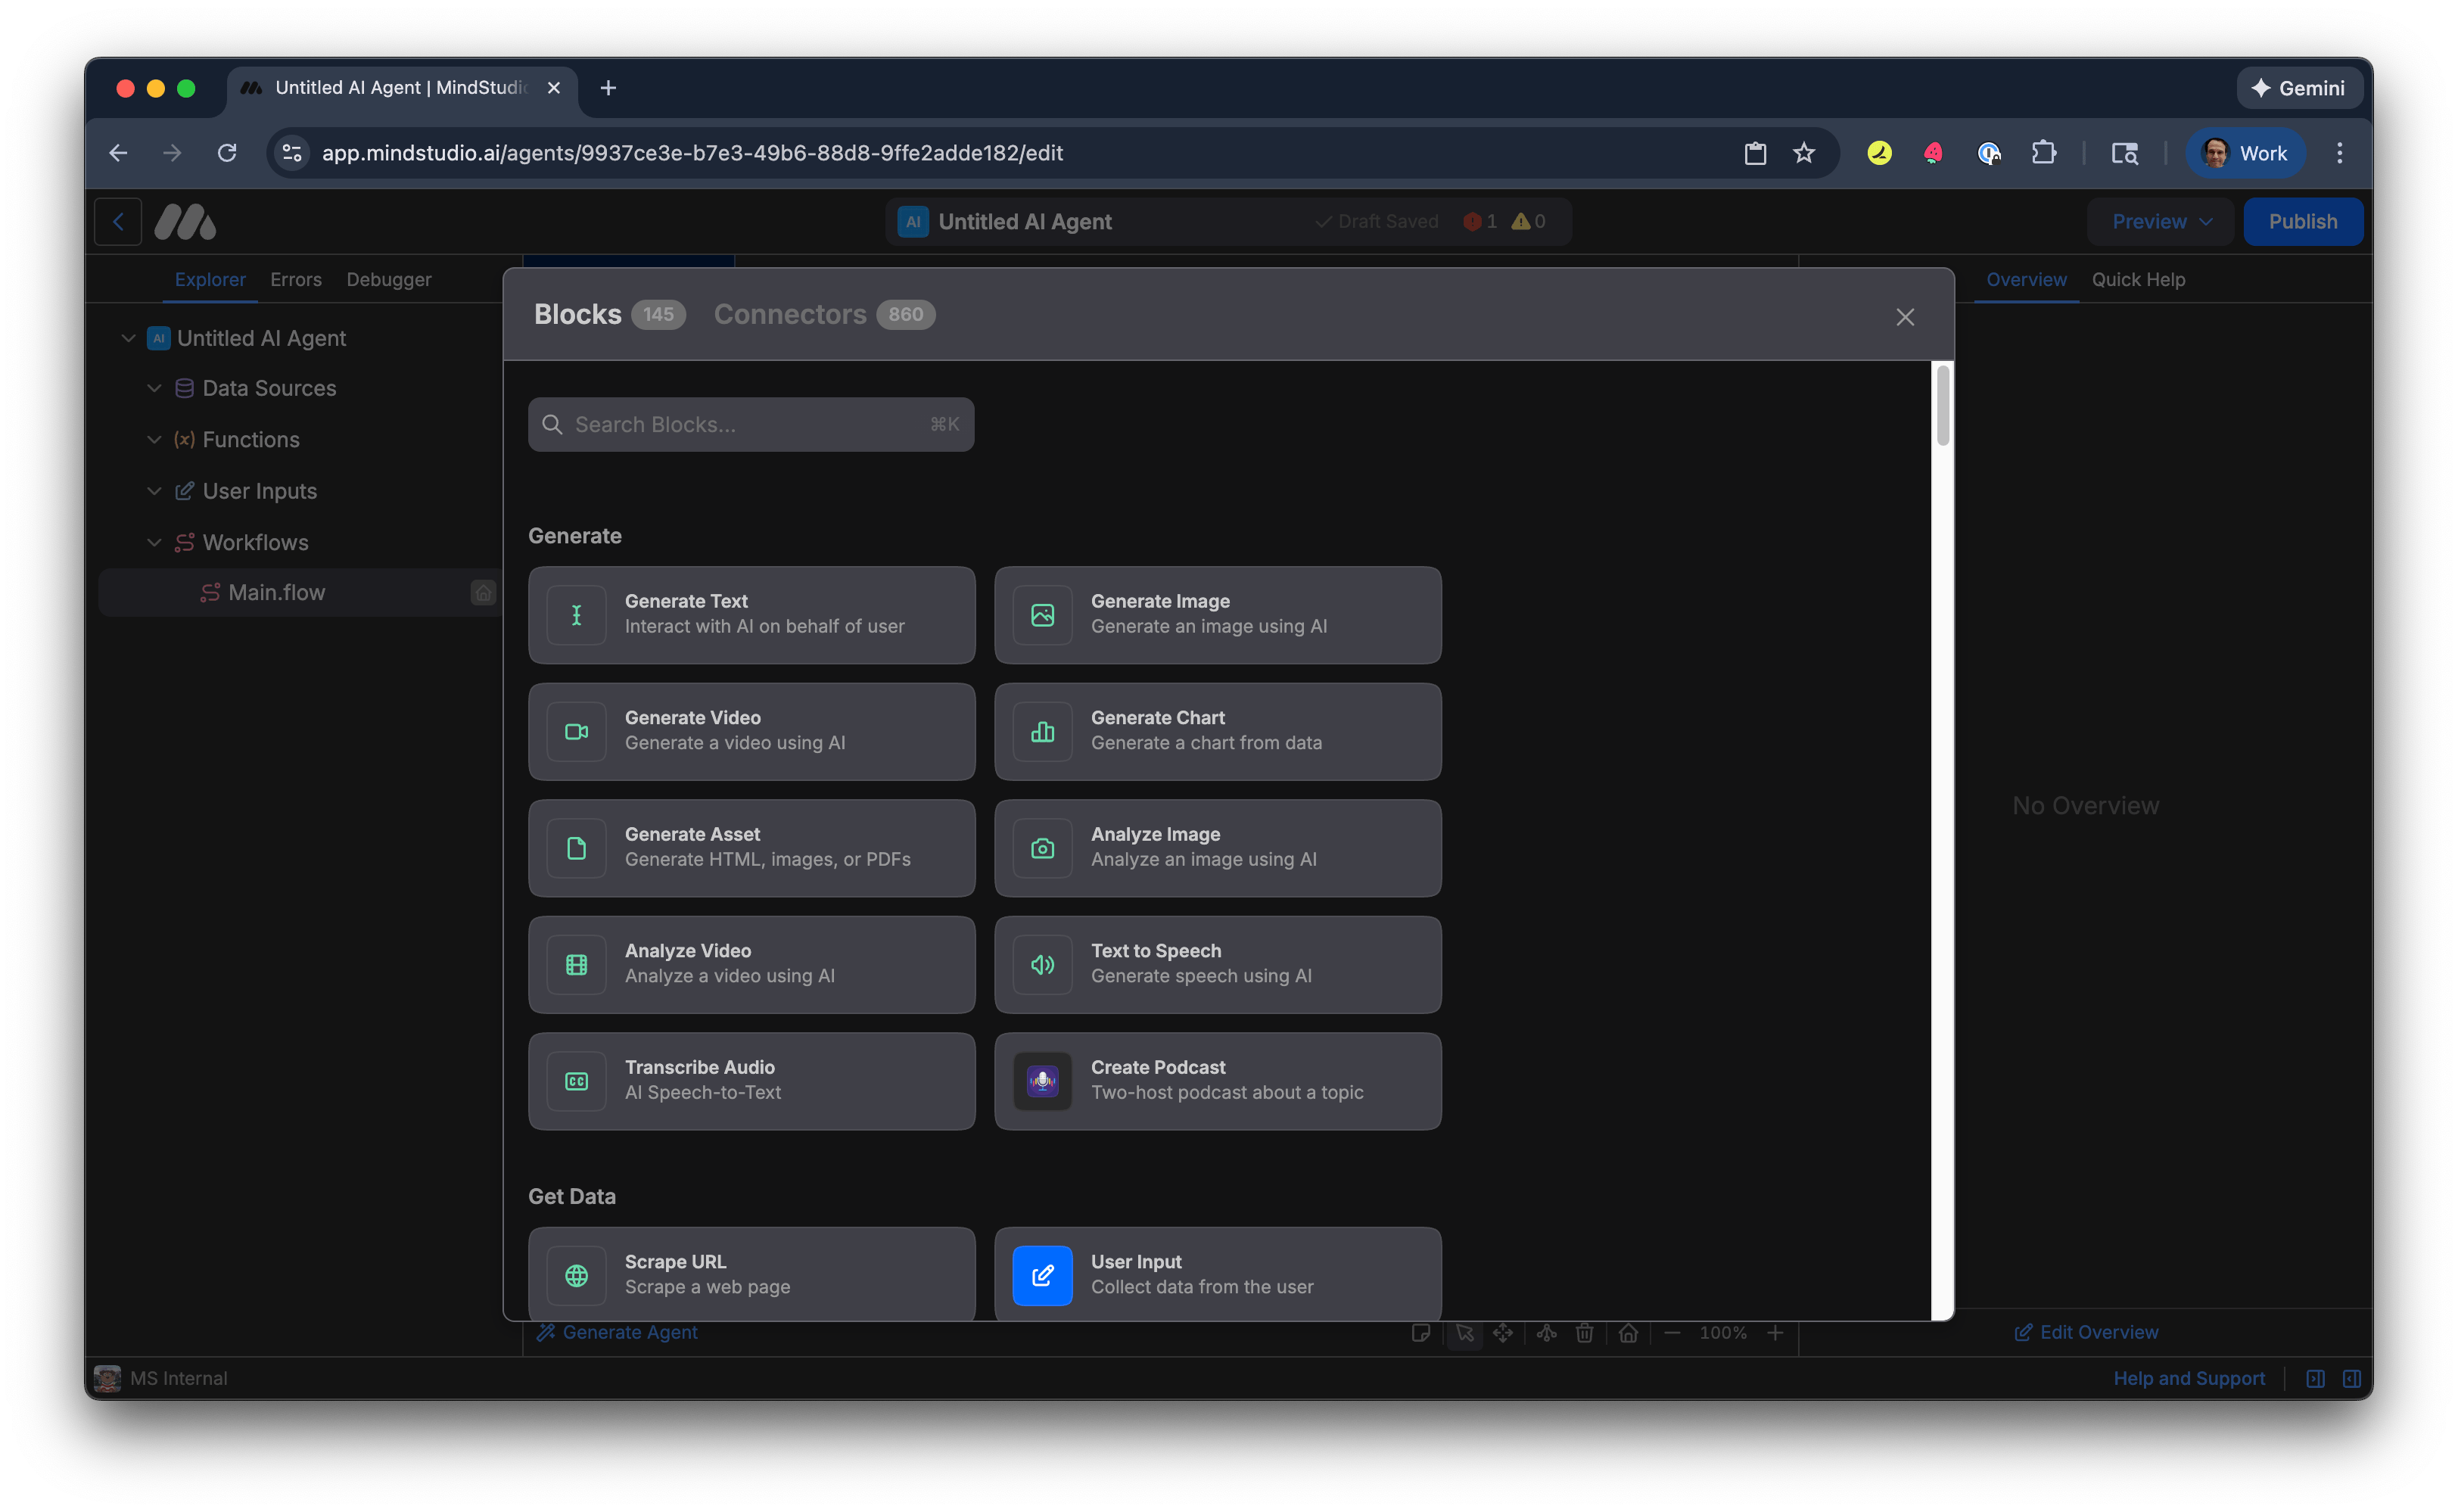
- Search for “Send Email” block, then select the “Send Email” block.
- In the “Account” setting, select your email address that is connected to the Send Email block, then skip to step 24. If this is the first time you are connecting the “Send Email” block to your email account, select “Connect a new account”.
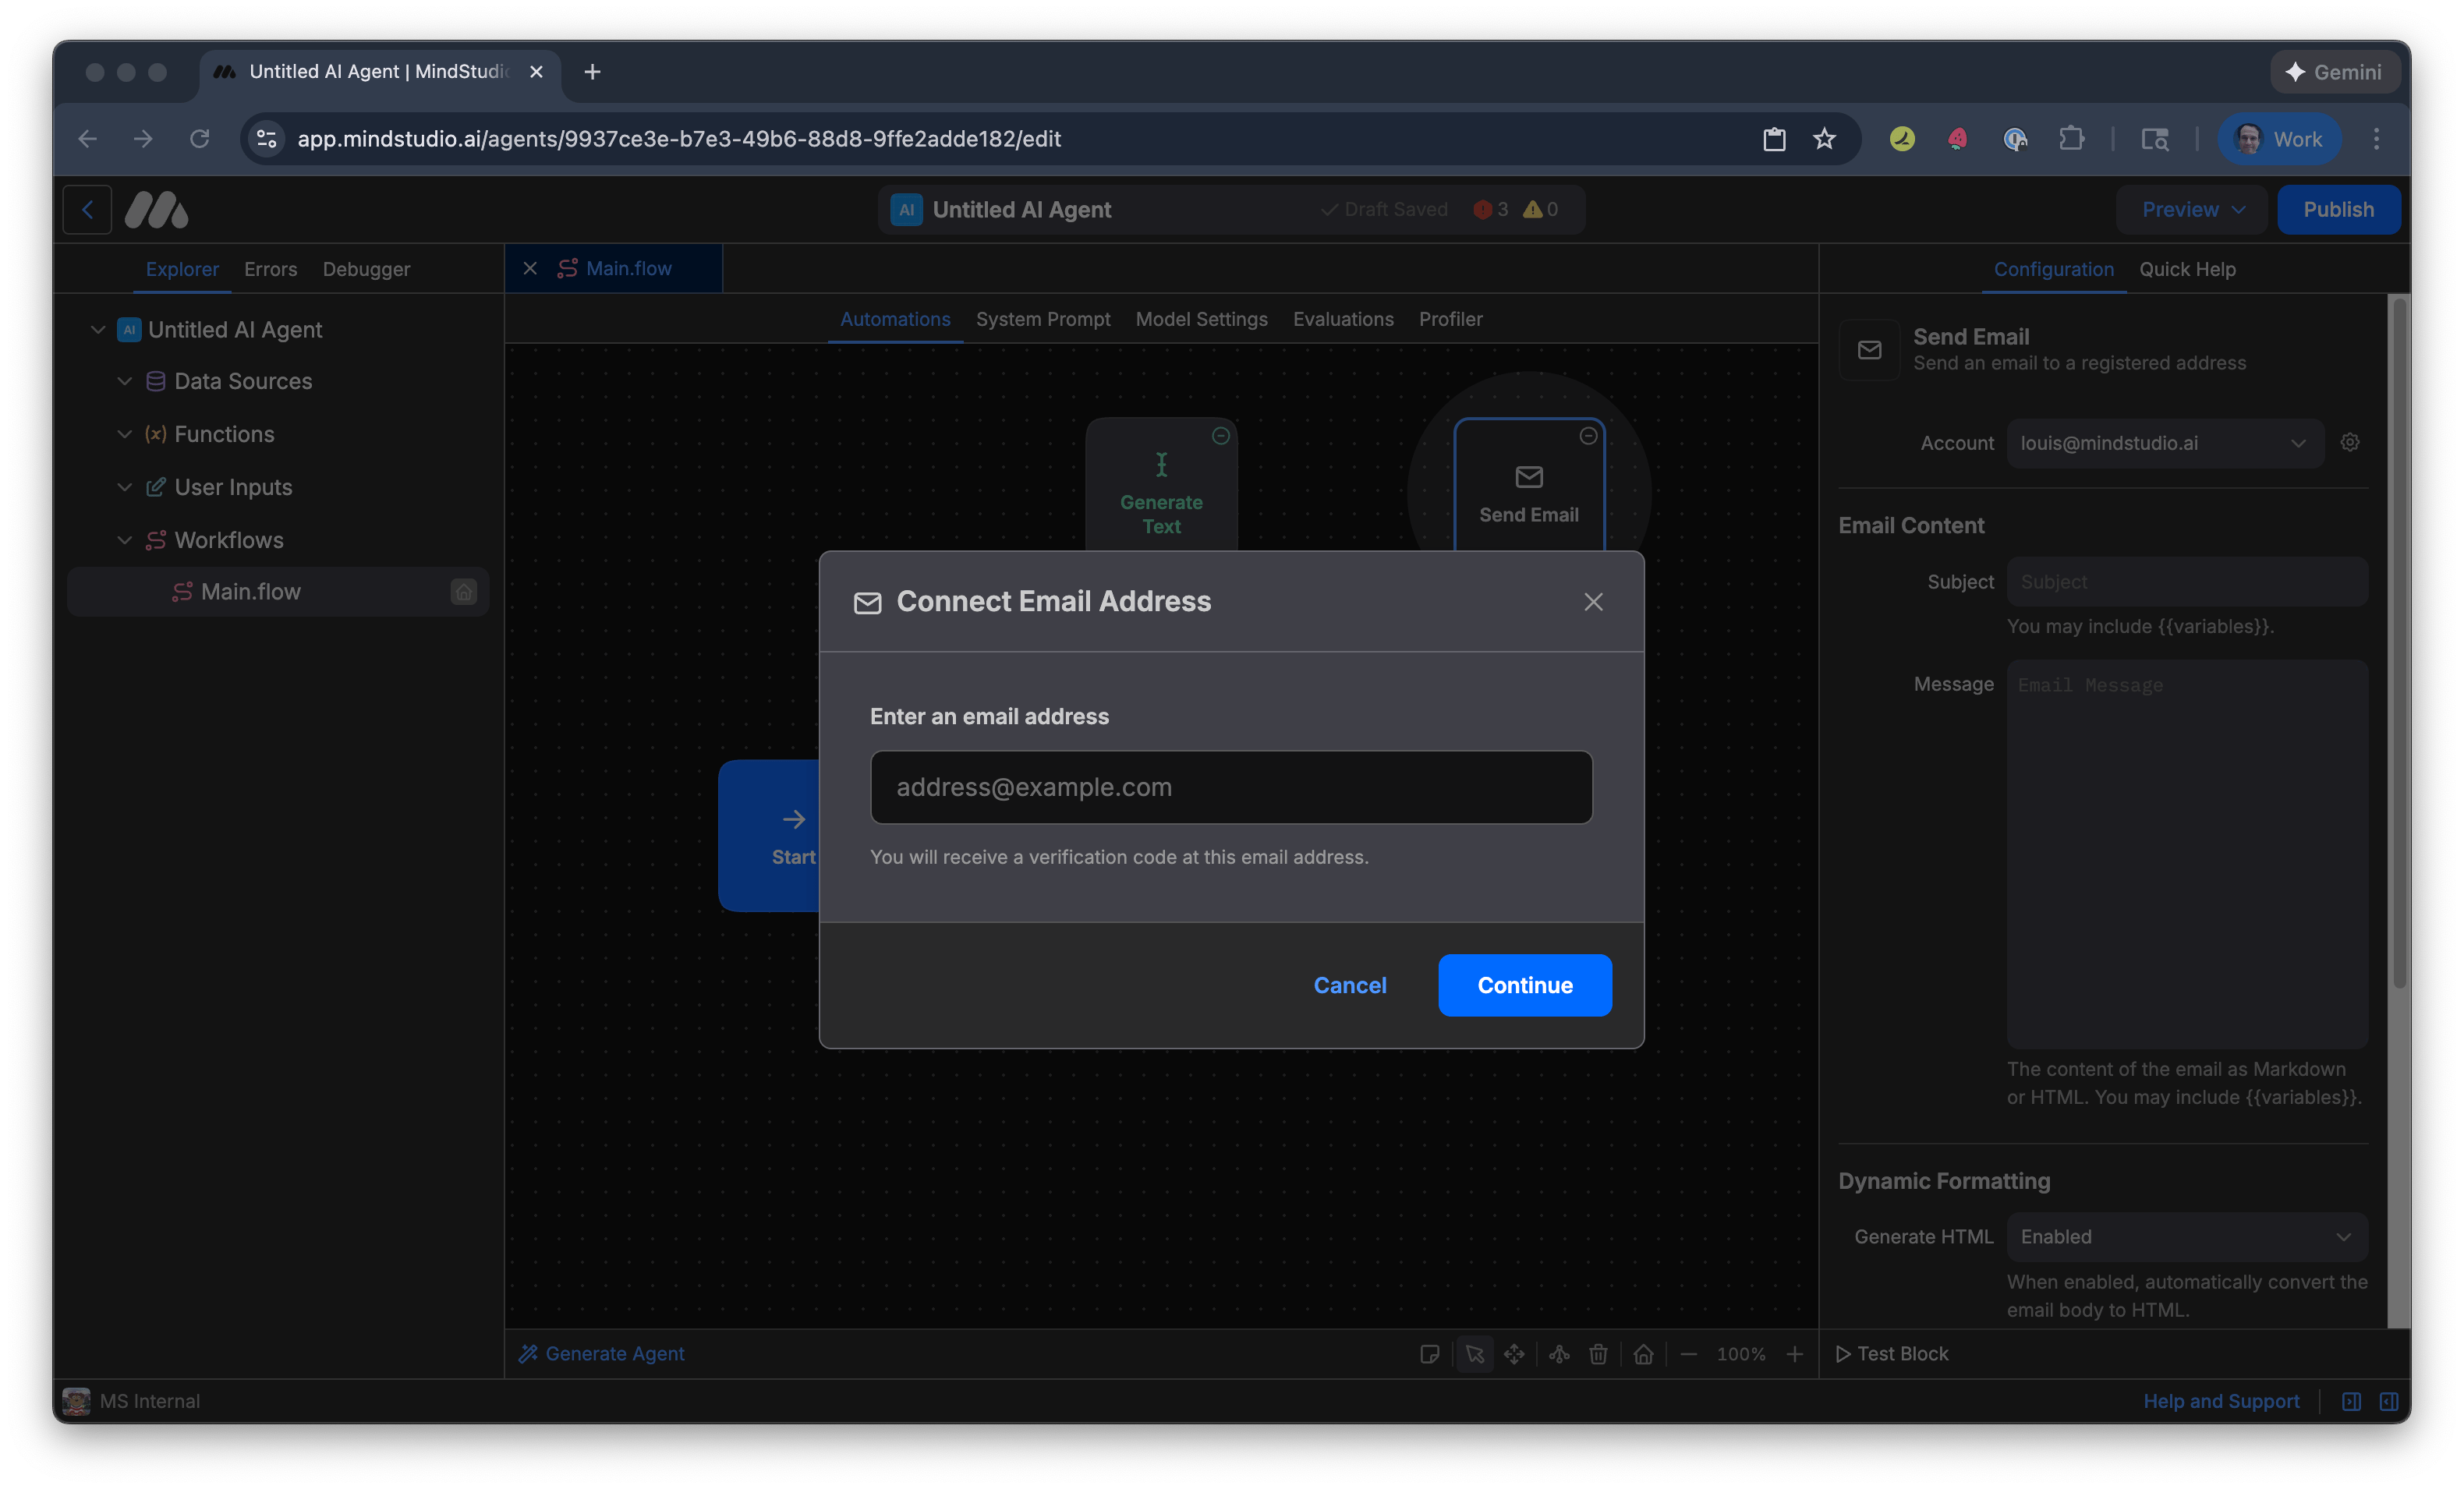
-
Enter your email address to connect to the “Send Email” block, then click “Continue”. Complete the connection. When the connection procedure is complete, your email address displays in the “Account” setting.
-
In the “Subject” setting, add an email subject for when the AI agent has detected changes to the webpage. For example, “Website Changes Report”.
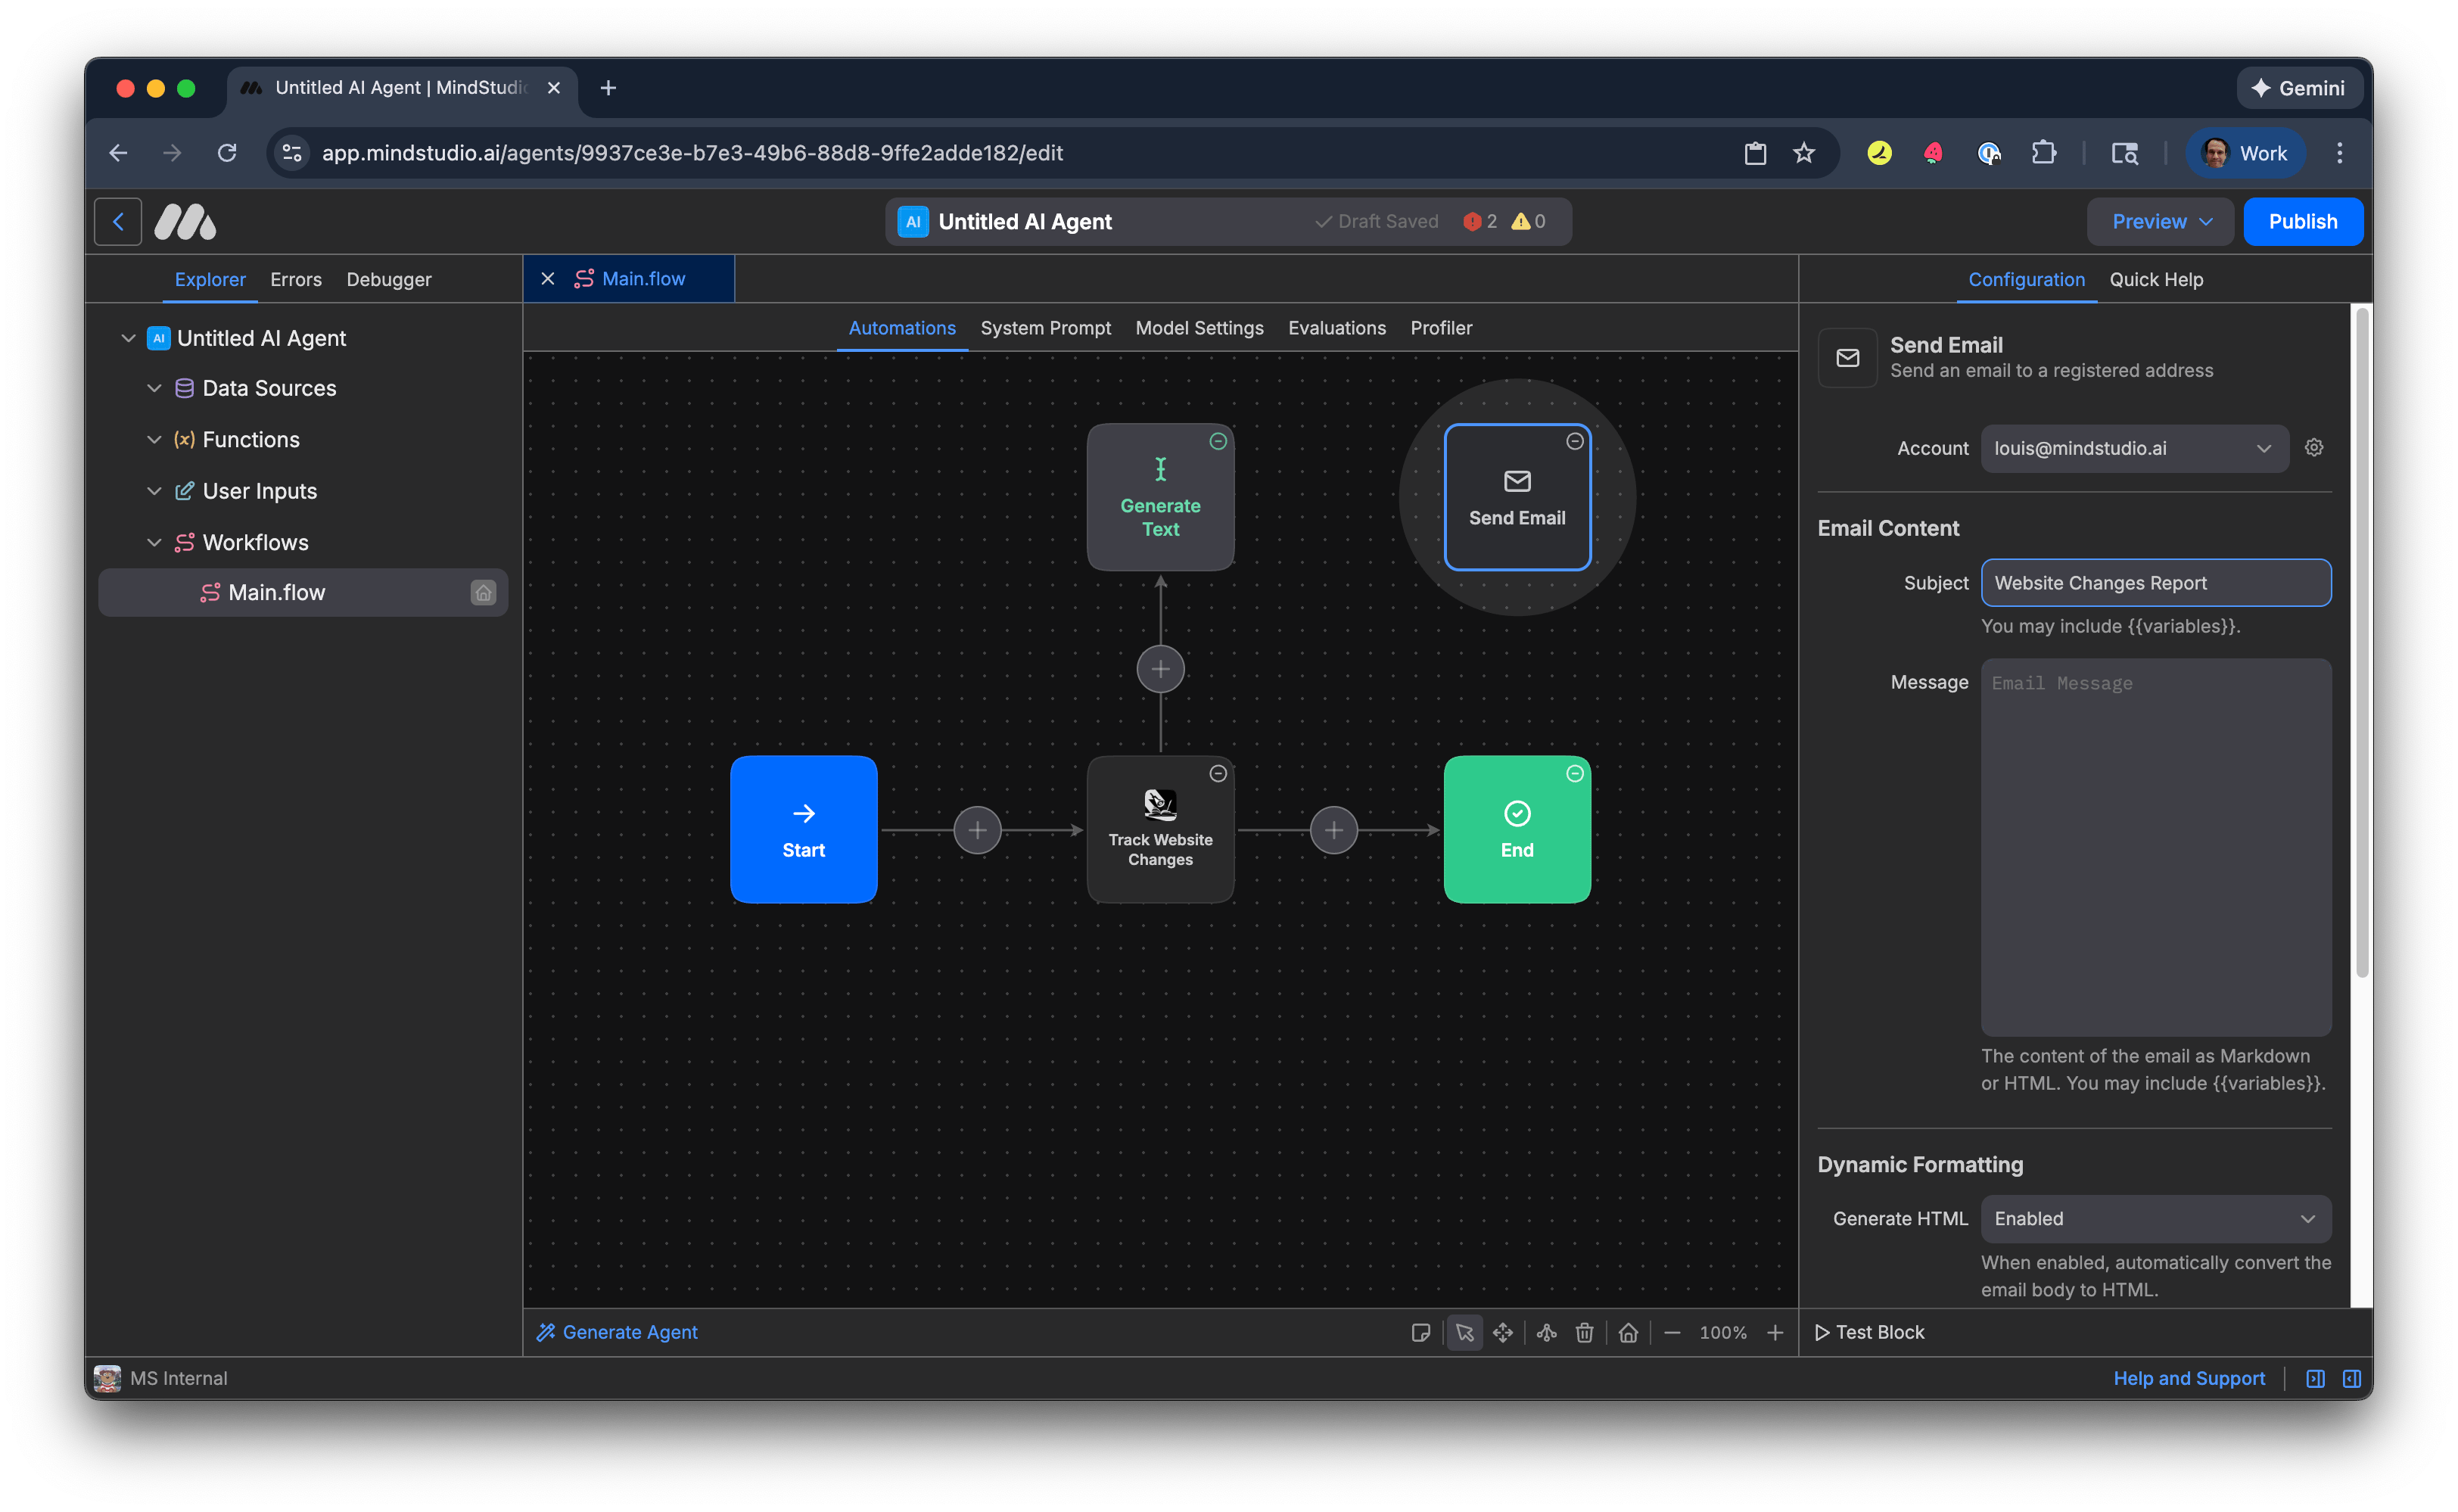
- In the “Message” setting, add “{{changeSummary}}”. This is the variable we specified to output the summary of detected changes from the “Generate Text” block.
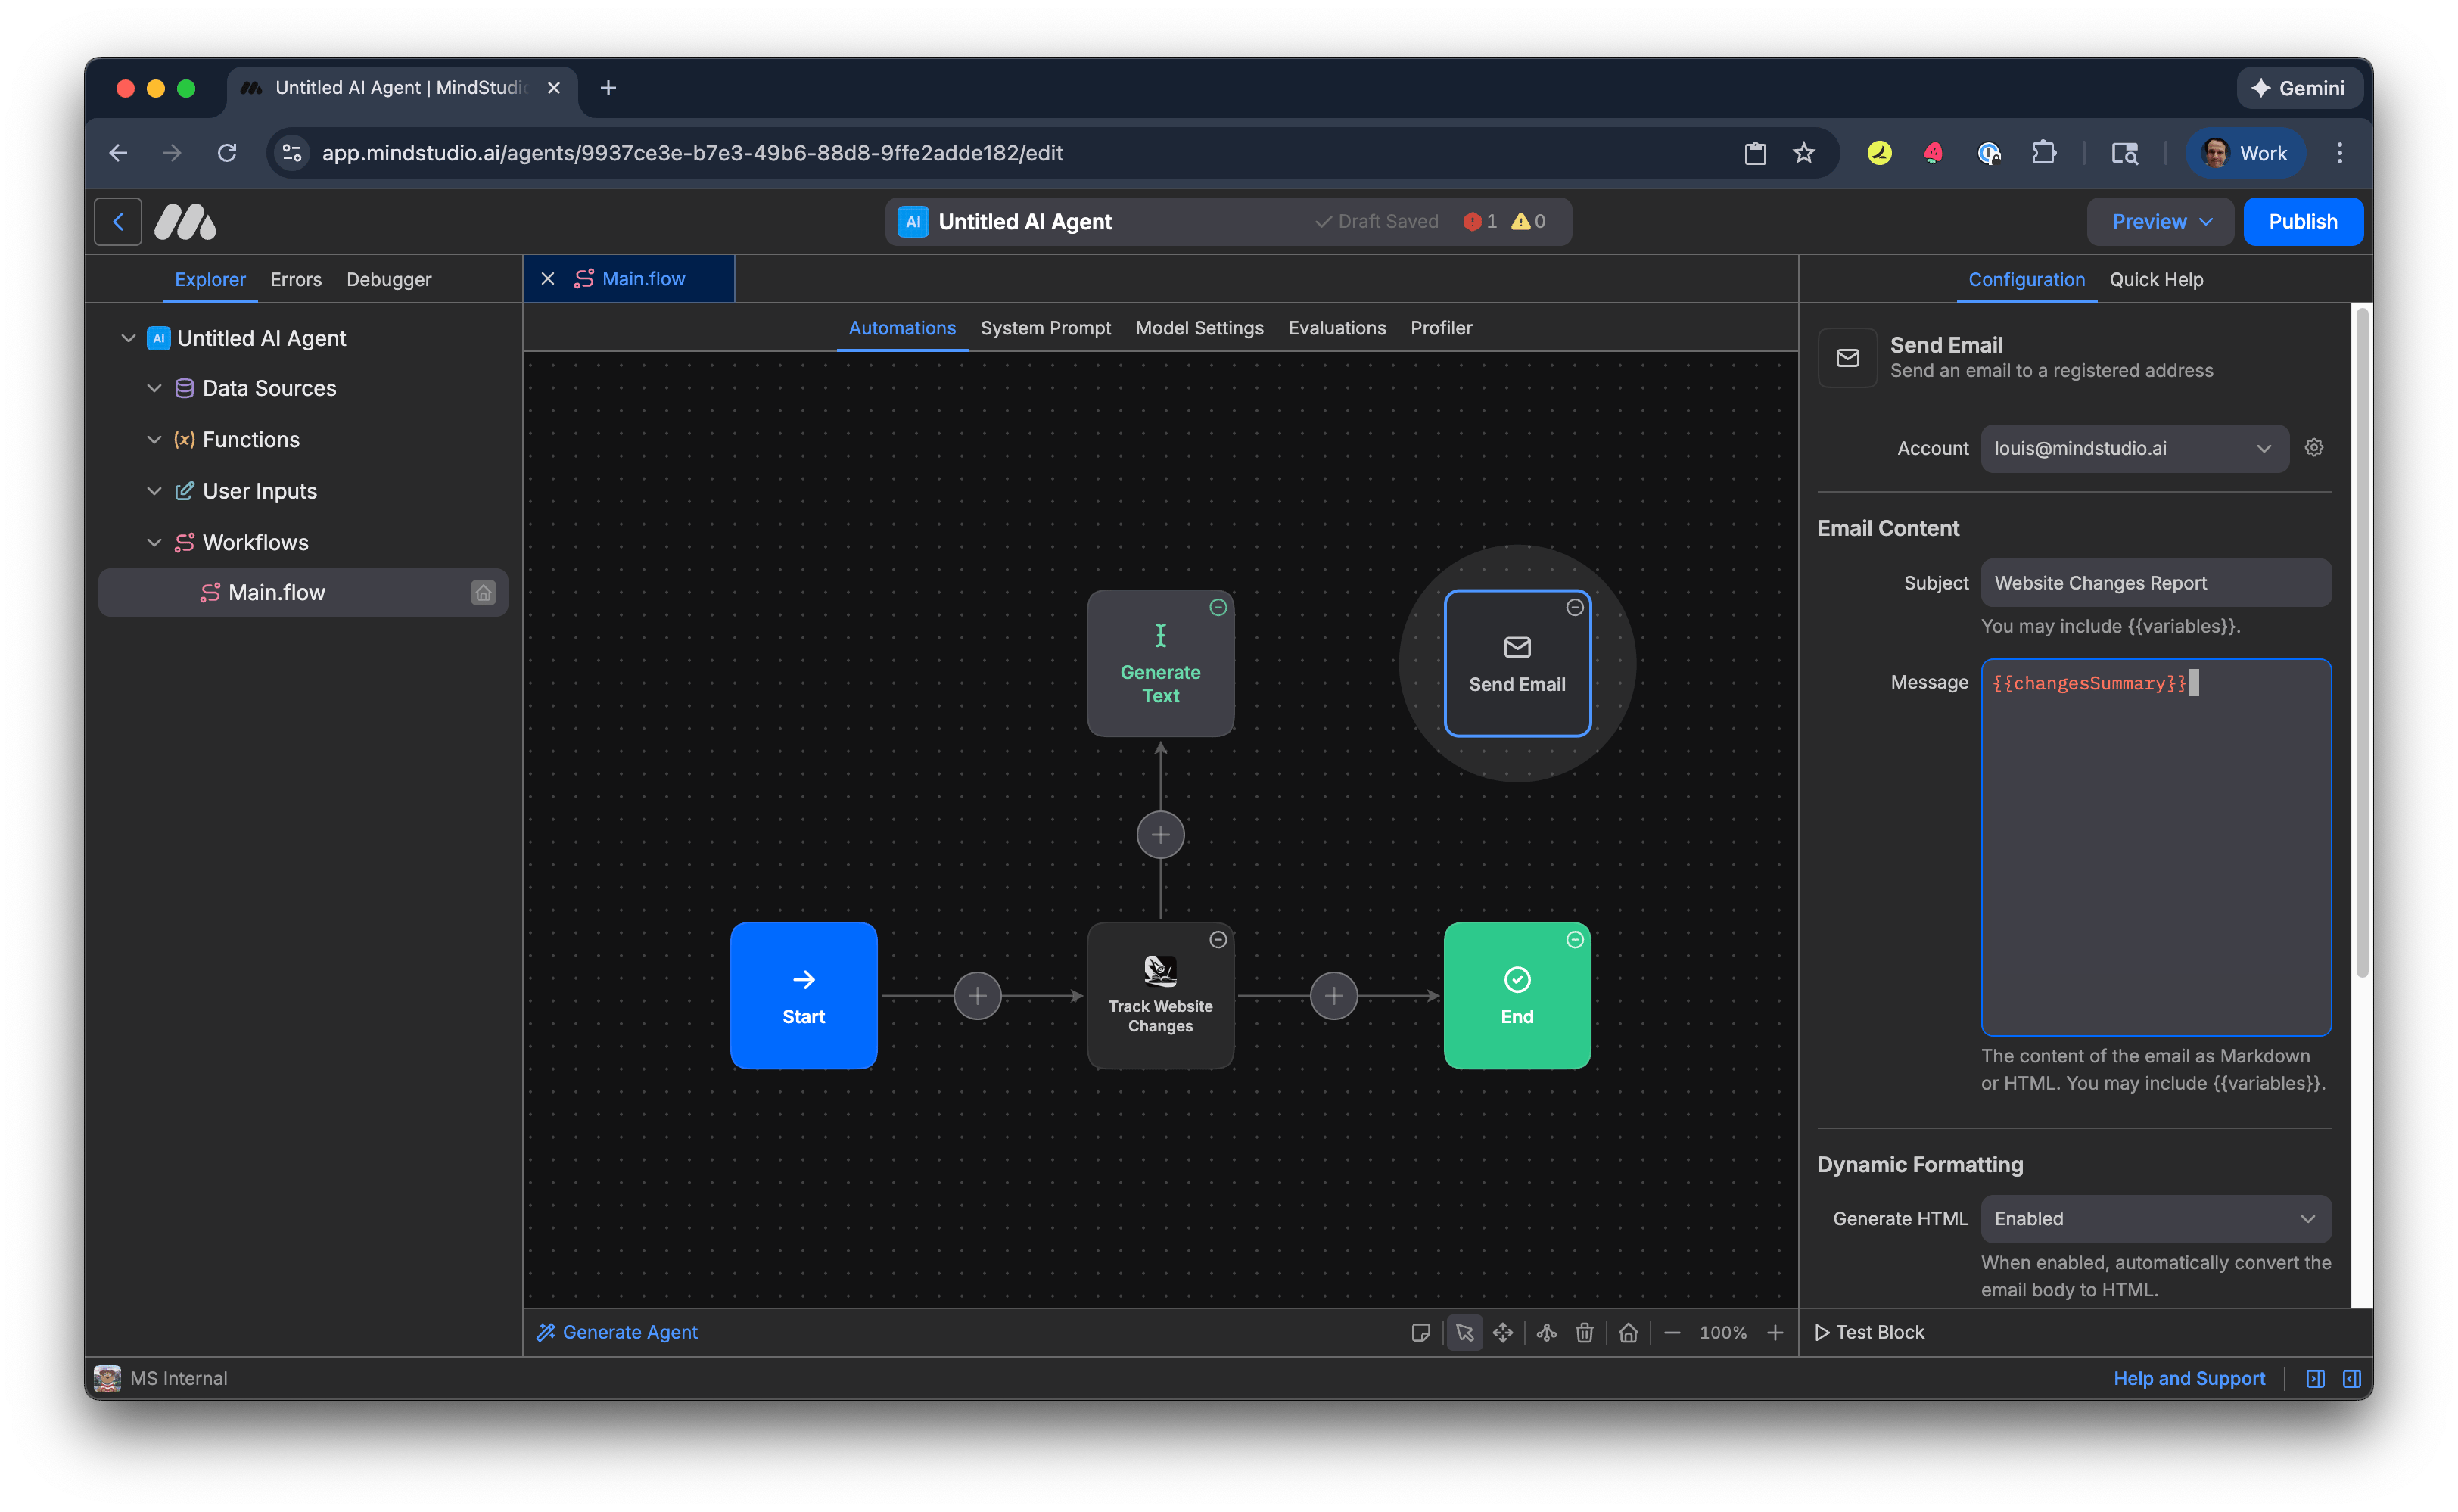
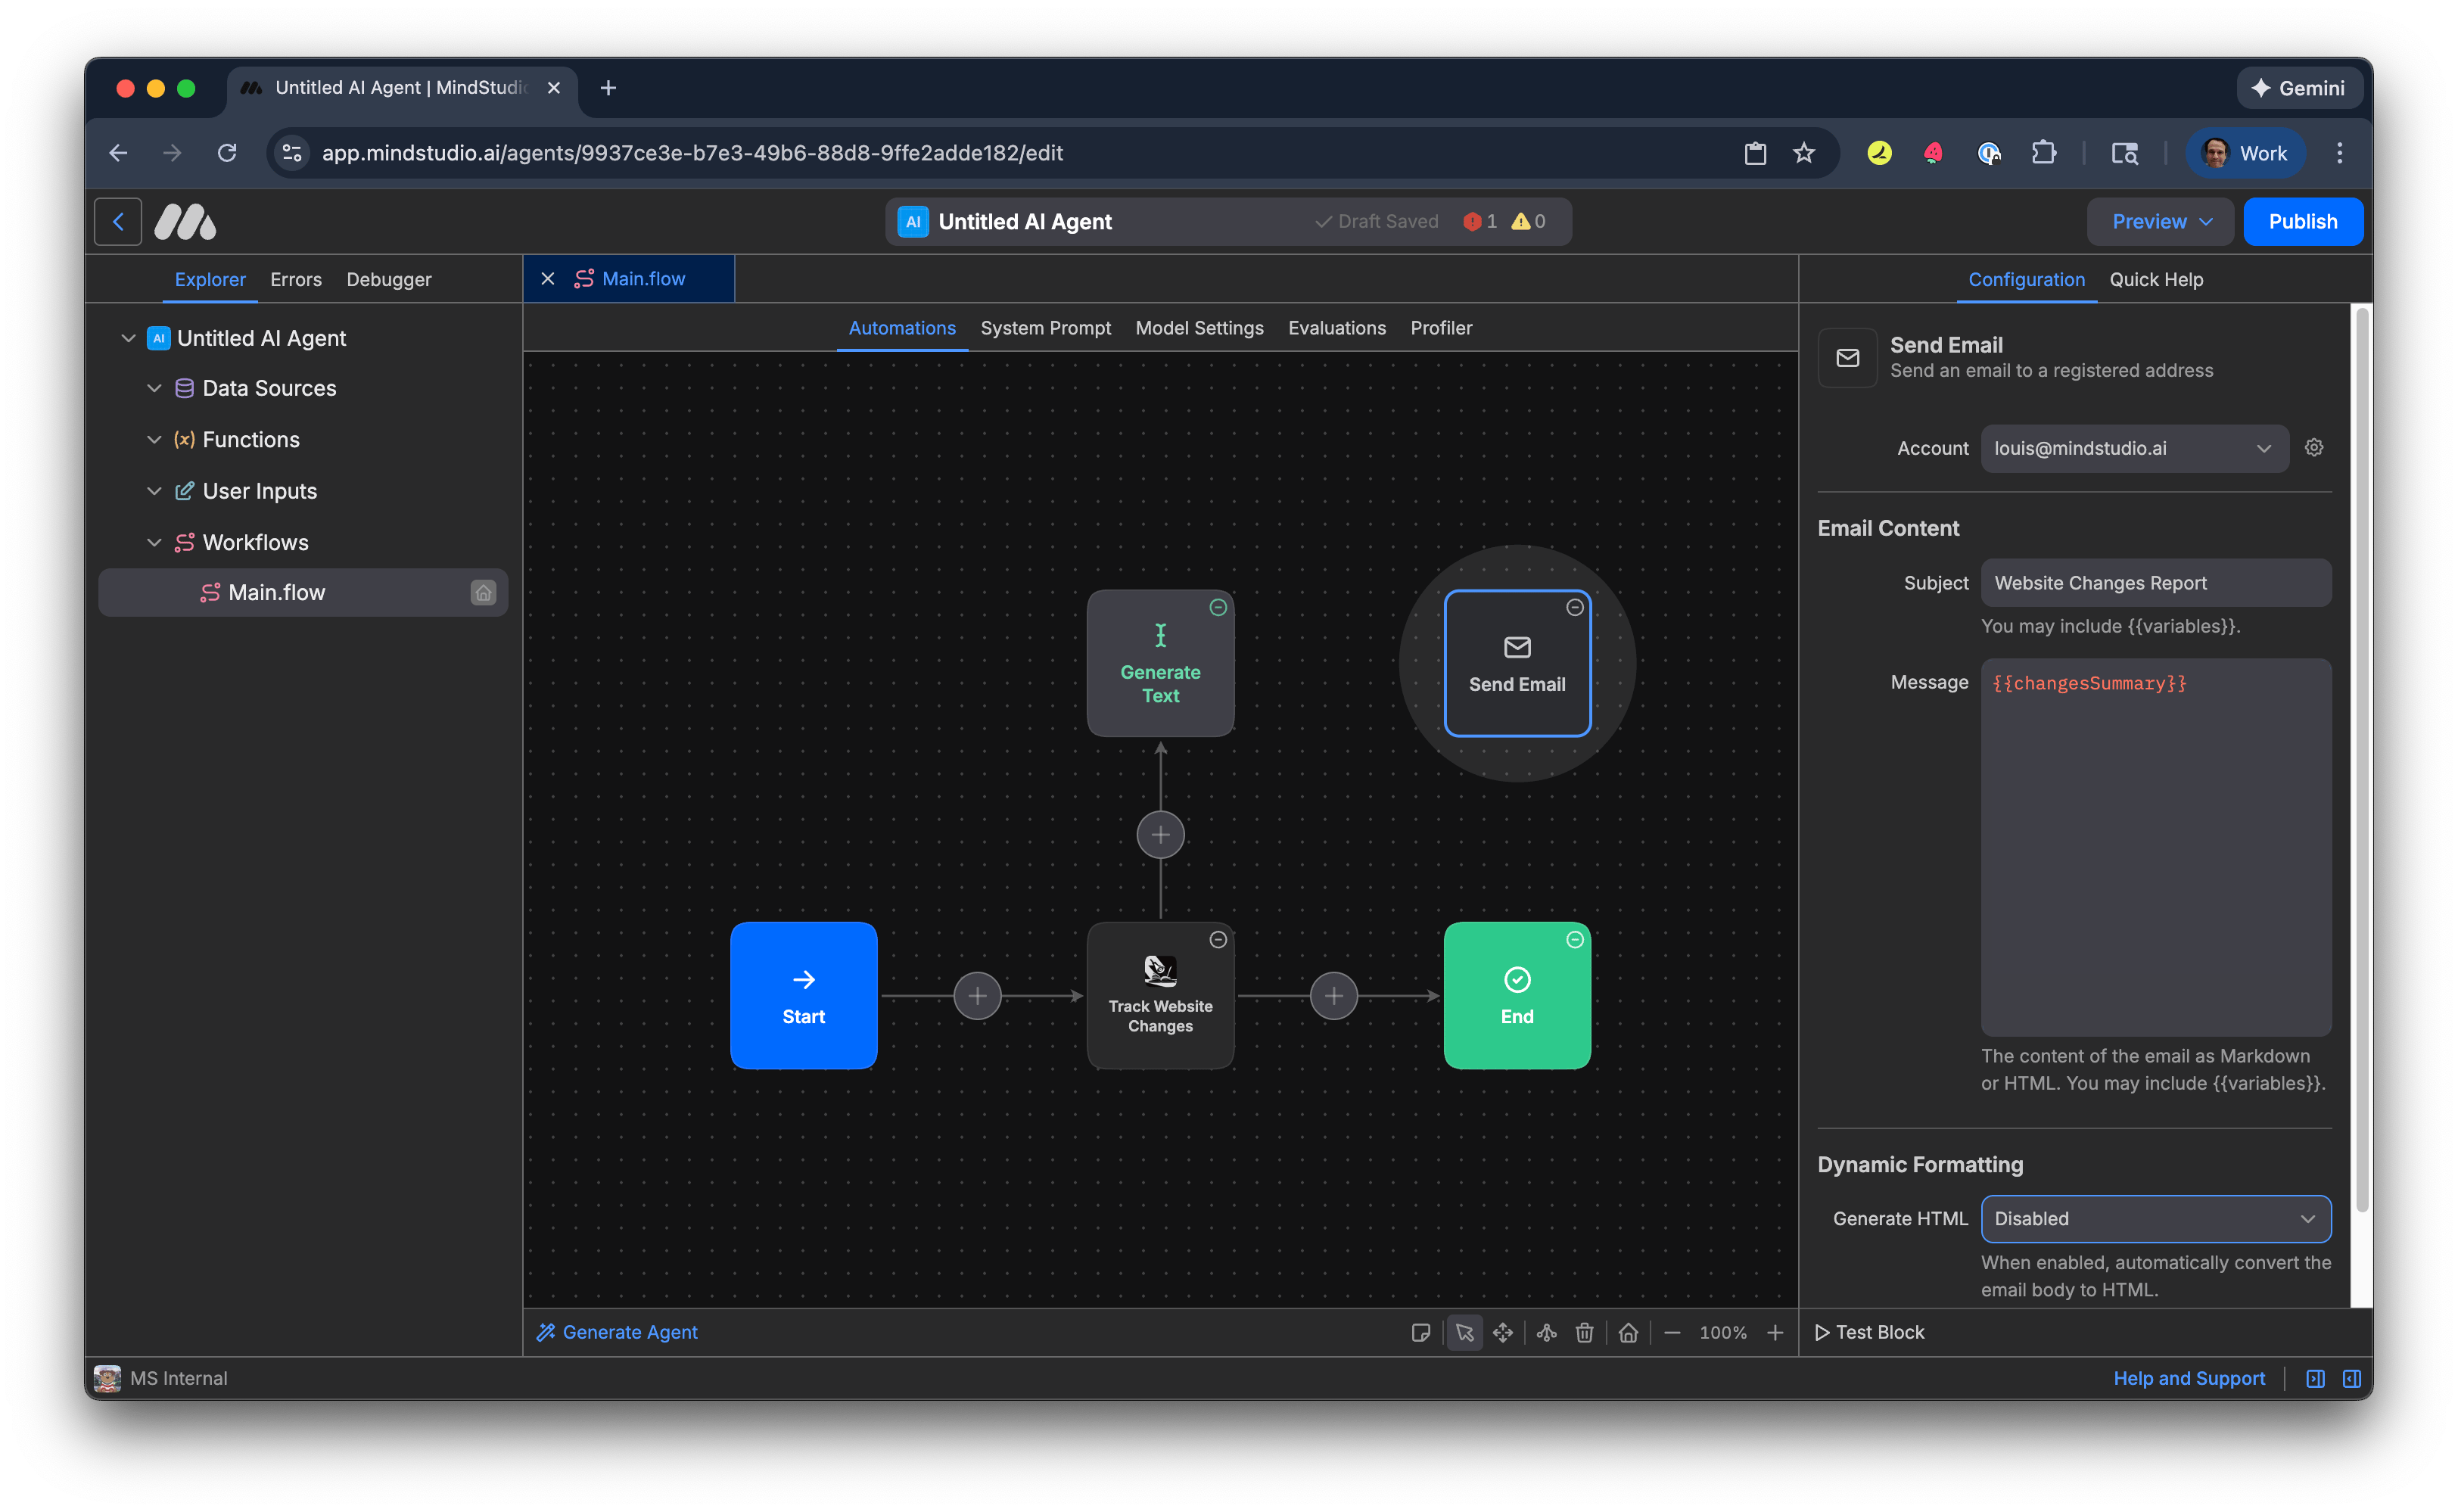
- In the “Generate HTML” setting, select “Disabled”.
- Connect the “Generate Text” block to the “Send Email” block.
- Connect the “Send Email” block to the “End” block.
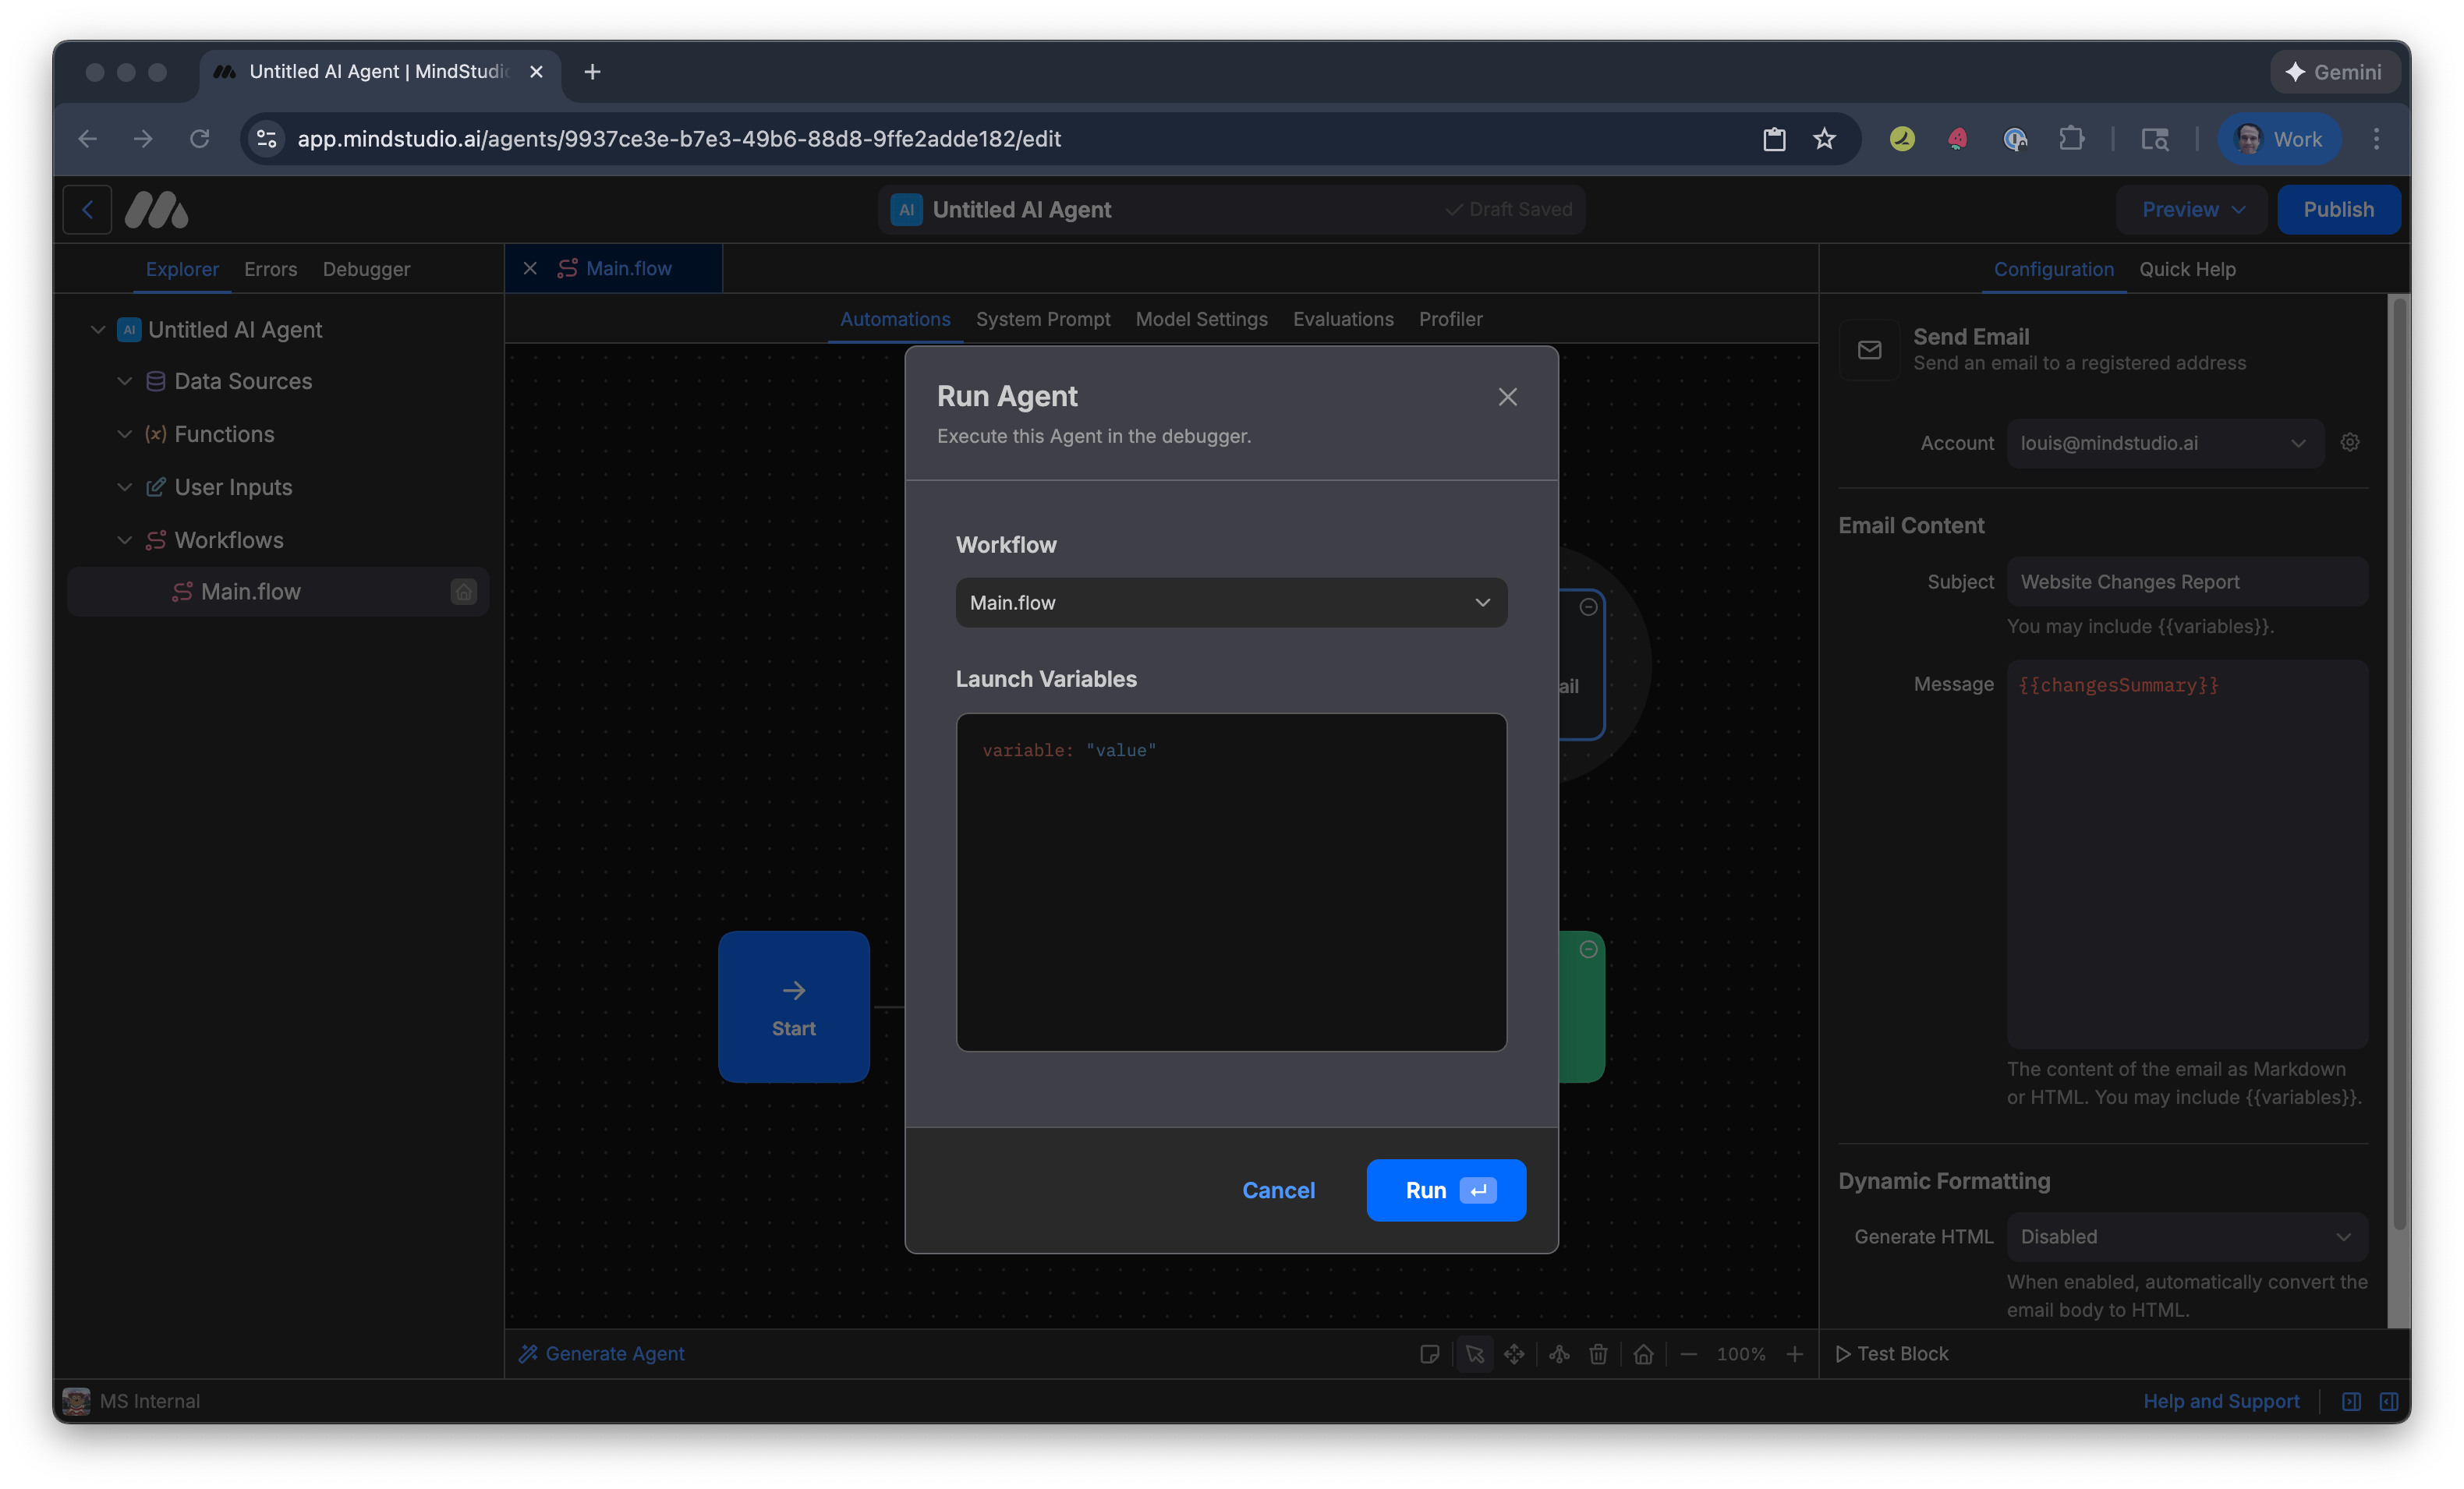
- It’s time to test the AI agent. Click “Preview”, then click “Run in Debugger” (or Cmd/Ctrl+R).
- Press “Run”.
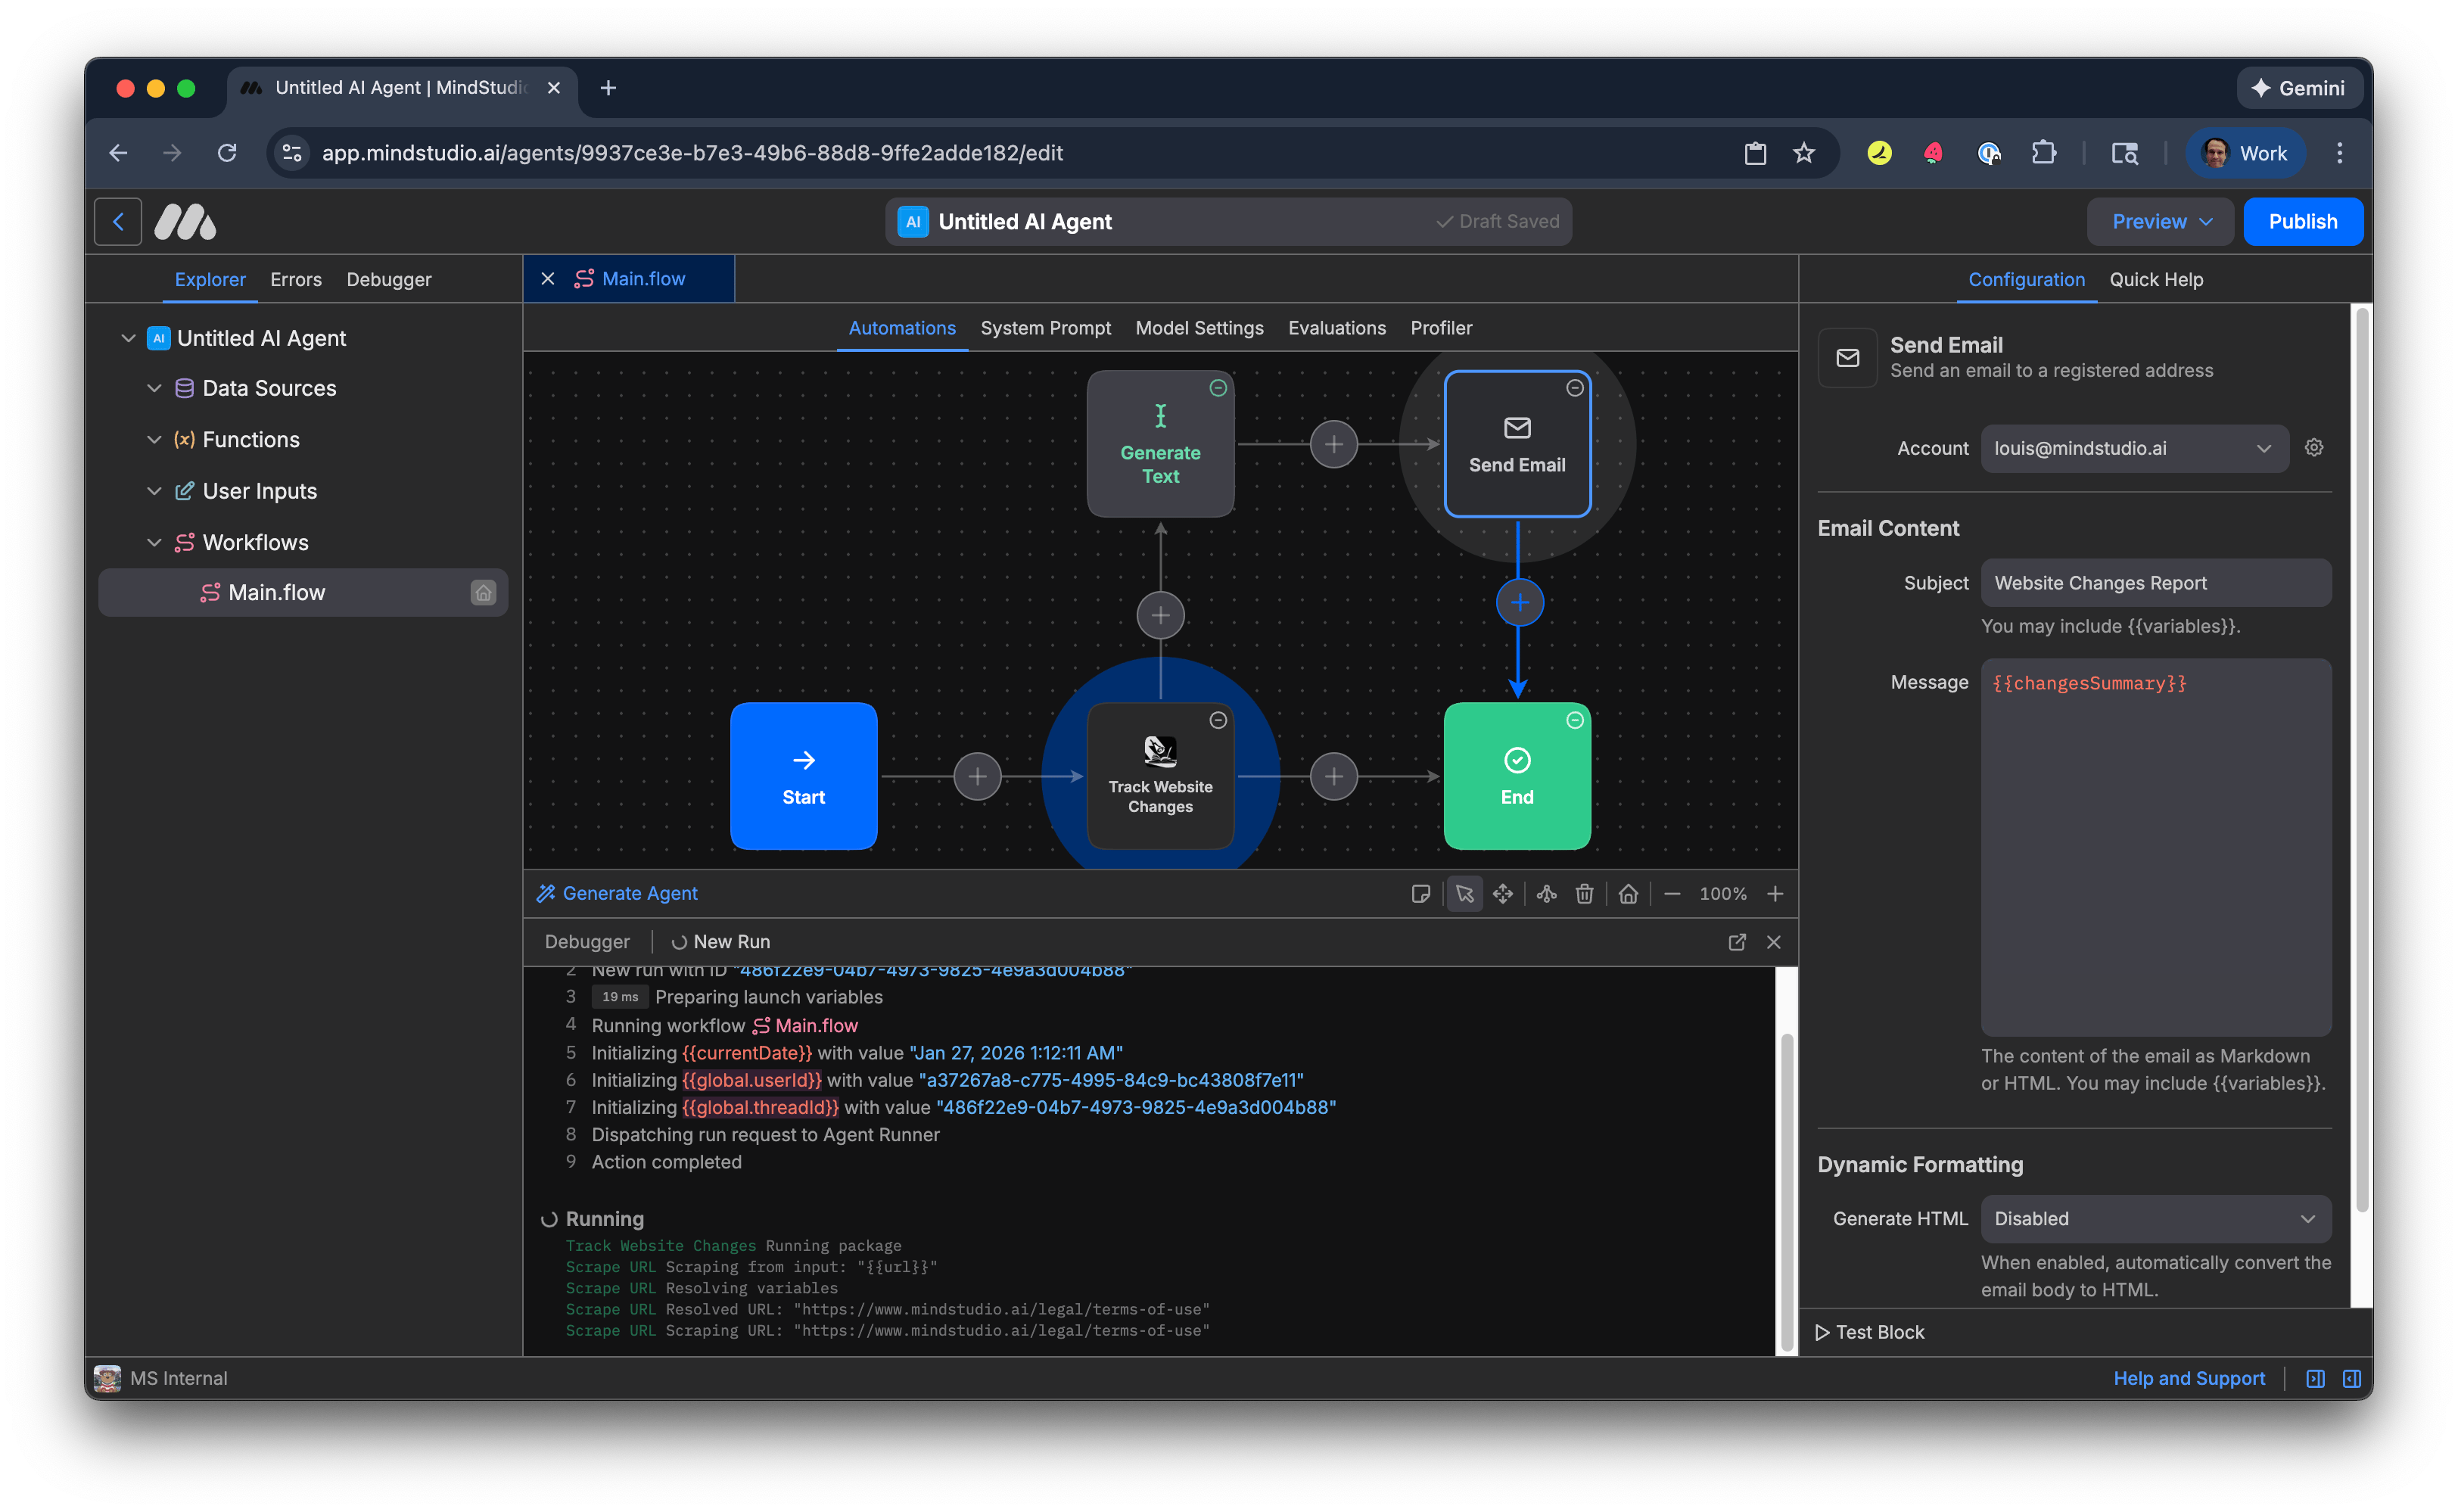
- MindStudio runs the AI agent in Debugger. Running the agent for the first time saves the initial webpage content to the global variable “global.scrapeResults”.
Remy doesn't build the plumbing. It inherits it.
Other agents wire up auth, databases, models, and integrations from scratch every time you ask them to build something.
Remy ships with all of it from MindStudio — so every cycle goes into the app you actually want.
-
Click “Preview”, then click “Run in Debugger” (or Cmd/Ctrl+R) immediately after the first workflow run completes. The AI agent checks the webpage scrape against the global variable “global.scrapeResults”, then transitions to “End” because there are no differences between the two.
-
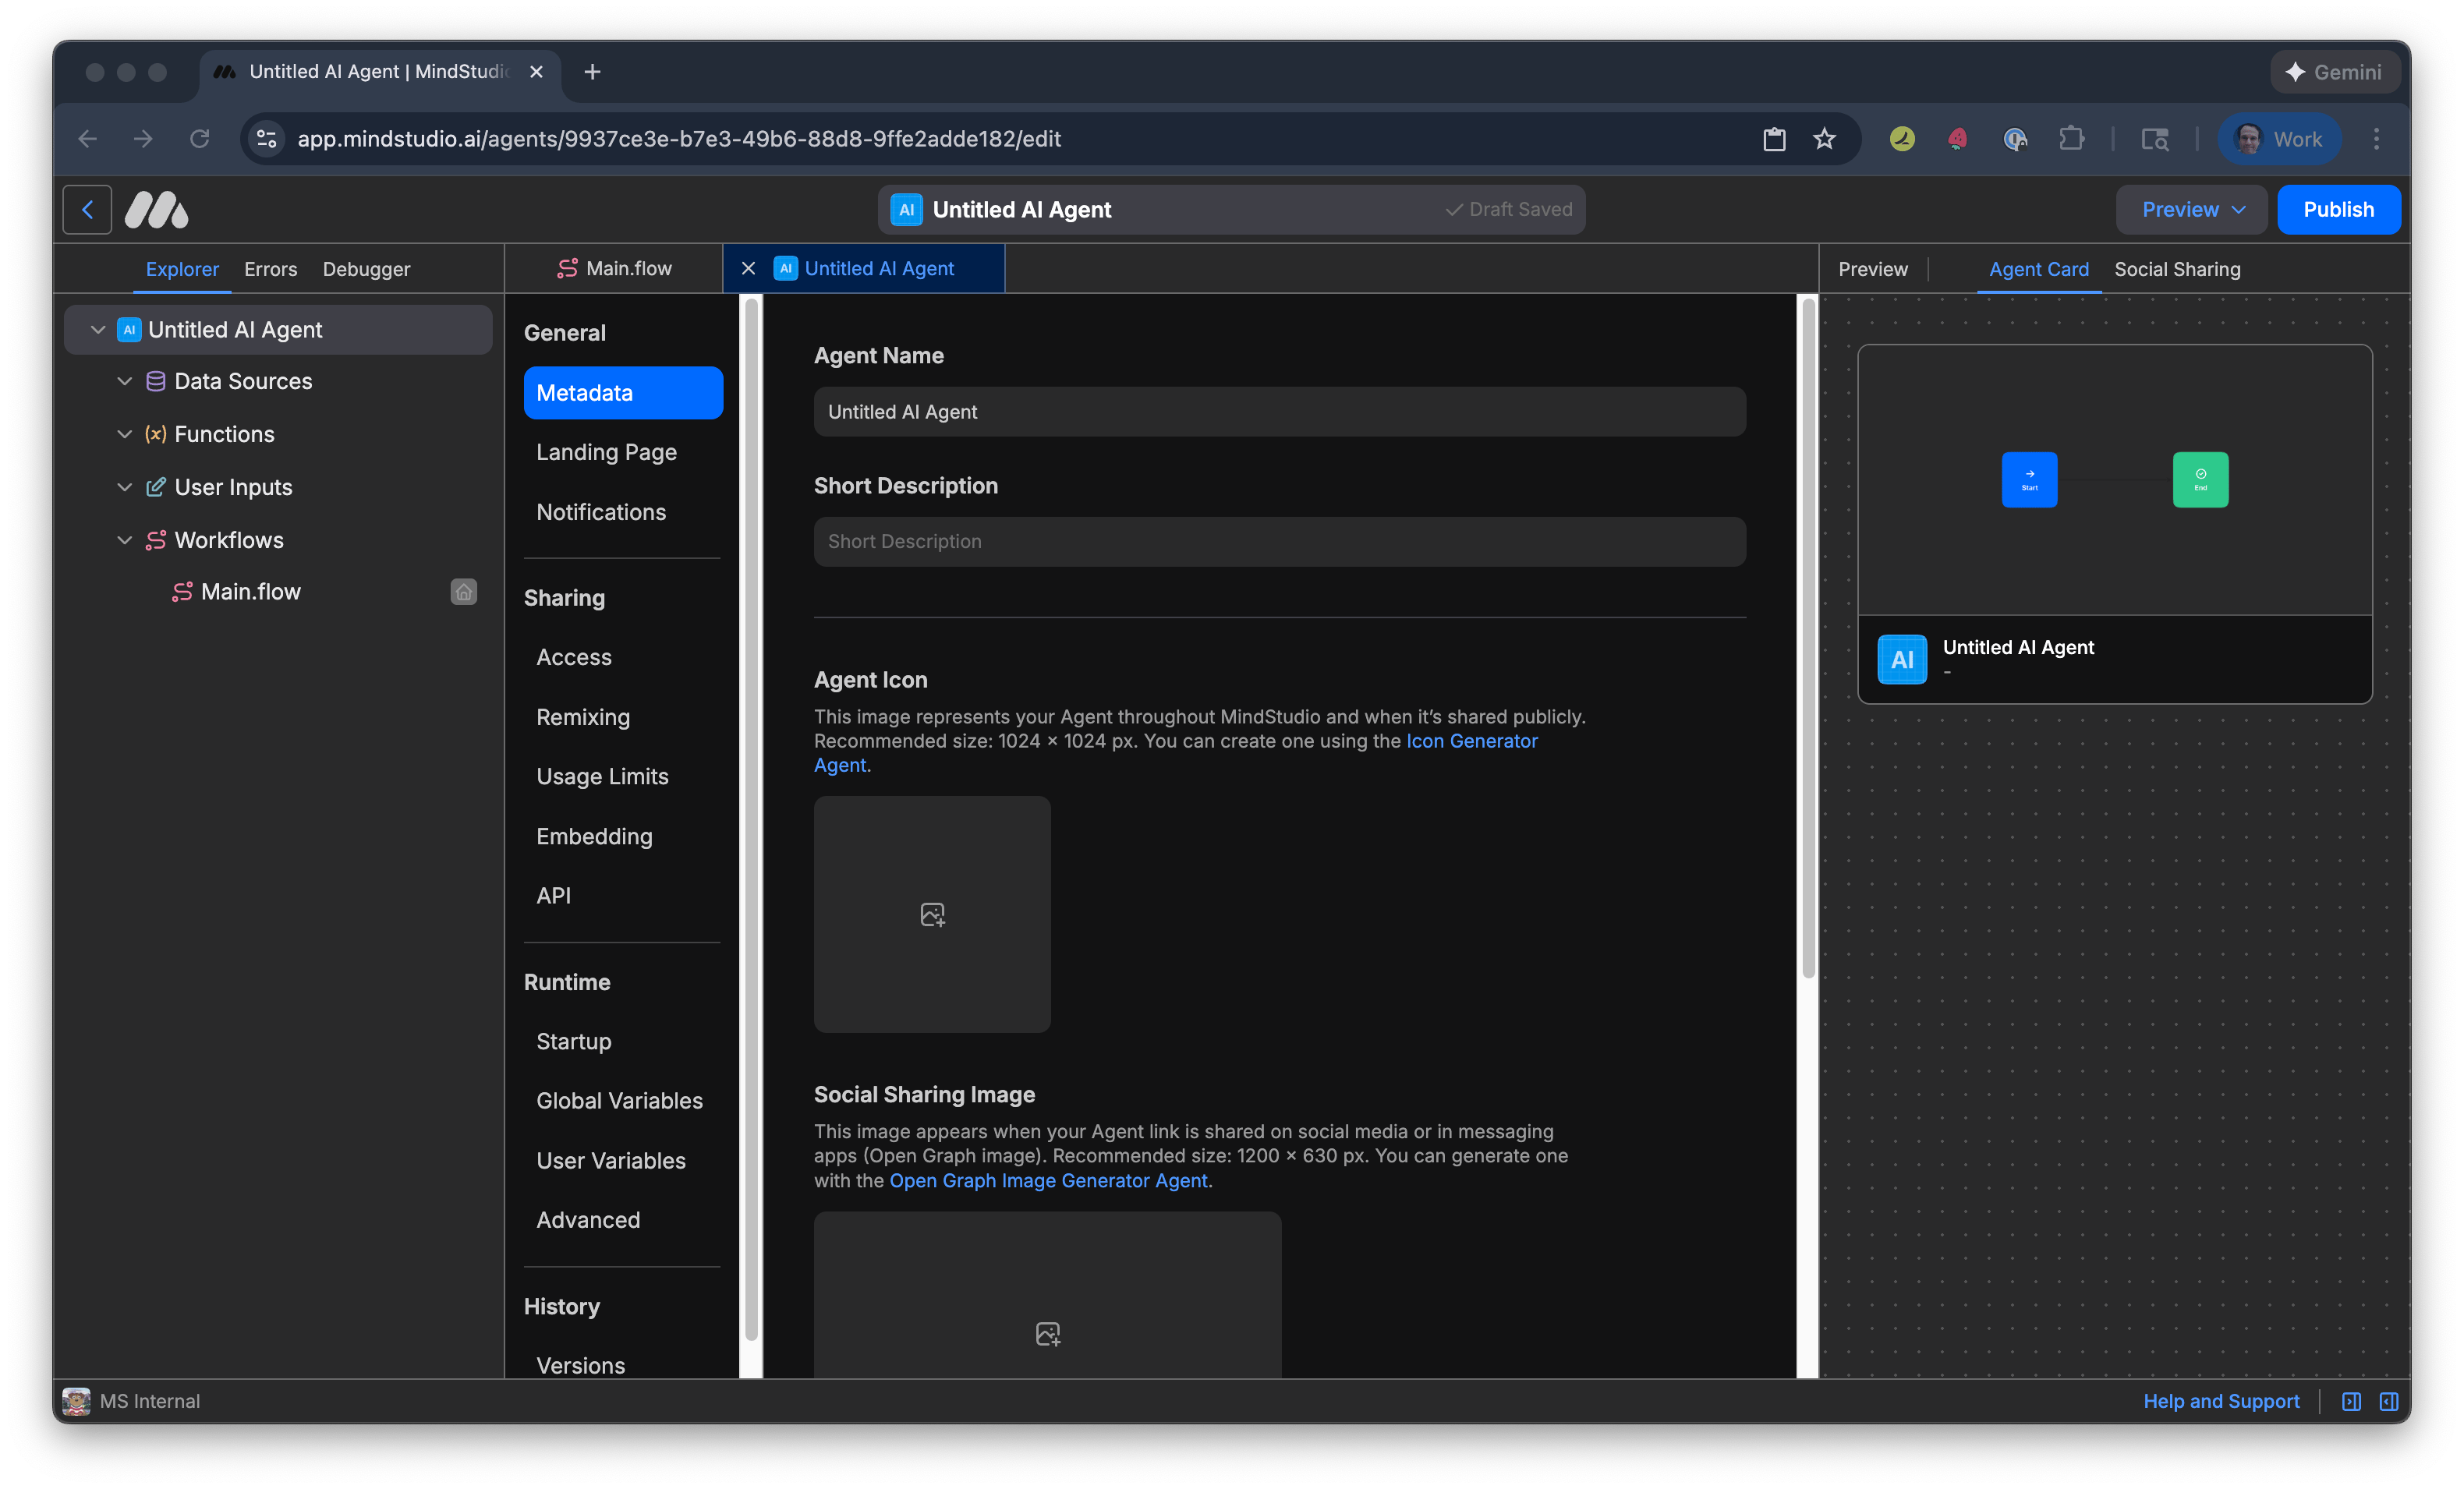
Click “Untitled AI Agent” above the Automation Canvas.
-
In “Agent Name” add a name for the AI agent.
-
Press “Publish” to publish your AI agent. The AI agent will run on the set schedule, then send you an email only when significant changes have been made to the specified webpage.